I am currently working on a mantel clock from the Hamburg American Clock Company. This is Part II in a two-part series. For Part I go here.
The Hamburg American Clock Company is otherwise known as Hamburg Amerikanische Uhrenfabrik or HAU and in many parts of the world, it is simply known as HAC.

In Part I, I described the steps taken so far which are disassembly, inspection, cleaning of the parts, and polishing of all pivots. The next steps are bushing work, reassembly, oiling (the mainsprings were oiled in a previous step), and finally, testing.
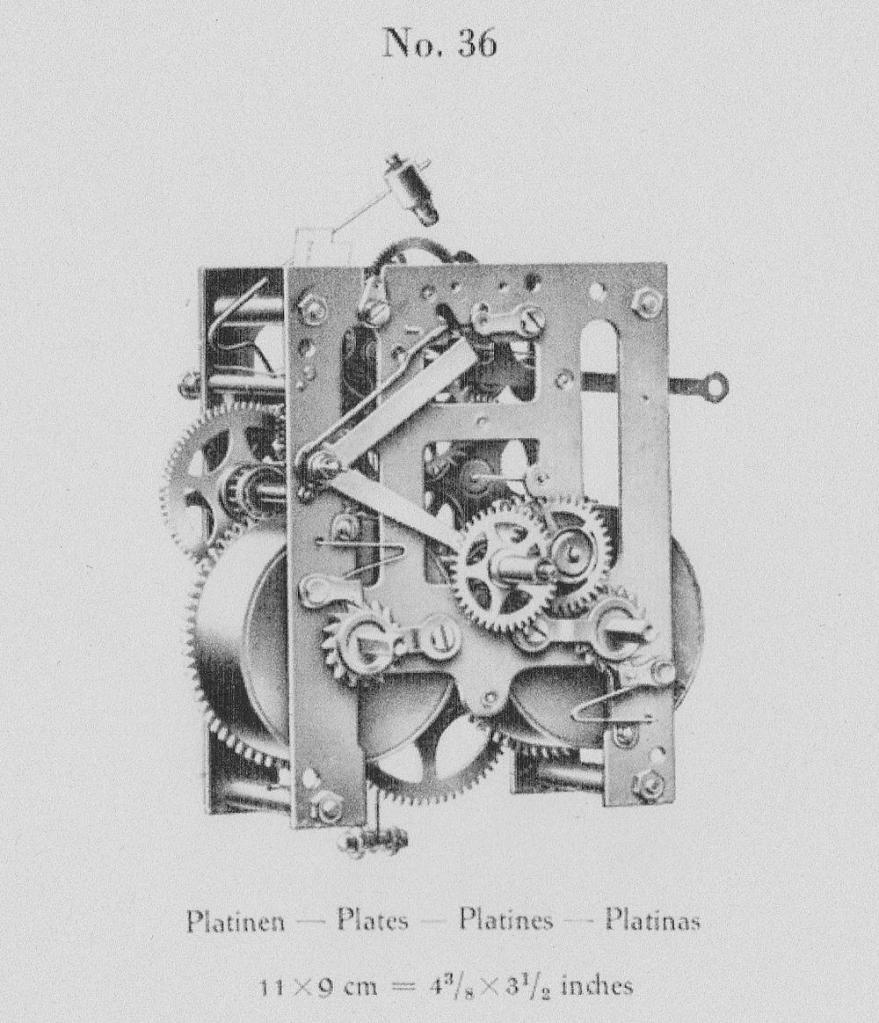
I believe this is the No. 36 movement by HAC.
The wheels that spin the fastest typically show the most bushing wear, but wear can also appear in other areas, such as the main wheels, which endure significant torque. For instance, I observed punch marks on the cap side of each mainspring barrel. While punching around any bushing hole is generally poor practice, it appears this was done at some point in the clock’s history and can’t be reversed. Nonetheless, the repair seems to have held up well.
Bushing Work
I have seen similar movements with much more wear than this one, but I felt that some bushing work was necessary to extend the clock’s lifespan.

Six Bergeon brass bushings were installed in total. For the time side (T), bushings were placed at T1 (front and back) and T3 (back). For the strike side (S), bushings were installed at S3 (back), S2 (front), and S4 (front). The numbers indicate the wheel location in the train beginning from the bottom. A couple of pivot holes were borderline, but I decided to leave them as they are.
Reassembly
It pays to be patient and methodical during reassembly. Rushing can lead to mistakes, such as missing steps or improperly aligning parts, which could cause malfunctions or even damage later. Taking the time to carefully double-check the placement of parts, and ensure everything is in its correct place will help ensure the reassembly is smooth and successful.
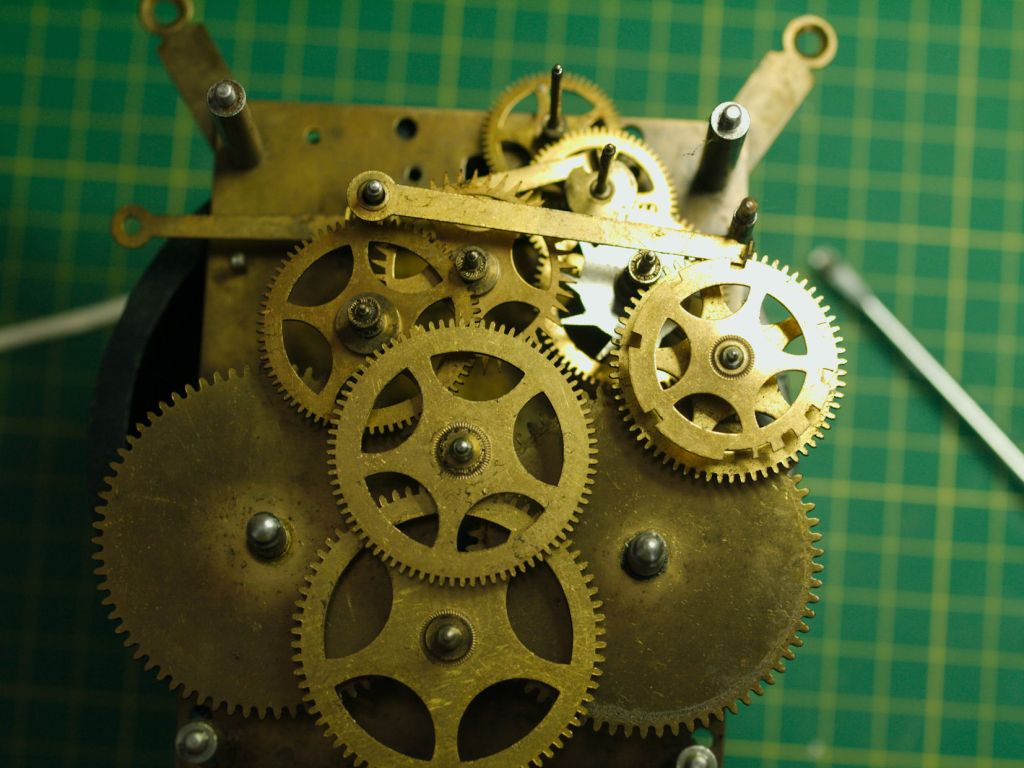
Once the wheels are in place the lever and there is only one multi-arm ever that resides between the plates. Position it such that the long arm rests in one of the deep slots of the count wheel while a short arm is placed in the cut out of the cam wheel (as above).
Positioning the pivots is a delicate process, and any forceful handling can result in a bent or broken pivot. In this, as in all cases when aligning pivots, a pivot locator is your best tool.

My usual practice is to position all the wheels and the lever(s) on the plate with the movement posts, first. Once the wheels are correctly located, I lower the front plate onto the back plate. I secure two nuts to the mainspring end which prevents the movement plates from coming apart as I position the upper wheels in the train.
The pin-wheel, which is uppermost and one wheel removed from the fly on the strike side, is placed in approximately the 12 o’clock position, the warning position. At the same time the hammer paddle is positioned between two of the points on the star wheel. More than once I have had to go back in to make minor adjustments when the paddle hangs up on one of the star points. It looks like this one is also a candidate for that very adjustment.

The movement has been placed on a test stand and the time side Is in beat and running as it should according to my Timetrax machine. Curiously, the Timetrax manual lists only one HAU/HAC movement, a three-train one but this one is likely similar to Junghans bracket clock movements which runs at 164 bpm. Junghans is mentioned for comparison because, by 1930, the company had successfully taken full control of HAC.
Testing
The testing phase is crucial in the process of servicing a clock, often taking the most time because it ensures that the clock is functioning properly before it is reunited with its case.

During this phase, the clock is put through various operational checks to simulate real-time performance, which helps in identifying any issues that may not have been apparent during the initial servicing or cleaning process. Issues such over-tightened or loose components can present themselves as well as problems with the escapement mechanism.
The testing phase serves as an important diagnostic step to identify what further repairs or adjustments may be needed.
This concludes the servicing of an 8-day HAU/HAC movement. If you have any comments or feedback on any of the steps in the process, please feel free to share!
Discover more from Antique and Vintage Mechanical Clocks
Subscribe to get the latest posts sent to your email.

You must be logged in to post a comment.