How to Start an Antique Clock Collection: Tips for Beginners

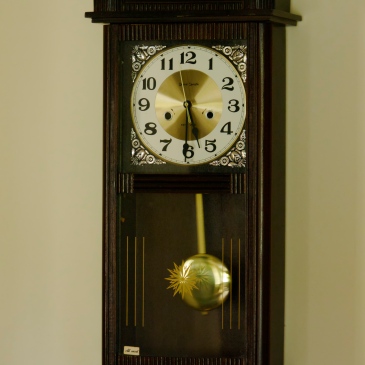
Starting an antique clock collection can be both exciting and a little overwhelming. With so many styles, makers, movements, and time periods to choose from, it’s easy to wonder where to begin. The good news is that you don’t need deep pockets or expert knowledge on day one—just curiosity, patience, and a willingness to learn.

I remember my early days of collecting, when I was eager to add just about anything to my budding collection. Today, I am far more discerning, carefully considering each potential acquisition. However, in my 25 years of collecting, I still own the first clock I would consider a true antique.

Seth Thomas Adamantine Mantel Clock, my very first true antique clock

If you’re thinking about starting your own antique clock collection, I offer some practical tips to help you get started on the right foot.

1. Start With What You Like

The best advice for any collector is simple: buy what you enjoy. Don’t worry about trends, investment value, or what others say you should collect. Whether it’s a simple kitchen clock, a shelf clock, a Vienna regulator, or a mantel clock with a rich patina, choose pieces that genuinely appeal to you.

One of my favorite clocks

If a clock makes you look twice when you enter a room, that’s always a good sign.

2. Learn the Basics Before You Buy

You don’t need to become a horological expert overnight, but learning a few fundamentals will save you money and frustration. Take some time to understand:

  • Basic clock types (wall, mantel, shelf, long-case)
  • Common movements (time-only, time and strike, chiming, spring or weight-driven clocks)
  • Key terms like escapement, pendulum, mainspring, and strike train

Books, museum visits, online forums, and blogs (like mine) devoted to antique clocks are excellent learning tools. The more you learn, the more confident you’ll feel when evaluating potential purchases. Knowledge is power!

3. Set a Budget—and Stick to It

Antique clocks can range from modestly priced to very expensive. Decide early on what you’re comfortable spending and remember to factor in possible repair costs. A clock that seems like a bargain may need servicing, which can quickly exceed the purchase price.

If you are bidding on a clock online, don’t get caught up in a bidding war. Set a firm limit and be prepared to walk away—other opportunities will inevitably come along.

Scottish tall case clock
A surprisingly inexpensive find; a Scottish tall case clock from the 1840s

Many fine antique clocks are still affordable, especially if you’re open to cosmetic wear or minor issues. A well-maintained, honest clock is often a better choice than an over-restored one.

4. Condition Matters More Than Perfection

It’s normal for antique clocks to show signs of age—after all, many are well over a century old. Look for clocks that are complete, structurally sound, and largely original. Missing parts, incorrect replacements, or heavily altered cases can be difficult and costly to correct.

When possible, ask:

  • Does the clock run?
  • Has it been serviced recently?
  • Are all the parts present?

Even if a clock isn’t currently running, it can still be a good purchase if you understand what it may need. In time, you will develop the skills and expertise needed to repair a non-running clock.

5. Buy From Reputable Sources

When starting out, it helps to buy from sellers who know clocks and are willing to answer questions. Antique shops, clock shows, auctions, and fellow collectors can all be good sources. Be cautious with vague descriptions or sellers who can’t provide basic information about the clock.

Over time, you’ll develop a sense for what feels right—and who you can trust.

6. Keep Records of Your Collection

As far as record-keeping, I find myself offering advice I don’t always follow. Perhaps that’s the true challenge of collecting.

From the beginning, get into the habit of keeping notes on your clocks. Record where and when you bought them, the maker, any repairs done, and any interesting history attached to the piece. Photographs are invaluable.

This not only adds enjoyment to collecting but also becomes important for insurance, resale, or passing the clocks on to future generations.

7. Be Patient and Enjoy the Journey

A good clock collection isn’t built overnight. It evolves over time as your tastes change and your knowledge grows. Some clocks will stay with you forever; others may move on as your focus becomes more refined. Although I enjoyed collecting common mantel clocks from the 1930s, 40s, and 50s, that is no longer my focus—and that’s perfectly normal. I wrote an article recently about the dynamic aspect of clock collecting that you might find interesting.

Collecting antique clocks is as much about the stories, craftsmanship, and history as it is about the clocks themselves. I marvel at the stories behind some of my clocks.

8. Investment value

From time to time, antique clocks are promoted as “investments,” but this is often a misunderstanding of both the market and the hobby. While a few rare, high-end pieces may appreciate, most antique clocks do not reliably increase in value once repair, maintenance, and storage costs are considered. Tastes change, markets fluctuate, and selling can be slow and unpredictable. Collecting clocks for enjoyment, historical interest, and craftsmanship is far more rewarding than treating them as a financial strategy.

Kienzle clock on display with Ingraham Huron
Ingraham Huron balloon-style shelf clock; Somewhat rare, but collected for appreciation—not investment

Final Thoughts

Starting an antique clock collection is a rewarding pursuit that connects you to history, engineering, and artistry. Take your time, ask questions, learn as you go, and most importantly—enjoy the process. Every clock has a story, and as a collector, you become part of it

Why You Should Avoid Buying Chinese-Made Mechanical Clocks

As a clock enthusiast, collector, or someone simply looking to purchase a dependable antique or vintage clock, it’s natural to consider all your options. Chinese-made mechanical clocks are often attractively priced and readily available through online marketplaces like Facebook Marketplace and eBay, but before clicking “Buy Now,” it’s worth understanding why many horologists and repair professionals caution against these clocks—and why you may want to steer clear of them.

Inferior Craftsmanship and Materials

The most common criticism of Chinese-made mechanical clocks lies in their construction. Many are made using low-grade materials—cheap metals for gears, soft brass for plates, and low-tolerance machining. This results in movements that may run erratically, wear quickly, or fail outright after only a short period.

Chinese companies were producing them by the thousands.

Some of the most frequent problems reported include:

  • Misaligned pivots and poorly cut gears
  • Escapements are prone to failure
  • Strong mainsprings (31-day clocks) that are dangerous to work on
  • Inaccurate timekeeping, even after careful regulation
  • Unreliable striking or chiming mechanisms

These issues aren’t just frustrating—they often make the clock uneconomical to repair, since the labor involved exceeds the clock’s value.

Daniel Dakota movement
A typical Chinese-made movement

Lack of Longevity and Serviceability

High-quality mechanical clocks from North America, Europe, or Japan can run for decades with proper care. By contrast, many Chinese-made mechanical clocks barely survive beyond a few years. The movements are often designed without repair in mind. In some cases, they’re riveted instead of screwed together, making disassembly and servicing impossible or impractical.

If you’re knowledgeable about clock repair, these clocks can be serviced; however, if the parts are excessively worn, replacement parts are virtually impossible to find.

You won’t find service manuals or replacement parts for most Chinese-made movements, and the quality is often so inconsistent that even parts from the same model can’t be interchanged reliably.

Few professional clock repairers will touch these clocks. Those who do will often try to convince you to replace the movement with a quartz one, and to be honest, that’s not a bad option, particularly if the case is in good condition.

Daniel Dakota wall clock, one of Tempus Fugits more popular models
Daniel Dakota wall clock

Knock-Off Designs and Deceptive Marketing

Many Chinese mechanical clocks mimic the outward appearance of high-end brands or antique designs. You’ll find skeleton clocks that resemble Hermle or Kieninger movements, regulator wall clocks styled like Vienna regulators, or “box” clocks with none of the refinement of the originals.

Some listings may even use phrases like “German-style movement” or “vintage design” to evoke a sense of quality or authenticity. Don’t be fooled—these are marketing tactics that mask low-grade manufacturing.

They Undermine the Clockmaking Tradition

Purchasing cheaply made mechanical clocks can inadvertently support an industry that values mass production over tradition, quality, and craftsmanship. When you buy from reputable makers or antique sources, you’re helping preserve centuries of horological heritage.

Brands and Labels to Approach with Caution

Western-sounding brand names were created specifically for export to make the products more appealing to North American consumers. While not every clock with a Chinese movement is inherently bad, the following brands and sellers are widely reported in horological forums and repair circles as problematic:

  • Citizen
  • Any clock that has “31 day” inscribed on the clock face
  • Any clock with directional winding arrows
  • Bulova
  • Daniel Dakota, the most well-known export brand, sold at big-box stores
  • Style House
  • Emperor Clock Company
  • Kingston
  • Andover
  • Tempus Fugit, not an actual brand, but commonly printed on dials of Chinese clocks
  • Regulator, like “Tempus Fugit,” many wall clocks were simply labeled “Regulator” with no brand
  • Alaron
  • Mirado
  • Elgin, pendulum wall clocks with faux weights or decorative fronts
  • Westclox / Ingraham (rebranded)

There are many other brands, of course. Many of these are rebranded or unbranded mechanical clocks that look appealing in photos but have disappointing performance.

What to Buy Instead

If you’re seeking a mechanical clock that’s beautiful, functional, and serviceable, consider these alternatives:

  • Antique or vintage clocks: Seth Thomas, Ansonia, Sessions, Gilbert, Waterbury, Arthur Pequegnat, Gustav Becker, HAC, Mauthe, Junghans, or Kienzle
  • Modern German makers: Hermle, Kieninger (now part of Howard Miller), Schneider
  • Japanese movements: Seiko, Rhythm (mostly quartz, but quality nonetheless)
  • North American producers: Howard Miller (uses German Kieninger movements), older Ridgeway clocks used Hermle and Urgos), Chelsea Clock (USA)

These makers have established reputations, better quality control, and are backed by communities of repair professionals and collectors.

Final Thoughts

The allure of a budget-friendly mechanical clock is understandable. But as with many things, you get what you pay for. A $40 box clock with a Chinese movement may seem like a deal, but when it fails in six months and can’t be fixed, the true cost becomes clear.

I must admit that in my early days of clock collecting and repair, when I was still on the learning curve, I dabbled in these inexpensive clocks, knowing that if the movement wasn’t repairable, I could simply throw it away without feeling guilty, given how little I had paid for it. I had two, one I gave away, and the other was converted to a quartz movement.

If you’re new to collecting or looking for your first mechanical clock, invest in something that has stood the test of time or comes from a manufacturer with a reputation for quality.

Beginner’s Guide to Choosing an Antique or Vintage Clock

Buying your first clock is an exciting journey, but it can also feel a bit daunting. In this article, I’ll share some practical tips and advice to help you choose your first clock and discuss the various types of clocks to consider.

One of the goals of this blog is to introduce antique and vintage clocks to younger generations and inspire an appreciation for these remarkable mechanical devices from the past. In today’s modern age of a throw-away culture, how many items can you think of that still function flawlessly after more than a century? It is a short list indeed!

Before we get started, let me clarify two key assumptions. First, I’m assuming you’re not purchasing your first clock with the goal of turning a profit. If profit is your motive I won’t be much help to you. Having collected clocks for many years, I can tell you that buying and selling clocks rarely yields significant financial returns. Of course, there are always exceptions.

Second, this guide focuses on mechanical clocks rather than electric, quartz, or electro-mechanical models. While some of the latter are certainly attractive, there are other resources available for learning more about these types of clocks.

An antique mechanical clock operates through a system of metal gears and levers, powered by weights or springs, wound manually, and displays the time. These clocks were essential for daily life in the past, providing reliable timekeeping that helped people manage their routines, coordinate activities, and regulate work, particularly before the advent of modern electrical or digital timekeeping devices.

Let’s explore why you would want an antique or vintage clock.

Choosing an Antique or Vintage Clock

Is the clock for decoration, an expression of your new interest in horology, or are you starting a collection? Your motivation for acquiring your first clock is important, as it involves an investment of your money.

Establishing a budget is essential to guide your decision. If your primary goal is to use the clock as a decorative piece, the condition of the case may take priority, and whether the movement works might not be a concern. However, if you want a functional clock and the one you choose is not in working condition, you’ll need to account for potential repair or restoration costs in your budget.

When considering the clock’s condition, it’s important to assess whether it’s running or in need of repair. A case that shows significant wear often indicates that the movement may also be in poor condition. Some damage can be repaired, but other types of damage may be expensive to fix, and if the clock was inexpensive to begin with, the cost of repairs may outweigh the value. An example of this is pieces of veneer missing on a clock. While small imperfections may be acceptable, large areas of missing veneer can significantly affect the clock’s appearance. Replacing large sections of veneer should be left to a professional restorer.

Miniature Ogee
The case requires new sections of veneer

Clocks with an interesting provenance may not only be more desirable to collectors but can also serve as fascinating conversation starters. Understanding who made the clock and where it was produced is crucial. A clock from a renowned manufacturer or region known for quality craftsmanship can be more valuable.

A clock with a well-documented ownership history, especially if it has been in the hands of notable individuals or has an intriguing backstory, can make it more desirable. If it was owned by a historical figure or used in a significant event, this can greatly enhance its appeal.

Look for original labels, receipts, or certificates of authenticity that confirm the clock’s origin, age, and maker.

If the clock has thorough documentation, be prepared to pay a premium price. Look for a clock with a known history of quality repairs or restorations, especially if these were done by reputable professionals.

The location and placement of the clock can influence your choice of type and size. For example, in a 600-square-foot apartment, a grandfather clock might not be the best option. A small mantel or novelty clock can be placed almost anywhere, while wall clocks don’t take up valuable floor or shelf space.

Antique and vintage mechanical clocks require periodic care and upkeep because their components are subject to wear and aging over time. The materials used in older clocks, such as metal gears, springs, and wood, can degrade or become less effective without regular maintenance. This should be taken into account when making your decision.

An emotional connection is important. You should select a clock that you genuinely connect with, as it will become a lasting part of your environment. Purchasing a clock simply because it’s inexpensive, but not to your taste, may lead to regret.

And finally, consider starting with a straightforward, reliable clock before diving into more complex or high-maintenance pieces.

Here are the Types of Clocks to Consider and Why

Mantel Clocks are compact clocks designed to sit on a mantelpiece or shelf. They often feature a strike while some might also feature a chiming mechanism such as Westminster chimes.

A mantel clock is a good entry point for beginners due to its manageable size and the many different styles and designs. In North America, popular examples come from manufacturers such as Seth Thomas, Ingraham, New Haven, Gilbert, and Pequegnat.

Wall Clocks are designed to hang on walls, ranging from simple schoolhouse styles to ornate regulator clocks. These clocks are ideal for those with limited floor space and looking for a functional piece. Look for clocks that are complete, with no missing parts, and inspect hands, glass, and the movement for any problems.

Grandfather Clocks otherwise known as Longcase Clocks, Tall Case Clocks, or Hall Clocks are tall, freestanding clocks often over six feet tall, with pendulums, often featuring intricate mechanisms and chimes. These clocks are statement pieces suitable for those with ample space.

Maintenance can be more demanding, and many of these clocks especially from the 1980s and 1990s have movements that are near the end of or at the end of their service life. A gently used tall case clock can provide many more years of service. While these clocks are undeniably charming, their sound might be a bit too loud for some individuals.

Cuckoo Clocks are typically from Germany, these whimsical clocks are known for their animated cuckoo bird and decorative carvings. These clocks are great for a touch of old country charm and fun, often appealing to families. All inexpensive ones require winding once per day and the cuckoo sound can be annoying for some. Look for an eight-day model instead.

Dave's cuckoo clock
Cuckoo clock

Ogee Clocks are classic 19th-century weight-driven clocks with a simple yet elegant design. They are an affordable entry into antique clocks and often come with a rich history. Ensure the glass and reverse-painted artwork are intact, as these are defining features. Shelf space is required as these clocks are not meant to be hung.

Most are 30-hour clocks that require winding once per day which some might regard as an annoyance if the intent is to have them running daily. Eight-day clocks are preferable since they require winding once per week. For a shelf clock, they are quite large and space could be a factor to consider.

George H. Clark 30 hour Ogee

Shelf Clocks are a broader category encompassing small to medium-sized clocks that fit on shelves or desks. They are practical and versatile, with a range of styles to suit different tastes.

Fancy clocks with intricate visible designs display beautifully and can serve purely decorative purposes.

HAC mantel clock
HAC mantel clock

Anniversary Clocks feature mechanisms that can run a year or more, have glass domes, and feature a rotating pendulum. They make a striking display and serve as fascinating conversation pieces. Historically, they were often presented as wedding gifts.

Kundo standard size 400 day clock

Novelty Clocks are clocks with unique designs, animations, or themes. They add personality and character to any room often sparking conversations. They can be as small as an alarm clock and can be placed just about anywhere in a room.

Chairman Mao Zetong waving as the clock ticks

Buying your first clock is a rewarding experience that combines history, craftsmanship, and personal taste. By considering factors such as your budget, the clock’s condition, provenance, and placement, you can make an informed decision and choose a piece that brings lasting enjoyment.

Remember to select a clock that resonates with you personally, as it will become a cherished part of your space. With thoughtful planning and care, your first clock can be the start of a lifelong appreciation for the art and beauty of horology.

AI-generated clock repair manuals and other clock repair book discoveries

Exploring Amazon’s selection of clock repair manuals presents several appealing options. However, purchasing these manuals can be intriguing, as it’s often challenging to know exactly what you’re getting until they arrive at your door.

I bought three such clock repair manuals this spring. The “Antique Clocks Repair Manual” by Phoenix Publishing, “Clock Repairing for Beginners – The Ultimate Guide on How to Care and Repair Clocks from Scratch without Prior Knowledge or Experience” by Angless Juliana, and The Clock Repairer’s Bench Manual by D. Rod Lloyd. Only one of these purchases has any real value for the clock repairer. Read on to find out which one is worth the purchase.

Antique Clocks Repair Manual

The “Antique Clocks Repair Manual” by Phoenix Publishing

The “Antique Clocks Repair Manual” by Phoenix Publishing is an AI-generated manual with no author. While AI-generated content can be useful for producing a large volume of material rapidly, it often lacks originality, has no creative nuances that come from human authors, and lacks detailed processes.

The manual is 130 pages long and consists of 39 chapters, covering topics from the history of antique clocks to teaching clock repair to others. Unfortunately, none of the chapters is particularly detailed. For instance, the chapter on disassembling the movement merely instructs you to take it apart without providing specific steps. It advises, “Once the movement is out, you can begin taking it apart. Make a note of the order in which parts are removed and carefully place them on a soft cloth to avoid scratching or damaging them. Be extra careful of any delicate components such as springs and gears.” This is not very helpful advice!

Clock Repair for Beginners

“Clock Repairing for Beginners – The Ultimate Guide on How to Care and Repair Clocks from Scratch without Prior Knowledge or Experience” by Angless Juliana.

“Clock Repairing for Beginners – The Ultimate Guide on How to Care and Repair Clocks from Scratch without Prior Knowledge or Experience” by Angless Juliana. At first glance, an intriguing title.

If I were looking for a manual on clock repair for beginners, this seemed to be it, judging from the title. For $8.95, it seemed like a bargain until I opened the book to page one.

The book’s cover suggests a reference to mechanical clocks when in fact, it is about caring for your battery clock. The pages are not numbered, contain no photos or diagrams, is 40 pages in length in a large font (80 words per page).

There are no number pages and all advice pertains to battery clocks

There are six chapters. In chapter four, “Why do clocks stop When They Do?”, I will quote the entire chapter, “Connections to the battery that are loose or unclean. Low battery warning. Battery pips are insufficiently long. Due to the accumulation of dirt and grime in the mechanism, there was an excessive amount of friction”. It’s puzzling why a manual would be dedicated to battery-operated clocks, as these are typically disposed of rather than repaired in our throwaway society.

The book title is very misleading. I’m surprised that an author would attach their name to such deceptive content. I would not want to be associated with a publication of such low quality.

The Clock Repairer’s Bench Manual

The Clock Repairer’s Bench Manual by D. Rod Lloyd

I have saved the best for last because the third purchase has real value, in my view. The Clock Repairer’s Bench Manual by D. Rod Lloyd is a large 8X10 manual, and at 378 page,s it covers a broad range of topics on the repair of mechanical clocks. For instance, page 73 begins with general comments on making repairs and covers topics such as pivot polishing, using a bushing machine, addressing bent pivots, replacing a pivot, repairing broken teeth, and so on, with plenty of photos and diagrams, and walk-through descriptions. It is a comprehensive manual that will be useful for anyone in clock repair, from the beginner to the expert, and it is the only one of the three I would recommend.

Unfortunately, none of these books can be found in a bookstore, where you can easily decide whether to buy them with just a quick glance.

For other clock repair books in my collection and those that I highly recommend, please navigate here and here.

Understanding Clock Pivot Wear and Bushing: Part I of Two-Part Series

Is your mechanical clock experiencing issues such as intermittent stopping or simply not running at all? This might be due to several issues with the movement, one of which could be pivot wear.

This is a two-part series. In Part I, I will explain why it is necessary to bush a clock movement, and in Part II, I will describe my method for bushing.

What are pivots?

Pivots are the ends of the axles, known as “arbours” in horology, that rotate in small holes drilled into the clock plates as the clock runs. They are the turned-down ends of the arbour. These, along with the holes they rotate in, can wear down over time causing enlarged holes that will contribute to poor running or stopping. The pivot hole must be perfectly round, and the pivots need a mirror-like polish to minimize friction within the train of gears. To protect the surfaces and reduce friction, approved clock oil acts as a barrier between the pivot and the pivot hole.

Worn pivots or pivot holes can cause the wheel to drift away from the pinion, eventually stopping the clock as the gears fail to mesh properly. Clocks in need of bushings may run erratically or stop altogether.

Worn Pivot hole
A very worn pivot hole

Oiling a dirty or worn movement

If a clock movement isn’t routinely serviced (cleaned and oiled), the plates of the movement will experience wear at the pivot points. Applying new oil over old oil can free abrasive dirt and provide a temporary solution but accelerate wear on the steel pivot and brass bushing holes because the contaminated oil acts like a grinding paste.

Worn pivots are often found in clocks repeatedly oiled without proper cleaning. Proper servicing requires disassembling the movement, cleaning the parts, addressing wear issues, reassembling, and testing.

Punch marks

From time to time, there is evidence of punch marks located around the pivot hole which is an attempt to close worn pivot holes. While a common practice in the past, this is no longer considered an acceptable repair practice.

Bent pivot
A pivot – in this photo, the pivot is slightly bent
Punch marks on a movement

Pivots need periodic cleaning and polishing to turn freely in the clock movement plate hole. Worn pivot holes are easy to identify as they appear oval-shaped rather than round.

Close-up of bushing wear
Bushing wear – the left portion of the hole is elongated

What is bushing?

“Bushing” is the process of replacing worn brass around the pivot so that the hole is round again. A new hole is drilled into the plate, and a new, appropriately sized bushing is pressed into place using a bushing machine like the Bergeon Bushing Machine.

Bergeon Bushing Machine

Some clockmakers prefer to hand-bush using reamers and smoothing broaches, producing satisfactory results, though a machine simplifies the task and is more accurate.

Severely worn steel pivots must be replaced with new ones, a process called re-pivoting. This involves using a watch or clock lathe to drill into the end of the wheel arbor to install a new pivot made from pivot wire.

Minor wear is expected over a clock’s life and can be managed with careful filing, polishing, and burnishing.

In summary, bushing is an integral part of movement servicing. Well-maintained clocks may show minimal wear and may not require new bushings, while others, due to neglect or improper servicing, may require many bushings.

Proper pivot and bushing work can extend a clock movement’s lifespan, ensuring reliable operation for years.

In Part II of this two-part series, I will describe my method for bushing a clock movement

Why should I repair an antique clock if the repair exceeds its value?

An often-asked question is why should I repair an antique clock if the repair exceeds its value.

The decision to repair an antique clock if the repair exceeds its value ultimately depends on your personal attachment to the clock and its historical significance.

Let’s talk about sentimental value

If the clock has been in your family for generations or has sentimental value to you, repairing it may be worth the cost, even if it exceeds the clock’s current market value. Repairs might include restoration or significant repairs to the case but a working clock that presents well is the main objective. Having a ticking clock can add a touch of elegance and charm to a room, as well as provide a sense of history and provide an important connection to the past.

A clock with a homemade plywood case was worth the repair because of its family heritage

A clock that is rare is worth the repair if…

If the clock is rare or has historical significance, it may be worth repairing regardless of the cost. Some antique clocks may have been made by renowned clockmakers or may be associated with important historical events or figures, making them highly valuable.

Valuable antique clocks must be carefully repaired because they often have unique and irreplaceable pieces that require specialized knowledge and expertise to repair. Any repairs must be done in a way that preserves their originality and authenticity.

To repair certain clocks, it may be necessary to use rare and difficult-to-find components or even handmade parts. This highlights the importance of collaborating with a skilled and knowledgeable clock repair specialist who has access to these parts or can create them. Even a small error in repair can result in significant damage to the clock’s mechanism and timing, leading to a reduction in value.

Improper repairs can significantly reduce the clock’s value and historical significance. Valuable antique clocks can be fragile and delicate, with intricate mechanisms and delicate parts that require careful handling during the repair. Any damage to these parts can irreversibly damage the clock, leading to a loss in value.

Working with a qualified and experienced clock repair professional is essential to ensure that the clock is repaired correctly and maintains its value.

Kienzle World Time clock
This Kienzle World Time clock has maintained its value

A clock as an investment

If you believe that the clock’s value may appreciate over time, repairing it may be a wise investment.

Clock collecting for investment purposes is a complex and potentially risky endeavor that requires a significant amount of knowledge, research, and expertise. While some antique clocks may appreciate in value over time, the market for antique clocks can be unpredictable, and there is no guarantee that a clock will increase in value.

Additionally, the cost of purchasing and maintaining a collection of antique clocks can be significant, and the potential return on investment may not justify the expense. Clock collecting for investment purposes should be approached with caution and with a thorough understanding of the market and the value of individual pieces.

Appreciate an antique clock for what it is

Antique clocks are often rare and unique, making them a great conversation starter. Guests may be intrigued by the clock’s history and design, leading to interesting conversations and the opportunity to share knowledge and stories.

On the other hand, if the clock has little sentimental or historical value and is unlikely to appreciate in value, it may not be worth repairing if the cost exceeds its current value. Ultimately, the decision to repair an antique clock should be based on a careful evaluation of its worth and your personal attachment to it.

Junghans Corner feet finished
A common bracket clock made by Junghans

Antique clocks have a sense of history and nostalgia that can be comforting and grounding. They remind us of the past and the craftsmanship that went into making these timepieces before the era of digital clocks and watches.

While antique clocks may not be as accurate as modern timepieces, they can still keep time and serve a practical purpose in a room.

Junghans Mantel Clock: Initial Impressions Sight unseen

As a manufacturer today Junghans is not the same company that made mechanical clocks many years ago. In response to the demands and advancements in technology in today’s world, the company has undergone a transformation in its products. In recent years, the company has established itself as a prominent manufacturer of high-quality wristwatches.

B13 stamped on the movement plate indicates that it was made in the last half of 1913

With a rich heritage in mechanical clockmaking, the company had established itself as a prolific producer of wall, mantel, and tall case clocks. Collectors and enthusiasts highly value the company’s clocks for their superior quality, craftsmanship, and classic designs that have withstood the test of time.

While I am not specifically searching for Junghans clocks, I have two other Junghans clocks in my collection. One is a bracket clock from 1911, and the other is an older wall clock from the turn of the 20th century.

As of this writing, my most recent acquisition is not yet part of my Junghans clock collection but here is what I know so far.

Based on the pictures obtained from the recent online auction where it was purchased, this unremarkable roundtop time and strike clock from 1913 seems to be in fair condition.

The 1915 Junghans catalog identifies the clock as the Hunsruck, named after a mountain range in Germany, and provides its specifications as 28.5 cm in height with a mahogany or oak case construction, a 14-day run time, and a silvered dial.

Cambered faceted front

It is unclear from the auction photos whether the clock is made of mahogany or not, but judging from the photos its reddish tone suggests it is mahogany. Occasionally, the feet may be replaced with a different type but it is highly probable that they are the original brass ball feet.

One notable feature is the faceted glass port below the clock face, which allows the pendulum bob to be seen in motion.

The photo above shows an example of what would have been the original pendulum with a weight of 150g or 5.2 oz.

The current pendulum is a replacement for the original unit, which was likely lost or misplaced. However, it is not a suitable match as it lacks the necessary weight and aesthetic appeal of the original brass pendulum.

The clock’s movement, which rests on a movement support piece, is a timeless time-and-strike design that was a hallmark feature of numerous Junghans mantel clocks during that era. The Junghans trademark is boldly showcased on the gong block.

The pendulum bob is not correct

When the clock was won at auction the delivery was arranged and I should have it in the next few days. The price? 55CDN plus buyers’ premium, taxes, and shipping.

It is assumed that the clock is operational, but its actual condition cannot be determined until it arrives.

Can I repair my antique clock with common household tools?

While it is possible to repair an antique clock with common tools, there are limitations to what can be achieved. That’s the short answer. Let’s explore this a little further.

Repairing an antique clock with common household tools is possible, but it can be challenging, and it depends on the extent of the repairs needed and your knowledge of the internal mechanisms and workings of the clock.

Screw drivers, clock tools
Screwdrivers

If the repair needed is simple, such as adjusting the time or fixing a loose screw, household tools may be sufficient. However, more complex repairs such as replacing broken parts or restoring the clock’s intricate mechanisms may require specialized tools and expertise that may not be readily available in a typical household toolbox.

The simple task of cleaning a movement can be accomplished with tools such as a screwdriver and wrench in addition to other common household items. The springs on an open mainspring movement, for example, can be contained with heavy household wire or a worm gear hose clamp.

Cleaning brass movement plates can be achieved using common household soap, while toothpicks are a useful tool for cleaning out bushing holes. Fine steel wool is also appropriate for cleaning steel arbors and brass wheels.

A collection of clock movements in need of repair
clock movements in need of repair

Antique clocks are often delicate and require careful handling, so it’s important to exercise caution and work slowly and methodically when attempting any repairs.

The wheels of a typical American time and strike movement

If you’re unsure about your ability to repair the clock yourself, it may be best to seek the help of a professional clock repair person who has experience with antique clocks.

When financial resources are scarce and it is challenging to find an expert in clock repair, one must embark on a journey of self-discovery which includes learning and mastering the skills necessary to repair clocks oneself, thereby gaining valuable knowledge and self-reliance.

The mission of this antique and vintage clock blog is to help people feel confident in making basic repairs to their antique clocks when they stop functioning by identifying the problem, learning about the different types of clock movements, understanding the workings of the movement type, gathering the right tools, taking your time and exercising patience while attending to detail, practicing basic repairs through repetition and knowing when to seek expert help.

Jerome cottage clock – progress so far

It is always challenging to find time to work on projects when life is busy. I picked up some part-time work this winter, teaching at a community college so between that my clock hobby teaching has taken precedence, for now.

Since the post on extreme restoration a week or so ago, I have continued planning the work to be done and have actually managed to address two issues, the second one only partially.

For my first thoughts on this Jerome Rose Cottage 30-hour clock, see the post below. I am sure you will agree that this is a candidate for extreme measures.

Posted Jan 31, 2023

The case has been cleaned of dirt and grime and I have removed some of the ragged pieces of veneer on the right side. The plan is to cover the exposed sections with new veneer but since the trim is curved I will have to work out some way to apply the veneer to the curved surface and clamp using some sort of curved block. I considered an old section of ogee molding but no, not the right shape.

The movement had been serviced in the spring of 2022 and is running perfectly.

One solid wheel on this tiny movement

Painting the door trim

In my collection of acrylic paints, I found antique gold which I believe is very close to the original trim framing the front access door.

Dark chocolate brown paint was used to cover the area between the glass and the gold trim and since it was a flat texture I applied a coat of shellac to give it a satin sheen.

The design of the small glass tablet will be a challenge to duplicate and I continue my search online for a cottage clock with the same design that I can pattern off, otherwise, I will have to improvise.

Before and after

Addressing the dial

The dial has been thoroughly cleaned but some of the dirt is embedded in the dial surface which is not an issue since I would like to retain some of the patina.

I haven’t quite found the exact paint match at this point, but I am not too concerned as building up layers is the first step in in-painting. With some experimentation I should arrive very close to what I am looking for. The real fun will be in-painting the Roman numerals and chapter ring.

In-painting the dial

Next steps

Next will be the veneer work but as mentioned clamping the veneer will be a minor challenge. I am sure I will find a way. The veneer looks like Rosewood and I have a small quantity on hand.

After the veneer work is completed the tablet will be addressed and that will unfortunately involve cutting or peeling the label on the inside, though I will preserve it as best I can.

Finally when all is done a coat or two of traditional shellac should make this clock very presentable.

This small clock has certainly been to hell and back but I do know one thing; whatever I do will be a vast improvement.

Look for more posts to come on this nice little cottage clock.

Sessions time and strike movement with a stiff minute hand

Most mechanical clocks have an hour hand concentric with the minute hand with the hour hand making one full turn every twelve hours. The special set of wheels off the centre arbour is called the motion works. Attached to the centre arbour is the minute hand. The hour pipe fits over the centre arbour and to it is attached the hour hand. This set of gears, called the motion works, is driven by the time train and powered by a spring or a weight.

I am working on a movement made by the Sessions Clock Co. It is from a model called the Grand Assortment probably made sometime before 1920. This is Grand Assortment #1 in a series of three.

Slightly blurry auction photo

The case is in rough shape and certainly needs some tender loving care. I thought my major challenge was putting life back into a tired case (another story) but it appears the movement needs resuscitation as well.

Note from a previous owner, this clock is from around 1915 or so, not 1903

Adjusting the time on the clock is a challenge because the minute hand is very stiff and takes some effort to move it. Something is amiss with the motion works, the time train itself or both.

Motion works at the centre of the movement

I initially cleaned the movement, checked for wear and determined that the little wear I observed should not be enough to affect the running of the clock.

I reassembled the movement and while on the test stand the problem reoccurred, a minute hand that was just as stiff to move as before and after a few hours, the movement simply stopped. I later discovered that the homemade click spring on the time side had unhooked and caught on the second wheel.

As received. Hmm, the pendulum rod is missing

I am not an expert on the meshing depth of gear teeth but I suspect that there is enough wear in the motion works and the time train to prevent the gear teeth from engaging smoothly with the contact point of the next gear, the lantern pinion. The combination of wear in several locations might produce the stiff centre arbour condition. Based on this theory I went ahead with bushing work.

Drilling a hole with Bergeon bushing machine
Drilling a hole in the plate with Bergeon bushing machine

This time I was somewhat more discerning concerning potential wear points and yes, a more careful inspection revealed there was likely enough wear to affect the running of the clock. I began with new bushings on the escape wheel rear plate and third and fourth wheels on the time side and finally the second wheel back plate for a total of 4 bushings on the time side; nothing on the strike side. It looked fine.

Reassembly

The main wheel arbours on this movement aren’t interchangeable. It is easy to confuse the two. After reassembling the movement I noticed that the plate did not go all the way down on the strike side. I compared the two arbours and the time side arbour is narrower at the top. Swapping them back to where they belonged fixed it.

Sessions mainsprings on this movement are not interchangeable

Setting up the strike side correctly on the first go-around is probably more luck than skill but this time there was no additional fiddling with the correct position of the warning wheel which is just below the fly.

I did not completely eliminate the stiff centre arbor but it is improved and the clock is running well. If I have to take it apart a third time I will check for a bent arbour in the train or the center arbour itself or a bent pivot.

Now to address a pretty sad-looking case.

Beyond the basics – more advanced tools for clock repair

See this article for basic tools for clock repair

Let’s assume you have decided to take the plunge and you are at the beginning stages of building an essential tools list for clock repair. Let me help you with your journey.

In the fall of 2022, I wrote about the five essential tools for clock repair. The sidebar will bring you to that article. Tools for clock repair need not break the bank, in fact, you can begin for less than a $100 investment.

The five basic tool groups included the screwdriver, the letdown tool, the pivot locator, the box wrench, and the pliers. If you are ready to move forward with more challenging repairs here are the next set of tools you will require. Assuming you have already purchased the basic tools the 16 additional tools you will require are relatively inexpensive and are the prelude to making your first big jump to specialized and advanced tools.

This time our budget is less than $400 (all prices quoted in US funds).

Let’s begin.

Optivisor or eye loupe

The closer you can see the better. I prefer opti-type visors. I cannot get used to an eye loupe but it is certainly cheaper.

Opti-type visors are more expensive but hinged so that they can be pushed upward and out of the way. I have had a couple of visors in the past but the set I use now is the Magnivisor pro series from Carson which is about $60. The little light at the top goes through batteries fast and sometimes I forget to turn it off, so I don’t use it but you might find it helpful for those dark spaces.

$10 will get you a set of three eye loupes on Amazon.

Magnivisor by Carson

Movement test stand

A test stand is very helpful when disassembling a movement reassembling it and testing it before it is reinstalled in the case.

I have several types for different purposes but I think the one to start with is Gene’s test stand which is under $70. If you are handy in the workshop it is a relatively simple one-day woodworking project that you can build for half the cost.

Clock movement stand
Clock movement test stand

Clock movement work stand

I use two types. The first is movement plate standoffs and the second is a simple 4-inch high stand cut from a PVC pipe. The standoff set is anchored to the bottom plate by screwing brass end pieces to the four corners of the bottom plate (you can use three if you wish). The standoffs are sometimes called assembly posts and are around the $25 range in cost.

If you have 5-inch PVC pipe lying around simply cut off a 3 or 4-inch section.

Standoffs
Standoffs; either three or four can be used
Movement on standsoffs

The PVC is easy to work with and does not leave screw marks on the movement plates if you are particular about that sort of thing.

The movement is sitting on a piece of PVC pipe

Magnifier light

Florescent or LED. A color temperature of 6500k is the best compromise. Newer LED magnifying lights have custom color temperature settings. I see them on Amazon for about $50. Florescent bulbs have a shorter life than LED. Recently mine burned out and the replacement cost for the circular light itself is around $40 (for a $50 lamp!).

Worklight
Work-light

Clock oil and oil applicator

I have not had much luck with pen-type applicators and the few I have had have split with repeated use. Plus I am not sure the oil contained within is of very high quality. I am a bit old-school and use a cupped dipper and oil reservoir. Mobius and Keystone are good brands.

Count on spending $10 to $20 for quality clock oil. Motor oil, WD40, and 3-in-1 oil are not suitable substitutes and for me, the jury is still out on synthetic oil.

clock oil applicator
Clock pivot oil
Clock pivot oil

Movement clamps

When working with mainsprings, spring clamps are an absolute must for safety reasons. More than one beginner in clock repair has injured themselves by not restraining the mainsprings. A set of flat clamps (my preference) are around $17. If you wish to save money heavy steel wire will do.

Assorted clamps
Assorted clamps; flat clamp on the upper left

Tweezers

Useful for encouraging tiny pivots into place, picking up small clock parts, and a hundred other uses. A set will set you back $10. Bergeon will happily sell you a set for a few hundred dollars but cheaper blunt nose and needle nose tweezers will do.

Tweezers
Tweezers

Micrometer

Measurement in clock repair is important and a micrometer is essential. They are relatively cheap and can be had for under $20 at your local hardware store.

Using a micrometer to check pivot
Using a micrometer to check the pivot diameter

Cotton swabs

A general all-purpose probing cleaner for those tight crevices and corners. You will be surprised how quickly you can use up a box of 400. Under $3. Also useful for cleaning out your ears when determining whether or not your clock is in beat.

Cotton swabs
Cotton swabs

Toothpicks

There is no substitute for cleaning clock bushing holes. Buy them in the hundreds, you will need a lot of them. Get them at the checkout counter for under $2.

Toothpicks
Toothpicks

Mini level

A level surface is required to have a clock in beat. This one by Starrett is over $50 but you need not spend that much. Count on about $10.

Level
Spirit level

Spider key sets

The 4 and 5-prone sets in even and odd sizes will be enough for a vast number of clocks. As you move along in your hobby you will accumulate box loads of keys but a spider set is handier. Count on about $15.

4 and 5 prong keys and singles

Organizing trays

These are dollar-store items. Great for organizing clock parts (and not losing them). You can pick up a wide variety of sizes for under $10 total.

Organizing trays

Screw head holding screwdriver

I have a set by Klein Tools and find it a time-saver, especially when returning a movement to its case and holding and guiding that finicky screw in place. The gripping action holds, starts, and drives slotted screws in awkward, hard-to-reach places. A word of caution; they can be easily ruined if used to torque a screw in place.

I wish they can be purchased separately for a reasonable cost because I never have used the large one. About $60

Flashlight

Great for locating that nut that mysteriously flies through the air and lands on your floor sometimes never to be seen again. There are many other uses as well. The fancy ones are flexible but I have a penlight which is less than $10.

Flexible flashlight

Set of Single-Ended Scaler Probes

Okay, they are the same ones used by dentists to pick at your teeth but they are perfect for pulling that helper wire into position, guiding a pivot in place, or just about any time you need to pick at something, probe an area, de-scale a tooth (clock teeth, I mean), and so on. I bought mine at a dollar store but a set can be had for around $15.

Scalers

Concluding remarks

And there you have it.

For the next level, the costs begin to escalate but after purchasing these tools, and becoming familiar with clock movements through practice you will want to explore your hobby further. In a future article, I will describe how you spend big money on more specialized tools but also how you can get away with advanced repairs on the cheap.

Five essential tools for antique and vintage clock repairers on a budget

Thinking about clock repair? Does the high cost of tools keep you from diving deeper into the hobby? Here are a few basic tools to get you started on clock repair.

These are also the five tools that I use almost every day in clock repair. The tools together are well under $100 and are essential when working on antique and vintage mechanical clocks. The most expensive is a letdown set which can cost anywhere from about $45 for a 4-piece set or approximately $65 for a 6-piece set. The other tools are less than $10 each.

So let’s begin.

The let-down set

The letdown set’s main use is to wind or release mainsprings in clock movements. It can be used on its own or in combination with a spring winder. It can also be used as a key gauge The 4-piece set includes a plastic handle and 3 chucks in sizes: #5-6, #7-8, and #10-12.

Broom handle let down tool

If you don’t mind sweeping the kitchen floor with a shorter broom handle you can make one of these and save even more money.

Letdown set
Four-piece letdown set

The safe release of powerful springs on any clock will save you from broken and bruised fingers, trust me!

The letdown key
The letdown key in action: letting mainsprings down on a German movement

The pivot locator

This tool is 8″ long with a knurled handle. The business end is the pivot locator which is used to gently push and pull pivots into their holes lining up wheel pivots between the plates when assembling clocks. It is long enough to go deep between the movement plates and is useful when working on either small or large movements.

Never try to muscle pivots into their bushing holes since it will lead to disastrous results such as broken and bent pivots. This tool is designed to allow you to carefully position pivots into their holes without the risk of damage to the wheels and gears. Every clockmaker I know has this tool.

Pivot locator

Flat nose smooth pliers

Below is an assortment of pliers, always good to have but the green handle one (center) has a spring action, a flat nose, and smooth jaws to prevent the marring of surfaces and is the first one you should buy. Smooth jaw pliers are also useful for releasing taper pins on clock minute hands. Others include needle-nose and wire clippers.

Assorted pliers
Assorted pliers but the flat nose type (centre) are the ones used the most

Box wrench

The photo below shows the small size of the box wrench among other tools. It is used for releasing nuts on movements. It grips better than pliers and spares the nuts from unnecessary abuse.

Screwdrivers and box wrench
Screwdrivers and box wrench; the blue handle slotted screwdriver is one of my top tools

Screwdriver

The blue handle screwdriver is of the slotted type. Before the days of the Robertson or Phillips screw, flat head or slotted screws were used in clock making, especially case construction. Begin with the small size and gradually acquire an assortment for all your clock needs.

Beyond the basic tools, it all depends on how far you want to pursue clock repair as a hobby or a vocation. Obviously, the costs begin to escalate as you acquire more complex tools but follow my advice; determine the need for the tool first before you put down your money, establish a budget, avoid buying everything at once, and become an expert on each tool you acquire and shop on the used market when possible.

First blog post – 6 years ago

Clock collecting from a beginner’s perspective. That was the subject of my first blog post six years ago. Since then I have seen a lot of excellent and not-so-good blogs come and go but I wanted to give it my best shot and after 6 years, well, I am still here.

I started with a free WordPress plan, moved to a personal plan and then, this year, to a Premium plan. I now permit advertising on my site but my only goal is to recoup costs for server space and domain name. Anything extra is gravy.

In the early days I would stop blogging in the summer and resume in the fall. That did not work so well as my viewership fell off and I had to rebuild after the holidays. Now I schedule all my articles in advance. In fact, I typically have about 15-18 articles “in the can” at any given time. Having an inventory of articles means there is no need to scramble with something new every 3-4 days, my typical interval between articles. Some of you bloggers must know how hard it is to put words together when inspiration is lacking.

I am not sure what I was expecting 6 years ago but now have a dedicated following, receive many interesting letters each week, have met people through my blog and it seems people appreciate my content. This is reflected in statistics which are the lifeblood of any blog and it’s those daily figures that keep a blogger motivated. For instance, I have more views in a typical day than I had in the first 3 months of my blog.

Not once do I claim to be a professional horologist but after 10+ years in clock repair as a hobbyist I think I know something by now.

Welcome to my first blog post written May 15, 2015 which I will present word for word.

wall clock
OK, so it’s a Chinese clock but it works

I regard myself as a clock collector and tinkerer. I am not a trained horologist nor do I have a unique talent for clock repair or even getting a simple clock back to working order, but I find the world of horology to be quite fascinating.

It is a relatively new hobby for me which began with the purchase of a Daniel Dakota time and strike wall clock. Why start with a Chinese-made clock which most would consider inferior to almost any other clock in the world. It was cheap, it piqued my interest in collecting and repair and it was something to practice on. I then moved on to a Ridgeway grandfather clock and to my current collection of Mauthe, Seth Thomas, Hermle, Forestville, Sessions, Smiths Enfield, Muller and Pequegnat clocks.

Arthur Pequegnat kitchen clock, known as the “Fan-top”

My blog will profile clocks in my collection both vintage and antique as well as describe my attempts at repair. Along the way I will seek advice from you, the reader, from clock forum sites and whatever information I can find online.

Seth Thomas Adamantine mantel clock

Clock collecting is a great conversation starter and it allows me to combine my other passions, photography and traveling (and now, writing). Locating good clocks means traveling around the province of Nova Scotia and Canada, meeting interesting people along the way and is some cases getting that one-of-a-kind deal.

Most photos on this site are my own. Photos from other sources will be given full credit. I will try to capture the beauty of these old mechanical wonders and anything about their provenance will included as well.

Forestville Westminster chime
Forestville Westminster chime mantel clock

Stay tuned. It is all a learning experience and as I bravely go further into the hobby I hope to share my frustrations and my successes.

As Winston Churchill once said, “Success is walking from failure to failure with no loss of enthusiasm”.

I have stayed true to form since then and continue to publish 7 to 9 articles per month. Since then I have acquired dozens of antique and vintage clocks from all over Canada and probably have upwards of 80 clocks in my collection at this point. I have also said goodbye to an additional 20 clocks through local sales and as gifts. It remains a hobby that I thoroughly enjoy although occasionally I have done some paid and pro bono work.

If you have stayed with me since the beginning, thank you, but if you are new to my blog or following for the first time, welcome!

Anyway as I said 6 years ago, “Stay tuned”.

Variables that affect antique and vintage clock prices?


Arthur Pequegnat Simcoe
Canadian made Arthur Pequegnat Simcoe mantel clock, circa 1916, $300 (in Canada)

There are many types and styles of clocks and dozens of manufacturers. If you are a collector you know exactly what you are looking for and have a good idea of its approximate value. If you are not an “expert”, selecting an antique clock can be a daunting task. But this article is not about helping you find that special clock. It is about the variables that affect clock prices in 2021.

Mantel clocks on display in a museum

Over the years I have learned the value of many antique and vintage clocks. When I come across an interesting clock on an online for sale site or in an antique store I have several questions in mind. Is there anything special about it? When was it made? Is it rare? Is it historically significant? Is the price too high or too low and why? How much work must I put into it if it clearly needs TLC and will the seller accept a lower price? That said, I am prepared to walk away at any point.

For example, E. Ingraham clocks are common and can be had for very little money but the more desirable Ingrahams of the 1860s and 70s are those that Elias Ingraham had a hand in designing. The Ingraham Grecian is an attractive example of a clock that was designed in a period of American clock manufacturing where dappearance and uniqueness mattered.

E. Ingraham Grecian shelf clock C. 1870

Condition is important. One look at the case will tell me how well it was cared for. In my experience, it is pretty rare to find a clock that has been professionally serviced and many where a previous owner applied their limited skills to get it running. However, if you have the skills to service the movement and are handy at restoration, there are certainly bargains to be found.

If acquiring antique and vintage clocks is something you enjoy but have no knowledge of clock repair, the cost of servicing must be factored into the price particularly if you want it to run reliably.

Let’s assume that you are looking for an authentic antique or vintage clock that has not been altered in any way save for minor cosmetic touch-ups. What factors influence the price you pay for a clock today?

one-weight Vienna wall clock
Miniature one-weight Vienna regulator wall clock, unsigned, circa 1870, in the $400 range

Here is a list of factors I would consider in making your next purchase and why you would pay more for some clocks and less for others.

Variables that affect clock prices today

  • Wall clocks generally command higher prices than mantel clocks, the exceptions are Asian wall clocks and the like that have little value.
  • Most mantel clocks less than 100 years old have little value.
  • Clocks that come from a prominent collection that are well cared for and in excellent condition are more desirable.
  • Demand in your local area affects price; Canadian-made clocks are sought after in Canada whereas the same clocks are almost worthless in the US.
  • Weight-driven clocks are more desirable than spring-driven clocks. The exception is the modern weight-driven grandfather clock whose value has plummeted in recent years.
  • Condition is key, a clock in excellent condition is worth more than one in poor condition or with parts missing.
  • Running clocks are worth (generally) more than non-running clocks.
  • A recently serviced clock is worth more than one that has either not been serviced in a long time or never serviced.
  • The same clock may be worth more than others that are the same or similar if it has special provenance i.e. a well-documented tall case clock that came from Grover Cleveland’s home.
  • A clock with a replacement movement is termed a marriage by collectors. Marriages are worth far less than an authentic clock but acceptable by some collectors.
  • Any clock that has had its mechanical movement replaced with a quartz one is worthless.
  • One of the largest factors in a clock’s value is the manufacturer. Many from Sessions Clock Co. are rather ordinary and relatively inexpensive but some Seth Thomas Sonora Chime clocks, for example, have good value.
  • Age does not always equate to a higher price. A clock that is 170 years old is not necessarily worth more than one that is 50 years old.
  • Mechanism type; double and triple fusee clocks and pinwheel regulators are worth more than open-spring-driven mantel clocks or modern tall-case weight-driven clocks.
  • Some clockmakers are more desirable than others; generally speaking a German-made Winterhalder and Hofmeier mantel clock is worth more than a similar American-made Gilbert mantel clock. Assuming both are in the same condition, an unsigned four-glass French clock has a greater value than a branded American crystal regulator.

Scottish tall case clock
Scottish tall case clock, circa 1848 for under $300

The Law of Supply and demand and the 30-hour ogee

The law of supply and demand is the theory that explains the interaction between the sellers of a resource and the buyers for that same resource. Generally, as price increases, people are willing to supply more and demand less and vice versa when the price falls. At the end of the day, the clock market is very unpredictable. Clocks on eBay that go for $400 one month are $100 the next.

An interesting example is a 30-hour ogee clock. Prior to the popularity of online auction sites 30-hour ogee clocks (below) were commanding prices in the hundreds of dollars. Antique stores had them in the $250-400 range and when the internet came along supply increased and prices dropped.

George H. Clark 30 hour Ogee
George H. Clark 30 hour Ogee, circa 1860

I have paid low prices for some of my clocks but higher for what I call special clocks that are not necessarily rare but are made with some level of precision or unique in design.

Seth Thomas Regulator #2
Seth Thomas Regulator #2, circa 1925, $800-1000 range

Closing thoughts

In commercial transactions, the principle that the buyer purchases at his own risk in the absence of an express warranty is termed Caveat Emptor, or let the buyer beware. In the clock world, buyers have little or no recourse if those goods turn out to be defective, misrepresented, or broken. The best of luck trying to get your money back if you are a successful bidder on an online auction site and your package arrives in pieces.

Selecting and purchasing an authentic antique mechanical clock can be a daunting task but it can also be a very rewarding experience.

The essential clock repair library according to Antiquevintageclock.com

Whether you are working on your first clock movement or have repaired dozens, instructional resources, I believe, are essential. There is only so much information gained from a YouTube video (sadly some information is plain wrong) or how-to instructions online and there comes a point in time when you simply must have more detailed information.

An example of a Canadian made gingerbread-style clock

Opinions vary as to what constitutes an essential clock repair library but in this post, I will present those resources for the novice in the clock repair world and for those of you who have taken further steps in your journey.

Most of my work is with American and Canadian clocks, though some are German, some French, and of course, some British. Here are my go-to books starting with the Steven G. Conover series.

My Four Conover books (or manuals) are:

  • Clock Repair Basics
  • Striking Clock Repair Guide
  • Chime Clock Repair
  • Clock Repair Skills

Conover is very hands-on with plenty of diagrams and detailed step-by-step instructions. He will walk you through the repair of a broad range of clocks while discussing trouble areas, repair how-tos and challenges.

I am always on the lookout for clock repair books but sadly most of what I have has gone out of publication years ago although some can be found in the sections of used books on Amazon


Next are my Laurie Penman books.

They are;

  • The Clock Repairer’s Handbook
  • Common Clock Escapement

While some of his descriptions are quite technical and more targeted towards advanced clock repair he explores the basics as well.

Working with Anniversary or 400-day clocks requires the Horolvar 400-day Clock Repair Guide. 400-day clocks can be quite finicky and you are asking for trouble if you do not have this resource. The perfect companion is Mervyn Passmore’s book entitled Anniversary Clock Adjusting. It is a little short on depth but simple and to the point.

Horolovar 400 Day Clock Repair Guide

Next are three books by Philip E. Balcome

  • The Clock Repair First Reader – Second Steps for the Beginner
  • The Clock Book – An Overview of Heirloom and Contemporary Clocks in the American Home (not a repair book per se but a guide to identifying clock parts, types, styles, and trends)
  • The Clock Repair Primer – The Beginners Handbook

Balcome books are easy reads and are targeted for beginners and more advanced repairers as well.

Canadian John Plewes’s Repairing and Restoring Pendulum Clocks is an excellent resource for Canadian homegrown clocks. He explores specific clocks, describes repair challenges as well as provide tips and tricks on a number of clocks from not only Canada but all over the world.

Extreme Restoration By T. E. Temple should be in everyone’s library. Temple explores everything from evaluating a project, clock case refinishing, restoring glass, and tablet renewal. His how-to step-by-step instructions are easy to follow. Although the photos in his book are black and white to reduce cost, a companion website provides colour photos.

Though not directly related to clock repair the Home Machinist’s Handbook by Doug Briney explores bench tools, home lathes, Milling machines, treating and finishing the final product.

Temple and Briney books

I am always on the lookout for clock repair books but sadly most of what I have has gone out of publication years ago although some can be found in the sections of used books on Amazon. I  scour used book stores and flea markets to grab pretty much anything I can find.

Although I do not have any of Tran Duy Ly’s excellent reference books I am always on the lookout for them. Of course, they are not about clock repair specifically but they are great resources for identifying the many models and types of clocks from dozens of makers over the years.

A typical reference in Tran Duy ly’s Ansonia clock book

Well, there it is, my essential library of clock repair resources. Of course, there are many other resources and if there is anything else you feel should be on this list, let me know.

A Smiths Enfield mantel clock comes back to life

Smiths Enfield mantel clocks are highly regarded by beginning clock collectors due to their popularity, abundance, and durable movements. For amateur clock repairers, they offer relatively few challenges.

I acquired my Smiths Enfield time-and-strike clock in 2013 from a young clock tinkerer in Dartmouth, Nova Scotia, but it was never a reliable runner. It would only run for a few minutes before stopping. Eventually, the clock was set aside and left in a corner of my shop.

Post war English time and strike movement

While not an especially attractive clock it embodies the utilitarian design typical of post-war English clocks from the late 1940s and early 1950s.

After several months and armed with new knowledge of clock repair, it was time to take a second look.

About Smiths Enfield

The Enfield Clock Company (London) Ltd. was established in 1929, with its first clocks sold in 1932.

The company utilized modern assembly line techniques to manufacture and assemble its clock movements, inspired by the American system of automated factories. Initially, clocks were sold wholesale and for export, with the movements supplied to shops that would then assemble the cases themselves. Enfield took pride in producing “British-made” clocks. However, in 1933, facing difficulties competing on price, the company was sold to Smiths Industries, which led to the name change to “Smiths Enfield”.

In 1935-1936, they introduced a striking 14-day clock in a Jacobean Oak case, which helped solidify the company’s position in the market. With the outbreak of war in 1939, the factory shifted to wartime production. While clock production continued, material shortages became a significant challenge.

After the war, American machines were allowed to be kept and production of the 53mm movement re-commenced. Production was later moved to the Smiths factory at Cricklewood and then later to their Welsh factory in about 1955. Under Smith Industries the production line was changed to watches. Ultimately all clock production was phased out and the company closed shortly thereafter.

A New Suspension Spring?

I serviced the clock in 2015, and it needed bushing work. Since the wear wasn’t severe, I thought I could delay it for another two years. However, the clock has not been running since then. At the time, I knew little about the purpose and function of a suspension spring, and since I assumed the one that came with the clock was correct, I thought there must be another issue causing the clock to run poorly.

Suspension spring post

It’s time to revisit the suspension spring to determine if that’s the issue.

Suspension spring location

Over the past four years, I have accumulated an assortment of suspension springs and, through trial and error, found one that is either correct for the movement or very close.

The suspension spring has a mounting hole on one end and a small T-bar on the other where the pendulum hangs. I replaced the old spring with a shorter, more flexible one. As a result, the clock started running. In the first week, it lost about five minutes, but after making minor adjustments to the pendulum length, the timekeeping improved with each change.

The takeaway from this is that the correct suspension spring is crucial to whether a clock runs, and it should be considered as one of the potential reasons when a clock is not working.

Get it now before it’s gone – is this clock worth collecting?

Antique steeple clock. Battery operated. Has been refinished Very nice clock

Hmm, I wonder if they had batteries 100 years ago?

Arthur Pequegnat Bedford – bringing a handsome mantel clock back to life – Part II

This is Part II of a two part series in which I describe the final finishing of an Arthur Pequegnat Bedford clock case.

In Part I I described the challenges of repairing the clock case and the minor repairs to the movement.

In the first part of the series I also described how I acquired this Arthur Pequegnat mantel/shelf clock during my travels to Quebec this spring.

The red oak veneered clock is complete with pendulum bob, a good label on the inside back of the access panel, coil gong and of course, the signature time and strike Arthur Pequegnat movement with nickel-plated steel plates.

Nickle-plated plates with brass bushings

It is the “Bedford” model. Online research informs me that two Bedford models were produced. This one, which is the later version, measures 9 ¾ inches high by 8 ¾ inches wide by 5 ½ inches deep. It has a silvered 6 inch dial with Arabic numerals with no Pequegnat inscription on the bottom of the dial face, spade hands surrounded by a thick brass bezel and concave base moulding. It has a passing ½ hour strike on a coiled gong.

The earlier model has a 5 inch enameled dial with stylized Arabic numerals and Pequegnat inscription on the dial face, spade hands, oak veneered case, a thinner brass bezel and convex base moulding. The case measurements are identical. The time and strike movement differs from the later model by having a ½ hour passing strike on a bell.

If the dial is a replacement, it is a Pequegnat and someone took the trouble to install larger (and correct) spade hands

I initially thought that the larger dial might make this a one-of clock but after working on the case I am inclined to believe that the dial might be a replacement. I observed two sets of screw holes, one for the larger dial and one presumably for a smaller one. A factory switch or perhaps a clock-maker replaced the dial at a later time for whatever reason. After looking at a photo of the Bedford taken at the Canadian Clock Museum in Deep River, Ontario (Canada) you can easily see the smaller dial and thinner bezel.

Bedford clock on display at the Canadian Clock Museum

Arthur Pequegnat Bedford mantel clock, assembled, cleaned and working but before case refinishing

I do not think the larger dial overpowers the look of the clock, in fact, it gives it a more contemporary presence. If the dial is a replacement, it is a Pequegnat and someone took the trouble to install correctly sized spade hands. Unfortunately, the previous owner is unaware of the difference.

The task of clamping and gluing the case took several days as each section of the case required attention. And now to the final finish.

Gluing and clamping took time

Before the case restoration. Yes, the clock was in sad shape.

Dirty case
Very dirty case with years of grime and no grain visible

After giving the case a good cleaning I applied one thin coat of Minwax red oak stain to hide the bare areas and rough edges. I let the stain sit for 5 minutes and wiped off the excess with a cotton cloth. I allowed the case to thoroughly dry for 24 hours before the first sanding. For the final finish I chose Minwax PolyWipe for two reasons, one, it is simple to apply since it is easily wiped on and secondly, I wanted to avoid the amber tone of a lacquer which might result in concealing the grain. I applied six coats of PolyWipe and used 400 grit emery paper between each coat.

After cleaning, sanding and two coats of PolyWipe this is the result.

PolyWipe applications
After two PolyWipe applications

I am pleased that the grain came up very nicely, reminding me of what it must have looked like many years ago.

Finished clock
Finished clock, after 6 coats of PolyWipe

After six thin coats of PolyWipe the result is a revitalized finish that is durable, attractive and will last for years.

The brass door has me puzzled. What I thought was a broken hinge was actually folded into the bezel and soldered.

7/8 inch hinge is soldered back into the bezel

Why? I am reluctant to remove the solder because I risk breaking the glass by bending the retaining tabs. They are in very tight. As it stands the glass door will friction fit onto the dial bezel. Not the best but it will do for now. I will give it a second look, perhaps I can de-solder that hinge without removing the glass.

A project that is well worth the time and effort. It is always satisfying saving an old clock and bringing it back to life.

Gilbert time and strike – why I am putting the movement aside for now

While antiquing some time ago I came across boxes of clock movements in a shop. Some were fairly new though I found a Gilbert time and strike date stamped 1906 which piqued my interest. In the box was the key, the coil gong, clock hands, pendulum and movement mounting screws. A movement without a case. Hmm, interesting! Here’s what I’m thinking.

You dig up an old clock from the basement. It was your mothers and you were immediately reminded of the soothing sound of the clock when you were a kid. Wouldn’t it be nice to get that old clock running again. You fiddle with it and despite your best efforts you just cannot get the thing going. Why not bring it to the local clock-maker? He takes a look at it and explains that it is worn out. It will cost much more than the clock is worth to repair it, he says. But there is a solution. Take the works out and replace the movement with a reliable quartz one and all for less than half the cost of a repair. It sure would be nice to get that old clock running again and who would know that a new quartz movement is inside. The clock-maker takes the movement out, asks the customer if they want it, puts it in a box on a shelf and uses it for parts on the next clock. I’ll bet I’m close.

It is a Gilbert time and strike with a passing bell strike on the half hour. It has a distinctive 24 hour count wheel meaning that the count wheel rotates just once every 24 hours, each half with slots for 12 hours.

Gilbert time and strike date stamped 1906

It sat in a box  in my office for several months. The other day I placed the movement on a test stand to determine its condition, wound the time side and BANG, the mainspring blew apart. A nice clean break! Luckily it did not take me or any other parts with it. The break was so far from the loop end that the mainspring was not salvageable. You can see the snapped section of the left mainspring in the photo above. Determined to see this movement in running condition I ordered a new spring from a clock supply house.

Top plate removed
Top plate removed

When I dis-assembled the movement it was worn but repairable. However, all pivots were in very good condition except one, the second wheel on the time side, front plate. It was worn at the shoulder as you can see in the next photo.

Unusual wear on second wheel, time side

Was this enough to stop the clock and why just one? Perhaps a combination of factors. It is the second wheel and under the most axial load or probably a contaminated pivot hole with enough embedded detritus that would have ground away at the pivot shoulder.

There are only two solutions, fashion a new pivot or turn down the pivot and polish it. Fashioning a new pivot is a lot of work. However, there is enough steel left after it is turned down to give me a strong pivot. I chose the second option and installed a new bushing to fit the new pivot size which is much easier than re-pivoting. I put the wheel on a lathe and ground the pivot down to the size I wanted and then gave it a polish.

New bushing that had to be punched to stay in place
New bushing had to be punched to stay in place

The second issue was an old bushing that had been installed at some point in the clocks life. I drilled out the old bushing knowing that the replacement bushing would be loose. Alas, it slipped out too easily. The solution, two punches adjacent to the bushing to secure it in place. Punching a brass movement is rarely a good idea but this was a solution that was appropriate to the situation.

I installed two more bushings on the strike side second wheel back plate and third wheel front plate and one more on the time side, second wheel, back plate.

With the new mainspring installed and the repairs completed, it was time to assemble the clock and test it. I cannot count the number of times when I have re-assembled an American time and strike only to find that the strike setup was slightly out of adjustment. You know you have a problem when the clock strikes until the mainspring winds down. Placing the lever in the maintenance cam while the count lever is directly into the deep slot and hoping that the warning wheel pin locks at just the correct moment is always fun. I have cursed a few times when I cannot get it right. In this case it was first time lucky, the stop pin was in the right location on my first try.

On the test stand, bell is now fixed in place

Toothpicks reminding of the location of the bell lever
As an aid in re-assembly toothpicks remind me of the location of the bell lever

The clock has been running but does not seem to be able to get past 5 days of an 8-day cycle. I realize that there are some things I need to address before I get this clock running a full cycle but I have other projects on the go. Since this movement does not have a case I took it off the test stand, put it in a box on a shelf, included some notes, and will address it at a later date when and if I ever get a case.

Gilbert Notes
Notes about the movement reminding me what needs to be done

So, I’ll wait for that illusive case but in the meantime into storage it goes.

240 clock posts later and still ticking away

The other day I decided to explore my humble beginnings and realized that 240 posts ago was post number one. Three years ago I had recently retired and I decided to look into blogging, something I always wanted to do. I never considered myself a great writer. I do not have that natural flair that some people seem to have for writing but I wanted to give it a try. I had some thoughts and ideas that I wanted to communicate with an audience that was looking for something a little different.

I attended a WordPress session at my local college and was very impressed with how easy it was to set up a blogging site. Anyone can do it said the facilitator and I wasted no time getting started. WordPress impressed me as a very intuitive package then and after 3 years I am still impressed with the power of the product.

This year as some of you know I decided to buy a domain name which I think is a great name and says everything it needs to,  antiquevintageclock.com and a 1-year automatically renewable subscription. I won’t go into the additional benefits of the new package suffice to say the time was right for a change. The result has been a slight uptick in hits and exposure to more powerful options within WordPress.

Just a note about hits. In the first week or so of my new domain name my hits dropped dramatically, something to do with Google’s ranking analytics and not unusual for a brand new domain name. Of course, after I hit the migrate button and saw my hits drop I found an article that spoke directly to making preparations beforehand to avoid low hits after migration but too late for me. It would have been nice for a WordPress warning box to pop that would have read, “Oh, before you do that you may want to read this”

So, here is what I said three years ago. It was a short article and I remember at the time what a real struggle it was to put those first few words together.

I am no more than a clock collector and tinkerer. I am not a trained horologist nor do I have a great talent for clock repair or even getting a simple clock back to working order, but I find the world of horology to be quite fascinating.

It is a relatively new hobby for me which began with the purchase of a Daniel Dakota 2-train wall clock about 3 years ago.

The clock that started my collection, a humble Chinese clock that still ticks today.

Now I know what you are thinking. Why start with a Chinese made clock which most would consider inferior to almost any other clock in the world. Well, it was pretty cheap and it piqued my interest in collecting. From there I moved on to a Ridgeway grandfather clock and to my current collection of Mauthe, Seth Thomas, Hermle, Forestville, Sessions, Smiths Enfield, Muller and Pequegnat clocks.

I intend to profile my clocks both old and newly acquired on this blog and describe my attempts to repair and maintain my modest collection. I might even solicit a little help from my fellow clock enthusiasts.

Some of the nicer things about clock collecting are that is a great conversation starter and it allows me to combine my other passions, photography and traveling. Finding good clocks means traveling around the province of Nova Scotia, meeting interesting people along the way and is some cases getting fabulous deals. All the photos on this site are my own. I will try to capture the beauty of these old mechanical clocks and talk about the pedigree if I can learn anything about the history of any of these clocks..

Stay tuned. It is all a learning experience and as I bravely go further into the hobby I will be able to share my many experiences.

Well, I am still doing what I set out to do, profile my modest collection and pass on the clock repair techniques I have learned to the novice and intermediate clock repairer. Do I know more than I knew then? Sure, isn’t that what learning is all about? I am still tuned in and I hope you are too.

Featured article on Chelsea Clock blog about my blog

The following is an article that was featured on the Chelsea Clock blog

I have always had a fascination with clocks. As a young boy I can remember the schoolhouse clock in my grandparents’ kitchen and the ticking sound it would make that echoed through the entire house.

Seth Thomas Adamantine time and strike mantel clock, circa 1913

We all have busy lives and despite my interest in clocks over the years it was not until the year 2000 that I started building my collection, first with a Seth Thomas Adamantine clock and later with more mantel clocks, wall clocks and finally a grandfather clock in 2012. My collection has expanded to include virtually every style of clock though my interest lies specifically with American and European wall and shelf clocks. As I write there are about 35 clocks ticking away in my home.

In my blog I stress that I am not a trained horologist but have accumulated enough knowledge over the years that I feel capable of addressing general clock issues

Clock repair came a little later. I began with general understanding of the cleaning and oiling of clock movements in order to keep my little collection running. As I acquired clock repair tools and equipment I progressed to servicing pinions, bushings, verge repairs, cleaning of mainsprings and case restoration.

In 2015 I decided to write a blog about collecting and servicing vintage and antique clocks. There are some excellent clock blogs but many are commercial sites or professional horologists selling their services. I decided to design a blog that would appeal to the amateur clock collector/repairer. In my blog I stress that I am not a trained horologist but have accumulated enough knowledge over the years that I feel capable of addressing general clock issues. Therefore, my blog is not aimed at the professional repairer or restoration expert but the individual looking for specific information about a certain clock, those who have a particular problem with their clock and finally those who have a general interest in clock collecting and repair.

Junghans Crispi wall clcok with compensating pendulum
Fully restored Junghans time and strike wall clock, circa 1899

Cleaned, bushings replaced and tested
Time and strike movement on a test stand after servicing

I publish an average of seven blog articles per month on a variety of clock topics. I appeal to a wide change of subjects; some articles have a philosophical perspective, some detail the challenges of working on a specific clock, some present simple repair techniques for the beginner, general maintenance tips as well as articles of general interest. As a history buff I try to include a background history or provenance of the specific clock I am profiling or information about its maker.

Using a micrometer to check pivot
A micrometer is used to size a bushing for an escape wheel pivot

Blogging has also allowed me to combine my other interests, that of photography and traveling. My wife and I have had many interesting adventures seeking out unique clocks for my collection.

The art of veneering – Part III – staining and finishing

This is Part III and the final part of a three part series on my first venture into veneer repair on an antique clock. Prior to beginning this project I spent many hours researching veneer repair, watching YouTube videos and seeking advice from my knowledgeable colleagues at NAWCC.

A recent acquisition, this is an 8-day Seth Thomas column and cornice time and strike shelf clock with sleigh front. It has a Plymouth (Hollow) lyre movement with a Thomaston Conn. label which means that the clock was made shortly before the incorporation of Thomaston in the early 1870s.

ST column and cornice , as found
ST column and cornice, as found

An example of veneer loss

I assessed this clock in Part I and described the steps in preparation for the veneer repair. In Part II I described the process of  applying veneer. Part III concerns the final finishing. Once the case work is complete I will focus my attention on servicing the movement, addressing the dial issues and replacing the clear glass with a floral pattern in the upper tablet.

The lighter coloured sections in the next photo are new veneer pieces. New veneer is found on the top of the cornice, the left cornice base, the right column support and sections of the bottom base.

Veneer repairs are complete
Veneer repairs (light areas) are complete

Finishing is the final phase of this project. In many respects this can be the most challenging phase of the project because once the hard work of applying veneer is complete the job means nothing if the new veneer does not match the old veneer. Although it can never be a perfect match the goal is to come as close as possible.

One finish seemed to stand out above the others

I conducted an experiment on leftover Brazilian Rosewood.

I selected three stains/finishes, Minwax Rosewood gel stain, Wipe-On Polyurethane satin clear coat and yellow shellac. I utilized various light sources to see the effect colour temperature had on the results and came to the conclusion that there was one finish that seemed to stand out above the others.

In the photo below there are three swatches on a piece of leftover veneer; Rosewood gel stain on the left, Wipe-On Polyurethane in the middle and on the right is yellow Shellac. Wipe-On Poly initially struck me as the best of the three; it is subtle while bringing out the character of the Brazilian Rosewood veneer while keeping that “aged” look but it is too muted. Rosewood gel is reddish and quite dark and looked very striking compared to the original Rosewood.

I concluded that yellow shellac was the best choice. Shellac darkens the veneer and accentuates the red tones nicely. Shellac would have been been the original finish when the clock was made and it is still the finish of choice today.

Comparing three stains
Comparing the three stains

Although veneering is a challenge, it is very rewarding work and I eagerly await my next project

New veneer above cornice, base of cornice is original though it looks like it was replaced
New veneer above cornice. The base of right cornice is original though it looks newer

Most of the base was replaced with new veneer
After two coats of shellac

After three coats of shellac, the case is complete

With dial and doors re-attached
With dial and doors re-attached, movement is out of the case at this stage

Although veneering is a challenge, it is very rewarding work and I eagerly awaiting my next veneering project.

Movement serviced and oiled
Lyre movement serviced and oiled

With the veneer repairs completed and the movement serviced there is still work to be done on this clock. I have decided that the gesso columns will stay as-is. Next is perfecting a tablet design for the access door to replace the clear glass, and finally, making a decision regarding the dial face; whether to leave as-is, find a suitable replacement or buy a new one from a clock supplier.

Seth Thomas column and cornice "Empire" style time and strike shelf clock
Seth Thomas column and cornice “Empire” style time and strike shelf clock

Lessons learned:

  • Allot a significant portion of time for the project, it is time-consuming and meticulous.
  • For an authentic repair hide glue must be used; avoid white or yellow carpenters glue though I would think there are rare times when it would be considered.
  • Hide glue:
    • must be a certain consistency to work properly. It should drip off the brush like honey. My hide glue was too thin at the start of the project.
    • will last a while in the fridge. Don’t cap the glue while it cools; condensation will hasten mold growth
  • Stay away from plastic based modern stains and finishes and go with shellac or any finish that would have been used at the time.
  • Some use filler to smooth the gaps between pieces of veneer, I did not use filler for this project; it is something I might consider next time.
  • A light sanding of the veneer is all you need, aggressive sanding will destroy the veneer (lesson learned).
  • Apply painters tape on the veneer before cutting; doing so eliminates ripping and tearing.
  • Use a sharp hobby knife
  • In future I would consider replacing larger sections rather than a patchwork of small pieces though that largely depends on how much veneer you have to work with.
  • Clamps are essential. Get various sizes of clamps and use wax paper between the clamp and the veneer, you will thank me!
  • Leave the area clamped for 24 hours. Although hide glue bonds quickly clamping for a day will ensure maximum adhesion.

This was a great project and I am confident that my next veneer project will be even better. Time, patience and perseverance are keys to a successful veneering project.

Waterbury 30 hour Ogee clock – servicing Part II

Waterbury OG clock
30-hour Waterbury Ogee with a beautiful veneered case

This 30 hour Ogee clock was purchased in the fall of 2017. I was eager to add this clock to my collection as it is the one particular style of clock that I do not have. From my research on Waterbury clocks I determined that it was made in or around 1870.

I decided to turn the worn trundles inward and seal them with Permatex (medium strength thread-locker) so they are fixed rather than rolling; not ideal but reversible

While the case is in remarkable condition for the age of the clock the movement has suffered the ravages of time.

Simple 30 hour movement, top plate removed

Testing over the course of a day or so revealed that clock would not run for more than a few minutes. The movement was taken out of its case and inspected to determine what needed to be done to get it to running condition.

I expected punch marks and there were a number. In the old days clock-makers would attempt to address pivot wear by closing the pivot holes with a stake or punch. Not ideal but a common practice. Bushing work was definitely required. The pivots, on the other hand, were in very good shape and polished up nicely.

Punching the bushing home

My first task was to address the bushings. Ten bushings were installed, 5 on each plate. The front bushing work included the escape wheel bridge, always a challenging spot to bush. Next I addressed the other serious wear issue – the trundles on all of the lantern pinions.

Lantern pinions on the escape wheel

The trundles on the lantern pinions were in bad shape as you can see in the photo above. The wear seen here was identical on all 4 lantern pinions. Notched trundles were not what I expected.

The trundle work was certainly the most interesting part of the repair. My experience with lantern pinion work is zero. After some research the method I selected was to hand drill through the top shroud to release the worn trundles.

Drilling through the shroud to release worn trundles
Drilling through the shroud to release worn trundles; I used a smaller bit than the one pictured here

After releasing the worn trundles I used 1.10mm pivot wire which is ideal for this purpose and matched the worn trundles precisely.

Test fitting of pivot wire before the wire is cut to proper length

I began with the fly. I drilled into the top shroud. I then cut 1.10mm pivot wire into the required lengths then rounded the ends with a cut-off disc on a  Dremel. After the fly was completed I addressed two more lantern pinions in the same way. I staked the shroud ends to seal the trundles inside.

With three done the escape wheel lantern pinion was next and that is when I ran into a snag. The escape wheel shroud is reversed (see photo below), so I cannot drill into the top shroud without a lot of guess work. Using needle nose pliers I decided to turn the worn trundles inward and seal them with Permatex (medium strength thread-locker) so they are fixed rather than rolling. This is not ideal but it is reversible.

There does not appear to be a definitive answer as to whether the trundles should be free-moving or fixed although I suppose they are designed to roll with the gear teeth. At some future point the trundles on this wheel will need to be replaced.

So, how do you get at those trundles?

The clock did not come with a pendulum bob so, a new one was attached. The suspension spring and leader was replaced to address a crimped spring that resulted in a wobbling pendulum bob. I used .09mm suspension spring in the correct length. The clock now runs well and it has completed a number of 30-hour cycles.

I suspect that this will be a clock that will not be run daily, the inevitable hassle of constantly winding a 30 hour clock but I am pleased that it is back in running order and I will ensure that is runs on special occasions.

So you want to fix a mechanical clock – Part I – a beginner’s toolkit

Tools are essential for clock repair because they enable precision and accuracy, which are critical when working with delicate mechanisms and intricate components. Let’s identify the key reasons.

Antique and vintage clocks can lose significant value if repaired improperly. Using the right tools minimizes the risk of damage, preserving their historical and monetary worth. The right tools, such as screwdrivers, pliers, and tweezers, allow you to handle small parts without causing damage. Specialized tools ensure components are handled carefully and correctly.

Proper tools make the repair process faster and more straightforward. For beginners, having the right tools helps build confidence and competence. They allow you to focus on understanding clock mechanisms without being hindered by improper equipment.

This article will describe some of the tools required to tackle the repair and/or cleaning of mechanical clocks.

Based on years of clock repair experience, I recommend the following essential tools for any beginner’s toolkit. While some of these tools can be sourced from your local hardware store, specialty items will need to be ordered from clock supply companies such as Timesavers (USA), Perrin (Canada), or Meadows and Passmore (UK).

Whenever possible, avoid purchasing tools from craft shops, as their prices are often significantly higher. They are ideal for paint and quality paintbrushes but they tend to charge much higher prices for general-purpose tools. A ball peen hammer bought at a hardware store, for instance, costs half as much as one found in a craft shop.

A suggested list of items

Keys: clock keys come in many different sizes. You must use the correct key for the winding arbours of your clock. The pronged keys in the photo below will fit a multitude of arbours.

4 and 5 prong keys and singles

Magnifier: They are available in various strengths and allow a much closer view of your work.

Magnifier
Magnifier

Work light: Illuminates your work, this one articulates and has a magnifier. I have since replaced this light with an LED one. The lamp burnt out and the cost of the fluorescent lamp was more than the entire lamp. Plus the new LED lamp has light temperature and intensity controls.

Worklight
Work-light

Pliers: A variety of pliers to hold onto your work, release taper pins, tighten nuts, and cut wires. The green handle pliers are non-serrated (flat-nose).

Assorted pliers
Assorted pliers

Hammers: A ball peen hammer is very useful (not pictured). The craft clip holder is useful for steadying items that are to be soldered.

Hammers and craft clip

Files: Variety of sizes to help shape or file down anything on a movement. Avoid inexpensive Chinses files and spend a little more on quality ones.

Files
Files

Tweezers: Getting into tight situations, grabbing small parts, and positioning parts into place are typical uses for tweezers

Tweezers
Tweezers

Level: To find the correct beat the movement (clock) must be level.

Level
Level

Spring clamps: To restrain the power of the mainspring. The flat clamp (upper right) is for those mainsprings which do not leave a lot of working room. Otherwise, the other round clamps are good for most applications. I prefer the flat clamps.

Assorted clamps
Assorted clamps

Screwdrivers: Always handy to remove movements from cases, loosen bolts, and pry parts.

Screwdrivers and box wrench

Letdown set: Before working on a movement the mainsprings must be let down or restrained in their clamps. The letdown key is the safest method of letting down the mainsprings. Inserts cover most arbour sizes.

Letdown set
4-piece letdown set, #5-6, #7-8, #10, #12

Hand reamers and broaches (cutting and smoothing): For bushing clocks when you cannot afford the luxury of a bushing machine. Cutting and smoothing broaches are useful for enlarging a new bushing when tight tolerances are required. They come in assorted sizes.

cutting and smoothing broaches

Cotton swabs: A variety of cleaning uses.

Cotton swabs
Cotton swabs

Clock oil: Once the movement is apart and cleaned it must be re-assembled and then oiled before use. The oil, whether it is conventional or synthetic, must be specifically designed for a clock movement.

Clock pivot oil
Clock pivot oil

Toothpicks: For cleaning and “pegging out” bushings on a movement

Toothpicks
Toothpicks

Clock stand: Once the movement has been re-assembled it is tested outside the case for a short period. Gene’s movement stand is a fully adjustable test stand.

Clock movement stand
Gene’s clock movement stand

For those handy with a hammer and saw a stand can be made at home with whatever lumber is at hand.

Testing the Kienzle movement on a makeshift test stand
Testing a movement on a home-built test stand

Camera: At every part of the process a digital camera can record critical stages in assembling and disassembling a movement. I use a 50mm macro lens for close work. A cellphone is a perfectly acceptable alternative but one with good macro capabilities is preferred.

Digital Camera
Digital Camera

Electronic Caliper: Indispensable for measuring the thickness of anything be it springs, pivots, plates, and so on. Available at a clock supply house or save a little money and buy the same tool from a retail outlet such as  Canadian Tire in Canada.

Using a micrometer to check pivot
Using a micrometer to check pivot diameter

Pivot locator: It is an excellent tool for aligning pivots with their holes during assembly.

Build your set of tools little by little to spread the cost. You may already have some of the items I’ve mentioned but buy what you need when you need it. As for those specialized tools, broaches for example, it pays to spend a little extra for better quality.

These are the tools you require to start your journey into clock repair. If you have a tool (or tools) you feel is indispensable for the beginning clock-maker please let me know.

In Part II I will describe tools for those who would wish to advance their skills in clock repair.

Is clock collecting part of the counter-technology revolution?

Is clock collecting (and repair) part of the counter-technology revolution?

Many years ago, social scientists predicted with the onset of modern technology it would sap us of our knowledge. Our brains would simply melt away. Concentration and initiative would be sucked out of us. Why would you need to know anything if it is readily available at your fingertips? How often do you hear the phrase, “just google it”. Sadly, it has become an integral part of our lexicon.

People are embracing old technology and returning to the fulfillment of doing things for themselves

The term counter-technology is not a term I invented. I found it mentioned in a car magazine article some time ago. Many people are collecting and repairing antique cars more than ever. Why? Reliving past memories? Getting your hands dirty. Rejecting the modern world?

Has the analogue world returned? Yes and no. Wine and beer making has become a huge industry and there seem to be mom and pop microbreweries everywhere, antique furniture purchases have increased dramatically, backyard chicken coops are popping up everywhere, fountain pen collecting is a “new” thing, vinyl records are spinning back and stamp collecting is returning with renewed vigor.

Retro is in. But is is not just that! It is a statement. People are embracing old technology and returning to the fulfillment of doing things for themselves. We all know the value and satisfaction of pursuing a simpler way of life but at the same time we still want to feel connected to our busy modern world. We want both. This is our inevitable response to the new digital world. We are pushing back but just enough to satisfy our needs by remaining connected with the past but we still feel the need to be plugged in.

However, every now and then we feel the need to dis-engage. Digital detoxification. It’s a thing. Somehow we want to wash the digital world from our lives, however briefly. I spend summers at our family cottage in Quebec (Canada). There is no Internet and I am totally fine with that. But what’s the first thing I do when I return home? You got it!

You too can be saved

Simplicity breeds complexity

To truly embrace the analogue world the mechanical clock is my personal statement. Not only do I collect antique and vintage clocks I repair them as well. As readers know I am not a trained horologist but I love the challenge of repairing a clock and I love accumulating knowledge in the pursuit of my hobby. Needless to say I am not always successful and my office has a few notable failures. I am fine with that. Failure breeds learning. It is my response to the increasing pressures of the digital world. It is my response to our increasingly complicated world. Simplicity breeds complexity.

Like the juggler who can keep all the balls in the air at once

It took years to learn the skills necessary to repair this Sessions Westminster A Westminster chime clock
It took 2 years to learn the skills necessary to repair this Sessions Westminster A chime clock

Analogue verses digital. It is a question of balance, like the juggler who can keep all the balls in the air at once. I admire people who have “analogue” hobbies but I especially admire those who remain connected to our modern world by maintaining a delicate balance between both.


Website Powered by WordPress.com.

Up ↑