Seth Thomas is a well-known American clock manufacturer with a long history, and they produced a variety of clock movements over the years. The Type 89 movement is one of the many clock movements produced by Seth Thomas over the years. This type was made between 1900 and 1938.
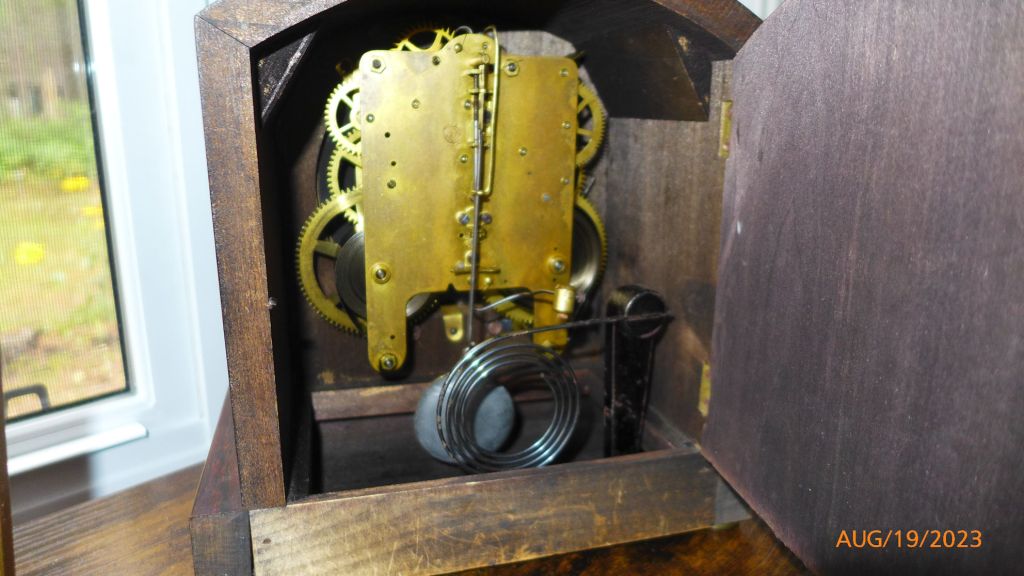
I acquired this mantel clock during the summer of 2023. From a distance, it looked very good but upon closer inspection what I thought was a rosewood veneer finish was in fact, a thin wrapper, so a bit of a disappointment.

However, the focus of this blog post is not the clock’s case but the ubiquitous type 89 clock movement found within that made its way into thousands of Seth Thomas clocks.
Disassembly
The first step is to remove the hour and minute hands. Working from the back, four case screws release the movement from its case. Things will go along more smoothly if the coiled gong is removed as well.
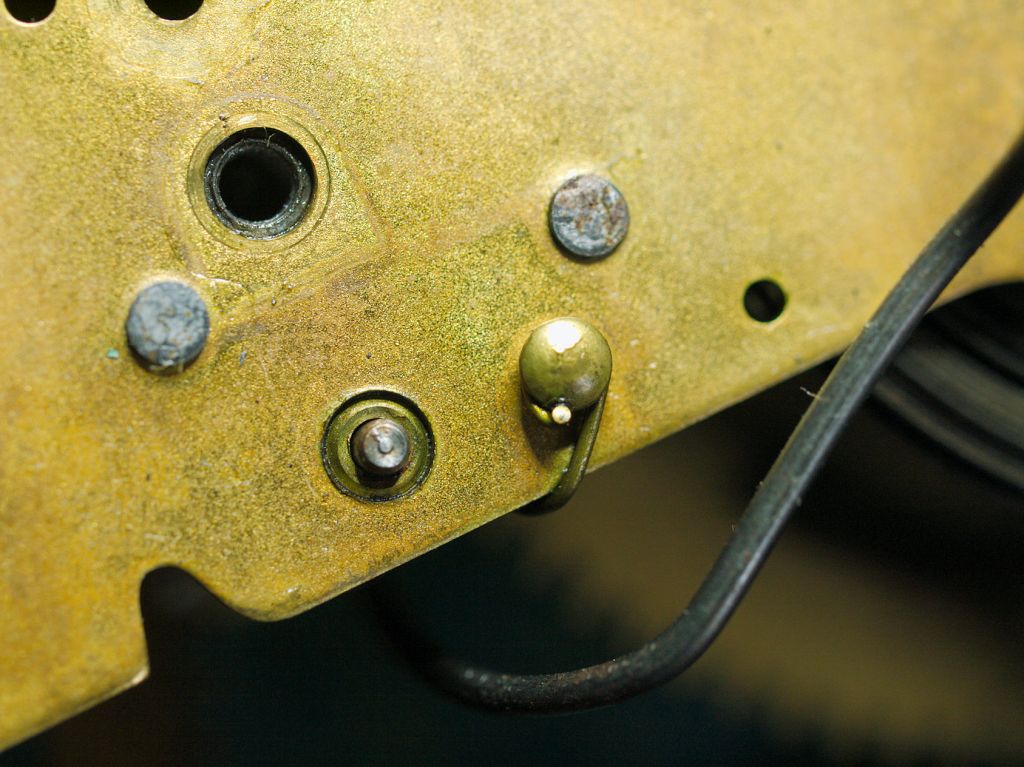
Looking at the back plate, the suspension spring and rod must be removed first. Then comes the regulating adjustments screw and rod which consists of releasing 3 machine screws and then pulling out the spline gear which is operated through the clock face by the small end of a double-ended winding key. Once that hardware is removed it is on to the removal of the back plate.
There are 4 nuts (plus the pendulum rod retainer screw) to be removed, however, it is advisable to unhook the helper spring at the top and the hammer spring at the bottom before lifting up the plate. This will prevent the wheels from being dislodged as the back plate is removed.
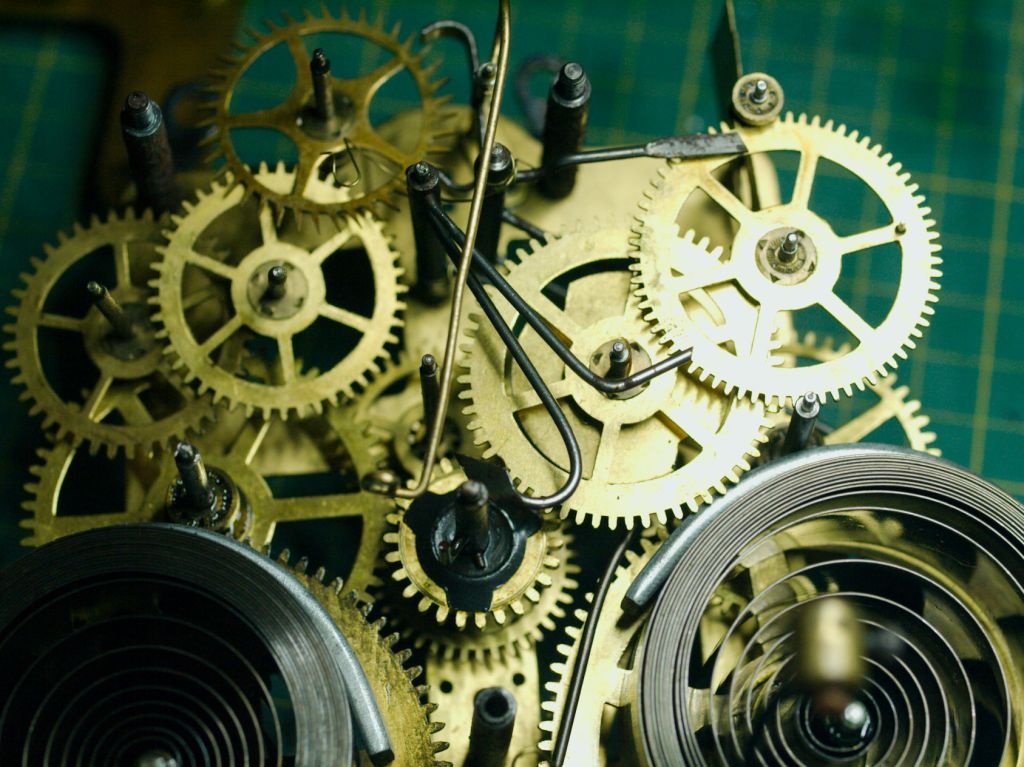
If the wheels spring out, reassembling the wheels becomes a challenging task of guesswork to determine their correct locations, especially for beginners.
As each part is removed place them in a hobby tray or receptacle so that nothing will be lost or misplaced. No matter what the skill level, separating the time side gears from the strike side is always a good practice.
Findings
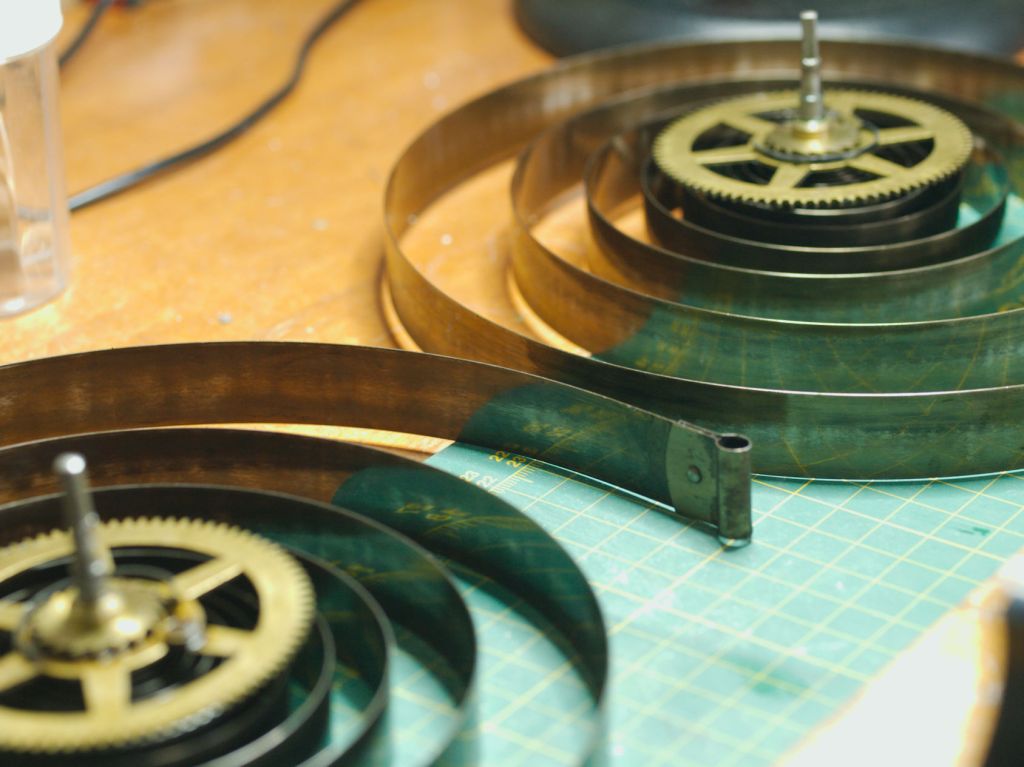
Upon lifting the back plate, my initial observation was the replacement of the mainspring on the strike side at some point in the clock’s life.
Whenever I encounter a replaced mainspring, my immediate focus shifts to inspecting potential damage to the main wheel teeth and the lantern pinions in the second and third wheels. This is because the force of a break occasionally causes secondary damage along the gear train. This is often referred to as collateral damage. Fortunately, the components up the train in this movement are undamaged.
An initial inspection of wear indicates a need for five new bushings on the time side, while only one is necessary on the strike side. Further examination may reveal more once a more detailed assessment is conducted.
Interestingly, the strike side shows less wear, indicating that it was seldom wound. My assumption is that after the repair of the mainspring, the owner decided it wasn’t worth the risk of another mainspring break and chose not to wind it frequently or at all.
More concerning is evidence of rust on the movement posts, some pivots, and the lantern pinions. The clock was obviously stored in a humid location for a period.
All parts were cleaned in the ultrasonic cleaner and thoroughly dried.
Despite my best efforts, I could not separate the main wheels from the mainsprings. I opted to place both the wheel and mainspring in the ultrasonic cleaner. This is not a typical practice for me as it dirties the cleaning solution and limits resue, but I intend to dispose of the cleaning solution after this servicing.

That’s all for now
Despite encountering disappointment in the clock’s case, the disassembly and findings of the ubiquitous Seth Thomas Type 89 clock movement revealed a replaced mainspring on the strike side, a need for bushing work, and evidence of rust, presenting challenges that will be addressed in the upcoming stages of cleaning, bushing work, oiling, and reassembly.
I will conclude here and save the remaining details of the servicing for a subsequent post.
Discover more from Antique and Vintage Mechanical Clocks
Subscribe to get the latest posts sent to your email.

Ron, I appreciated your detailed description of the disassembly process. Looking forward to the Servicing blog!
LikeLike
Thank you. Part 2 is February 2nd.
LikeLike