
I was attracted to the style of this clock but disappointed when I learned that it was a marriage of a Waterbury case with a Seth Thomas movement. Briefly, a marriage is when parts from two different makers come together.
Buying a clock from a flea market, antique mall, a shop or what have you is always a gamble. On this particular clock there is no trademark or name on the dial or a label in the back of the case that told me who the maker was. I made an assumption and it was an impulse buy.

While at the antique store I opened the back of the case to confirm that the clock had a movement and it was complete with pendulum bob and coiled gong and to me everything appeared correct until I brought it home. My first thought was an Ansonia movement when I looked at it under the dim light of the store.
Seth Thomas and other makers made similar cabinet style cases but this is the Wren by the Waterbury Clock Company. Being a marriage, the clock is worth much less to those particular about such matters. No matter, it looks attractive.
I can imagine a past owner’s conversation with the repair guy, I don’t care what you do, just make it work! And the repair guy responds by removing the very worn Waterbury movement and replacing it with a Seth Thomas. Easy peasy!
One of the current seller’s stickers on the case said it was a non-working clock but with minor adjustments, such as moving the pallets closer to the escape wheel and releasing the time-side mainspring, I had it running in no time. There is not much wrong with the movement and a good cleaning plus a bushing or two should put things right.
So, what did I buy?
As I said, I like the case and it has a decent movement but when a clock is a marriage one can expect some questionable repairs and interesting changes as one takes things apart.
I am not absolutely certain the dial pan came with the case or was added later but the glass and bezel are certainly from a mid-century mantel clock. It is so ugly it will be tossed into the spare parts drawer. I will keep the dial pan but a piecrust bezel with flat glass is more appropriate for the period.

I removed the dial and discovered a number of extra screw holes here and there, varying lengths of screws, some screw holes filled with pieces of wood, even a couple of Robertson screws (not invented until after the First War) and so on. Obviously the replacement movement required new holes and why not drill a few extra holes for good measure!
The hole on the dial just above the 12 is larger than it should be. It was either enlarged to accommodate the regulating arbour or it’s a new hole altogether.
On a positive note both the case and the movement are from a similar period.
Disassembling the movement
But this post is about servicing the movement.
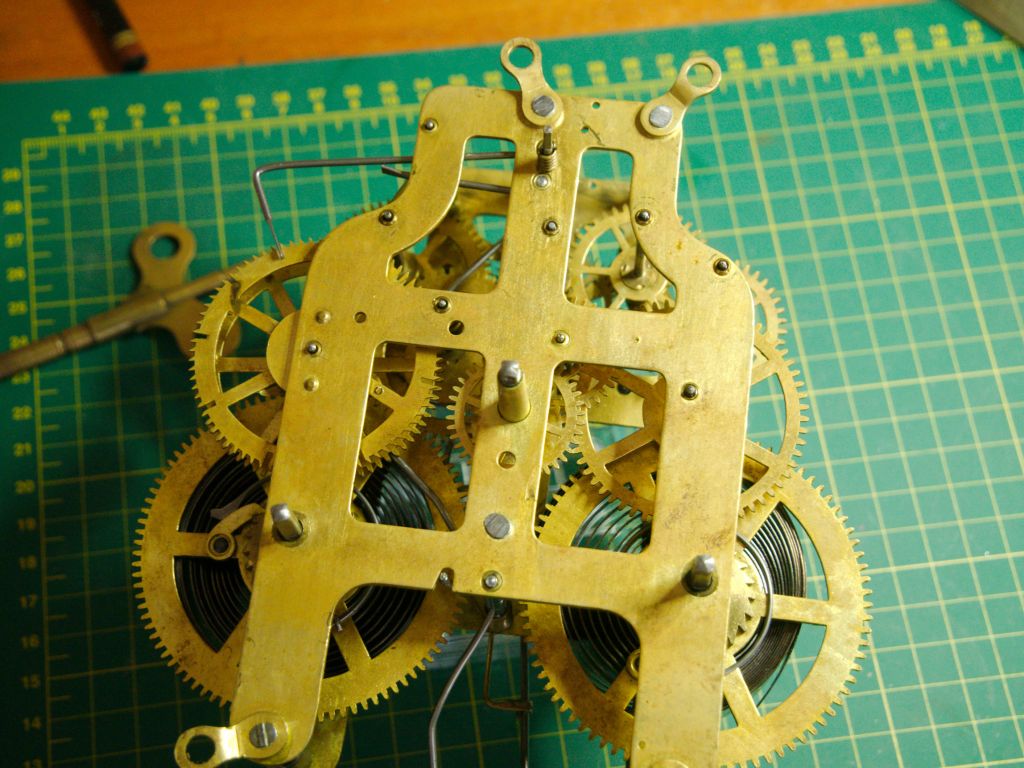
I am impressed with the engineering of this Seth Thomas movement. It is robust and well-designed though it has an interesting, overly complicated, speed regulating feature.
From my research I found that the hip style movement is the type 44 which was used for a 12 year period beginning in 1890. In 1903 it was presumably replaced with the type 89 movement, simpler to manufacture, fewer parts and more reliable, and appeared in many thousands of ST mantel clocks afterwards. It has a sickle shaped brass piece between the plates so that the clock can be turned backwards repeatedly at the hour to sync the strike with the hands. It is technically called a set-back counter weight.
There were variations of this movement, front winding movements as opposed to rear winding, with and without the worm gear speed regulator and some with stop works. This movement does not have Geneva stops.
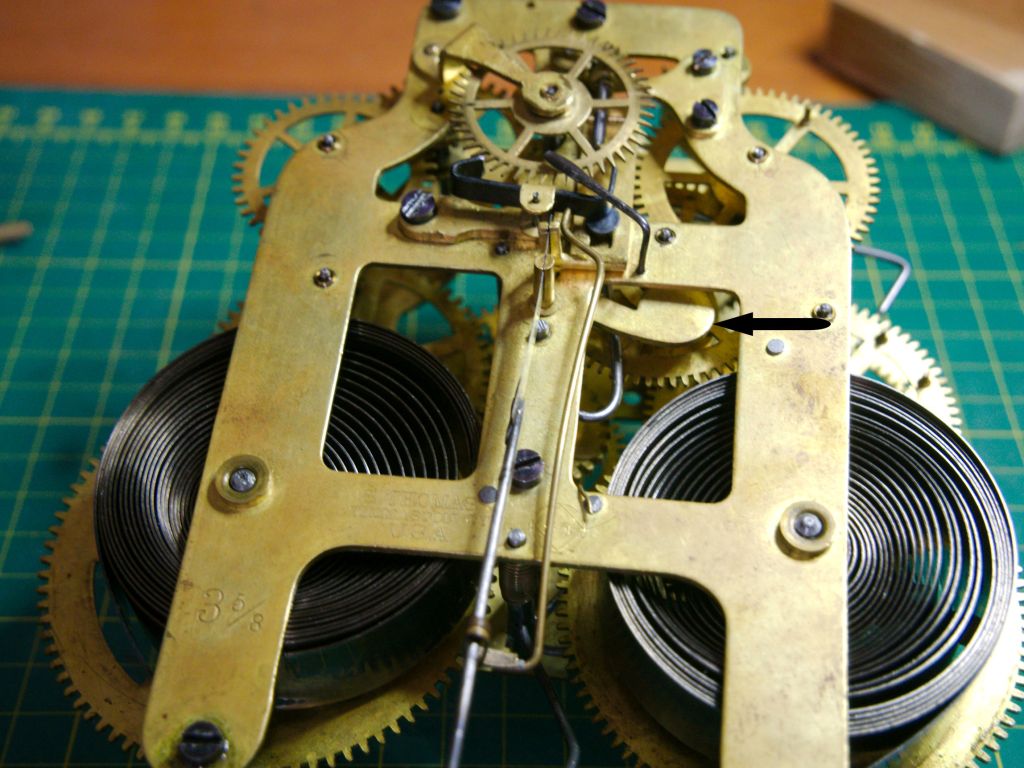
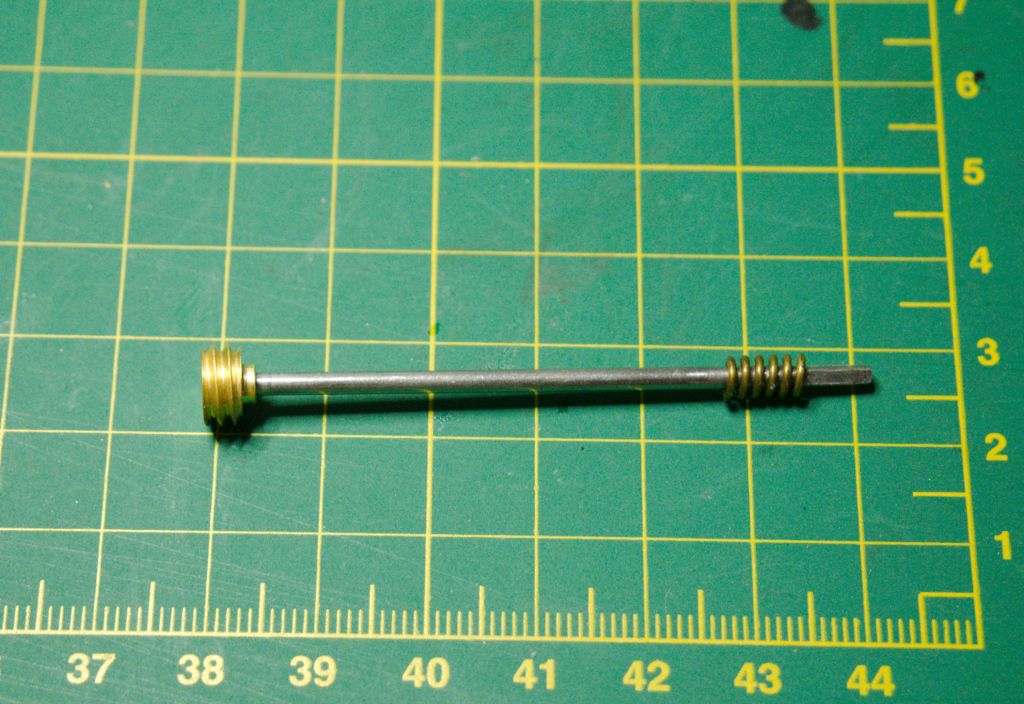
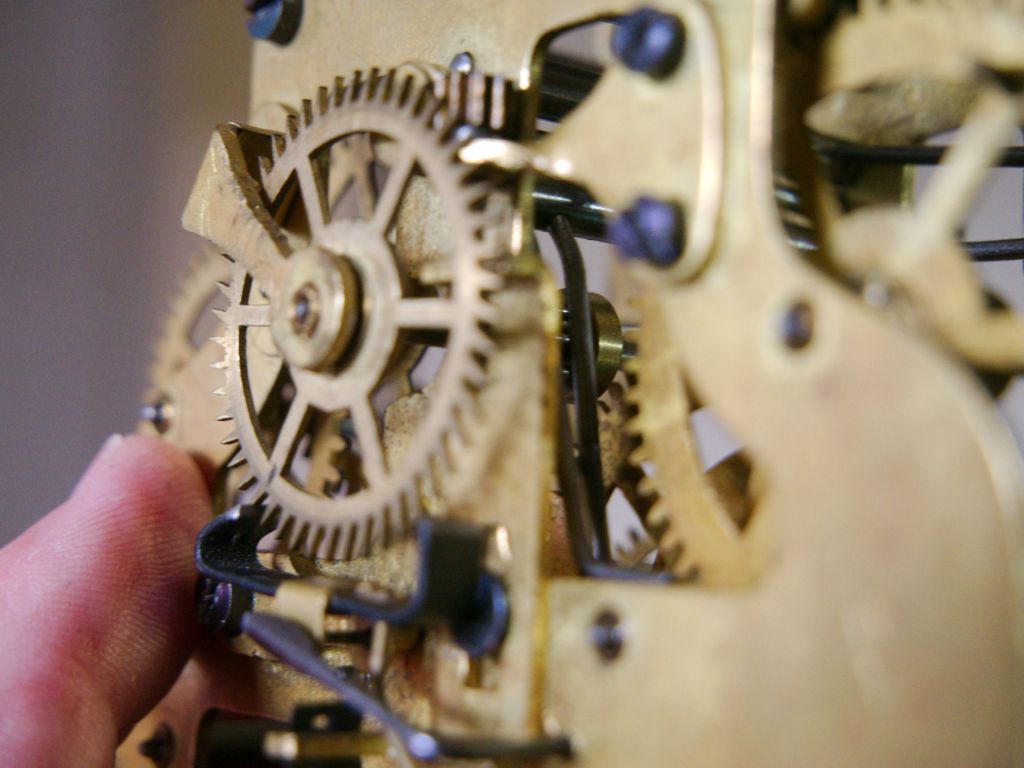
It took me more time than usual to pry open the plates because I was slowed down by the intricacy of regulating mechanism. Part of the mechanism consists of a long arbour that passes from the front plate to the back plate. At one end is a worm gear and on the other is the regulating end. It is secured to the outside of the front plate by means of a spring with a pin through the arbour. To release the arbour, the pin must be pulled and the spring releases.
Well, actually the spring flew across the room. No problem, I’m used to crawling on the floor looking for clock parts.
I have worked on a lot of American time and strike movements but this type of regulating mechanism is a first for me. In fact, the set-back counter weight is also a first for me.
Analysis of the movement
The movement has had 12 bushings installed, 5 on the front plate and 7 on the back. The work is well done but I don’t like the arrows scratched into the plate indicating where each bushing would be installed. I use a Sharpie pen and after I have completed the bushing work I wipe the marks off with alcohol. There is no need to mar the plates.
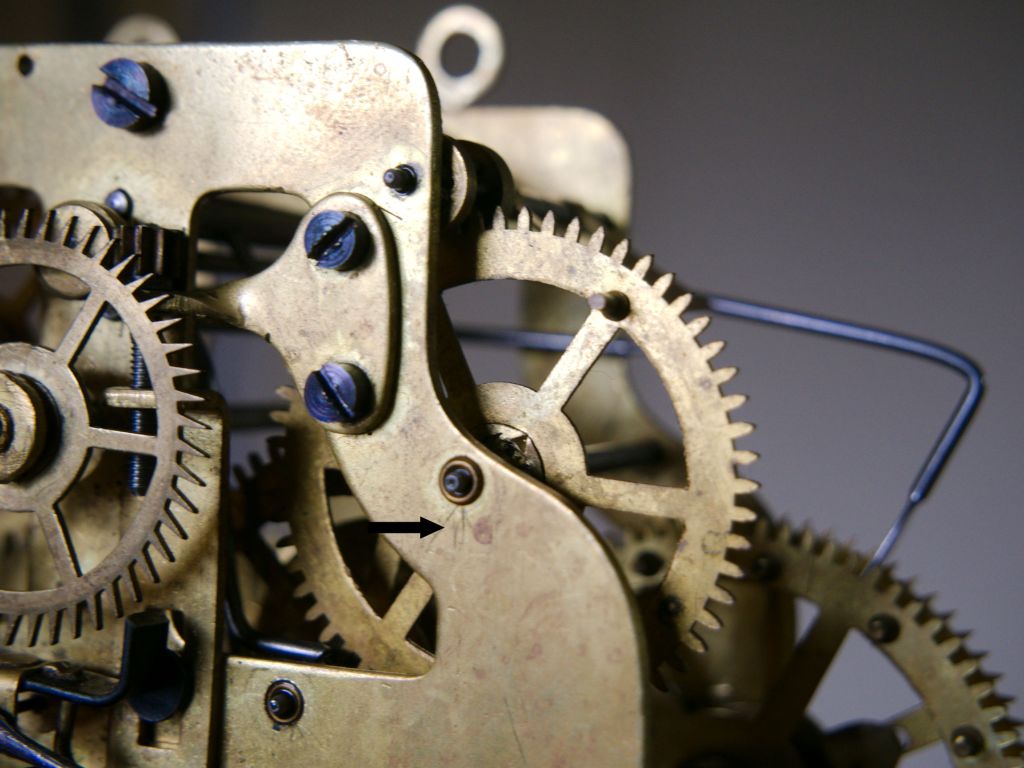
After looking over the movement carefully I can see there is enough wear in some bushings that they must be replaced, both second wheels, front plate, the governor, both front and back and the escape wheel bridge bushing which for some reason has punch marks around it, the only unsightly repair.
The mainsprings look to be in good shape and still bears the original ST trademarks. No worn gear teeth and the pivots, plus the lantern pinions are all in great shape.
All in all, not bad for a movement that was last serviced quite a number of years ago.

The pivots were polished and next is the bushing work. Two were interesting to say the least.
The count count wheel and the strike pin wheel are side by side. A bushing was required for the pin wheel but I could not access it from inside the plate. This is one of those few times when drilling from the outside is the only way however, I was able to push the bushing home from the inside plate. It is one of those situation where you have to stand back, analysis the problem and consider a strategy. It worked.
The second was the escape wheel bridge. To stabilize the bridge a 5-step block jig comes in handy. Otherwise, it is very difficult to keep the bridge steady and drill a straight hole.
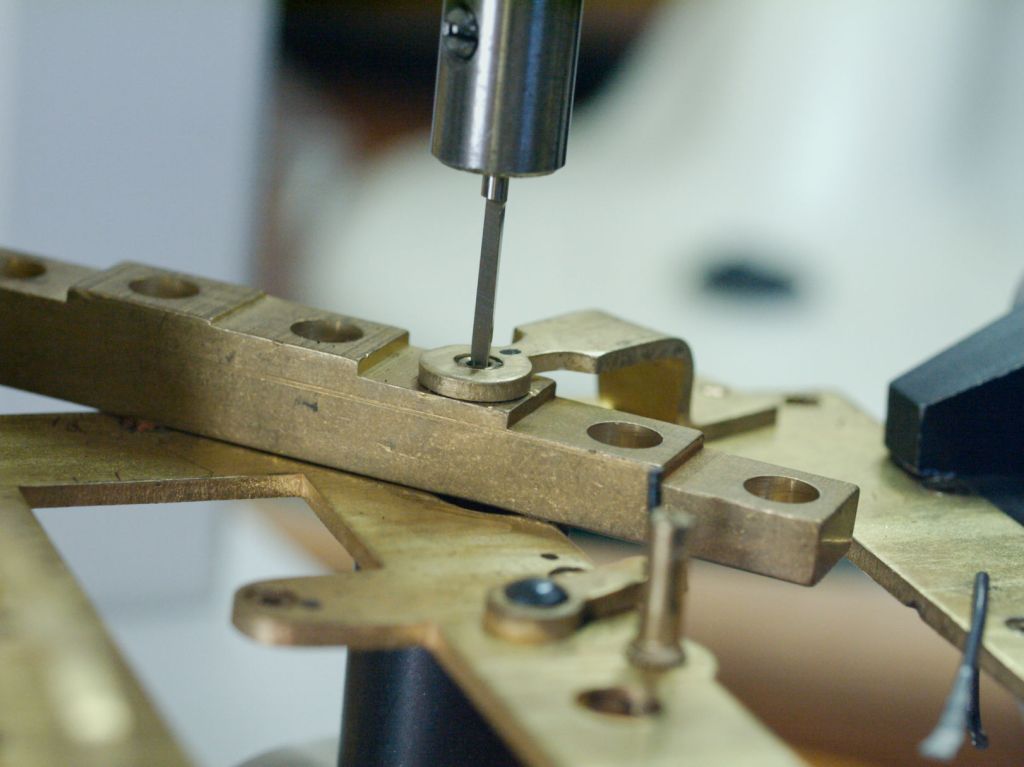
The drilling went fine until the last 3.47 mm cutter. When I began to drill out the hole the old bushing came out. I knew right away that the new bushing would not have a tight fit. Evidently a past repairer had the same problem.

The block from a staking set is a useful tool. With it I was able to lay the plate down on it and punch the bushing from the inside to stabilize it.
Once together everything fell into place or so I thought. Unfortunately, I will have to take it apart again because I forgot the regulating worm gear which can only be installed with the plates separated. The movement will run perfectly fine without it, but it is part of the clock.
In the meantime the movement is running well.
Discover more from Antique and Vintage Mechanical Clocks
Subscribe to get the latest posts sent to your email.

You must be logged in to post a comment.