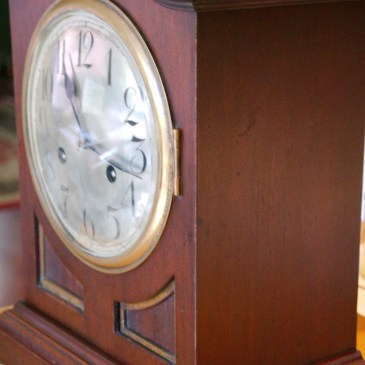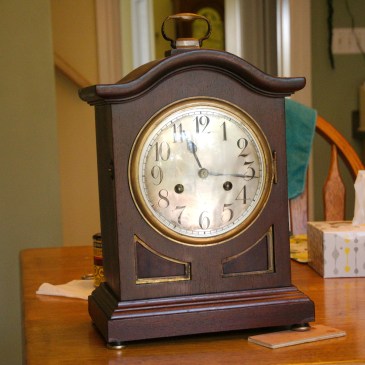

Solar time and strike mantel clock by Eatons – first look

In the 1960s, T. Eaton & Co., one of Canada’s most iconic department stores, offered a variety of home goods to suit the tastes of the era. Among their diverse range of products was a charming collection of clocks, including the small but striking mantel clock that continues to capture the attention of collectors today. Its distinctive style and craftsmanship represented a unique intersection of mass-market appeal and decorative elegance.

In this article, we take a closer look at this somewhat ordinary-looking clock, exploring its design, history, and place within the broader context of mid-century Canadian home décor.

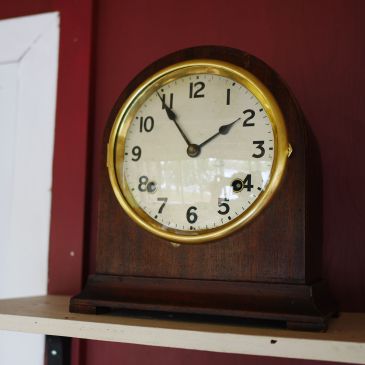
Solar mantel clock
Solar mantel clock

A changing economic and retail environment in the late 1990s, along with mismanagement, culminated in the chain’s dissolution in 1999. As a young child, I remember pouring through the Eatons “Christmas Wish Book” trying to decide on that perfect gift….for me!

Eatons catalog
1975 Eaton’s catalogue, page 184, clocks (Online image: Fair Use; for information purposes only)

Eaton’s catalogue, as well as department stores spread across Canada, sold a variety of clocks including this mantel clock with a German-made Hermle movement under their house brand, Solar. Many of the Solar clocks sold from the 1950s through to the 1980s survive in Canadian homes to this day more as decorations rather than functional pieces.

This particular example is a time and strike mantel clock featuring a 6″ dial and a dark walnut case. Priced at approximately $50 or $60 when it was first sold, it measures around 13″ wide, 7″ high, and 4″ deep. Its compact size makes it an ideal choice for homes where space is limited, fitting comfortably in nearly any room without overwhelming the space.

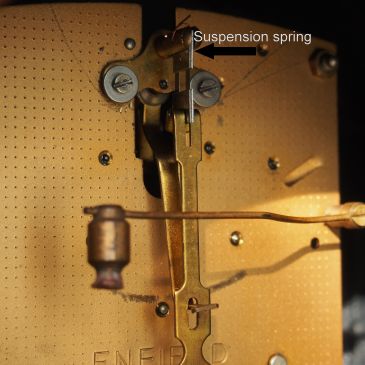
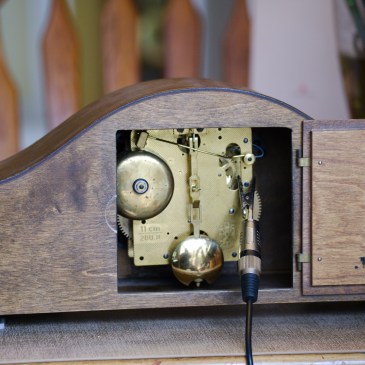
Equipped with a Type 141 German movement from Hermle, this clock features a recoil escapement, an 11cm pendulum, and operates at a rate of 200.8 beats per minute. It strikes on the half-hour with a bell, though its chime isn’t particularly melodious. As a testament to its design and durability, the type 141 is still being produced by Hermle GmbH & Co. KG today.

It also came with instructions and a product card from Eatons.

Solar Hermle movement
Solar with type 141 Hermle movement (trademark FHS)

When I purchased the clock, it wasn’t running, and I hoped that a thorough cleaning would restore its function. The scratches and gouges on the backplate of the movement suggest that it has been serviced before. However, I won’t know the full extent of any previous repairs until I remove the movement from its case for a closer inspection. My main concern is the possibility of plated pivots, which were a common issue with Hermle clocks from the late 1970s to the late 1980s. Fortunately, I have a strong feeling that this clock predates that troublesome period.

The case, on the other hand, is in near-perfect condition.

It will be serviced and put up for sale. I am not normally in the business of selling clocks but will sell the odd one locally to trim my collection and cover clock supplies.

Look for an upcoming blog article on the servicing of the Hermle movement.

Mauthe box clock – In clock repair, fine-tune adjustments are part of the experience

Do you ever run into those situations working with clock movements when one little thing is so annoying? I recently serviced one of my box clocks, a Mauthe with a bim-bam strike. Everything went according to plan except for one small issue; the strike side was misbehaving. I’ll explain a little later but first something about the clock.

German "box" clock by Mauthe
German “box” clock by Mauthe

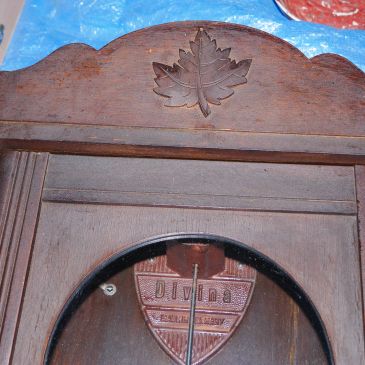
Nowhere on this clock German “box” clock by Mauthe does it have the Mauthe trademark or name, not on the clock face or any markings on the movement. However, an excellent clue is the two-rod gong, which was made by Divina, a subsidiary of Mauthe.

Divina rod gong
Divina rod gong

The clock was likely sold under the Forestville or Solar name in department stores across Canada in the 1940s. There is an applique of a maple leaf on the crown so, I would like to think it was made for the Canadian market. These are very good movements, are designed for long life and the sound of the gong is impressive.

So, what’s the problem?

The movement was taken out, cleaned, and one bushing installed. The movement is in very good overall condition despite having last seen a servicing in 1979 according to a date scratched on the front plate.

Mauthe movement front plate

Putting these German movements back together is not that difficult but one always must be mindful of the small pivots and the risk of bending or breaking one. How do I know that? Well, I might have bent or broken one or two along my journey through clock repair but not on this movement.

Mauthe movement back plate
Mauthe movement backplate

Two critical adjustments prior to assembling the plates are the placement of both the stop or warning wheel and the star wheel.

Mauthe movement and the star wheel

The stop or warning wheel requires about half a rotation to arrest the train during the warning phase by means of a stop pin. During dis-assembly I made a note of the location pin, at approximately the 12 o’clock position which saved time and frustration and it worked just fine once assembled.

What I missed was the correct positioning of the star wheel relative to the two hammer arbours. Because there are two actuators and two paddles, they must be placed between two star points on the wheel. Otherwise, one of the paddles will become hung up on a star point at the end of the strike.

For example, during the end of the strike, you might hear the bim part of the “bim-bam” strike and the bam part at the beginning of the next strike. Of course, there is always the risk that the hung up paddle will stop the train entirely.

It is a simple adjustment but the mainsprings must be let down for safety reasons and the plates pulled apart enough to relocate the paddle lever arbours so that both paddles are between the star points. In the process of repositioning the levers, one or two other wheels may or may not pop out. Once all the wheels are relocated, screw down the corner of the plate and test the strike side action.

After the adjustment, the strike side ran as it should. It is a little thing but pretty annoying especially when it is discovered after the movement is put together.

In clock repair, fine-tune adjustments are part of the experience.

Antiquevintageclock.com find of the year

What is my best clock find of 2020?

2020 was a very trying year for us all and I suppose that applies to clock collectors generally when it comes to acquisitions. Despite the pandemic, I managed to purchase a few clocks though obviously, not as many as in other years.

The contenders for the year are clocks from Solar, Junghans, Sessions, Arthur Pequegnat, and Fleet, leading up to the big winner of the year, a Scottish tall case clock.

Solar

First on the list is an attractive German-made Solar time and strike mantel clock, sold by the Eatons Department store chain in Canada during the 1960s and 70s.

Solar mantel clock
Solar mantel clock, 1965

It has a Hermle type 141 movement and strikes the half-hour on a bell. It was a non-working clock when I bought it for $20 but it was simple enough to service and now runs like a charm. I will likely sell it locally for a few dollars more.

Junghans bracket clock

For $40 I could not possibly go wrong with this bracket clock even though it was a non-working clock and need some serious TLC. I serviced the movement, refreshed the case, polished the brass, added new feet and the clock now occupies a prominent location in my family room.

Junghans Corner feet finished
Junghans time and strike bracket clock, 1911

Sessions 3W electric clock

The diminutive Sessions desk clock has a Synchron motor (60 cycles per second) and the only repair is to replace the plug. I like the simplicity and style. It has some issues consistent with an 87-year-old electric clock but it is in pretty good shape for its age.

Sessions desk clock, 1934

Arthur Pequegnat

Next is an Arthur Pequegnat Canuck time and strike gingerbread or kitchen clock as it is otherwise known. This was another inexpensive find, $50 on an online for-sale site, and for $10 more, another clock completed the deal.

Arthur Pequegnat canuck, inset shows the dial before restoration, 1918

I spent a considerable amount of time on this clock, refreshing the case, inpainting the dial, and refurbishing the movement. I was very satisfied with the results and this clock will join my collection of 7 other Arthur Pequegnat clocks. A nice find for a very good price.

Fleet Time Company

Next is a Fleet Westminster chime mantel clock from the late 1930s, made by the Fleet Time Company of Montreal. Fleet assembled clocks for 4 short years before World War II sourcing movements from Germany with locally made cases. It is the $10 clock that was combined with the deal above.

Fleet Westminster time mantel clock, 1937

The clock as received

I refurbished the case and replaced the time side mainspring but did nothing to the movement except re-oil it. The case was completely stripped down to the bare wood followed by the application of a medium oak stain and a clear satin topcoat. This is a lovely mantel clock with a rich Westminster chime and I will probably keep this one in my collection since it was assembled in Montreal and represents a small but important piece of Canadian horological history.

McLachlan tall case clock

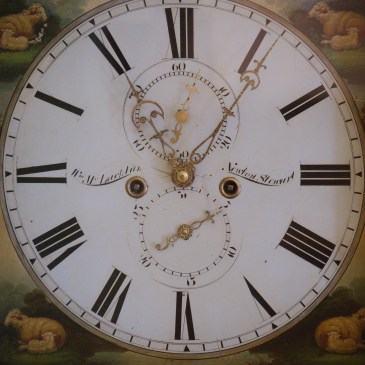
Finally, let’s come to my prize for the year, bought at a live auction in February 2020, a Scottish tall case clock assembled by William McLachlan of Newton, Steward in 1848. Completely restored were the dial, movement, and the case, which required extensive structural repairs.

Scottish tall case clock
Scottish tall case clock, 1848

With an English bell strike movement, tall, stately mahogany case, beautiful hand-painted dial and heavy 13 lb weights, this clock has a commanding presence in my home. If you have ever heard the sound of an antique bell strike clock you will understand that is it as loud as it is because it was designed to echo through a stately Scottish manor. It is a conversation piece and those who have seen it marvel at its condition and age.

Despite a difficult year, I was pleased with my purchases. I am confident that 2021 will be a better year for me as a clock collector and a better year for us all.

Junghans bracket clock – a small detail makes a big difference

A small change makes a big difference on a Junghans mantel clock from 1911. Let me explain.

Back in September 2020, I bought a German-made Junghans bracket style clock. It is 14 inches high by 10 inches wide by 6 inches deep, mahogany veneered, attractive brass accents, and a carrying handle on a curved domed top.

Junghans clock
Junghans bracket clock

I just love the way it looks.

Junghans bracket clock handle

What about those chrome feet

The clock is original in almost every way; the quality time and strike movement is original to the clock, the spiral gong is correct; latches, bezels, and so on look good and work perfectly but for some strange reason it has replacement chrome feet and they bug the heck out of me.

Why should a small detail mar the classic lines of this clock!

Junghans bracket clock
Junghans bracket clock, chrome foot

After searching various online auction sites, I discovered that the original corner feet would have looked like the ones in the below photographs. I can only surmise that many years ago one fell off, got lost and the repairer simply found what would work and tossed the other three feet out.

Junghans bracket clock online
Clock feet (Online photo, Fair Use: used informatively for the public good)

Bracket clock feet
Clock feet (Online photo, Fair Use: used informatively for the public good)

So, where to find corner feet. There are a number of suppliers worldwide but my usual go-to supplier here in Canada, Perrins who are otherwise excellent, has a very limited selection of clock case corner feet and not in the style or size I was looking for.

US suppliers similarly have a limited supply as bracket clocks are not as popular there as overseas. England is the logical place to look since it is the land of the bracket clock.

Interestingly, the term bracket clock first appeared in 19th century England and is commonly referred to as a spring-driven pendulum table clock with a carrying handle (and often with subsidiary dials) so that it could be moved from room to room in the owner’s home. Of course, true bracket clocks had a strike silencer so as not to disturb the owner’s beauty sleep.

Using the search term “brass bracket feet” I searched the two largest suppliers in England, Cousins and Meadows and Passmore.

I found exactly what I was looking for at Cousins UK. Cousins calls the part a ridged carriage clock corner foot made of polished brass, sourced from Spain or India. They come in three sizes and for this clock, I chose the smallest one.

It took two weeks from the order date to arrival on my doorstep. I am very impressed!

Bracket clock feet Cousins
Bracket clock feet from CousinsUK (Online photo, Fair Use: used informatively for the public good)

The feet are made of brass and look to be of decent quality.

Installation was simple. Rather than risk splitting the base so near to the edge I pre-drilled the holes. Using a mini electric drill I first marked the holes with each foot in place and drilled a deep enough hole.

Two slotted brass screws are required per foot. As I screwed one screw of each foot I checked for correct orientation and made a small adjustment as necessary.

Perfect!


Corner foot for Junghans bracket clock
Corner foot for Junghans bracket clock, the screw holes are pre-drilled

Corner foot for Junghans bracket clock
Left front corner foot

The feet are very sturdy and look exactly what the manufacturer would have used at the time.

Junghans Corner feet finished
Junghans bracket clock with new corner feet

Compare this last photo with the first to see the difference the new feet make on this clock.

This is an example of a subtle but important change that is very inexpensive (less than $24) and I am sure you will agree that it makes a dramatic difference.

Junghans Sydney
Junghans Sydney

While I was working on this clock I visited the Junghans site and discovered a 1912 Catalogue which informs me that this clock was called the Sydney.

It was available in fumed oak or mahogany, 14 1/2 inches tall “with brass handle, inlaid polished brass designs, polished brass feet, and plain silver dial”. Both finishes were available with an 8 day or 14-day movement. The quarter strike 8-day clock had 2 gongs while the 14-day movement had 1 gong.

This then is a 14-day movement with a mahogany case and is referred to as model 7020. Judging by the name and the style, this clock was made for the English market.

It seems my research concerning the new polished brass feet paid off very nicely.

Junghans bracket clock – cleaning a silvered dial and brass accents

Lately, I have been working on a stately bracket clock by Junghans from the latter part of 1911. I love the look of this clock though some would say it is quite plain.

Junghans mantel clock on display on the day it was bought

The Regency style veneered mahogany case of this time and strike bracket clock is in reasonably good condition save for a small piece of veneer missing on the right side of the base and replacement chrome feet which look decidedly out of place.

I had completed servicing the movement a while back but also planned to address both the case and the dial as part of the rejuvenation of this clock.

After a thorough cleaning (and scrubbing) with Murphy’s soap, I freshened up the case followed by three coats of shellac.

The top of the clock looked good after a cleaning

Cleaning the dial

Silvered dials present a somewhat more challenging problem than zinc painted or paper dials. The silvering is very thin and can be rubbed off easily through over-aggressive cleaning resulting in a damaged finish so, it pays to be cautious.

Here is a prime example of a German U.M. Muller wall clock dial where someone used a strong cleaner resulting in a serious blemish. The dial must be completely restored. I have no plan to fix it.

U M Muller clock dial
U M Muller clock dial, damage between the numbers 6 and 7

Of course, there is the option of leaving this dial as-is but why not attempt a cleaning. As this is a non-porous dial, dirt is surfaced based.

Junghans clock dial
Junghans clock dial and the extent of the dirt and grime

From my research, many methods of dirt removal seemed dubious and any kind of chemical on a silvered dial is plain wrong. I chose to use mild (diluted) liquid soap and Q-tips to lift off the grime. While it took dozens of Q-Tips dipped in soapy water and gentle scrubbing in the direction of the spun dial most of the dirt was removed and none of the silvering was damaged. It is difficult to see any improvement as one proceeds so, it pays to be patient. After a couple of hour’s work of gentle rubbing, this is the end result.

Junghans clock dial after cleaning

While not perfect it is much improved. The aged look remains, with a patina that most would consider acceptable. Following the cleaning, where there was missing paint on the numerals, they were filled in with black acrylic paint. No further restoration is necessary.

Junghans clock project is finished
Junghans clock project is almost finished but for the lower brass features

Brass features

Next are brass features above the base section. Q-tips (many of them) and Brasso (Simichrome works well too) are perfect for bringing up the shine. Following the polishing, everything is wiped clean with soap and water and the inset panels are given a fresh coat of shellac.

The carrying handle on top was also cleaned with Brasso.

Junghans Corner feet finished
Junghans Cbracket style clock

Dial work and case cleaning are options when bringing any clock back to life but it boils down to personal choice. Some choose to leave things as they are to retain the original patina but I am in the camp that a little cleaning goes a long way. Cleaning takes time and patience, however. You may not see the results immediately but work carefully and you will be amply rewarded.

You may have noticed that the feet are different in the last photo but I will save that story for another day.

Tick Talk Tuesday #28 – What’s it for? The double ended key

Tick-Talk Tuesday is about the letters and comments I have received from you, the reader, concerning your clock, issues you might have had, challenges you face or a clock you would like me to profile or my responses to your questions with advice on your particular clock concern. For those comments and questions that stump even me, I consult within my clock circles for the best possible answer

Double-ended keys
Double-ended keys

TD says,

“Hi Ron,  I’m TD.  I purchased a Gilbert Clock from an antique store in xxxxxxx, Wis.  It’s a Gilbert Tambour style mantel clock model 2041. It’s marked “Normandy Chime 2041.”  The question I have is what is the keyhole under number 12 for?  The clock sat in the store for a long time, that is till it found ME.  I have a thing for old clocks. I feel they’re a living thing and it’s a shame if they’re not ticking away as long as they’re able to. Just like Us!”

Gilbert mantel clock 1925, small arbour below the 12 is for regulating the clock

Gilbert movement
Gilbert movement, the top centre is the regulating mechanism

My response,

Hi TD,

I have a Gilbert tambour 2038 with Normandy Chime which is similar in some ways. Look at the key that came with your clock. It should be doubled ended one like this one.

The small end fits into an arbor just below the “12”. This is for regulating the speed of your clock. You might see an “S” and an  ”F” above the 12. Turning the key clockwise speeds up the clock and counterclockwise slows it down. If you have only a single-ended key, it is the wrong type for your clock although it will wind it up.

I also have a thing for old clocks. Be careful it is addictive.

Hope this helps.”

Whoops! Should have been published on Tuesday. My wife caught the error this morning.

Junghans bracket clock – servicing the movement

Junghans bracket style clock, tilted to adjust the beat

I posted the first look at this clock a while back.

The Regency style veneered mahogany case of this Junghans time and strike bracket clock is in reasonably good shape save for a small piece of veneer missing on the front right corner and replacement chrome feet which look decidedly out of place.

The movement ran briefly after I got it home but after a short while refused to run despite adjustments. The seller says he had had the clock for two years and never had it running so I was sure it needed a good cleaning. In any event, my plan was to service the movement.

The movement is has a maker’s mark with B11 just below it. This refers to the approximate date of manufacture, the latter part of 1911.

Removing the movement

To remove the movement remove the hands, first the minute and then the hour hand. Open the rear access door to release two thumbscrews screws underneath the movement seat board. Move the gong assembly aside (or take it out completely by releasing a screw on the bottom of the case) and remove the works.

Junghans time and strike movement, B11 is under the Junghans trademark

Assessing the movement

This is a well-made movement. Early Junghans movements were robust and strong runners. I have heard stories of Junghans clocks from this era running well despite being very worn. Junghans’s movements are a cut above Mauthe, Hermle, HAC, and other mass-produced German clocks made during this period, in my view. The movement exudes quality with solid front and back plates though lantern pinions are favoured over cut pinions.

The movement has been serviced at least once, so far as I can determine. There is an “S” mark on the strike side barrel cap, helpful when returning the barrels to their correct location. I did not measure the mainsprings but the strike side spring is notably longer than the time side. There are two possible reasons, one that the strike side mainspring was replaced at some point in the clock’s life, or two, there is more load on the strike side requiring a stronger spring.

Junghans movement top view, strike side

The mainsprings are in good condition and there is plenty of power though there is more oil than necessary within the barrels. After assessing the movement I could see that there had been no significant repairs in the past. The crutch has been bent in several places in an attempt to adjust the beat but otherwise, everything looks reasonably good for the age of the clock.

Junghans movement, plate removed

Disassembly

Separating the plates was more difficult than it should have been. I had to remove all four pillars (secured by screws on both ends) to determine what was sticking. I discovered that the motion works centre arbour pivot was “stuck” in the backplate. By “stuck” I mean that although the wheel was moving freely the end of the pivot had been flattened. Why I don’t know. Had the pivot been punched in an attempt to enlarge it, had someone hammered the pivot end for whatever reason, had the pivot been replaced or it is possible that the plates had never been separated and that is how it came from the factory? Once the pivot was pried from the plate I rounded the end with a file and it now fits perfectly.

Junghans B11 movement
I use a screwdriver to point out any washer I find on a movement

All parts were cleaned in the ultrasonic cleaner which removed a considerable amount of accumulated grime. As always the ultrasonic cleaner does a great job with lantern pinions and the lantern pinions, on all 6 wheels, are in excellent condition.

There has been no bushing work done on the movement. The only punch mark I observed was just below the escape wheel outside the plate where an attempt was made to close the hole.

To bush or not to bush

After cleaning the movement, pegging the holes, and polishing the pivots the next step is deciding whether or not to bush the movement.

I could see that some bushings may be required, 4 on the backplate where there is more load on the wheels and 2 on the front plate for a total of 6, 2 on the strike side, and 4 on the time side but I will make a final decision once I have checked the entire movement further.

I installed all the wheels and checked for pivot movement within their respective pivot holes. The wear was not excessive. However, after much thought, I decided there is enough lateral movement of the pivots in their holes to affect its running. Besides, I wanted to place the clock in a prominent area of the house and by addressing wear issues now the clock would run well for some time without another servicing.

Seven bushings were installed, 3 on the time side, and 4 on the strike side. The largest one, which I did not include in my initial assessment, was a 4.5mm (OD) bushing for the count wheel.

Junghans front plate count wheel bushing
Junghans front plate new count wheel bushing

Re-assembly and testing

Once all the pivot work is complete and the holes pegged out again it is time for re-assembly. Setting up the strike side of the count wheel strike means ensuring that the warning pin is sitting just off the locking lever (12 o’clock position), the drop lever is sitting on the flat section of the cam wheel, and the count lever is in one of the deep slots of the count wheel.

Testing the Junghans movement; beat amplifier attached

Only this time it was not all roses. The strike train consistently missed the half-hour strike because the count lever would drop in the middle part, not the beginning of the deep slot, occasionally missing the half-hour strike. Plus, the count lever did not completely rest on the cam. I cannot remember spending as much time correcting the strike side on a German movement as I did on this one. On one occasion I had everything together to discover that the paddle was hanging off one of the points of the star wheel. Having too much load at the beginning of the strike either will stop the strike or add one more strike to the indicated hour.

I must have taken the movement apart 5 times, and of course, each time I reassembled the movement I was wary of damaging those tiny pivots. Eventually, everything worked out. Sometimes when working with German countwheel strikes everything falls into place the first time. Not so much this time.

While on the workbench, I replaced the old tired suspension spring with a new one.

Junghans clock dial
Junghans clock dial numbers have been retouched

So, after a long-overdue cleaning and a few new bushings, the movement is oiled and is on the test stand. After several small adjustments to the beat, it is now running and striking as it should.

Now to see how we can address a grimy silvered dial. Join me in a couple of weeks as I take you through cleaning the dial face.

Cuckoo clock bellows repair

Cuckoo clock – 30 hour time and strike

A cuckoo clock will happily run and strike without bellows but it is the bellows that create the unique sound.

When a cuckoo clock requires servicing the bellows should be inspected and if they are in poor condition they should be replaced. The constant, every hour and half-hour strike of the clock combined with the actuation of the bellows causes leaks at the creases as these are the highest wear points.

So, how does one repair the bellows?

Cuckoo clock
Cuckoo clock bellows located on each side of the movement

Carefully take the old bellows tubes out with a hobby knife. On some cuckoo clocks, you may have screws that hold the bellows in place. Once they are out resist the temptation to rip them off the wood columns as the bellows themselves can be used as a template for your new bellows.

Cuckoo clock bellows
Cuckoo clock bellows easily removed by unhooking the actuator rods and releasing a screw

Cuckoo clock bellows actuator rods

Here are the basic steps

Make a tracing of the bellows opening on paper. Scape away all the old covering and old glue with an Exacto knife or similar. Using TYVEK, cut a piece of material approximately 2 inches by 7 inches. On the fixed end of the two bellows pieces glue a new hinge with a strip of TYVEK.

Cuckoo clock bellows use as a template
The old Cuckoo clock bellows can be used as a template

Using the template you made earlier and with the bellows open wrap the TYVEK around the bellows. After you are satisfied that it will fit, apply Seal-All or a carpenter’s yellow glue to all outside edges. The sides will have a V-shape. Press the TYVEK to the sides and ends of the bellows for about 2-3 minutes until the glue sets. Trim any excess TYVEK.

Wait for about two hours until the glue is dry. Using a popsicle stick or similar, start by gently making the creases pushing inward as you go. Press the bellows together and clamp (or rubber band) for 24 hours. The TYVEK needs to be formed so that it knows which way to fold when the bellows are actuated.

When done reinstall the bellows back into the clock case, connect the actuators, and re-attach the back cover.

If you hear a “Cuck” but no “Koo” you’ve done something wrong. Once you’ve done a few of these you will get it right every time.

Enjoy the unique sound of your cuckoo clock.

Junghans bracket clock – first look

Junghans mantel clock on display

I found this German mantel clock on a local online buy and sell site. The seller had two clocks, one, a generic German-made Westminster chime and this, a Junghans bracket-style clock. I knew right away that this was the better deal. It appeared to be a higher quality clock compared to the other one. I offered a slightly lower price and the seller quickly accepted. He said he never had it running in the two years he owned it and added, “I got to get rid of it, I’m moving”.

Junghans bracket clock handle

During my search to find the model name or number I came across one listed on eBay at the time of writing and two others while browsing similar auction sites. None had the model name or number but prices are all over the map, ranging from $50 to $300. I still do not know the model name or number.

Although it has a carrying handle on the domed top and would be termed a bracket clock, let’s just call it a rather plain-looking mantel clock with a handle. When I envision a classic bracket clock I picture a clock with verge escapement, subsidiary dials over a signed dial housed in a gaudy case. Let’s call this a poor relation.

Junghans clock side view, not cleaned yet

The Regency style veneered mahogany case is in reasonably good condition save for a small piece of veneer missing on the bottom side front and replacement chrome feet which look decidedly out of place. It has not been cleaned in ages and scrubbing with soap and water removed a considerable amount of built-up dirt revealing a very attractive case.

The silvered dial shows some aging consistent with wear and caused when advancing the hands many times combined with the simple act of winding the movement arbors. The hands are original judging from other clocks like it. I may touch up the numbers and the hands in addition to giving the dial a cleaning to spruce things up a bit but we’ll see when I look at it further.

The dial catch, back access catch, and hinges work well. These often break from constant use.

Judging from scratch marks on the backplate, the movement has been worked on in the past. I won’t know the extent or quality of past servicing until I take the movement out of its case and examine it more closely. The movement has a maker’s stamp with B11 just below the mark. This refers to the approximate date of manufacture, the latter part of 1911.

Junghans time and strike movement

When I brought it home the clock ran briefly, stopped, and failed to proceed. It will need a thorough servicing and a few adjustments to get it running again.

Forestville mantel clock servicing – not fun when things go wrong! Part I

Forestville mantel clock

This post is about a mantel clock made by the Forestville Clock Company of Canada and some challenges servicing the movement.

In 2013 we were on a visit to the Thousand Islands and stopped at an antique store in Gananoque, Ontario. As my wife and I were strolling through the store and she noticed this mantel clock made by the Forestville Clock Company of Toronto. Somewhat plain in style it seemed to be in great shape and it was exactly what we were looking for at the time.

History of the Blackforest Clock Co. and Forestville Clock Co. of Toronto

The Blackforest Clock Company of Toronto, Ontario was founded by Leopold and Sara Stossel in 1928.  Both clock movements and complete clocks were imported from Germany and sold through department and jewelry stores across Canada. Their son Ed Stossel started working part-time with his parents’ company in the 1930s and later became a full-time employee in the late 1940s.

Some assembly work was carried out in their Wellington Street East factory. Initially imported mantel clock and grandfather clock movements were installed in cases made in Kitchener (home of the Arthur Pequegnat Clock Company), but later the complete mantel clocks were imported from Germany. This arrangement was interrupted by the Second World War, which also led to a name change to the Forestville Clock Company in 1941.  During the war years, the company imported its clock movements from England, the United States, and France. However, starting in the mid-1950s German factories again became the source of most Forestville clocks, with Mauthe being a major supplier.

The Forestville Clock Company was very successful during the middle decades of the twentieth century. Its grandfather clock cases and some of the wall clock cases were made in Canada. Ed Stossel retired in 1979 and unfortunately, the company survived just a few more years without his leadership.

Most Blackforest and Forestville mantel clocks still have their paper labels tacked inside the back door. This one does not.

My Forestville mantel clock

This clock movement and case are imported from Germany in the 1960s. There is a serial number on the backplate but no database exists online to date this clock. I am thinking that the  movement is made by Mauthe

The pivots and bushings appear to be in good condition at first inspection. The clock keeps good time and there is a simple speed adjustment on the hairspring escapement to regulate the clock. This mantel clock is handsome, has good lines and reflects the style of the period.

Servicing the movement

After 7 years I have put off servicing the movement far too long. The rack and snail movement is relatively simple to work on with all the adjustment wheels, save the warning pin, on the outside. The mainspring barrels can be removed separately for servicing, common for movements of the 60s,

The hairspring escapement is something I will not attempt to clean. They can be finicky to work on and if the movement has been running beforehand, like this one, there is no pressing need to fool with it. It is well protected by a plastic shroud. Three screws unhook it from the movement.

While there is some wear on the time side I see at least 3 new bushings required, two on the front plate and one on the back.

Hairspring escapement

When working with German and French movements one must always be very careful of the delicate pivots. Normally when I work on these clocks I am aware of how easy it is to bend or break a pivot and this clock was no exception. However, I had the movement apart and was reinstalling the gears to determine bushing wear and went about repositioning the center gear when I noticed its centre cannon front plate pivot had sheared off.

Arrow indicates center wheel with broken pivot (strike barrel removed)

I was not even aware that I was putting undue pressure on the pivot as I was carefully guiding each pivot in place with a pivot locator. However, either I applied too much pressure or it was ready to go because I broke a pivot. To give a sense of how small it is, here it is beside a pair of tweezers.

Broken pivot

My experience with pivot repair is very limited. This is not like a broken or worn pivot on an American clock which is less challenging to repair because they are simply much bigger. This pivot is small, perhaps 0.5mm or so. Although I have bushings that size I do not have pivot wire that small and had to make do with a piece from my assortment of 0.85mm to 1.10mm wire.

Repairing a broken pivot, pivot wire is glued in place and left on the lathe overnight

I centred the arbour with a centring bit and then using a high-speed bit, drilled to about 4 or 5mm into the shaft, enough to anchor the pivot wire. Once the wire was inserted, I used high-strength Permatex Thread Locker Red to secure the wire which takes 24 hours to cure. The next day I installed a bushing in the front plate and put the gears back together to check the action of the new pivot. It is working okay. I was not convinced the repair would work but I will reserve judgment until the other 3 bushings on the time side are installed.

Can’t wait to find out if the repairs are successful? It’s a long wait but on November 25th, I will present the results.

Ansonia Syria parlour clock – Part II

Over the summer of 2020, I was asked to service a friend’s clock. It is an attractive machine-carved oak Ansonia Syria parlour clock in the popular Arts and Crafts style of the late 19th century.

Ansonia Syria

It has great sentimental value to my friend but she recognized that it was in need of adjustment or repair. It had been in her late husband’s family for a number of years and she wanted it to preserve it as a reminder of his life.

This is Part II of a two-part series. My general comments and first impressions are found in Part I which you can find here.

It is an attractive clock in relatively good shape for its age. From my research, I have determined that it was made sometime in the early to mid-1890s.

Time and strike movement with an 1882 patent date

In this post, I will continue with disassembly, cleaning, general comments about the condition of the movement, and any potential trouble spots.

Dis-assembly and servicing the movement

The movement is held in the case by 4 screws. Once out of the case the first order of business is to restrain the mainsprings with mainspring C-clamps before separating the plates. Safety is paramount; those springs are powerful.

Although C-clamps are the round type in the following photo I prefer flat clamps for most American movements. Either will do but flat clamps are perfect for tight spaces.

Olie Baker spring winder

After disassembly, my Olie Baker spring winder was put into action to unwind the spring, inspect it for cracks, surface rust, or any other issues.

Each mainspring is stretched out and cleaned with a Scotchbight pad and WD-40. It is carefully wiped down leaving no trace of the WD-40 and placed in the ultrasonic cleaner for 20 minutes. Once out of the ultrasonic cleaner, you must work quickly to dry and clean the mainspring. Rust is insidious and will creep in quickly.

The mainsprings looked very good and once cleaned and carefully inspected I have no hesitation reusing them.

A mainspring is cleaned, oiled and returned to its arbour

I applied a drop of Keystone mainspring oil on each of the coils, wound the spring several times to spread the oil. Once the C-clamp is re-applied and hooked on to the arbour, the excess oil is wiped away. The clicks are in good shape, sometimes a weakness in American movements. At this point, there is nothing more to be done to the mainsprings until the movement is assembled, so, let’s put them aside.

I try to minimize wrestling with American time and strike movement so that once I have the top plate on I loosely attach the bottom two screws and move to the time side because the strike side wheels and levers can be the most frustrating to position correctly and are left to the last

Everything is ready for the next step

I inspected each of the wheels and pivots for wear and found everything including the lantern pinions to be in generally very good condition with one exception. There is minor wear on the flywheel lantern pinions but not enough to warrant replacement at this point.

I usually put the time and strike gears and pretty much everything else in one or two containers. When you have done many movements you learn to quickly identify the location of each component. I can take out any wheel or lever, for example, and identify its specific location. However, if you are just starting out or have not built up enough confidence I highly recommend separating the two sides. In the early days of clock servicing, that is exactly what I did.

I was curious to find that a past repairer scratched “S” (for strike) and “T” (for time) on each one of the wheels according to their location. I understand why but esthetically it does not look good. However, marking the mainspring arbours came in handy. I make it a point to return each mainspring on the arbour they came from. In most cases, the mainsprings are the same length and thickness but every now and then I come across two different sizes. Better to be safe than sorry. That aside the movement appears to be in good condition.

A bushing is marked for replacement

Once the parts are cleaned and dried and the pivot holes are pegged it is on to the next step, pivot polishing. I use a #11 Emory board to polish pivots. I secure each of the wheels in a 3-jaw chuck on my Taig metal lathe and move the Emory boards in an up and down motion to polish the pivots.

Taig lathe at its slowest speed setting

Following the polishing, it is on to any bushing work that may be needed. In the case of this movement, two bushings were needed, the second wheel, front plate and the fourth wheel backplate. Here, a new Bergeon brass bushing is pushed into the bottom plate.

New Bergeon bushing. Notice the fixed lifting lever, lower left

Movement Re-assembly

And now for re-assembly and testing.

Since the lifting lever is attached to the bottom plate and is otherwise immoveable the count lever is the only component that has to be put in its correct location.

I try to minimize wrestling with American time and strike movement so that once I have the top plate on I loosely attach the bottom two screws and move to the time side because the strike side wheels and levers can be the most frustrating to position correctly and are left to the last.

All is ready for the top plate

Once the time side wheels and the hour gear are in place I attach the third screw and then work the wheels and levers into place on the strike side. Once everything is in place I tighten all the screws. A pivot locator is your best friend when re-assembling any movement.

Pivot locator

On the first attempt, I was not able to synch the strike side locking wheel (sometimes you get lucky the first time) but I mounted the movement on the test stand overnight to check out the time side and the next day it was running as expected. The locking wheel pin needs to be adjusted but that can wait till tomorrow.

One issue raised its head after re-assembly. The strike side gears were not moving at all. I tested each gear and found the flywheel (governor) was sluggish and had no end shake. It freed up if the nut nearest the flywheel was loose enough. The reason. A past repairer installed a bushing that was too tall for the plate. End shake allows freedom of the movement when the plates are screwed tightly down. I filed down the protruding bushing on the inside of the plate and the strike side then ran smoothly.

On the test stand

Next day

Now to open up the top part of the strike side to reposition the locking wheel. Safety first. I restrain the mainsprings just in case the whole thing explodes. I re-positioned the stop pin so that it is resting on the stop lever and presto, everything is working as it should.

I would like to refresh the case but the owner left strict instructions to leave it as-is.

Ansonia Syria parlour clock – a favour for a friend – Part 1

Over the summer I was asked to service a friend’s clock. It is an attractive machine-carved oak Ansonia Syria parlour clock in the popular Arts and Crafts style of the late 19th century.

”my poor clock needs a good servicing and cleaning. It runs slow, eg. I set it and would it on Sunday and by Friday it’s about 14 minutes slow, about 2-3 minutes per day, and it needs new hands”

It has great sentimental value to my friend but she recognized that it was in need of adjustment or repair. It had been in her late husband’s family for a number of years and she wanted it to preserve it as a reminder of his life.

Ansonia Syria mantel clock

It was in a well-packed box and in it was a note. The note said, ”my poor clock needs a good servicing and cleaning. It runs slow, eg. I set it and would it on Sunday and by Friday it’s about 14 minutes slow, about 2-3 minutes per day, and it needs new hands”.

Packaged with care

I opened the box, attached the pendulum, gave both arbours several turns, and started the clock. The fact that it is in running order and striking correctly is certainly a positive sign and testament to the fact that it was serviced in the past. Does it need a simple cleaning and regulating or is something else going on?

Apart from a couple of nicks and scratches, the case looks good. I asked the owner if she would like the case reconditioned and she said she prefers it the way it is. Fair enough.

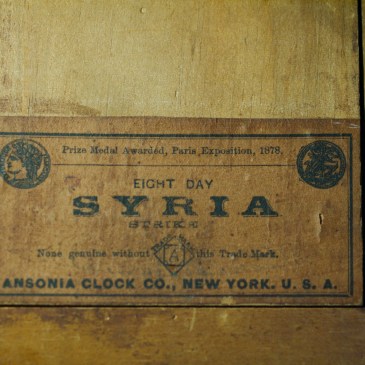
The Ansonia Syria is an attractive mantel clock and according to the label affixed to the inside of the back access door, it is an 1878 Paris Exposition winner. This is helpful because it allows the clock to be dated. On the movement, there is a patent date of June 18, 1882. It is probably safe to say that it was made within a few years of the 1882 date which puts it in the late -1880s to 1890s. Tran Duy Ly in his book on Ansonia clocks (page 245) lists the year of manufacture as 1894.

The Ansonia Clock Company competed with many popular clock companies of the time; Waterbury, Gilbert, Seth Thomas, E. N. Welch, and New Haven to name a few.

Let’s look into this clock a little further. A few interesting anomalies struck me as I examined the clock case and the movement.

  • Just above the 12, there is a brass insert that looks like the head of a large pin. It is there to conceal a hole. Although difficult to see in the photo, the letters “S” and “F” appear at either side of the pin. The pin hides the hole for the regulator. Clocks with this type of regulator come with two-sided keys and the smaller end is used to insert into the hole and regulate the clock to slow it down or speed it up. The dial pan is also held in place by common nails.
  • This movement in this case does not have a regulator mechanism and the mechanism was not removed from the movement. This is a period-correct Ansonia replacement movement that originally came out of a kitchen clock with an alarm. The alarm would have been attached to an activating lever which has been cut off on this movement (see the centre of below shot).
The base of the alarm actuator
Standoffs on the back of the movement
  • In the above photo, you can see standoffs on the rear plate and clearly standoffs on the front plate. The front standoffs are fashioned from a brass ribbon, bent, drilled out, and cut to fit. The clock is, what we term in the clock business, a marriage. It is always nice to see that it has a movement from the same manufacturer and from the same period as the clock case but a marriage certainly reduces its desirability and makes it difficult to classify it as an antique.
  • Next, the suspension spring post has been re-soldered, loose perhaps.
  • And lastly, the hour hand is a replacement. The original hour hand would have been a trident style.

That having been said, the clock has great sentimental value for the owner, and the fact that it is a marriage and has undergone changes over the years may not be a factor.

The movement has been worked on in the past. There are 16 replacement bushings. The bushing work looks professional and after a first look perhaps 2 or 3 require replacement though none on the strike side. Otherwise, the movement was dirty and had thick black-greenish oil residue on several pivots. Not surprising in an antique clock but indicative of some level of wear. The mainsprings were dripping with brown oil, but I have seen a lot worse.

The next step is to service the movement. Part 2, in four days’ time will detail disassembly, bushing work, and general cleaning.

Scottish tall case clock with new top finials

The final step in the repair/restoration of my tall case clock are the top finials. This clock had top corner finials at one point in its life. There is evidence that something was there on either side of the crown. I have no idea what they might have looked like but judging from photos of many tall case clocks of the 1850s period they were likely a brass ball type.

My first sight of the clock in a corner of an auction house

It is a classic Scottish tall case design from the 1850s. The removable bonnet is 23 inches at its widest point, the waist is 15 3/4 inches wide and the base is 20 inches wide. The bonnet has tapered columns on either side. The dial access door which covers the entire bonnet swings to the right. The solid wood access door on the waist measures 9 X 24. The clock stands approximately 84 inches.

Continue reading “Scottish tall case clock with new top finials”

Pequegnat Simcoe – servicing the movement

Arthur Pequegnat Simcoe mantel clock

The Simcoe is one of 8 Arthur Pequegnat clocks in my collection. It is very similar in dimensions and style to the Jewel produced around the same time but a few dollars more at the time. The Jewel is an unadorned box while the Simcoe has more bling, a piecrust dial bezel, claw feet on each corner and lions head handles with rings on each side.

Time and strike movement with steel plates
Time and strike movement with nickle-plated brass plates

To collectors, it is often referred to as a”Berlin” clock. Although it is impossible to date Pequegnat clocks the name Berlin distinguishes clocks made before 1917 and those made after and up to 1941 when the factory finally shut its doors for good. Clocks made prior to 1917 were inscribed “Berlin”, Ontario on the dial face as Kitchener was known as Berlin until midway through World War I. Kitchener is the present seat of the Regional Municipality of Waterloo, Ontario (Canada). Those made afterwards have only the company name.

I passed by the clock in an antique store in Victoria, British Columbia without realizing that it was a Pequegnat. My wife has an eagle eye, told me to take a second look and I returned. Sure enough, a Pequegnat!

The yellow oak case is in very good condition with one or two small scratches and a chip just above the top of the bezel. The dial pan has had an ugly repair, there are two dabs of solder at 12 o’clock and 6 o’clock protruding through the front of the dial.

Piecrust bezel
Piecrust bezel with some ugly repairs

The working movement looked to be in good shape but I expected some wear when I took it apart. After all, it is nearly110 years old.

I don’t know why Pequegnat chose to nickel-plate its movements. Perhaps the look was more exotic but the practical reason was to mitigate the formation of rust, The plating distinguished itself from similar American offerings notably the Seth Thomas number 89. Earlier Berlin movements had nickel-plated brass plates while later Kitchener clocks had steel plates with pressed in brass bushings.

Nickle-plated brass plate, rear

Front plate with duller finish

On to the movement itself. Having a bell for the 1/2 hour strike adds to the complexity of the movement. It does not surprise me that later Pequegnat dispensed with the bell and relied on a passing strike gong. A keyhole regulator adjustment on earlier clocks, another complexity, gave way to an adjustable pendulum.

Key hole regulator adjustment

As expected, there were no surprises. The only evidence that the clock has been worked on is the newer strike side mainspring which is slightly smaller in height than the time side. Regardless, both springs run the full 8-day cycle.

There was no evidence of bushing work in the past and it is no surprise that it required some bushing work. Four were required on the time side and one on the strike side: S2R, T3F, T4F and EW front and back.

Assembly and testing

Now on to assemble and test the movement.

Assembly went well. On the test stand, the movement seemed to be working well but after a few days, I observed that it was not striking every hour. It was working well before I worked on it, so, something is amiss.

I wound the mainsprings tight thinking it was a power issue until I discovered that the helper spring on one of the lifting levers did not have enough tension. In other words, the unlocking lever was not lifting the count lever to prepare for warning. The solution? Tighten the lever helper spring.

In the meantime, I gave the case a good cleaning and one coat of shellac.

After a week it is running well and back on display.

Arthur Pequegnat Simcoe

Tick Talk Tuesday #27 – Feet for my Gilbert mantel clock

Tick-Talk Tuesday is about the letters and comments I have received from you, the reader, concerning your clock, issues you might have had, challenges you face or a clock you would like me to profile and my responses to your questions with advice on your particular clock concern. For those comments and questions that stump even me, I consult within my clock circles for the best possible answer

Gilbert mantel clock

DG writes

“Hello again Ron,

Firstly, many thanks for your advice. It was extremely helpful. The clock is running, striking the right number of times and back in its case, adjusted for beat and now just getting it to keep reasonable time. I made up two pivot locators (a good suggestion) from wire, one heavy-duty to get the centre pillar in place (it always seemed out of alignment!) and another to adjust the pivots. I had trouble in getting some of the pivots to stay in place long enough to close the front and back plates as I went along so resorted to some Blu Tack on the bottom bush to hold them – not very professional but I couldn’t think of anything else. Getting the strike to work as it should was a total challenge and took me a long time but I got there in the end (probably the most satisfying part of the whole business). I am afraid it wasn’t a very professional restoration but I learnt a lot about Gilbert clocks in the process!

The date stamped on the movement is 1914. I’ve attached a photo of the front of the clock. It looks to me as though it had something attached to the bottom, front corners (there are two pin holes each side) which I am guessing were feet. Have you any idea what these might have looked like? Looking at pictures on the Internet there seem to have been slightly different styles as well as gold and a dark antique look, on Gilbert clocks. Any idea where I might find some – eBay?

Once again, many thanks.”

My reply

“It is certainly a  good feeling putting a mechanical clock back together and have it in working order. If you can manage a Gilbert clock you can handle just about any American time and strike movement.

It is probably very similar to this clock https://www.duetimeblog.com/gilbert-mantel-clock/

which has a piecrust dial instead of the plain dial on your clock. You are correct. It would have had feet at one time. If one went missing I suspect they were all discarded.

Finding feet exactly like them will be a challenge. eBay is one source. Though not quite the same style something like these might work for you. https://timesavers.com/i-9882301-mantel-clock-cast-feet-4-pieces.html

Ron”

Pequegnat kitchen clock servicing – Part II – cleaning, pivot polishing, bushing work and testing

On the bench is an Arthur Pequegnat time and strike kitchen clock which is part of the popular Maple Leaf series produced up to 1941 when the company closed its doors for good. In Part I of this two-part series I discussed disassembly and assessment of the work to be done.

In this Part II I continue with cleaning, pivot polishing, bushing work assembly and testing.

Nickel-plated steel plates

Parts cleaning

All parts are cleaned in the ultrasonic and dried immediately afterwards. The mainsprings were cleaned, oiled and placed back in their spring retainers.

Bushing work

One of the pivots had small amount of scoring but otherwise all other pivots were in good shape, polished and made ready for bushing. Here I have the wheels ready for polishing. An emery board is perfect for pivot polishing. A steady-rest (top right) also comes in handy for those pivot ends that are difficult to secure in the 3-jaw chuck.

Getting ready to polish the pivots
Getting ready to polish the pivots, steady-rest is in the upper right of the photo

As mentioned in Part I, I wanted to begin with the most problematic bushing wear, the escape wheel, but first it meant straightening out one of the pivots. A straight pivot will allow the arbour to align better.

Bent pivot
Bent pivot, escape wheel

Here (below) is the hatchet job of a past repairer. Normally I have sympathy for folks who had few tools to work with in the old days but attempting to close a pivot hole so aggressively and bending a pivot in the process is terrible workmanship. It is a wonder the clock ran at all.

Punch marks around a pivot hole

The new bushing is certainly an improvement. My one concern was cutting into the steel as the pressed brass inserts for the bushings are not quite on-center. It is a quick way to ruin a Bergeon reamer and this time, it was close! This was the toughest one, the other 4 on the time side were standard installs. As mentioned in the last post, the strike side pivot holes were in great condition which happens when the strike side is not wound.

New escape wheel bushing

Reassembly and testing

Now, on to reassembly. The last 2 movements I worked on had steel plates with a similar problem; bent plates. If they are bent in any way it is a struggle to align the top and bottom pillars. Moreover, if the plates are bent especially in the middle they may impede the running of the movement as there may be insufficient end-shake for the wheels to run. There needs to be a little end-shake or the gear’s arbour will bind. I am not a big fan of steel plates.

Generally, I do not replace helper springs but if they are broken, replacement is essential. Many Canadian time and strike clocks have helper springs to maintain tension on lifting and locking levers including the lever for the strike action. The hammer spring looked good when I disassembled the movement but during reassembly, the spring promptly snapped. The .35mm brass spring was replaced with one the same size.

Having worked on two other similar Pequegnat movement recently, I knew exactly where to position the stop wheel for the strike side. Everything went together smoothly, the movement is now on the test stand and destined to run for years to come.

The case is in great shape but the dial was beginning to flake. I found the right combination of colours and inpainted where needed.

As received with some flaking of the dial

Maple Leaf kitchen clock

While there was little wrong with the clock before servicing it is nice to know it will continue along for many years to come.

Pequegnat kitchen clock servicing – Part I – disassembly and assessment

On the bench is an Arthur Pequegnat time and strike kitchen clock which is part of the popular Maple Leaf series produced up to 1941. Among collectors it is know as the “Pointed Top”. This Canadian made clock was bought at an antique store in Bloomfield, Ontario the summer of 2018 and presumably spent its life in or around the Toronto area.

The Arthur Pequegnat Clock Co. made clocks in Kitchener, Ontario (Canada) from 1904 to 1941. Canadian clock collectors are very familiar with the name and associate Pequegnat clocks with solid construction, robust movements, conservative designs and nationalism since many clocks were named after towns and cities in Canada.

Pequegnat made mantel, shelf, hall clocks (Tall case) and wall clocks mostly of oak though some were mahogany veneered. The Kitchen clock or gingerbread clock as it is often called was very popular at the time and Pequegnat made an effort to keep up with current styles with a range called the Maple Leaf. There were six versions of the Maple Leaf clock made by the Arthur Pequegnat Clock Co. Though the dimensions are similar they share two unique characteristics; all Maple Leaf’s have the distinctive maple leaf tablet and Maple Leaf pendulum. It is Pequegnat’s interpretation of a truly Canadian clock styled after similar American ones.

I always make it a point to mark the time side wheel and mainspring so as not to confuse the two

It is a distinctive Arthur Pequegnat movement with nickel-plated steel plates (confirmed with a magnet) and brass bushings pressed into the plates. Unlike most Pequegnat movements this one is unmarked. Because of the shortage of brass after the First World War, Pequegnat used steel for their plates but with pressed brass bushing inserts. There must have been a cut-off date when Pequegnat switched from brass to steel plates so, this movement may have been made during the transition period at or around 1916.

Nickel-plated steel plates

Not surprisingly it had been worked on in the past. One escape wheel bushing on the front plate has ugly punch marks around it made while a past repairer attempted to close a pivot hole. In the process the pivot was bent. Upon closer inspections there are dients on the top of the pivot.

Punch marks around a pivot hole
Ugly punch marks around escape wheel pivot hole

Otherwise there appears to be an average amount of wear for its age. I corrected one small issue right away; the half hour strike arm was loose in the arbour and had turned to one side. I oriented it to the correct position and secured it with Lock-Tite.

Disassembly and assessment

Ah, but I discovered another reason why the strike arm was loose. While the time side requires at least 5 or 6 bushings due to excessive wear, the strike side has almost no wear at all. I can only surmise that the strike side was seldom wound. It makes perfect sense that the half-hour strike arm was twisted out of the way so as not to make any sound at all.

Overall, less bushing work for me but as far as I am concerned both sides are meant to run and they will.

Broken pressure washer on the count wheel

Though still usable the pressure washer on the count wheel is broken.

Bushing work

I thought I would tackle the worst bushing first, the escape wheel, back plate. First, to straighten the bent pivot. I put the wheel in the chuck of my mini lathe and gave the wheel a few spins. Yes, definitely bent.

Bent pivot
Bent pivot

Using a punch I inserted the hollow end into the pivot and determined where I had to bend it by giving it a few more slow spins on the lathe. It is soft steel and bends easily.It is important not to be too aggressive as the pivot can snap off. Installing a new pivot is not fun!

Using a hollow end punch to straighten a pivot

Once straightened I gave it a good polish.

Polishing the pivot
Polishing the pivot with an emery board

It is worth mentioning that on this movement the time side mainspring is 17.2 mm high while the strike side is 15.6mm; not the first time I have seen a differential on movement such as this. I always make it a point to mark the time side wheel and mainspring so as not to confuse the two.

Now it is on to cleaning, pivot polishing, bushing work and testing which will be discussed in Part II.

Uhrenfabrik Mühlheim, Müller & Co box clock – servicing the movement

It is time to service this very fine German box clock by U. M. Muller. I have been stalling for too long. I am a little leery because the last time I worked on one of these the strike tension spring broke (my fault) so I made a promise to be more careful this time.

I bought this clock in 2013 and while it has been very reliable and running daily, like all things mechanical it requires attention from time to time.

A little background.

German “box clocks” effectively spelled the end of the Vienna regulator period because they were cheaper to produce, had simpler lines and appealed to the middle class consumer of the 1930s.

U M Muller box clock

According to Schmid’s Lexikon, the original founders of this company in Mühlheim started in 1867. It was acquired by R. Schnekenburger around 1880, then by Gebrüder Müller around 1896 when it became Uhrenfabrik Mühlheim vormals R. Schnekenburger. In 1900 it assumed the name Uhrenfabrik Mühlheim, Müller & Co. or UM Muller.

This U. M. Muller box clock features wood carved inlays on the door, metal dial, wall stabilizers, brass bezel trim, spade and spear hands, beveled glass framed in brass and a fixed wood carved crown. The case reflects excellent quality.

Logos are helpful in dating a clock. U. M. Muller clocks can be dated by the lion logo on the clock face. If the lion’s tail is up it is pre-1930. On this clock the tail is down which puts it is in the mid to late 1930s.

Back of movement

Okay, enough of background; let’s get on to servicing the movement which is the subject of this post.

U M Muller movement, front plate

It is a count wheel strike which is not unusual but to be honest I was a little surprised and expected a rack and snail movement for a 1930s clock.

The movement has been opened at least once, perhaps more. I could not see any obvious signs of repairs, so, perhaps a cleaning or an adjustment was all it required. It was very oily and I suspect it was sprayed with some sort of solvent. Despite the “wet” condition of the movement it is actually in very good condition.

I had two issues with disassembly. One, I could not pull the count wheel off its arbour despite my best efforts, so on it stayed. I simply worked around it. It made for an interesting installation of the cam wheel bushing. Secondly, the strike lifting lever spring snapped when I disassembled the clock. See, this is what I feared!

I salvaged what was left of the spring, which is essentially a stiff, straight wire that hooks onto the strike arbour, but had to drill a new hole in the plate adjacent to the old one to secure the spring. The remaining spring happened to be just long enough to do the job.

Spring repair for U M Muller movement, solder used to secure the spring in place

The movement was disassembled and parts placed in an ultrasonic cleaner. After drying all pivots were polished.

Mainsprings

The powerful mainsprings are a weak point in German clocks of this era. Usually when they break they take a few things with them. It is called collateral damage and manifests itself in broken wheel teeth, bent wheels, arbours and so on. As the mainsprings were in top shape with plenty of power, no splits or cracks, they were cleaned and reinstalled in their barrels.

Bushing work

The movement required 3 bushings, the escape wheel front and back and one on the cam wheel, strike side. It was actually not as worn as I expected and likely could have gone on further without stopping but the bushing work and overall servicing including a good cleaning will certainly extend the life of this clock.

The three 2mm diameter bushings required for the plates are some of the smaller ones in my supply. Not a huge problem but they are so small that one snapped out of my tweezers when I grabbed it from the container. It is on the floor….somewhere!

Wheels are in place and ready for the top plate

Otherwise, the bushing work went well.

Testing

the movement was assembled and while the time side ran well the strike side was out of adjustment. With count-wheel strikes it generally takes a couples of attempts to get it right but I think I have only one adjustment to make, relocating the stop wheel so that the stop pin is in the 12 o’clock position. I will leave it and test the time side for now.

Next day

This is the day when things go horribly wrong.

I let the mainsprings down and opened the plates to relocate the stop wheel. In my haste to reassemble the movement I bent one of the pivots on the governor. I knew it right away because when I had the plates back together the train would not turn and the fly was “stuck” in one spot. Out came the wheels and once I attached the fly arbour to the chuck of my lathe and gave it a few spins I could see how much it was bent. It was not bent by much, but any amount will stop the train. I straightened it as best I could and it looked pretty good. The pivots are tiny and care must be exercised when moving the wheels around when assembling the plates. It is a hard lesson for all clockmakers.

The lion’s tail is downward

Of course, while straightening the fly arbour the tiny fly retention spring, which is a small wire, flew into the room somewhere. I had to fashion a new fly spring from 19 gauge wire. What else could go wrong! Thankfully nothing else did.

This should have been a relatively easy movement to work on. Instead I seemed to have encountered one problem after another but with each problem I arrived at a solution. Despite my issues this is a well made German movement and really nice to work on.

All is well, the movement is running and striking as it should.

Pequegnat Bedford – servicing the movement

Restored Athur Pequegnat Bedford mantel clock
Restored Arthur Pequegnat Bedford mantel clock

To Canadian clock collectors, Arthur Pequegnat are clocks highly regarded. Irrespective of model names they are generally classified as either “Berlin” or “Kitchener”. The Arthur Pequegnat Bedford is a Kitchener clock. Let me explain.

Although it is impossible to date Pequegnat clocks to the exact year of production, the name Berlin distinguishes clocks made before 1917 and those made after and up to 1941 when the factory finally shut its doors for good. Those made after 1917 are referred to as Kitchener clocks. Prior to 1917 “Berlin”, Ontario (Canada) was inscribed on the dial face and after the war, simply “Canada”.

Later Pequegnat movements, such as this one, have steel plates with brass bushing inserts while older Pequegnat movement plates were nickle plated brass

Kitchener is the present seat of the Regional Municipality of Waterloo, Ontario (Canada).

This clock was given to me by a gentleman from Quebec City in May 2018. He wrote to me and asked if I wanted it, at no cost. It was his father’s clock and he felt it should go to a home where it would be appreciated. All I had to do was pick it up. While on our annual journey to our cottage in central Canada we stopped by, spent the morning chatting about clocks and other things, and have become friends ever since.

Bedford with a 6-inch dial, Canadian Clock Museum

This clock might possibly be a variant. Most Bedfords have the smaller 6-inch dial as opposed to the larger 7-inch dial on this clock.

The dial bezel and glass might also have been added as part of a later repair. The past owner told me that the clock fell and the damage was extensive. I spend part of the summer of 2018 reconstructing and refinishing the case but did nothing with the movement.

Gluing and clamping the case

Now, two years later, the movement must be serviced.

Later Pequegnat movements, such as this one, have steel plates with brass bushing inserts while older Pequegnat movement plates were nickel-plated brass. The change to steel was made during World War I when brass was in short supply. Most Pequegnat movements are stamped with the company name; this movement is unmarked.

Standard Pequegnat movement with steel plates

It was a running clock when I received it, had been running since 2018 and I did not expect too many issues while performing the service nonetheless there were problem areas. In a past repair, someone attempted to close pivot holes by punching into the steel plate. That did not work well. There is some bushing wear and from my initial assessment, at least 5 or 6 new bushings are required. On the other hand, the pivots look to be in very good condition.

Servicing the mainsprings

The strike side’s main wheel assembly fell apart when I removed the mainspring. Using a punch I staked it back together. The mainsprings are in very good condition with no rust or cracks and will be re-used. They were cleaned, oiled with Keystone mainspring oil and reinstalled on their wheels.

Servicing the mainsprings

Bushing work

As mentioned above, a past repairer attempted to unsuccessfully close at least 4 existing bushings by punching into the steel plate, so, this movement has never been bushed.

This movement was certainly more worn than I thought. After assessing the movement a second time I determined that 9 bushings were required, 6 for the time side and 3 for the strike side. With brass inserts punched into a steel plate, one is always fearful of an insert becoming dislodged or falling out. Not this time, everything went smoothly.

The 4th wheel on the strike side is unlike every other wheel with a thinner shaft just below the pivot area. The shaft was turned in order to access the lantern pinions from that end. Why not come in from the other side?

Odd repair on 4th wheel, strike side

I have seen many interesting repairs over the years so I am not especially surprised.

Parts laid out after cleaning in the ultrasonic

Once the repairs are made, the parts are cleaned, the pivots polished and new bushings installed, it is on to reassembly.

Everything but the verge is ready for the top plate

Once the wheels and levers are in position it is ready for the top plate. The escapement verge is installed once the plates are together.

During the course of reassembly I discovered a bent steel front plate which meant lining holes to the pillars was frustrating. Brass bends easily but steel also bends with enough force. I suppose if one attempts to punch a plate to close pivot holes while the movement is assembled, the plates might just get bent.

On the test stand. Beat amp microphone attached to set and monitor the beat

Then, it is on the adjustments and testing. The movement is running and striking as it should but a testing period of a couple of 8-day cycles should tell me if any further adjustments are required.

After two weeks all is good and the movement is returned it its case. It should be good for years to come.

Mauthe box clock movement servicing

It is time to service the movement on this mid-thirties German box clock. It was purchased at an antique mall in Peterborough, Ontario in May of 2017, and other than oiling, nothing has been done to it. While it has been running well since then, it is due for servicing. Plus, this little project is one of the many clock tasks that has kept me busy during the period of pandemic isolation.

There is nothing anywhere on this clock that tells me it is a Mauthe, not on the clock face or on the movement. However, the gong marked by the name Divina tells me that Divina was a subsidiary of Mauthe. It was likely sold under the Forestville or Solar name in department stores across Canada in the 1940s. There is an applique of a maple leaf on the crown so, I assume that it was made for the Canadian market.

German "box" clock by Mauthe
German “box” clock by Mauthe

As mentioned, this spring-powered rack and snail movement has no makers mark though 25226 is stamped on the front plate as well as the numbers 42 and 105; 42 the pendulum length in centimeters and 105 as beats per minute.

The front plate shows the rack and snail

CA 79/9 scratched in the lower right of the front plate is a clock-makers mark for servicing in September of 1979, presumably the last time it was taken apart for cleaning.

Dirty as expected but in good shape

Both plates are 1.8 mm brass. The backplate is solid while the front plate is open. It is a robust movement that was designed to last.

Spring-loaded weight on the governor

An unusual feature is a spring-loaded weight on the governor. Manufacturers sometimes used a special fly that has a small spring-loaded weight attached to try to even the power curve of the strike side. The faster the fly spins, the further out the weight, providing more resistance.

Day I – dis-assembly and servicing mainsprings

Safety is paramount; first and foremost, let down the mainsprings.

The rack, snail, lifting levers, and other assorted parts are separated from the movement before the plates are opened up. The strike hammers stayed attached to retaining pins as they were just too difficult to take out. Additionally, despite my best efforts to pull the gathering pallet off the arbour, it would not budge. I did not want to risk any damage to either part.

The movement was dirty, as expected, but I have seen much worse.

Once everything was apart I reinstalled the time side to check bushing wear and found the only suspect bushing to be T2, front plate. After taking out the time side gears I reinstalled the strike side gears and found that side to be in very good condition. The pivots likewise on both sides are in excellent condition.

The movement is in very good condition for an 80-year-old clock.

In the normal course of clock servicing I install more than one or two bushings

Different sized mainsprings for time and strike

The time mainspring is slightly shorter in height and length and therefore less powerful than the strike mainspring. On many movements, both sides have the same mainspring power but this movement is clearly different. Is it by design? There is more resistance pushing the strike gears through the train in that it has to work a little harder so, one would expect a strong mainspring.

Note the difference in the size of the cut pinions below. Both are second wheels. The one on the right with the larger leaf pinion is the strike side, the left is the time side.

Each time I work on German or English movements I make it a point to scratch a small “T” on both the time barrel and mainspring so as not to interchange them. Even if both sides have identical mainsprings I note the difference as a matter of practice. If the springs are different and they are switched, the increased power of the incorrect, more powerful strike spring might result in premature failure of the time side.

Second wheels and difference in the size of cut pinions

The other possibility is that during a repair in September of 1979, the time side mainspring was replaced by a smaller, and more than adequate, mainspring.

I took the springs out of their barrels and gave each a cleaning in the ultrasonic. Once dry I applied Keystone mainspring oil to each mainspring and returned the springs to their barrels. That’s it for day one.

Day 2 – bushing work

In the normal course of clock servicing, I install at least one or two bushings. On this movement, one bushing was required, T2F. The hole was marginally oblong and I am sure the clock would have functioned fine without it but as a precaution, a new bushing was installed.

Cutting into the brass to prepare for a new bushing
Ready for the top plate

I generally spread my clock cleaning and servicing over several days but the bushing work went so quickly that I decided to proceed with assembling the movement.

The only critical adjustment prior to assembling the plates is the stop wheel. The stop wheel requires about half a rotation to arrest the train during warning otherwise, all the other adjustments are made outside the front plate. During dis-assembly I made a note of the location of the wheel, at 12 o’clock, saving time and frustration and it worked just fine.

Rather than use a test stand I returned the movement to its case for further testing.

What defines a successful clock day?

What defines a successful clock day? When everything goes according to plan, I’d say.

I ordered a number of parts from a clock supplier that finally arrived recently. Among the supplies was a good quality pivot oiler, a mainspring for the time side of a mantel clock, a set of better quality broaches and movement parts for my English bell strike.

I have a number of oilers but they are cheap and dispense far too much oil. A high quaility German made oiler is the right choice.

The broaches are made by Grobet and they are of excellent quality. The inexpensive broaches that I bought when I began my journey into clock repair will be put aside.

Success #1

In the fall of 2019 I picked up a clock made by the Fleet Time Company a short-lived Montreal-based company that lasted 4 years before World War II.

Fleet clock without the movement

The case had to be refinished but when I finally returned the movement to its case I discovered a broken time side mainspring. Some movements are designed such that the mainspring barrels can be removed without dis-assembly. I removed the barrel to take measurements for the replacement mainspring. Using needle-nosed pliers I pulled the mainspring out, measured the width, thickness, length and ordered one from my supplier. I had to put this project aside until the mainspring arrived.

Using my Ollie Baker spring winder I coiled the spring into a retention collar and inserted it into the spring barrel and once inside the barrel, it was capped and returned to the movement.

Broken time side mainspring, not reusable

It is finally nice to hear it chime.

Success #2

I recently serviced an Arthur Pequegnat Canuck time and strike kitchen clock. After installing 5 bushings and reassembling the movement I was not able to make the strike side run correctly. Today, I pulled the plates apart slightly to make an adjustment to re-locate the stop wheel.

The movement just before servicing

That was enough to allow the movement to go into warning. The clock is happily ticking and striking.

Success #3

I recently serviced a Waterbury York time and strike parlour clock. The strike side did not work when I bought it. I took the movement apart, cleaned it, installed several bushings and installed two missing helper springs. The movement ran well on the test stand but not when I returned it to its case.

In the case with the dial attached and the clock stopped. Today, I discovered that the crutch, a later replacement, is rubbing against the back of the dial, but just to be sure, I removed the dial and the clock ran without a problem. The solution; push the crutch loop further back into the movement.

Thoughts

These might seems like small victories but I’ll take them when they come. In the clock world some days are filled with challenges and frustrations but there are days like today where everything seems to go perfectly and that makes up for everything.

English bell strike servicing Part I – the assessment

In February 2020 my wife was perusing an online auction house looking for interesting bargains and noticed a 170-year-old Scottish tall case offered for bidding.

Over the past couple of years we had talked about acquiring an antique tall case clock but those we liked were either well beyond our reach or required extensive repairs so, here was a unique opportunity.

Though we had only auction photos to go by, the clock looked intriguing and was very much what we had in mind. We began our bidding low and managed to win the bid with a decent and acceptable (to us) price.

Tall case clocks have dropped dramatically in price over the past few years; nobody wants them and they do not fit the modern minimalist lifestyle of the young today. Besides, where would you put it?

Tucked into the corner of the auction house

The clock was not without issues nor did I expect it to be problem-free. The case required some structural work and the overall finish was dull and lifeless.

This article concerns my initial impressions and assessment of the movement prior to cleaning and dis-assembly.

Movement as found

What was I up against in terms of servicing the movement? What kind of issues would I find and did I have the skills to address those issues?

My preliminary assessment involved setting up the movement, connecting the weights, and performing some tests. After putting the clock in beat I managed to have it running for about a day.

while the time side ran well the strike side was another matter. Attaching the weight to the strike side produced a run-on strike until the power was depleted. Hmm, something serious or simply a minor adjustment?

Back of clock showing the crutch, bell, and hammer

While I have worked on dozens of English, German and American time and strike movements, this was my first attempt at an English bell strike. They are relatively easy to dis-assemble and re-assemble but are notorious for being temperamental. The greatest challenge is not the cleaning of the components or the reassembly, it is achieving long term reliability as a dozen parts threaten to hang up, split, or fall apart. Wear combined with scars from old repairs challenge any clockmaker.

First impressions

It is a very heavy movement with 3mm plates and large well-engineered components. These movements were designed to run reliably for years but 170 years and a history of cumulative repairs leaves one with a movement that can fail in many unexpected ways.

Looking at the escapement from above

Problem areas/issues

  • Enlarged pivot holes: I am reluctant to bush every pivot hole but upon inspection at least 3 bushings are required and possibly a fourth.
  • Repaired rack tail: The rack tail takes quite a beating. Once the rack is released during the strike sequence it drops with a bang on the snail. Years of banging ultimately results in a damaged and often repaired tail. The fix on this movement is ugly but the question is, is it robust enough to continue doing its job?
  • Homemade rack tail spring: Made from copper wire; there is too much tension causing the rack tail to strike the snail with too much force. A new rack spring has been ordered. In the meantime, I am using a thinner spring wire.
  • Worn gathering pallet: Assess and determine functionality.
  • Loose clicks: Loose clicks are a common issue with English bell strike clocks. The clicks on this movement are loose though the strike side is a little tighter than the time side. Both are functional. Should they be replaced or will they continue to function reliably as-is?
  • Loose crutch The crutch rod connecting to the escape wheel arbour has been adjusted too many times. It is loose and must be addressed.
  • Stiff Suspension spring: The suspension spring is the incorrect thickness and fashioned from a piece of a metal ruler! There is little amplitude. A new suspension spring assembly, pendulum rod, spike and hex nut have been ordered.
  • Bent rack: If it is soft steel it can be bent back to its original position. If it is hardened steel it could break if I tried to bend it.
  • Loose bell connection: Bell has been removed many times and the thread for the bell rod end where it connects to the cast iron bell, is stripped.
  • Missing seconds hand: Ordered
  • Calendar hand not connected: The movement has no calendar function. The face has a calendar hand and while the movement has no calendar wheel the movement is period correct. Was the movement replaced early in the clock’s life or was the clock originally built and assembled without a calendar function? That will remain one of the clock’s mysteries.
  • The cables are brass and they look old: I will make decision whether or not they should be replaced.

Side view showing the main wheel and the time train

And this ends part I. In the next part, dis-assembly and re-assembling the movement will be covered so, stay with me as we explore this movement further in Part II.

Don’t throw those old clock parts away

Don’t throw that old clock case or movement away. In this article, I will describe how I repurpose/reuse an old ogee clock case and how saving those old clock parts will come in handy someday.

Some time ago I responded to an ad on our local online for-sale site from an individual who had four clocks for sale, all for $20. I had no idea of the condition of the clocks but for the price I couldn’t lose but I knew it would be interesting. So, off my wife and set off for a 30-minute drive north of our home in Nova Scotia. The seller had them spread out on a table in an old barn. They had been stored in an attic for many years and were filthy.

None of them were in great shape but three came with mechanical movements which was worth the price alone.

They are:

  • E N Welch 30-hour Ogee movement and case,
  • Elisha Manross time and strike steeple clock, with 30-hour movement,
  • Ansonia Extra Drop time-only, 8-day wall clock with movement,
  • Waterbury mantel clock, replacement quartz movement.

That ogee case on the left was missing half of its veneer and would never be whole again

I managed to salvage two clocks from this bunch.

The Ansonia Extra Drop is hanging in my office and runs daily. The Elisha Manross steeple clock from 1843 has been cleaned up, serviced, and is now on display. The Manross clock has the distinction of being the only one in my collection with rare brass mainsprings.

A couple of missing pieces but looks good and runs well (reflection between 6 & 7)

Both clocks look great

Elisha Manross 30-hour steeple with brass mainsprings and new right finial & base

The Welch ogee and the Waterbury mantel clock were well beyond the due date they still had use as donor or parts clocks. I removed the brass bezel, strike rod block, dial face, rear door, and hinges from the Waterbury clock and tossed out the case which was not salvageable. Even the veneer could not be reused.

There was quite a bit to salvage from the Welch clock. I took out the movement, cleaned it, and put it aside to be used as a spare Ogee movement. I removed the pulleys, glass, hinges, iron nails, door catch and stripped the case entirely of its Rosewood veneer.

A new door made from the back panel of the ogee

Waterbury shot drop with new/old door

Talk to any clockmaker. Many save parts from clocks beyond repair for future use

Veneer from the ogee was used to make a new finial base for the Elisha Manross steeple clock

A section of old wood is glued to a missing section of the backboard for the Ansonia Extra Drop wall clock

Veneer from the ogee clock was used to cover the finial bases for an old Scottish tall case clock.

Talk to any clockmaker and you will find many that save parts from clocks beyond repair. Conserve, do not throw anything out, it may have a future use as a hard-to-find part for a repair.

Fleet Time company of Montreal – case refinishing and 2 surprises

While refreshing the case of this relatively nondescript mantel clock assembled by a short-lived Canadain clock company I ran into two interesting surprises.

Here is a garden-variety vintage Westminster chime mantel clock from the Fleet Time Company of Montreal (Canada). Many of these clocks were sold at department stores across Canada during the pre-war (WWII) era. However, this little known Canadian clock company had a brief life. Between 1936 and 1940 the company produced a range of two and three-train mantel clocks with movements sourced from Germany but were forced to end their operations.

The Second World War took a heavy toll on this company as the source of movements dried up and so did the company’s fortunes.

Wood cases were made in Canada for some models while other cabinets were imported from Germany.

This particular clock has a Gufa Westminster chime movement and I assume most of their 3-train clocks had a similar if not the very same movement. Gufa is the Guetenbacher Uhrenfabrik, located in Gütenbach, Germany. They manufactured 400-day clocks, cuckoo-clocks and later they became the “Jahresuhrenfabrik” (August Schatz & Sons in Triberg, Germany).

Rather than advertise the maker, many Fleet Time clocks simply had the word “Foreign” stamped on the movements.

This is a clock that could easily have been thrown in the garbage and I am fairly sure that is where it was headed. While I was in the city of Halifax (Nova Scotia, Canada) to pick up an Arthur Pequegnat Canuk kitchen clock the seller took me into his garage, pointed to a clock sitting on a shelf, and said. “for $10 more you can have this one”. “Why not”, I said!

Refinishing the case

I thought I would tackle the case first. While the front of the clock looks okay, the finish on the side sections were down to the bare wood plus scratches on top really detracted from the general appearance of the clock. It was a real mess. On top of that, the left side shoulder section was completely detached and had to be re-glued. Hot hide glue was used for this repair.

The finish was badly worn on both sides

Surprise #1

Rather than reproduce the dark lacquer finish I chose to sand the case down to the bare wood to see what lay beneath. To my surprise, I discovered a nicely grained, and beautifully textured grain. Enhancing the veneer with a light walnut stain is the way I chose to go because I did not want to go as dark as the original finish. Special Walnut, which has a light tone is perfect for the case and if I did not like it I could apply a darker walnut stain over it later.

Choosing the right stain; part of the case is still drying off from a wipe down with a damp cloth

The special walnut is very pleasing to the eye.

Special walnut stain

And the top of the clock.

Top of clock

After two coats of stain (above), here is the result.

After two coats of stain and two coats of shellac

The Special Walnut stain produced a very pleasing result. I applied one more coat of shellac, let it dry, and topped it off with Minwax Polishing Wax to produce a satin finish. Not the finish that came from the factory but it wlooks good.

Surprise #2

After cleaning the chapter ring, polishing the chrome bezel I was ready to return the movement to its case but what I should have done was test the movement beforehand.

When I received the clock I confirmed that the strike and chime functioned as they should and I assumed the time side was fine.

Broken mainspring which is not reparable

I inserted the winding key into the centre arbour and found no resistance. Hmm!

On these movements the barrels can be pulled out without disassembling the movement which certainly simplifies repairs. I pulled out the barrel, popped the back cap off, and discovered a broken mainspring. Using needle-nose pliers and heavy gloves, I pulled the mainspring out with for closer examination. No part of this mainspring is reusable and a new one must be ordered.

Occasionally when a mainspring breaks it takes a few other components with it like broken teeth, broken leaf pinions or bent arbours referred to as collateral damage. I inspected the gear teeth, pinions and arbours on the time train, gave the wheels a few spins and found everything moved smoothly, so, no damage this time. The broken mainspring is the only issue keeping this vintage mantel clock from striking and chiming again.

Mainsprings care easily sourced from a clock supplier. I waited until I built up a list of supplies for other projects then submitted the order online. German and American mainsprings are best and avoid those made anywhere else particularly India.

The movement was placed in a plastic bag along with nuts, hands, screws etc. and stored safely away until the mainspring arrived.

Two weeks later

Two weeks later, out come all the parts from storage.

Using my Olie Baker spring winder and mainspring retention collar I installed the mainspring into its barrel.

Fitting the barrel back into the movement involves moving the strike rods out of the way which is a bit of a pain, then, the barrel slides into a channel on the plate. The movement was returned to its case and the hands attached.

Fleet Time Westminster chime

The strike hammers were re-positioned for the best possible sound and my guess is that the clock is running and chiming for the first time in many years. As of this writing, it has completed a number of 8-day cycles. And to top it off, it looks great!

Let’s see, $10 for the clock $19.50 for the mainspring and less than a few dollars for stain, glue, etc. A satisfying project combined with a piece of Canadian clock history.

A 1847 Elisha Manross steeple clock with rare brass mainsprings

Among American clocks, the name Elisha Manross does not immediately come to mind unlike well-known clockmakers such as Seth Thomas, New Haven or Waterbury. However, Elisha Manross (1792-1856) was an important pioneer of the Connecticut clock.

Brass mainsprings are very rare. It is possible for a clockmaker to go through their entire career without seeing brass mainsprings. Why? Because brass was used for a very short period as a mainspring in clocks. From 1836 to 1850 brass mainsprings were used because steel was considered very expensive. It was not until 1847 that the tempered steel mainspring developed for everyday clocks was introduced and with it, the brass mainspring faded into clock history.

Tempered brass mainspring, American Clock and Watch Museum, Bristol Connecticut, June 2019

Quite often 30-hour time and strike Gothic Steeple clocks such as this one by Elisha Manross (Ca. 1847) have steel mainsprings because the original brass mainsprings broke and were replaced. That the mainsprings in this clock are original and still in excellent condition tells me that this clock did not have a particularly hard life.

Elisha Manross 30 hour movement
Elisha Manross 30 hour movement, as found

My plan is to preserve the brass mainsprings. Some might be tempted to replace them with steel ones. My interest is in preserving the brass mainsprings in this clock because they represents a very important part of the history of American clocks and should be back in the movement where they belong.

Continue reading “A 1847 Elisha Manross steeple clock with rare brass mainsprings”

Website Powered by WordPress.com.

Up ↑