This two-weightGustav Becker regulator wall clock, purchased in 2016 as a “project clock,” proved early on to be more challenging than I thought. This is the third and final post in this series. For the story behind this clock and an analysis of the steps taken so far, the first and the second posts can be found here and here.

After repeated but unsuccessful attempts to source correct replacement parts, the original movement was ultimately replaced with a complete 1918 P27 movement. That decision proved sound. The replacement movement has run reliably for more than nine years, making the recent strike issues described here less a surprise and more a predictable outcome of a long service interval.
The current issue is intermittent stopping during the warning phase, with the warning lever binding against the stop-wheel pin. In the absence of obvious breakage or damage, and given the movement’s extended service interval, the symptoms suggest accumulated wear rather than sudden mechanical failure.
With that diagnosis in mind, let’s now shift to systematic bushing work, careful reassembly, and methodical testing of the movement.
Polishing Bushings
Polishing the pivots prior to addressing pivot hole wear is a critical step, since even minor surface roughness can accelerate wear in otherwise sound bushings. Ensuring the pivots are smooth and true allows any remaining issues to be correctly attributed to pivot hole wear rather than the pivots themselves.

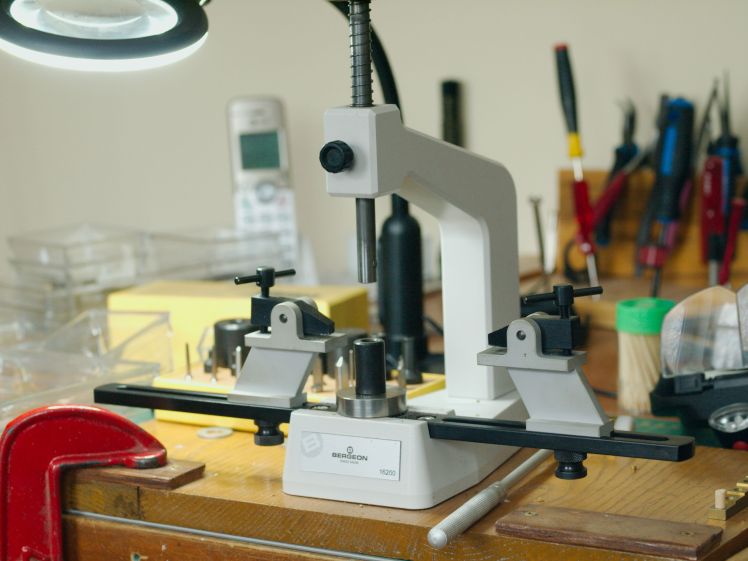
The pivots were inspected and polished using my Taig metal lathe (above). An emery board was used to clean and polish each individual pivot. No pivot wear was expected, and none was found.
Bushing Work
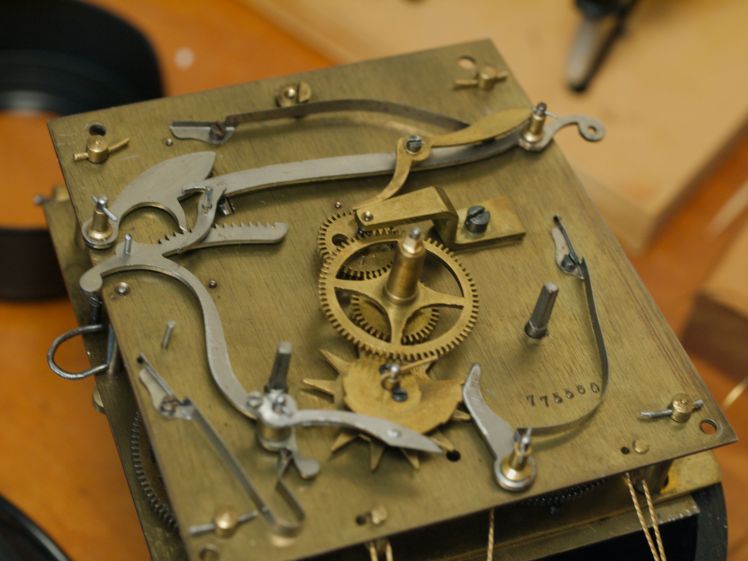
The next step is addressing wear, particularly on the strike side. Pivots in this movement are significantly smaller than those found in mass-marketed American movements. As a result, some of the pivot holes measure only 0.6 to 0.7 mm, requiring small 2 mm diameter Bergeron bushings.
This demands a high level of precision when drilling the plates, as accurate placement is critical. Off by a fraction of a millimeter, and the wheels will not mesh correctly. Two new back-plate bushings were installed on the second and third wheel pivot holes.
After checking the action of the wheels, I debated whether or not to include the fourth wheel pivot hole, which did not look as worn as the other two. I decided not to at this point. Interestingly, both replaced bushings showed punch marks adjacent to the pivot holes, a previous attempt to reduce pivot hole wear by closing them. Punching pivot holes might have been an acceptable practice years ago, but not today.
Reassembly
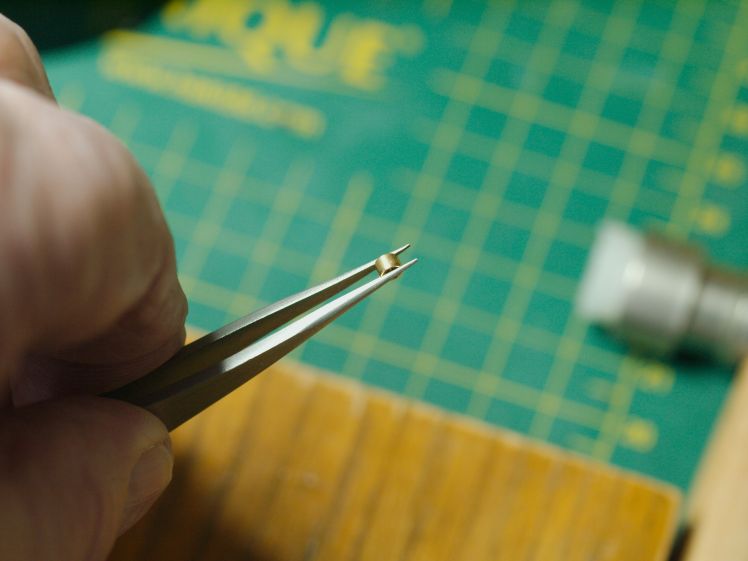
Working with small pivots presents its own set of challenges. There is always the risk of a bent pivot. Now, it could have been me, or it might have been there for quite some time, but I noticed a slightly bent pivot on the flywheel. Straightening a bent pivot is not for the weak of heart. A broken pivot can be a catastrophe.
Can it be fixed? Yes — and I have done pivot work in the past — but it’s something best avoided whenever possible. I have a staking tool specifically for correcting bent pivots, and I did my best to straighten it. I also have the original movement, so I could have used the fly from that movement if my minor repair had gone sideways.
Other than the minor hiccup described above, assembly went as planned.
Have I ever left a part out? More than once. I’ve put everything together only to discover the hammer arbor looking up at me as the last part in the bin, practically saying, “You forgot me.” Not this time.
Aside from the winding drums, there are only 6 wheels and the fly. The strike levers are on the outside of the front plate. Below the large hour wheel on the front plate are two smaller gears that must be timed. Curiously, there are timing marks on the bottom of the gears, so, using a black marker, I indicated the timing marks on the top of the wheel. This aligns the movement for striking at the 12 o’clock position.
Otherwise, the stop wheel should be very close to 12 o’clock, and the gathering pallet is positioned to clear the rack. Next come the various levers and the taper pins to keep them in place.
Testing
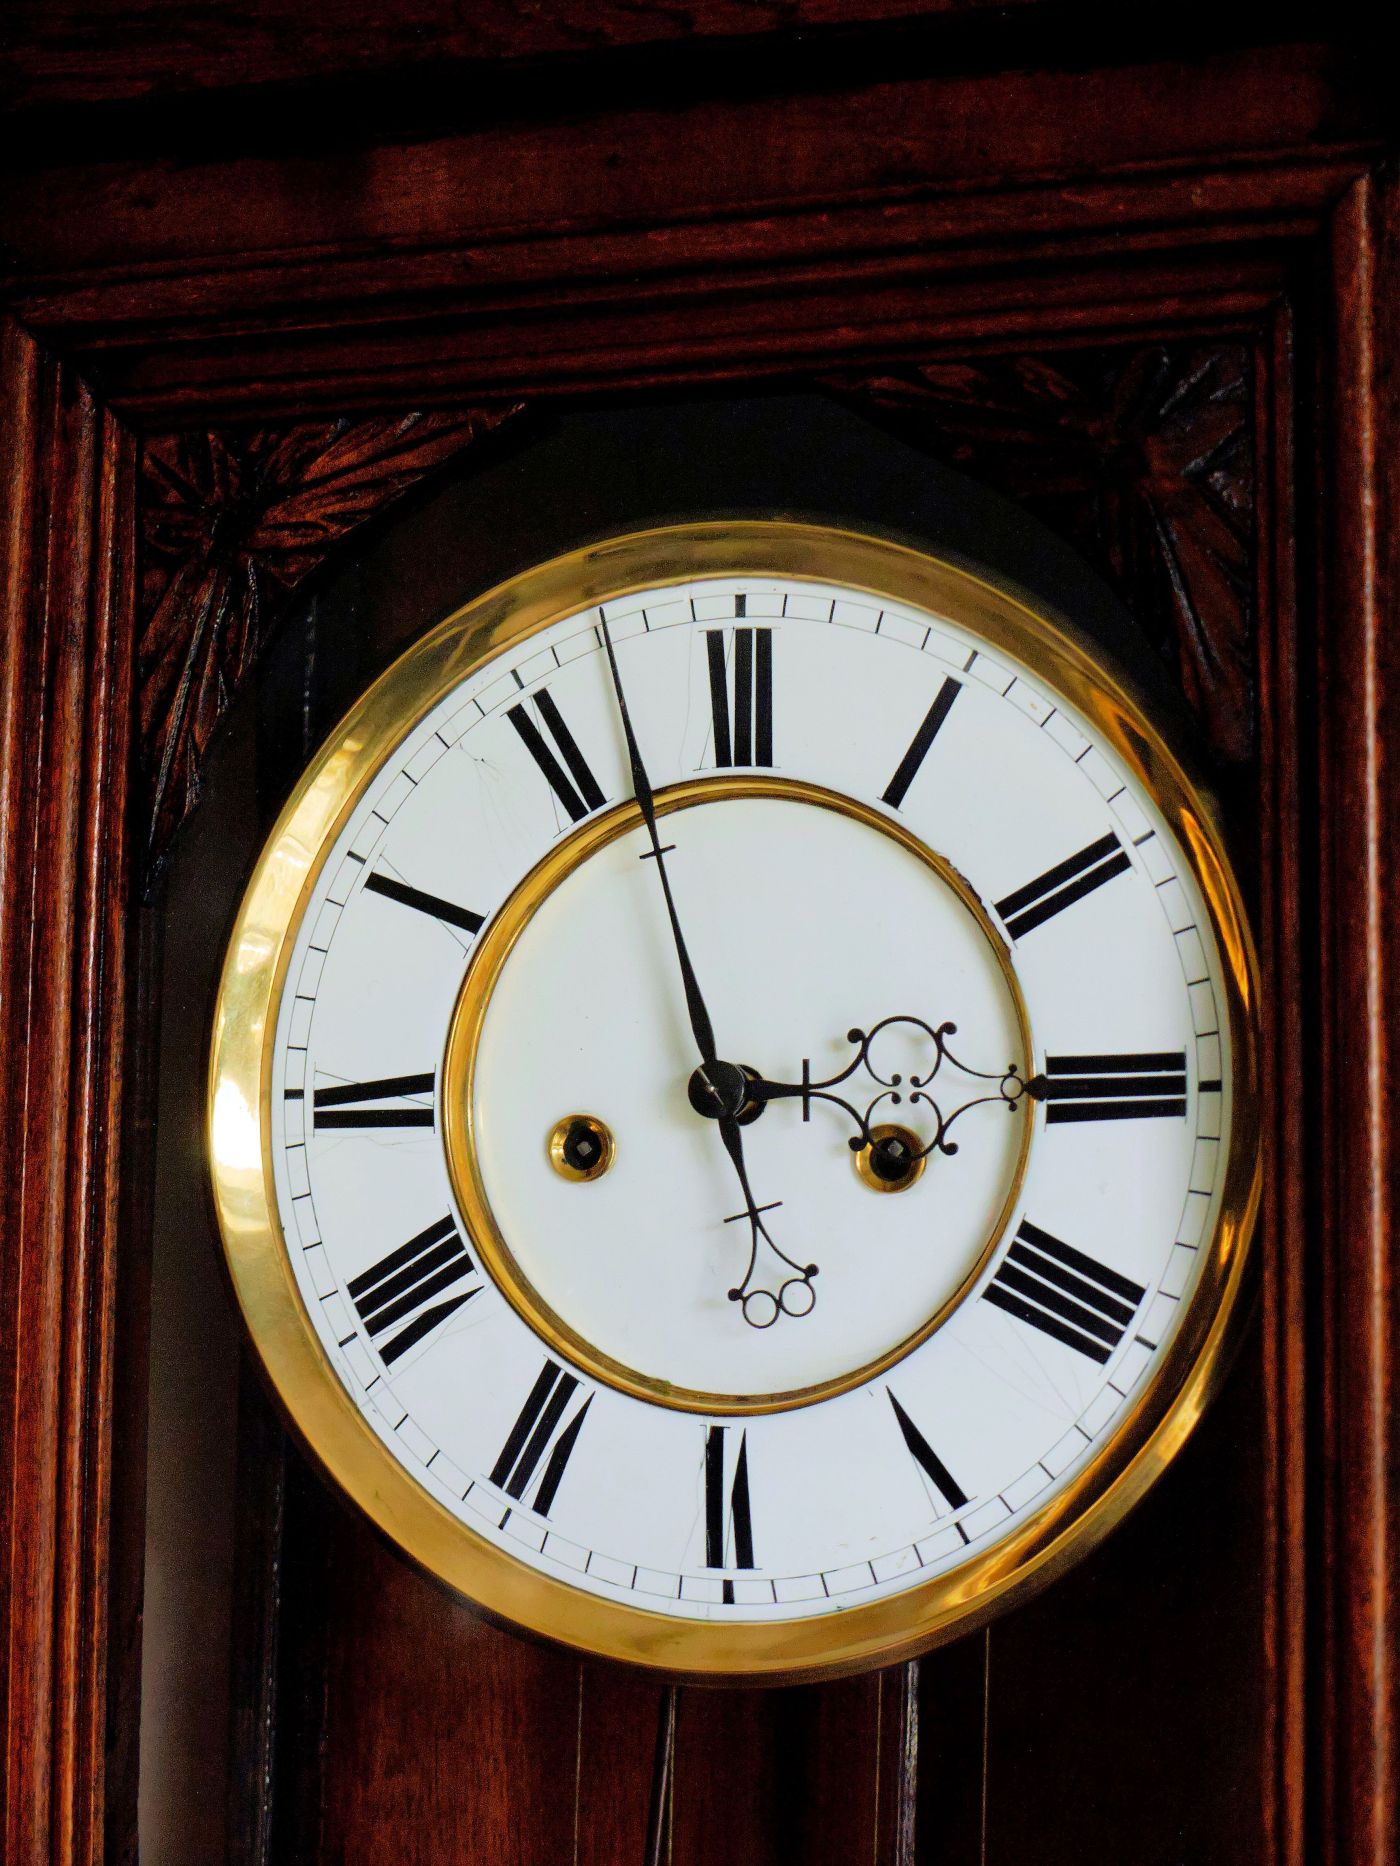
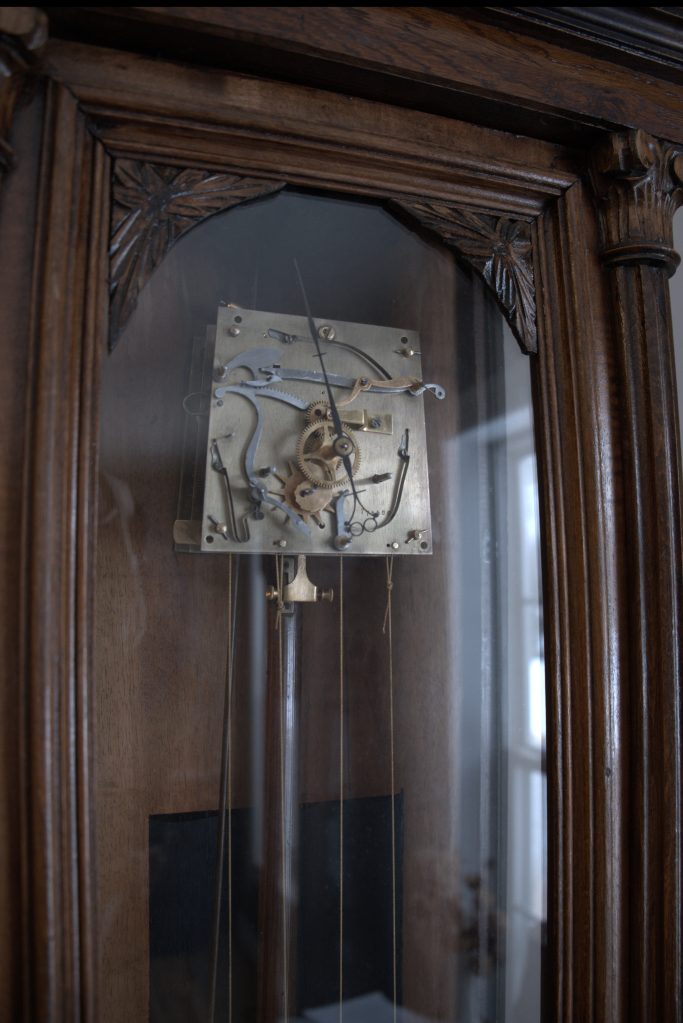
I have five testing stands, but none that accommodate a Vienna Regulator, so the movement was returned to the case for testing. During the testing period, I did not attach the hands or the dial.
With the striking issues finally sorted out, the clock is now running as it should — steady, reliable, and doing exactly what it was meant to do. As of this writing, it is on its second 8-day cycle and keeping time within a few seconds per hour.
Final thoughts
It now seems likely that wear on the striking side lay at the heart of the problem, and those issues have finally been addressed. As with any clock repair, time itself will be the true judge, but for the moment, all signs are encouraging. With a little luck, it will settle in and run contentedly for many years to come.
This has always been one of my favourite clocks in the collection and one that I keep running daily, so it was genuinely disheartening to see it silent for the past few months. I tried every reasonable adjustment to coax it back to life without dismantling the movement, but in the end, there was no substitute for proper disassembly and servicing. Sometimes a clock simply tells you when it is time to do things the right way.
I will let it run through another full eight-day cycle, make any final adjustments that may be needed, and then refit the dial and hands — hopefully marking the return of a familiar and welcome presence in the room.
Related Links
- Understanding pivot wear and bushing wear Part 1; Part 1 of a 2-part series
- Understanding pivot wear and bushing wear Part II; bushing involves replacing worn brass around a pivot by drilling a new hole and inserting a new bushing, either using a bushing machine or hand tools. The two articles walk the reader through the process of bushing
- Gustav Becker 2-weight regulator; 3 years later; I said in 2019, “Clock collectors usually pride themselves in having at least one Gustav Becker (GB) clock in their collection. I have just one, but I am always on the lookout for another.” The article shows the clock on display in our living room.
- Tools I Use; Tool I use plus additional information on clock repair.
Discover more from Antique and Vintage Mechanical Clocks
Subscribe to get the latest posts sent to your email.

Another interesting description of a clock repair. Although I don’t have a Vienna Regulator – and probably never will – I still find these descriptions interesting and they add to my learning about clocks in general and clock repair in particular. I like the small lathe – very envious !
LikeLike
The Taig is not especially expensive either but it’s one of those nice-to-have tools. Thanks for your comments.
LikeLike