Why does a mechanical clock movement require servicing? The answer is quite straightforward. Maintaining your clock’s movement is essential to ensure it continues to function properly and extends its lifespan.
Regular servicing reduces wear and tear, ultimately preserving the clock’s functionality. Ideally, most clocks should undergo servicing every three to five years to maximize longevity.
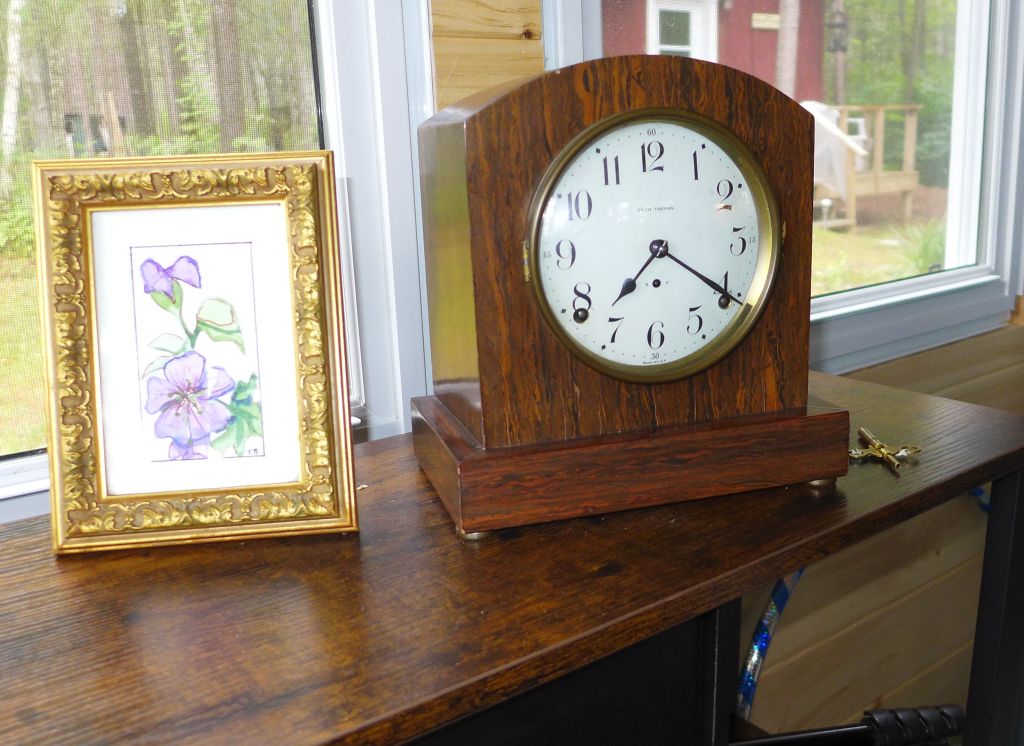
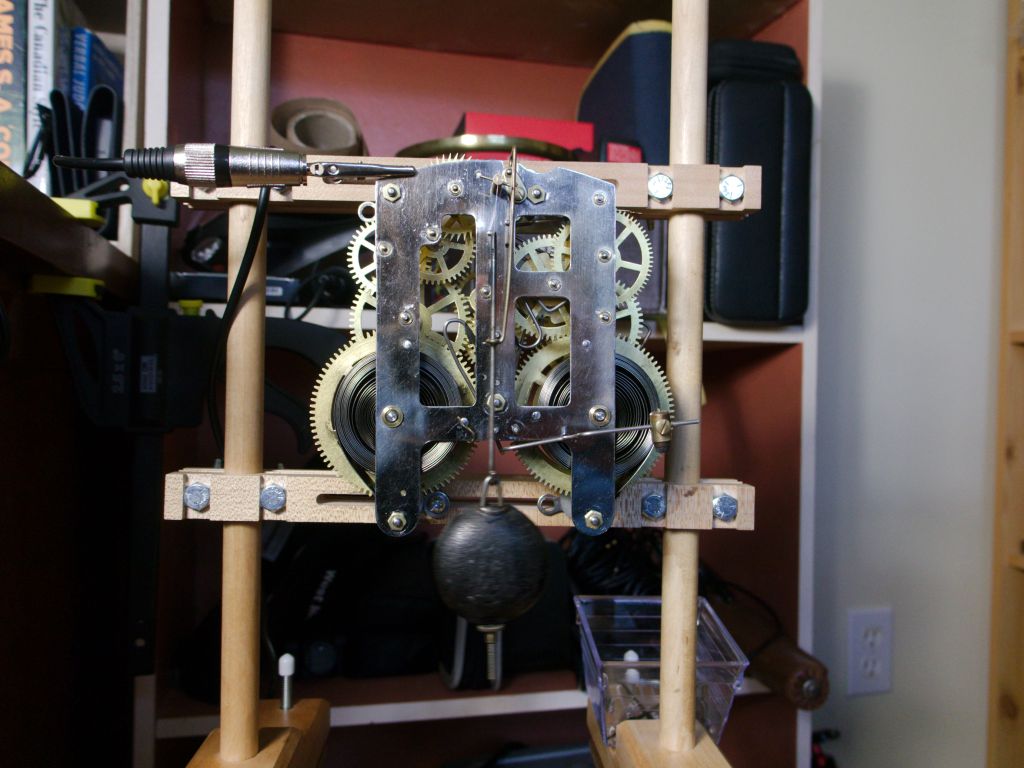
This article outlines the seven steps I typically follow when servicing an antique or vintage clock movement, using a common American, pendulum-driven movement as an example, Seth Thomas’s Type 86 8-day time and strike movement.
Step 1 – Initial Assessment: Upon receiving a clock, my first task is to determine if it runs. I assess whether it runs and strikes correctly and completes its full 8-day cycle. If it operates for fewer than 8 days, there may be an underlying power problem, which could stem from various factors like weakened mainsprings, worn bushing holes, bent arbours, and so on but more often than not a good cleaning will improve its run time even if there is some wear in the movement.
Step 2 – Addressing non-running clocks: When the clock does not run, I conduct an examination to identify potential issues such as missing or broken components, bent wheel assemblies, and arbours, damaged or worn gear teeth, worn pinions, snapped mainsprings, and broken or broken clicks along with any missing parts like suspension springs or pendulum bobs.
Nevertheless, when all components are intact and the mainsprings appear to be in good condition, I take measures to ensure the clock is properly adjusted for an even beat.
I’ve observed that on many occasions, the mainsprings are wound tightly, and relieving this tension tends to address the problem (albeit temporarily), allowing the clock to operate relatively smoothly. However, if it stops running soon after starting, I note the problem areas and set it aside for servicing.
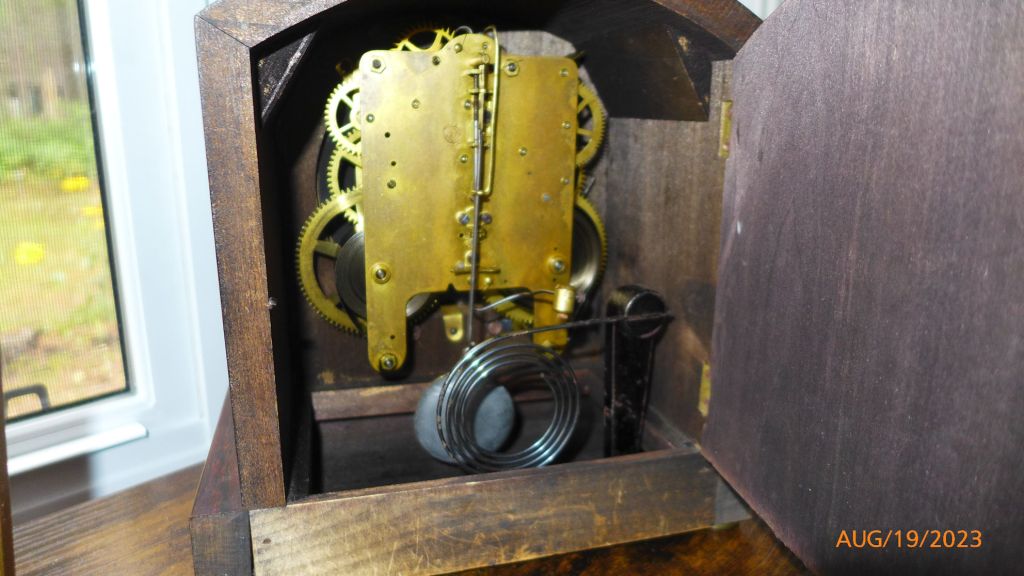
Step 3 – Disassembly and assessment: After removing the hands, dial face, and taking the movement out of the case (4 screws hold the type 86 in place), I conduct a thorough visual inspection. This step involves checking for damage, dirt, and excess oil, and determining the extent of cleaning required.
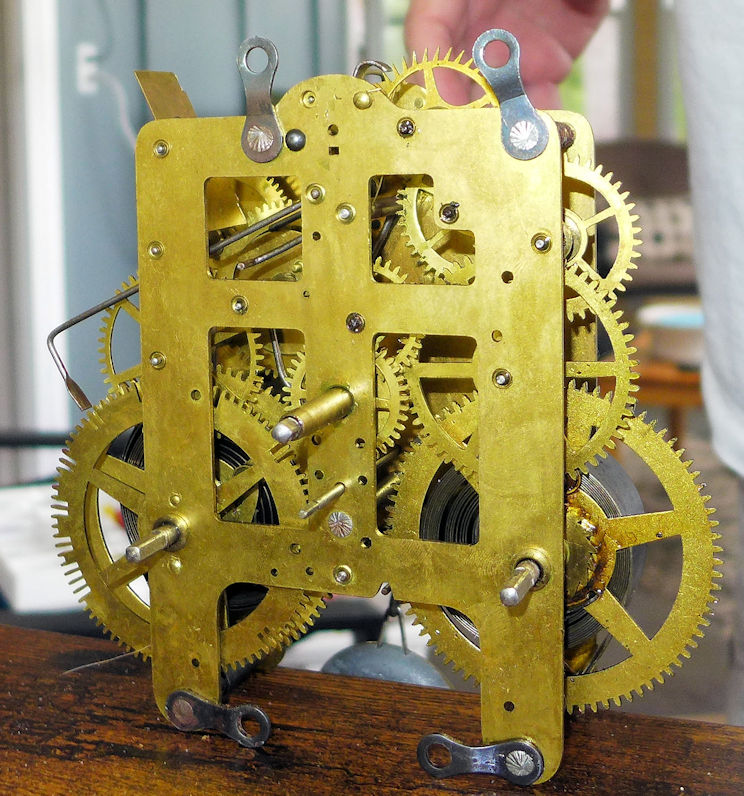
I use retaining clamps to safely secure the mainsprings’ power and then proceed with disassembling the movement. Disassembly includes removing outboard parts such as the crutch and suspension rod, releasing the four or five bolts holding the plates in place, and proceeding to remove the wheels and levers.
I assess wear in various areas, including pinions, pivot holes, arbor conditions, and connections between plates and pillars. I also look for tool marks and indications of previous servicing.
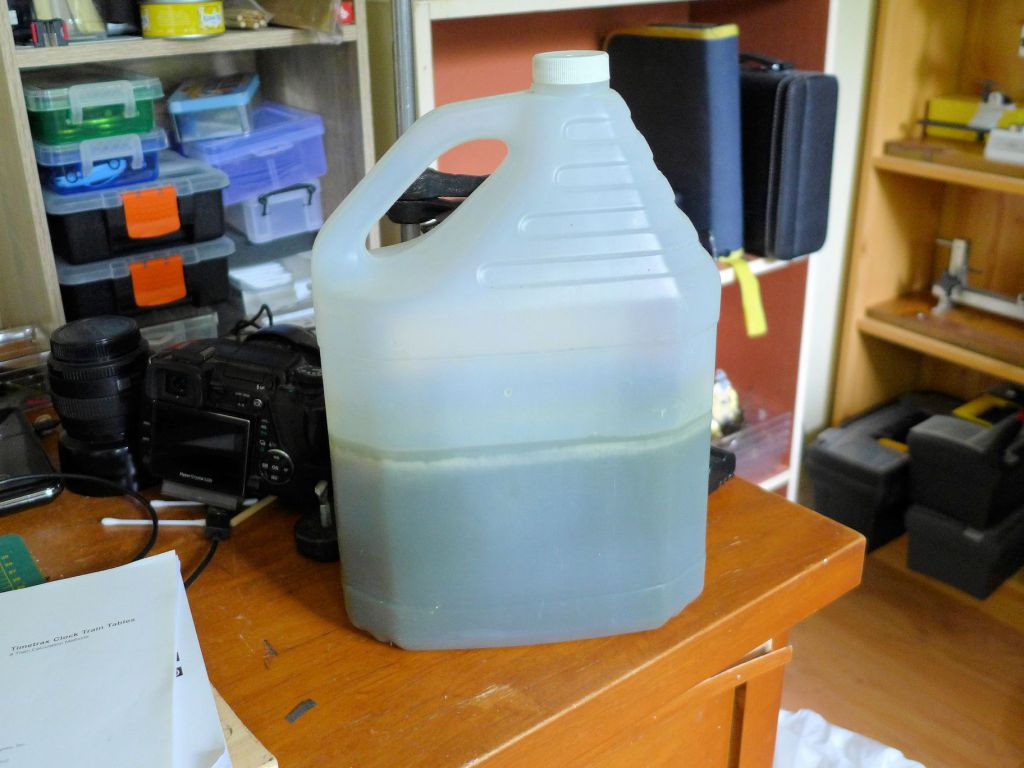
Step 4 – Cleaning the parts: Cleaning the clock movement parts is crucial, and I prefer using an ultrasonic cleaner. I use a mild alkaline, biodegradable degreaser concentrate for cleaning. I organize the parts in compartments for easy identification, with strike parts separated from time-side parts.
For open-loop mainsprings such as the type 86, I detach them from the main wheel before cleaning. To guarantee that the mainwheels and springs are reinstalled in their original spots, I mark them with either “T” or “S” for clear identification.

Drying the parts promptly is vital to prevent rust formation. I use shop towels and a portable hair dryer to ensure all areas are dry. Lantern pinions tend to be especially difficult to dry and a hair dryer is an ideal tool to remove excess water.
After cleaning, I inspect the cleaning solution and, if suitable, reuse it.
Step 5 – Polishing pivots: The next step involves polishing the pivots. If the pivots are in good condition, a few passes with an emery board are sufficient. A small metal lathe is ideal but a portable drill will do.

For pitted pivots, more aggressive cleaning and polishing may be necessary, and in extreme cases, pivot replacement may be required. Cleaning and wiping the pivots with a soft cloth is essential, followed by bushing if needed.
Step 6 – Bushing, broaching, and pegging pivot holes: I determine which pivot holes need bushing by assessing lateral pivot movement and marking each one (with a black marker) to be bushed.

I use a Bergeon bushing machine known for its precise work. After making the bush hole, I clean it from chips and burrs, followed by broaching if necessary. In the process, both cutting and smoothing broaches are used to ensure an optimum fit.

All pivot holes are pegged with toothpicks until no residue remains.
Step 7 – Making necessary repairs: Other potential repairs include re-pivoting, straightening or replacing wheel teeth, sourcing parts, making new parts, and addressing issues with worn lantern pinions and escapement components.
Step 8 – Reassembly, testing, and adjustment: Finally, I reassemble the clock movement, carefully securing the gears and levers in place. I use a pivot locator to move the pivots to their correct location. Once reassembled, the movement goes through a testing process and adjustment on a test stand, ensuring it is in beat and properly regulated. This testing phase can take up to a month before returning the movement to its case.
In conclusion, servicing antique or vintage clocks significantly extends their lifespan. These seven steps provide a general guideline for clock movement servicing, though some steps may require further explanation, and individual procedures may vary among clockmakers.
Discover more from Antique and Vintage Mechanical Clocks
Subscribe to get the latest posts sent to your email.

Thank you for your posts, I
LikeLike