If you’re new to clock repair or restoration, one of the first hands-on steps you’ll encounter is removing the movement from its case. This process needs to be done with care to avoid damaging delicate components.

Start by taking several clear photos of the clock from all angles—front, back, sides, and inside. These images will be your reference when it’s time to reassemble everything. Next, gently remove the pendulum by unhooking it from the suspension spring or leader. Set it aside somewhere safe.

I highly recommend using small containers to store any clock parts, screws, or retainers removed during disassembly—there’s no greater frustration in clock repair than losing a tiny screw.
Next, remove the hands. Unscrew the hands nut or remove the brass or steel taper pin holding the minute hand in place. There may also be a brass compression spacer attached to the minute hand. Lift and remove it and the minute hand. The hour hand is friction-fit on the hour pipe; simply pull it off.
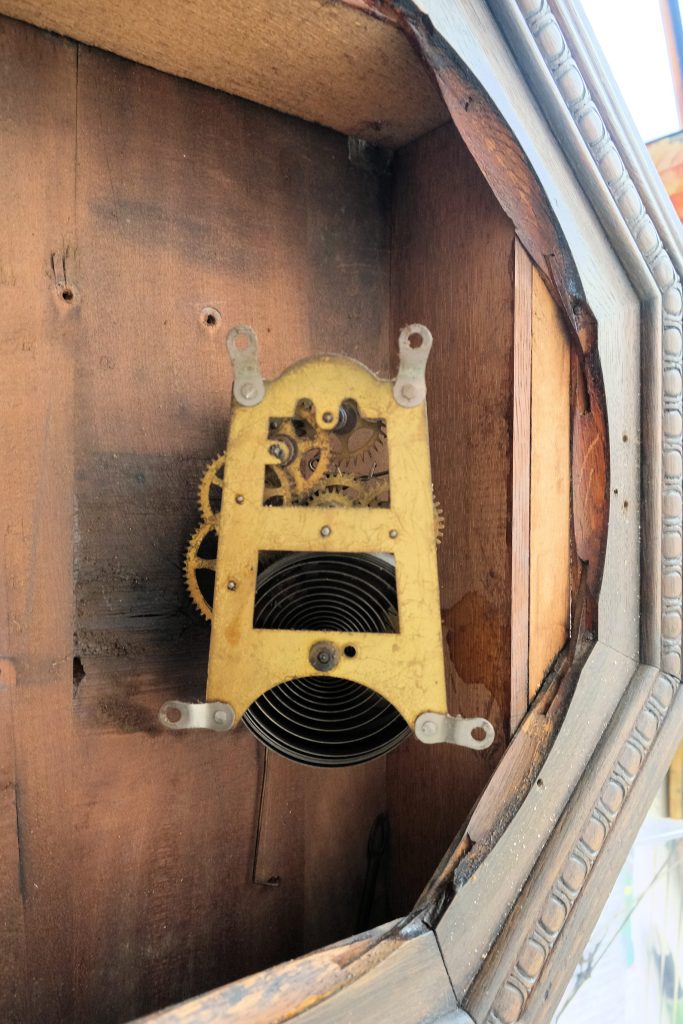
In some designs, such as those requiring the removal of the movement through a rear access door, lay the clock flat to get better access. As a precautionary measure, it is advisable to remove the glass dial in advance, since placing the clock face down while working on the movement may result in the glass cracking (yes, that has happened to me). If the dial is removed, watch for tiny screws, clips, or pins—and keep track of how it was attached.
If the springs are open and relaxed inside the case, it may be difficult to remove the movement. Wind both mainsprings tightly.
Now locate the movement’s mounting hardware. Most movements are secured with case screws—usually at least four, one at each corner. On some clocks, you must remove the strike block before the movement can be taken out. This block is typically held in place by a large screw on the bottom of the case. In German wall and floor clocks, the movement is often mounted to a seat board and secured with two thumb screws. Simply unscrew the thumb screws and slide the movement forward to remove it.
At this point, you should be able to gently slide or lift the movement out of the case. There are times when the access door is so small that the movement must be carefully maneuvered to remove it.
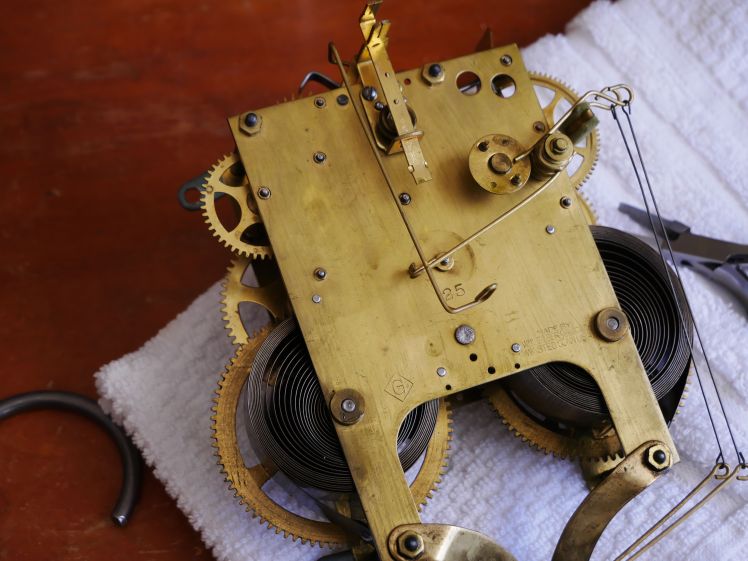
Once everything is removed and stored properly, you’re ready to inspect the movement for cleaning, bushings, or further repair.
If the clock is spring-driven and still wound, always let the power down using a let-down tool set. However, before doing so, wind the springs, insert a clamp, or wrap a wire around the mainspring to secure it. If the spring is housed in a barrel, letting it down allows the mainspring to relax safely within the barrel. This ensures safety during the removal process and prevents damage from a sudden release of tension.
And now you are ready for the next steps.
Taking it slow and staying organized will save you time (and frustration) later on.
Discover more from Antique and Vintage Mechanical Clocks
Subscribe to get the latest posts sent to your email.

Thank you for the piece below. Do look forward to these.
If you have the time to do so, I would like to get your thoughts and advice on what precautions should be made to transferring a pendulum long case clock to another location e.g. a 5 hour car ride away.
I thank you in anticipation.
H. Redwin
LikeLike
Check out this article.
LikeLiked by 1 person
Gosh ! That was quick.
Thank you for the link. I could not have asked for more.
Best wishes to you sir.
H. Redwin
LikeLike