Of the five anniversary clocks in my collection, none have cost me more than $30. It’s unfortunate because these clocks are truly fascinating devices. They are well-crafted, delicate, and ornamental, driven by spring mechanisms. While many thousands were produced, their abundance is reflected in their low value today. My focus is on collecting the older mechanical models, the last of which were manufactured over 35 years ago, and steer clear of the battery-operated anniversary clocks still being sold.
Among clock repair enthusiasts (horologists), opinions on anniversary clocks vary—some enjoy working on them, while others struggle to develop an affinity for them. I fall firmly into the former group, finding these clocks both intriguing and enjoyable to work on.
Gustav Becker, Haller, and Schatz 400-day clocks are certainly more desirable, better made, and fetch higher prices. While I don’t have any of these makes in my collection, I am always on the lookout for more desirable and collectible models.

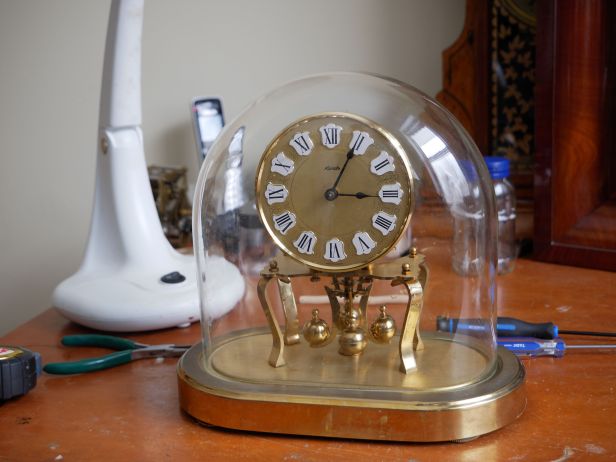
I picked this up for $5 at a local antique store. When buying one of these clocks, regardless of the price, it’s crucial to check that all parts are present, as sourcing a missing part can be nearly impossible unless you purchase an identical clock for parts. Often, the only issue is a broken suspension spring.
Fortunately, this Kundo clock was complete and in generally good condition. However, the suspension spring had clearly been snapped off due to improper transport. Many people either forget about or are unaware that these clocks feature highly effective pendulum locking mechanisms.
These are called torsion clocks because there is a weighted disk or wheel, often a decorative wheel with 3 or 4 chrome or brass balls on ornate spokes, suspended by a thin wire or ribbon called a torsion spring (otherwise known as a suspension spring). The torsion pendulum rotates about the vertical axis of the wire, twisting it, instead of swinging like an ordinary pendulum.
These clocks operate very slowly—in the case of this Kundo Junior, just 10 beats per minute compared to 100 beats per minute or more for a typical pendulum mantel clock. Due to the slow movement of the gears, wear is minimal, and it’s quite common to find these clocks with a broken suspension spring as their only issue.
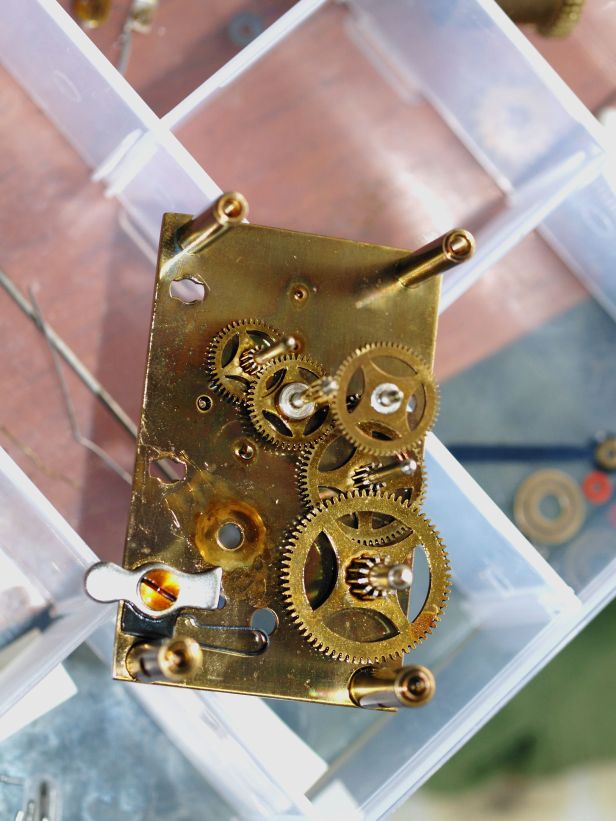
The movement was disassembled and cleaned in an ultrasonic cleaner. The mainspring was removed from the barrel, cleaned, and serviced. Otherwise, there was minimal wear to the pivot holes. In fact, I have never needed to install a bushing in an anniversary clock because their slow operation results in very little friction.

Now, it’s time to install the new suspension spring. The suspension spring is a very thin piece of steel running down the back of the clock, designed to twist back and forth while suspending the pendulum balls. It’s crucial not to kink or bend it, as a bent or crimped spring is the most common reason these clocks fail to function properly.
You can purchase pre-assembled suspension springs in kit form—springs already fitted with blocks and a fork—but I’ve found it far more cost-effective to buy the springs separately and re-use the blocks and fork. To ensure accuracy, I consulted my Horolovar manual (I eventually purchased one) to find the exact template—Kundo 5E, in this case. I then unscrew the blocks and fork to install the new spring. Here is an example of a suspension spring from a Kern 400-day clock.

Installing the suspension spring requires a little patience. While it is a delicate process, it’s relatively easy to do. It’s best to work on a flat surface. There are screws on both the top and bottom blocks that must be loosened before the new spring can be inserted. The bottom block was a bit stubborn, and a jeweler’s screwdriver is essential—you don’t want to strip those tiny screws.
Use the template in the Horolovar manual as your guide. For the Kern clock mentioned earlier, I had to rely on some guesswork while waiting for the manual to arrive, but once it did, I was able to confirm the measurements. After positioning the blocks, attach the fork and secure it with screws.
Install the bottom block first. Attach the spring block to the 4 pendulum balls with the pin then lock the pendulum balls in place using the locking lever. Some 400-day clocks use a simpler bottom block solution that simply hooks the block into place. Because this one uses a pin it is a bit more frustrating. After the bottom block is secured and locked in place install the top block to the top mount by first slipping the fork over the verge post. In the case of this Kundo it is a small side screw that secures the top block to the mount (saddle?).
I then attached the dial face and the hands then gave the pendulum a gentle 360-degree spin. Not surprisingly the clock failed to maintain its spin. An adjustment was required.
Looking at the top of the clock, you’ll see a screw that can be loosened to adjust the fork in one direction or another. Be very careful not to kink the suspension spring when loosening this screw. Loosen it gently, just enough to allow movement, and make small, incremental adjustments when setting the beat. While you can buy a beat adjustment tool for 400-day clocks, with a bit of trial and error—observing the verge’s action and fine-tuning the beat setter—you’ll eventually find the correct beat. You’ll know it’s “in beat” when the time between the tick and tock is the same. At that point, the clock should run smoothly. Since the ticking is so quiet, it helps to turn off any background noise in the room while making adjustments. I have several loud-ticking clocks in my office, and I stop them to assist with the process.
If you work on enough torsion clocks, a Timetrax or similar beat amplifier will make the task much easier.
The clock has been running for several weeks and is in the process of being regulated. Above the pendulum balls in a regulating adjustment dial. You will see a “+” and a “-“. Adjusting towards the plus side speeds up the clock and the minus slows it down. I recommend minute turns for either adjustment.
There’s some debate about whether or not to oil these clocks, given the slow movement of the gears. While polishing the pivots to reduce friction can certainly be beneficial, I believe a bit of pivot oil is never a bad idea.
As I mentioned earlier, I’m part of the group that enjoys working on 400-day clocks, appreciating their delicate mechanisms and the satisfaction that comes with restoring them to working condition.
Discover more from Antique and Vintage Mechanical Clocks
Subscribe to get the latest posts sent to your email.

I am 49 and just this year have gotten into ‘fixing’ clocks (I have always been fascinated by the movements). Anyway I really need your help. The spring in the barrel has snapped on the hook end and I need to replace it. However, I’m not ready to buy a snazzy spring winder (and making one still looks daunting) so I want to just a pre-loaded barrel. Could you PLEASE tell me the barrel number on this one…I have the exact one (different face). I replaced the tension spring and all else is well. Just can’t wind it! THANKS SO MUCH!!!!!
LikeLike
You have two options. You can try to match your barrel with one at a supplier like Timesavers or buy the spring separately and install it in the barrel without a spring-winder as you can see in this video. I have done it myself so, I know this method works. You must measure the thickness and width of the spring prior to ordering. You really need gloves for this. Hope this helps,
Ron
LikeLike