Clock collecting and repair allows me to combine my other hobby, photography with the world of horology.
I have seen so many poor photos of clocks that I thought I would cover one small aspect of photography, macro photography. The following is a generalist approach to macro photography that is intended to allow the hobbyist to take more interesting photos of their clocks. You can make macro photography as basic or as complex as you wish it to be. Here we are talking about normal macro as opposed to true macro when you are creating an extreme close-up image of an insect, for example. Normal macro is a sharp image of a tiny object requiring the lens to be positioned much closer to the object. You do not have to be a studio pro to take macro images but you should have a macro capable lens.
Most photos on my blog are taken with an 8 megapixel Olympus E330 SLR which I have had for about 10 years. It is coupled to a 50mm F2 lens macro lens purchased around the same time (equivalent 35mm focal distance of 100mm). For photo enthusiasts the lens has has 11 elements in 10 groups with a minimum focusing distance of 0.2m. In 2008 DPReview called the 50mm a “Superb image quality (lens) even wide open – sharp, distortion-free with no lateral Chromatic Aberration”.
I do not use a cellphone when taking clock pictures. Simply put, it is NOT the resolution, it is the lens
The 50mm lens is a true macro and it permits shots that would be otherwise impossible to take on a typical cellphone camera. I do not use a cellphone when taking clock pictures. It is NOT the resolution, it is the lens. There are occasions when I will use a more up-to-date camera such as my Panasonic G85 when taking some clock shots and all videos as the E330 is not video capable.

In some of the shots you will notice a purposely blurred out background. This is known as Bokeh. The degree of blurriness or Bokeh is an indicator of the quality of the lens but more importantly Bokeh allows the viewer to concentrate on the object in question without the distraction of a background. The decrease in sharpness is gradual on each side of the focused distance. This is accomplished by setting your camera lens to the widest possible setting (lower F stop, F2 for instance) and then focusing on one particular part of the frame. The contrast between in and out of focus portions of the frame concentrating around the subject and relative distance to other things in the frame creates a deeply enriched image.

A flash attachment like the Olympus FL-36 allows you to tailor the light for the scene. Make sure your camera has a hot-shoe for an external flash. Invest in an external flash unit with a 90 degree swivel (bounce) head. Buy the flash that is correct for your camera. You don’t need to spend a lot of money, external flash attachments can be very inexpensive.
When taking a flash picture indoors, turn off the camera’s built-in flash. Point the bounce flash head at the ceiling (rather than at the object) and take the picture. This will provide a soft, diffused light and it will cut down on reflections. Bouncing light creates a more natural effect rather a direct flash on an object which can be harsh and unattractive. Bouncing also works best with light coloured ceilings, white being the preferred colour. When there is no light to bounce off, a diffuser works well. The photo below shows the FL-35 with a diffuser (white rectangular shaped plastic top) attached.

The top photo (Westclox LaSalle alarm clock) was shot with a white cloth background and a bounce flash.
Use auto white balance (AWB) in your camera settings. Shooting in JPEG is perfectly fine but for more control over the final result, shoot in RAW to correct colour temperature and exposure in post processing.
Rather than explain each shot I will allow the photos speak for themselves.
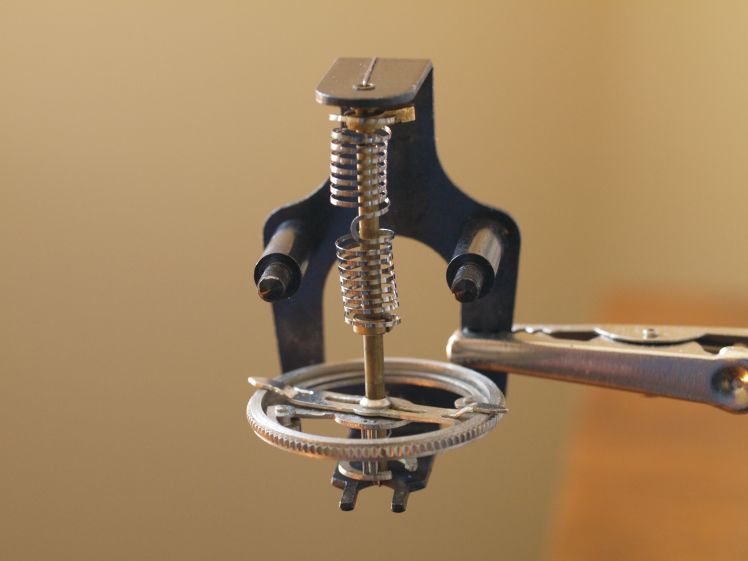


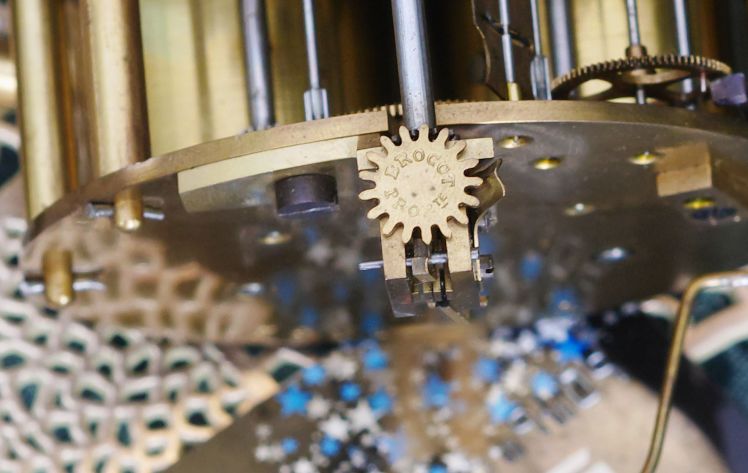


Having a capable camera with a high quality macro lens is essential to clock repair.
In a future article I will explore lighting, exposure and other techniques to enhance your clock photos. If you have any questions please leave a comment.
Discover more from Antique and Vintage Mechanical Clocks
Subscribe to get the latest posts sent to your email.

Attractive section of content. I just stumbled upon your website and in accession capital to claim that I acquire actually enjoyed account your weblog posts. Any way I will be subscribing for your augment and even I fulfillment you get admission to consistently rapidly.
LikeLike
Thx
LikeLike
It’s really a great and helpful piece of info. I’m happy that you just shared this useful info with us. Please stay us informed like this. Thank you for sharing.
LikeLike
Thanks for dropping by.
LikeLike