In the first segment of this two-part series, I detailed the assessment process of this Sessions time-only movement, which can be accessed here. This article explores the next steps in the servicing of this clock movement. I will also offer in-depth observations regarding the case’s condition and comment on any additional issues that have emerged subsequent to the assessment phase.

Two years ago, I acquired this Sessions schoolhouse clock at an auction with the intention of adding it to my collection of similar 19-inch clocks. The purpose behind this acquisition was to create a set of “time zone” clocks, as my children are scattered across the country. This setup allows me to easily glance up and determine the time in their respective areas.
In the initial assessment of the movement, I anticipated no significant surprises or wear due to the prior work done on it.
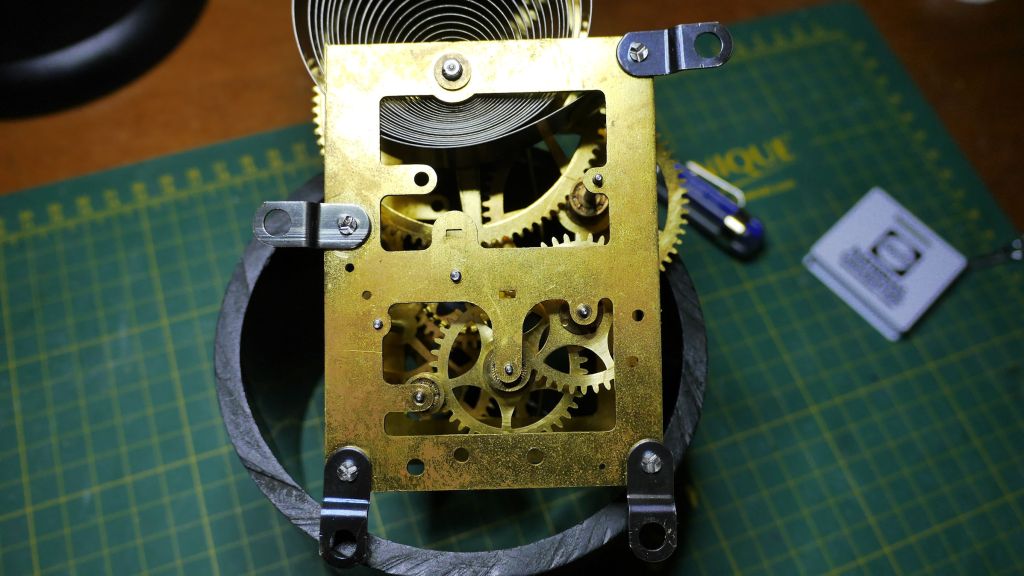
To disassemble for inspection, I removed the movement from the case. Using a let-down key, I restrained the mainspring with a C-clamp and then removed the 4 bolts holding the movement together. After taking out the mainspring, I inspected the remaining parts for wear. I observed slight elongated wear on the second wheel bushing hole but found no major issues requiring remediation. Further examination revealed minimal grime in the pivot holes and a lack of lubricating oil. Overall, the movement showed little wear.
And now, on to servicing the movement.

Using my Taig lathe I polished each of the pivots. Polishing methods may differ but I prefer to use a fine-grain emery board. Emery boards are affordable and ideal for the task at hand.
I slide the emery board horizontally while the pivot rotates within the lathe and clean off any residue on the pivots with a soft cloth.
All components are immersed in the ultrasonic cleaner, and after approximately 15 minutes in the cleaning solution, the parts are removed and thoroughly dried using a gentle cloth and a hairdryer to eliminate any remaining water within the lantern pinions.
Since there’s no requirement for bushing work, the procedure remains straightforward, and the components are reassembled after the drying is completed.
Once all the parts are together the pivots, entrance & exit pallets, saddle pin, mainspring arbour, and crutch loop are oiled using Keystone clock oil.
After assembly, the movement undergoes a testing period, which may extend for days or even weeks. However, for this particular time-only movement, because of its simplicity, the testing duration is shorter.
The case and dial
The case is very well-preserved, devoid of the typical dents and marks often encountered on clocks from this time period. Cleaning with soap and water will suffice.
I only realized that the entire dial face, except for the chapter ring, had been repainted after I started loosening the screws for the dial bezel. I hadn’t noticed this previously and had assumed it was a replacement dial because it appeared to be in such good condition. Achieving this required a steady hand, and as a result, it looks very well done.

Despite the care and attention given to preserving the movement and case, it is noteworthy that the hands are incorrect. Sessions would have originally used solid spade hands instead of pierced ones, and, naturally, both the hour and minute hands are too short.
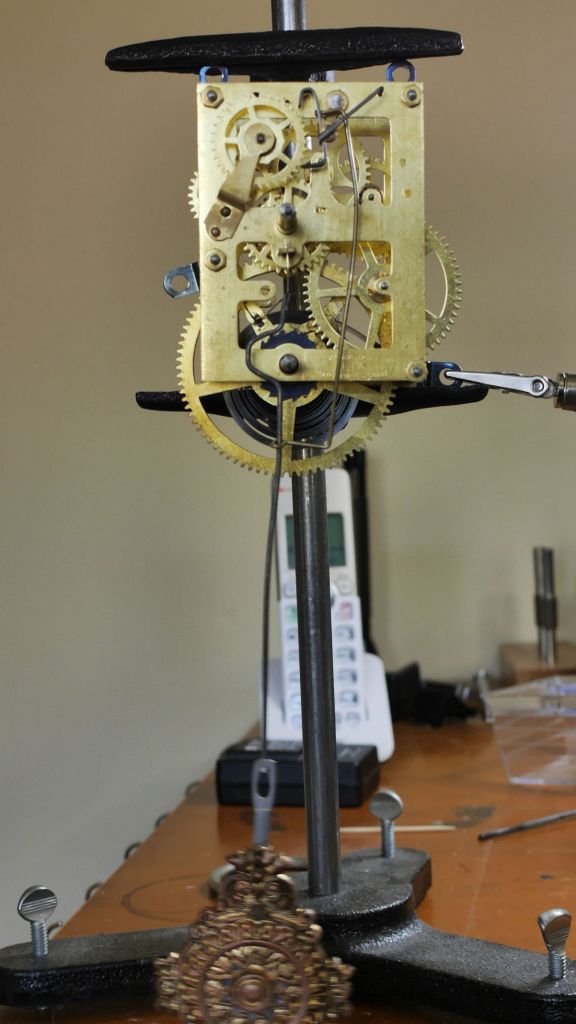
The test stand
While on the test stand, I had to make two adjustments to the recoil escapement. The entry and exit pallets were too far from the escape wheel which necessitated moving the saddle slightly in towards the escape wheel. This is the drop most often referred to and it can be visualized as the airspace between the leading corner of a tooth point and the part of the pallet it is about to fall on. The other is a crutch adjustment to bring the movement to the correct beat.
Two days on the testing stand prove to be adequate, and the final step involves reinstalling the movement back into its case.
Discover more from Antique and Vintage Mechanical Clocks
Subscribe to get the latest posts sent to your email.

<
div dir=”ltr”>Such detail, lots of peop
LikeLike
Thank you.
Ron
LikeLike