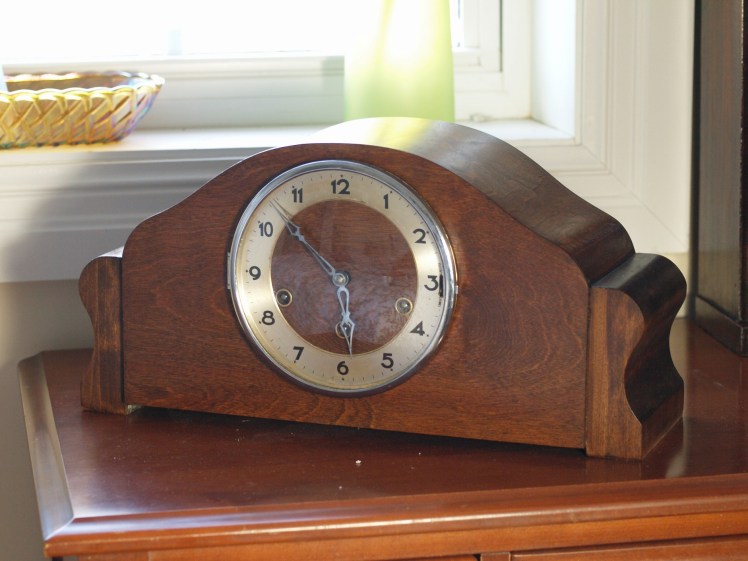
About a year ago I picked up two clocks. I had my eye on one, an Arthur Pequegnat Canuck shelf clock, and the other was “thrown in” as part of the deal. We completed the transaction on the Pequegnat clock and the seller asked me if I wouldn’t mind looking at a mantel clock stored on a shelf in his garage. He said, “for $10 more you can have this”. I did not know the make at the time but for $10, why not! It was in sad condition as you can see in the next photo.

A tin plate affixed on the back of the clock told me what it was made by the Fleet Time Company of Montreal (Canada).
Many of these clocks were sold at department stores across Canada during the pre-war (WWII) era. However, this little-known Canadian clock company had a brief life span. Between 1936 and 1940 the company produced a range of two and three-train mantel clocks with movements sourced from Germany but were forced to end their operations when the war began.

The Second World War took a heavy toll on this company as the source of movements dried up and so did the company’s fortunes.
Wood cases were made in Canada for some models while other cabinets were imported from Germany.
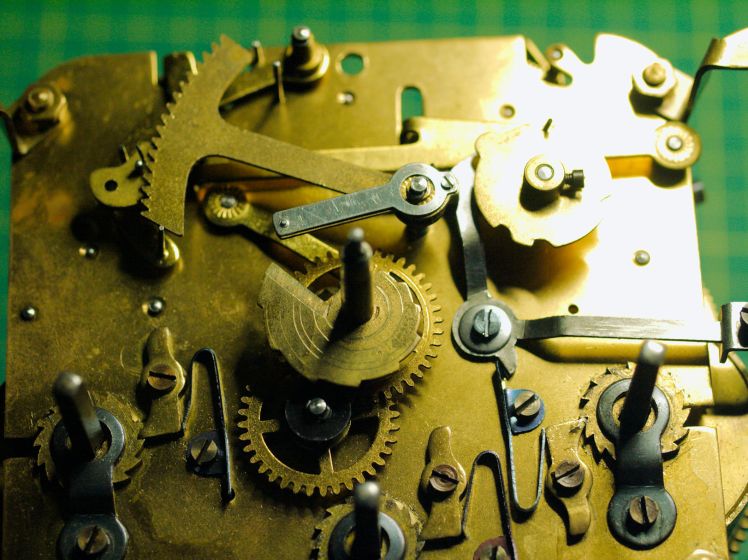
Servicing the movement
I had completed work on the case a few months ago and now it is time to service the movement.

The clock has a Gufa Westminster chime movement. Gufa is the Guetenbacher Uhrenfabrik, located in Gütenbach, Germany. They manufactured 400-day clocks, cuckoo-clocks and later they became the “Jahresuhrenfabrik” (August Schatz & Sons in Triberg, Germany). Gufa is not a name horologists come across very often in North American. There is a chime gear patent date number ending in 34 which likely refers to the year 1934 indicating manufacture between 1935 and 1939. It is a solid, well-built movement.
Assessment of the movement
I had replaced the time mainspring shortly after I bought the clock but I knew that I would eventually have the movement on the workbench. As is typical of German clocks of this period in that the mainspring barrels can be removed without dismantling the movement, so, replacing the time mainspring was an easy fix.
The clock was running, though not well. On the fourth or fifth day, the chimes (and strike) would stop though the time train would soldier on a few days more. Wear issues on the strike and chime train had to be addressed.
I disassembled the movement, put the parts into the ultrasonic cleaner, and discovered afterwards that the plates had been lacquered. With the ultrasonic heat setting on, the lacquer stripped off but not uniformly. As it is a $10 clock I am not concerned about aesthetics.

To eliminate the chance that I would mix up the wheels for the 3 trains, I tied each set together. Once out of the ultrasonic cleaner I untied them and placed them in their respective trays. Westminster chime movements have similar-looking gears in the three trains and it is best to separate them to avoid frustration during re-assembly.
After inspecting the movement I determined that new bushings were required on the second wheels plus the motion works arbour. Three of the second wheels on the backplate, one bushing for the strike side second wheel front plate, and one for the motion works for a total of 5 new bushings; not bad for a 3-train movement. These are the typical wear points on three-train movements as the second wheels handle the greatest load.
Bushing work
Once the pivot holes were pegged out and the wheels rechecked in their locations, the bushing begins. Aside from the second wheels, most other pivot holes were in good shape. I don’t often use bushings with an outside diameter of 4.50mm but this movement required 4 in total. All bushings had to be reamed out with a cutting broach followed by a smoothing broach. All wheels were test fit with the plates together and things looked good.
Reassembly
Next is reassembly. With so many wheels it is a bit trickier than a two-train movement but it is important to work slowly and carefully to avoid a bent pivot. Once the wheels are positioned, test each train to check that everything is in place. After the nuts are tightened, the remaining parts such as the locking plate, chime locking lever, warning lever, rack snail, mainspring barrels and so on are installed/attached.
Testing
Of all movements, three trains are the most difficult to set up correctly. Although all three trains spin independently they are interconnected by levers. In order for everything to function in unison, careful attention must be paid to the job of each lever, what it does and how it performs its function every 15 minutes.
Everything went fairly smoothly. Both the strike side and chime side go into warning as they should, the locking plate stops the chime at each quarter-hour including the hour, which is a good sign the locking hook on the chime train is in the correct position.

The chime strike lever is, however, sticking on the strike warning pin. Without taking the movement apart I used 1600 grit memory paper to smooth the hook end surface where it meets the strike warning wheel pin. The polishing allowed it to function a little better but continued testing revealed that that solution did not work. I finally had to remove the chime strike lever and polish the hook. the polishing was successful.
The next issue is the strike paddle which is ending the strike sequence hanging off one of the star points. The plates on the strike side must be opened up and the paddle repositioned. For safety reasons and to preserve the mechanism should things go awry, the power is let down on all mainsprings. Adjustments such as these come with the territory as nothing should be expected to work perfectly the first time.

After the aforementioned adjustments are made, next is the chime sequence and that means loosening the set screw for the main chime wheel and rotating the drum till the quarter strike is at the 1-2-3-4, the beginning of the sequence.
Once the adjustments have been made it is back to the test stand.
Okay, my strike paddle adjustment did not work but in the meantime, the testing of the movement proceeded and everything looks very good at this point. I will give it a few days and return to re-adjusting that paddle.
Everything is working now.
I’ll be honest, 3 train movements are not my favorite type to work on for 4 reasons. One, they often need major work only after a few years. Secondly, it is often not enough to install new bushings for worn pivot holes lower in the trains but to address other worn holes up the trains, as well. Thirdly, they are labour intensive and finally, except for modern movements, parts are almost impossible to find.
In many cases, certainly as far as a modern Hermle is concerned, it is often more cost-effective to simply replace the movement rather than repair it.
Discover more from Antique and Vintage Mechanical Clocks
Subscribe to get the latest posts sent to your email.

You must be logged in to post a comment.