The disassembly of an antique tall case clock need not be a daunting task. When I bought this clock at auction at the beginning of 2020 I put into practice some of the things I had learned when transporting a Ridgeway grandfather clock in 2013. My advice is to work slowly and methodically but think about what you are doing at each step of the process.
Why disassemble? A move across town, across the country, or even redecorating are three of many reasons. Even if you wish to move the clock from one area of your home to another disassembly is required. Yes, moving it a few inches requires disassembly.
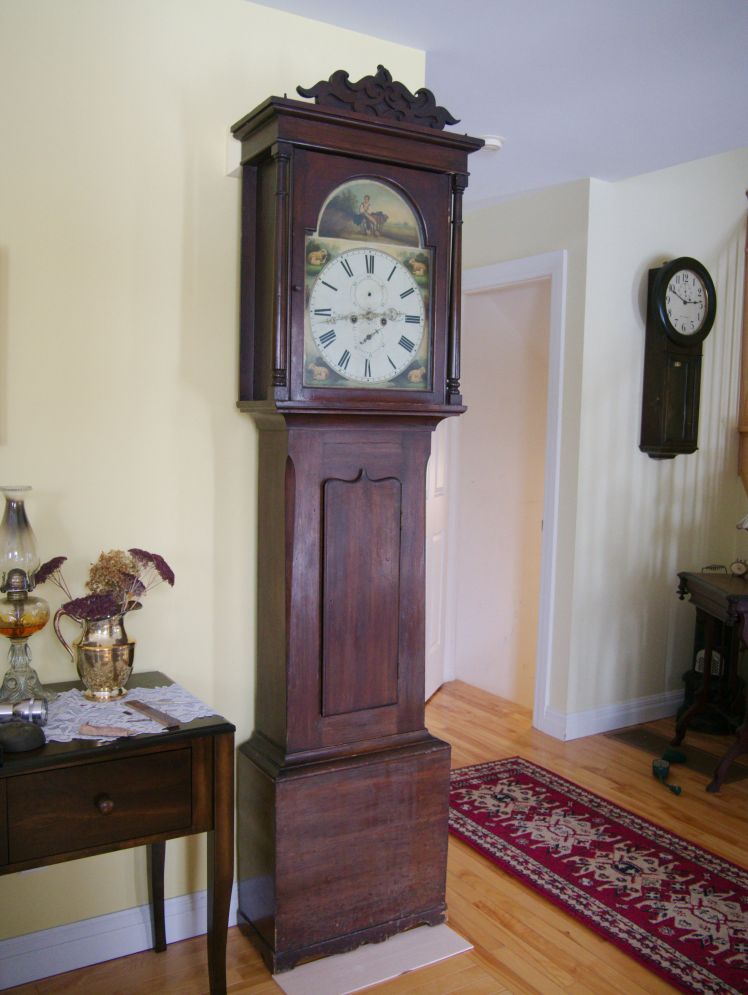
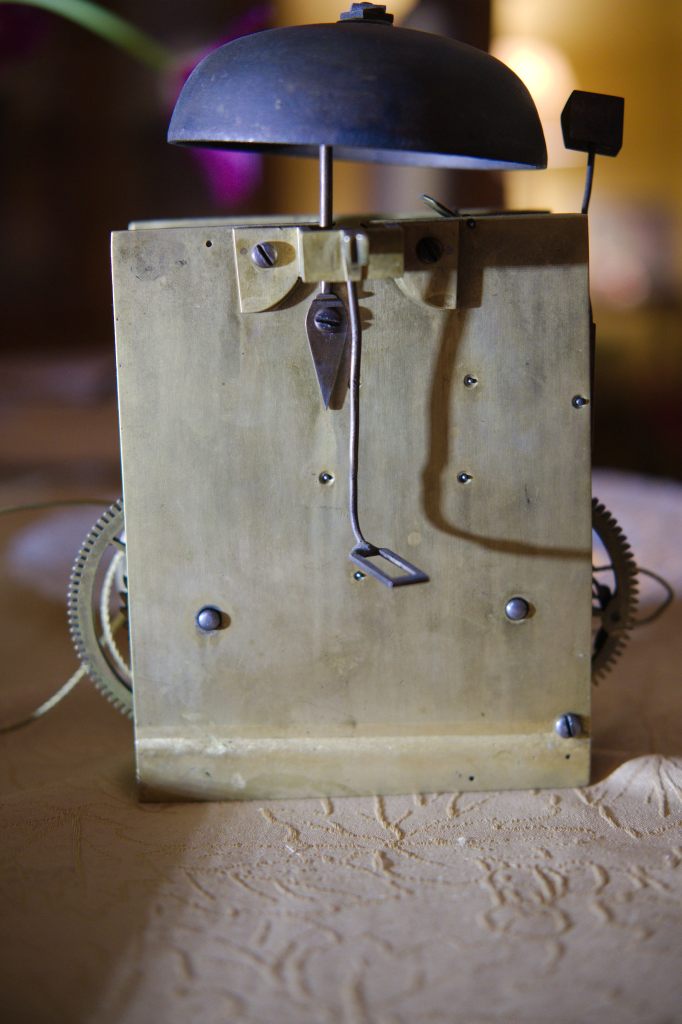
An antique tall case clock, such as this weight-driven Scottish tall case clock from the 1850s with an English brass bell strike, can be easily disassembled by one person. In this blog, I will walk you through the steps required to safely disassemble an antique tall case clock.
Similar American tall case clocks from the same period are disassembled in the same manner.
When disassembling there are occasions when some assistance is required. If you are not familiar with antique tall case clocks get some help with the process.
Here is a description of the main parts:
- There are three main sections of an antique tall case clock, one, the waist and base, second, the removable bonnet, and third, the movement and dial assembly plus the weights.
- The bonnet slides forward for easy removal. Prior to removing the bonnet check to see if the top finials are attached. Most tall case clocks have brass balls or wood finials. Over time they can become loose. If loose, remove them.
Disassembly is really quite simple if you carefully follow a step-by-step process and work slowly and methodically

- Check to see if the weights are on the clock. If not, removing the bonnet may cause the dial and movement to tip forward since the movement often sits unattached to the seat board rails. The movement and dial can be removed without the weights attached but you will need a second person to hold and stabilize the movement and dial while you slide the bonnet partway forward.
- If the weights are attached, remove the bonnet by gently sliding it forward. Avoid grasping the columns as they are not always as secure as they should be. Sometimes you can lock the door but if it cannot be locked put one hand at the top corner with a thumb on the door to prevent it from opening. With the other hand on the opposite bottom corner slide the bonnet forward and put in a safe place. If necessary, jiggle the bonnet from left to right if it is sticky.
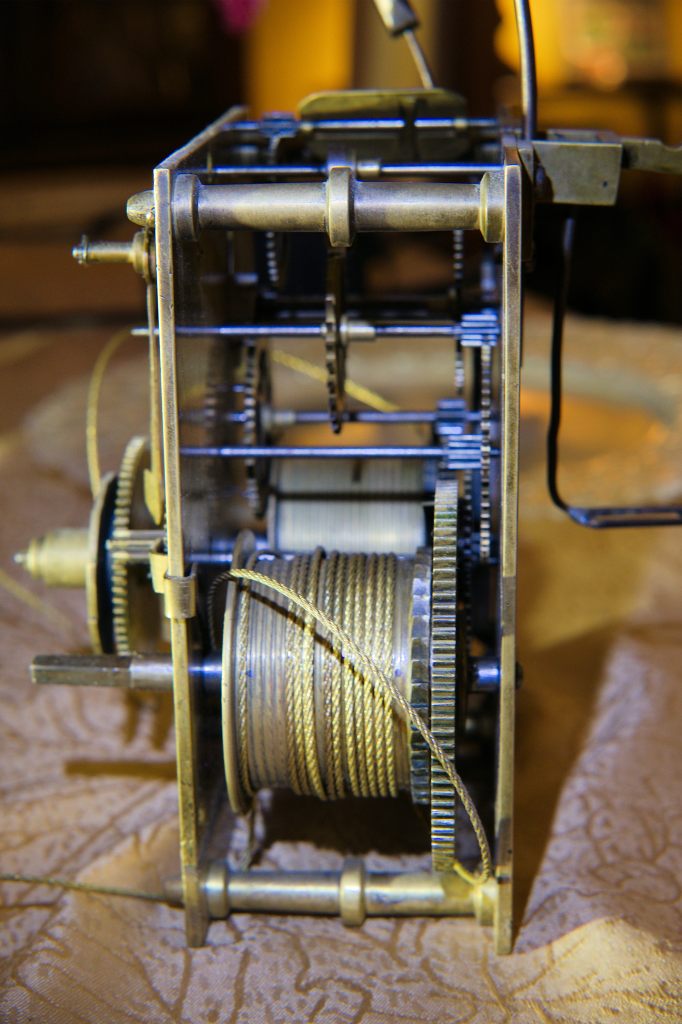
- Temporarily place masking tape/painter’s tape over the cables on the drums to prevent them from tangling.
- Remove the time side weight by unhooking it and putting it in a safe place.
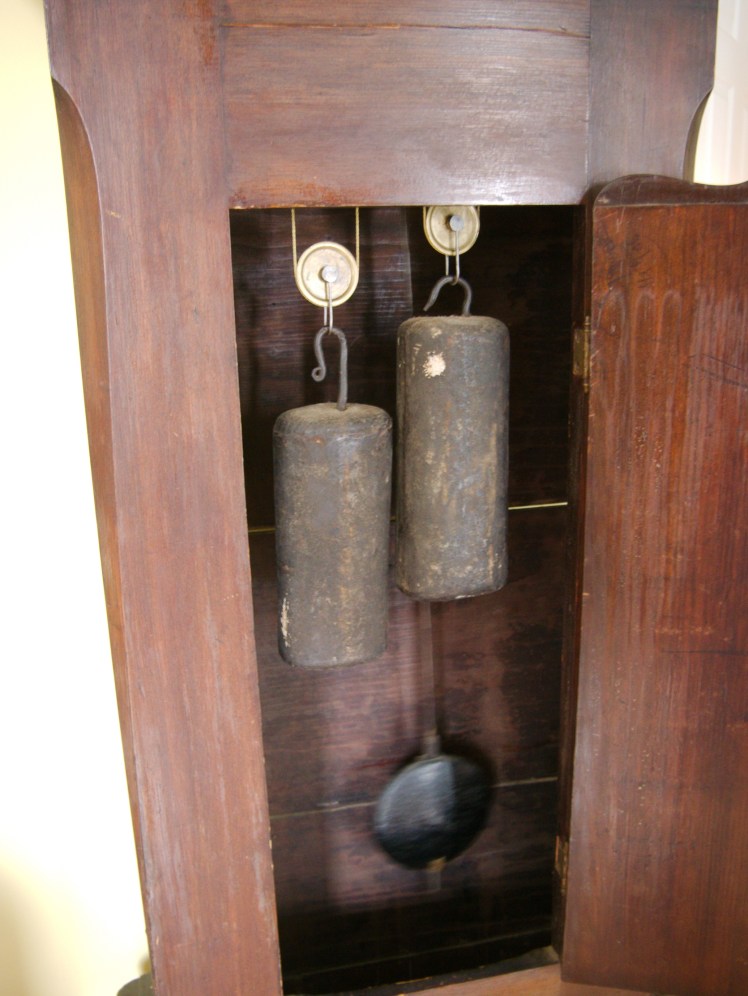
- Remove the pendulum from the rear by lifting and unhooking the top of the suspension spring from the post and lower it gently through the opening of the crutch and put it in a safe place. Be careful not to bend the crutch when removing the pendulum.
- Remove the strike side weight by unhooking it and putting it in a safe place. Before you do so ensure that the dial and movement are stable on the seat-board rails.
- Lift the movement and dial from the seaboard rails or sideboards (if there are nails or screws they must be removed) Nails/screws do not have to be re-used because the weights are enough to stabilize the movement and dial on the seat-board rails. Lift and put it in a safe place.
- If the case is tethered to the wall behind it for stability, unhook or unscrew the tether (some are tethered though many are not).
- Lock the access door or wrap a string around the waist to prevent it from opening prior to moving the waist/base section for relocation or transportation.
It may look intimidating at first but disassembly is really quite simple if you carefully follow a step-by-step process and work slowly and methodically. You are now ready to move or transport your antique tall case clock.
To reassemble reverse the procedure above.
Discover more from Antique and Vintage Mechanical Clocks
Subscribe to get the latest posts sent to your email.

You must be logged in to post a comment.