Tools are essential for clock repair because they enable precision and accuracy, which are critical when working with delicate mechanisms and intricate components. Let’s identify the key reasons.
Antique and vintage clocks can lose significant value if repaired improperly. Using the right tools minimizes the risk of damage, preserving their historical and monetary worth. The right tools, such as screwdrivers, pliers, and tweezers, allow you to handle small parts without causing damage. Specialized tools ensure components are handled carefully and correctly.
Proper tools make the repair process faster and more straightforward. For beginners, having the right tools helps build confidence and competence. They allow you to focus on understanding clock mechanisms without being hindered by improper equipment.
This article will describe some of the tools required to tackle the repair and/or cleaning of mechanical clocks.
Based on years of clock repair experience, I recommend the following essential tools for any beginner’s toolkit. While some of these tools can be sourced from your local hardware store, specialty items will need to be ordered from clock supply companies such as Timesavers (USA), Perrin (Canada), or Meadows and Passmore (UK).
Whenever possible, avoid purchasing tools from craft shops, as their prices are often significantly higher. They are ideal for paint and quality paintbrushes but they tend to charge much higher prices for general-purpose tools. A ball peen hammer bought at a hardware store, for instance, costs half as much as one found in a craft shop.
A suggested list of items
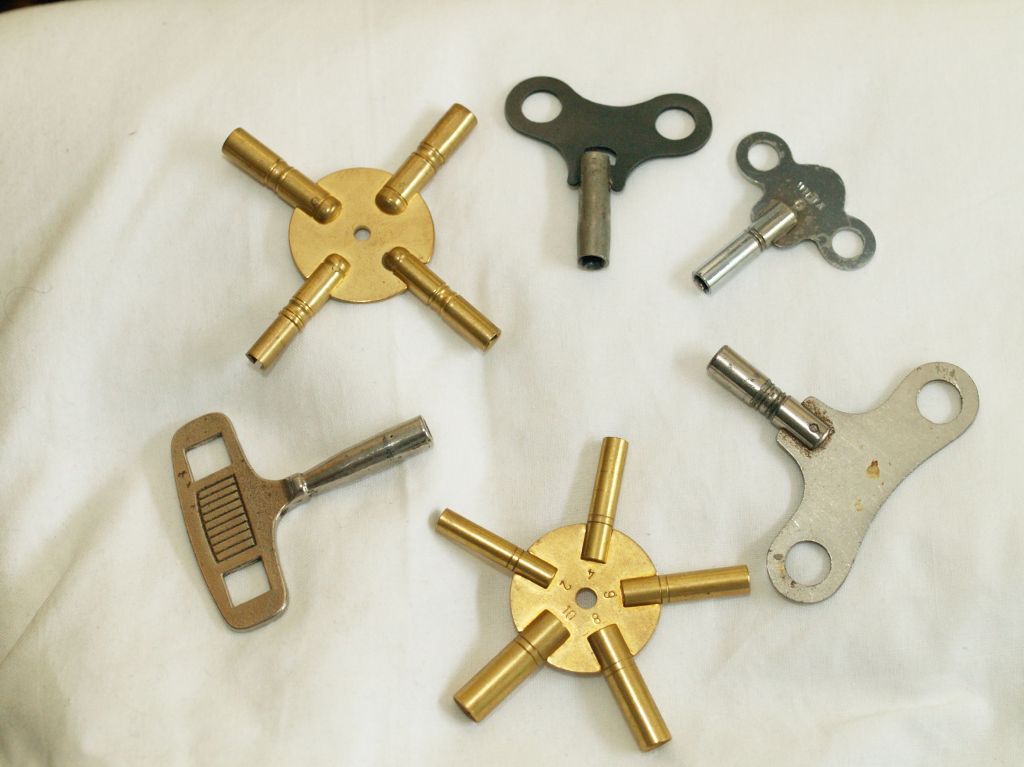
Keys: clock keys come in many different sizes. You must use the correct key for the winding arbours of your clock. The pronged keys in the photo below will fit a multitude of arbours.
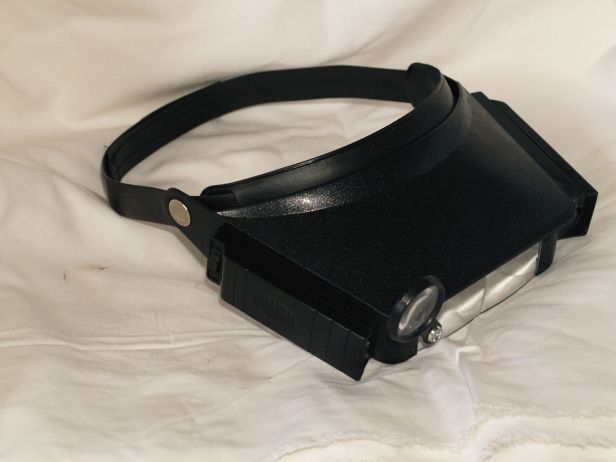
Magnifier: They are available in various strengths and allow a much closer view of your work.
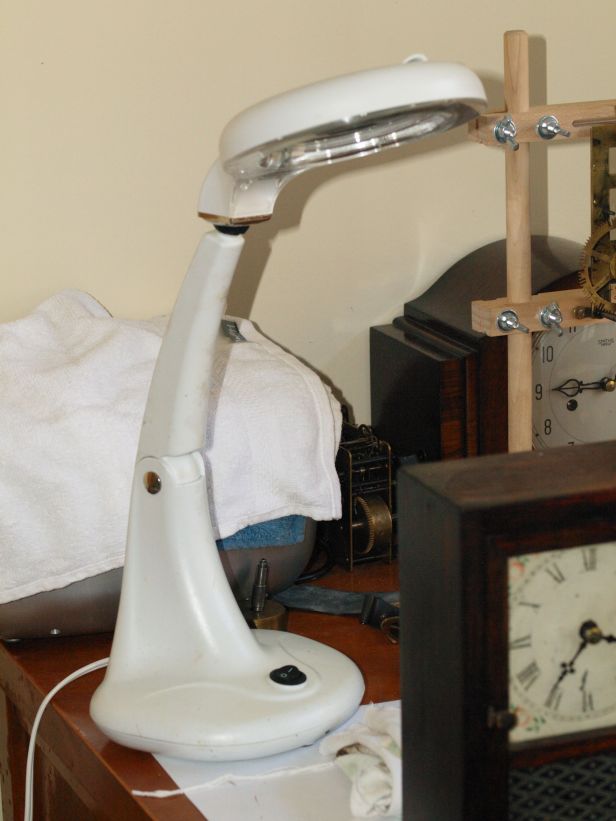
Work light: Illuminates your work, this one articulates and has a magnifier. I have since replaced this light with an LED one. The lamp burnt out and the cost of the fluorescent lamp was more than the entire lamp. Plus the new LED lamp has light temperature and intensity controls.
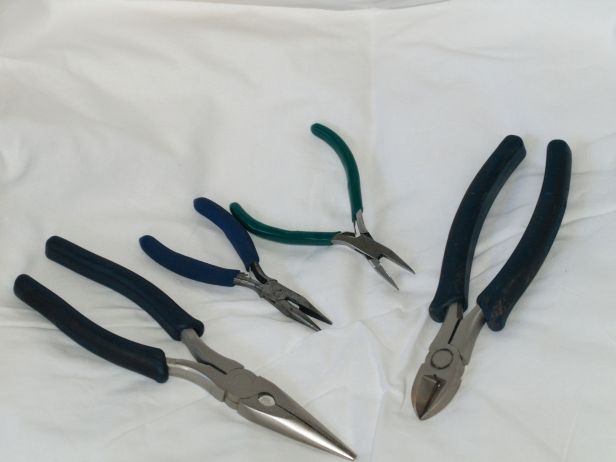
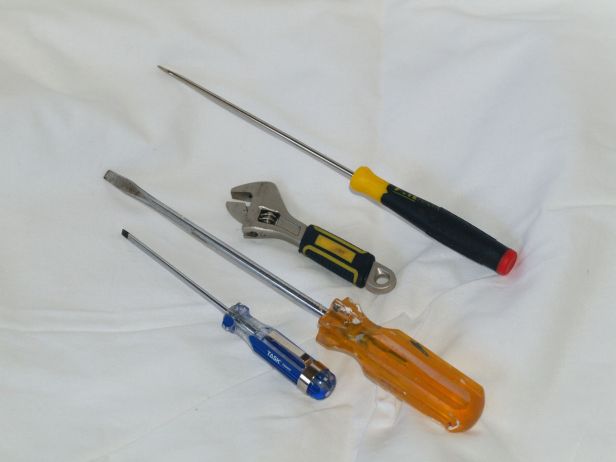
Pliers: A variety of pliers to hold onto your work, release taper pins, tighten nuts, and cut wires. The green handle pliers are non-serrated (flat-nose).
Hammers: A ball peen hammer is very useful (not pictured). The craft clip holder is useful for steadying items that are to be soldered.

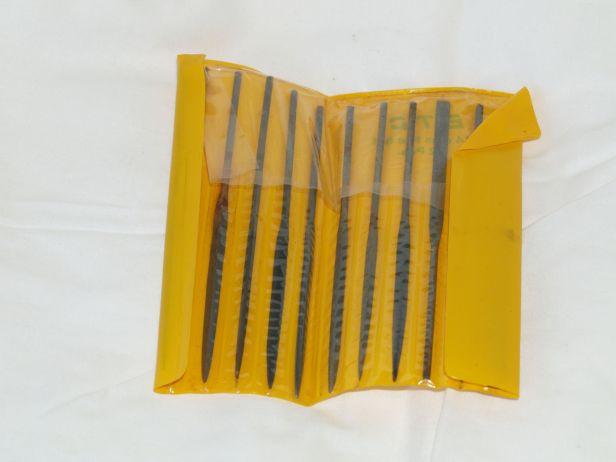
Files: Variety of sizes to help shape or file down anything on a movement. Avoid inexpensive Chinses files and spend a little more on quality ones.
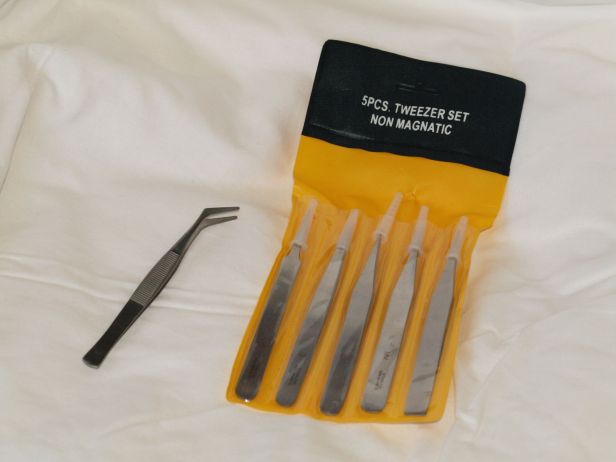
Tweezers: Getting into tight situations, grabbing small parts, and positioning parts into place are typical uses for tweezers
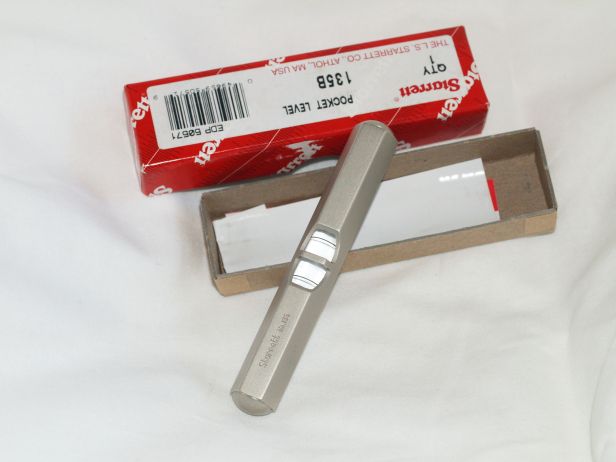
Level: To find the correct beat the movement (clock) must be level.
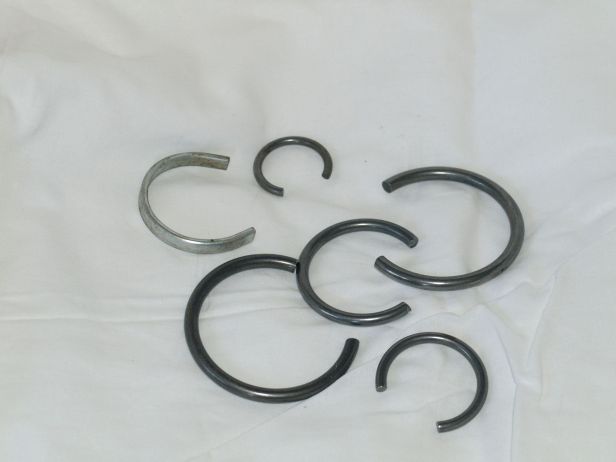
Spring clamps: To restrain the power of the mainspring. The flat clamp (upper right) is for those mainsprings which do not leave a lot of working room. Otherwise, the other round clamps are good for most applications. I prefer the flat clamps.
Screwdrivers: Always handy to remove movements from cases, loosen bolts, and pry parts.
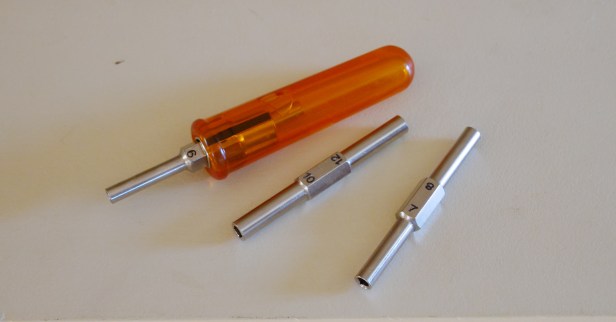
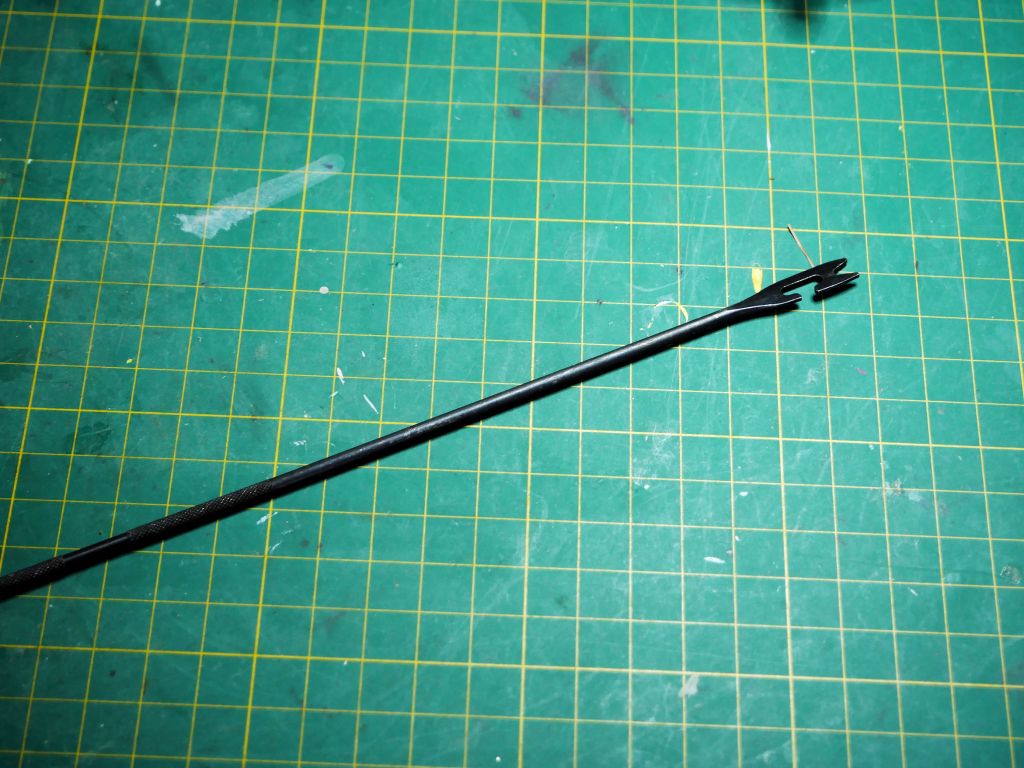
Letdown set: Before working on a movement the mainsprings must be let down or restrained in their clamps. The letdown key is the safest method of letting down the mainsprings. Inserts cover most arbour sizes.
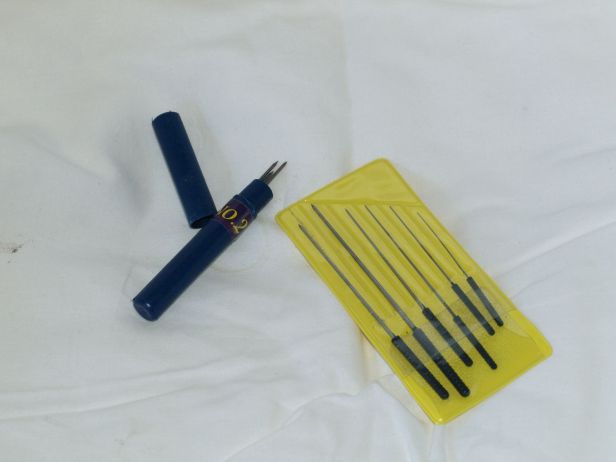
Hand reamers and broaches (cutting and smoothing): For bushing clocks when you cannot afford the luxury of a bushing machine. Cutting and smoothing broaches are useful for enlarging a new bushing when tight tolerances are required. They come in assorted sizes.
Cotton swabs: A variety of cleaning uses.

Clock oil: Once the movement is apart and cleaned it must be re-assembled and then oiled before use. The oil, whether it is conventional or synthetic, must be specifically designed for a clock movement.

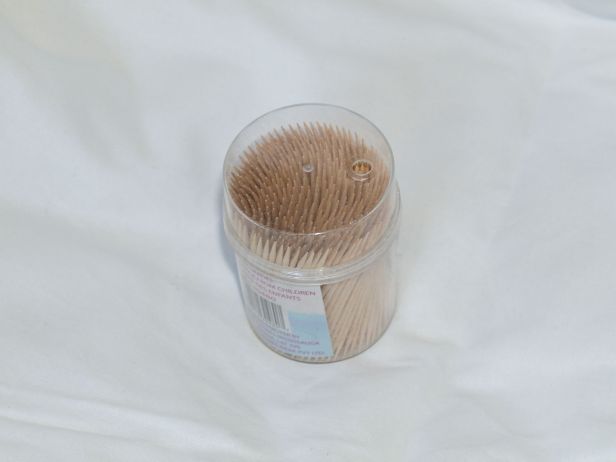
Toothpicks: For cleaning and “pegging out” bushings on a movement
Clock stand: Once the movement has been re-assembled it is tested outside the case for a short period. Gene’s movement stand is a fully adjustable test stand.
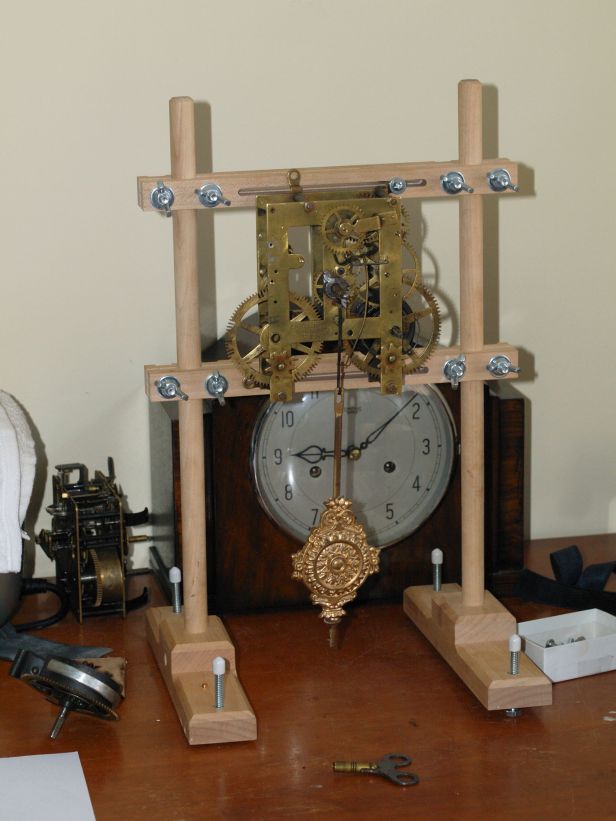
For those handy with a hammer and saw a stand can be made at home with whatever lumber is at hand.

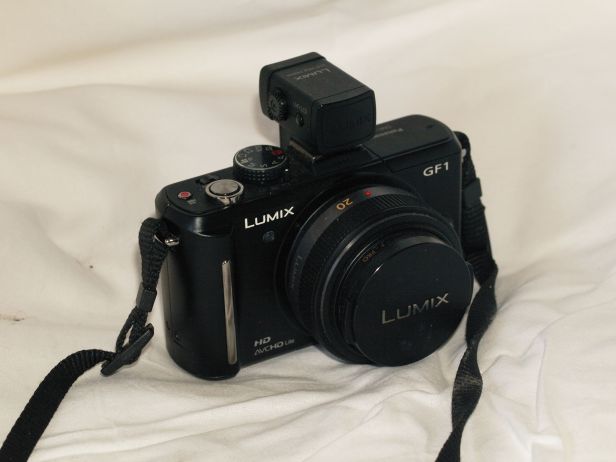
Camera: At every part of the process a digital camera can record critical stages in assembling and disassembling a movement. I use a 50mm macro lens for close work. A cellphone is a perfectly acceptable alternative but one with good macro capabilities is preferred.
Electronic Caliper: Indispensable for measuring the thickness of anything be it springs, pivots, plates, and so on. Available at a clock supply house or save a little money and buy the same tool from a retail outlet such as Canadian Tire in Canada.

Pivot locator: It is an excellent tool for aligning pivots with their holes during assembly.
Build your set of tools little by little to spread the cost. You may already have some of the items I’ve mentioned but buy what you need when you need it. As for those specialized tools, broaches for example, it pays to spend a little extra for better quality.
These are the tools you require to start your journey into clock repair. If you have a tool (or tools) you feel is indispensable for the beginning clock-maker please let me know.
In Part II I will describe tools for those who would wish to advance their skills in clock repair.
Discover more from Antique and Vintage Mechanical Clocks
Subscribe to get the latest posts sent to your email.

I like how you pointed out some of the tools that are needed to repair a clock such as screwdrivers and spring clamps. My dad told me that his old clock that he has in his living room stopped working and he does not want to get rid of it. I will help him look for a repair shop so that it can be properly fixed.
LikeLike
I see you in PA. Thanks for your comment. Some of the tools you need are simply common ones around the house, others, of course, are specialized.
Ron
LikeLike