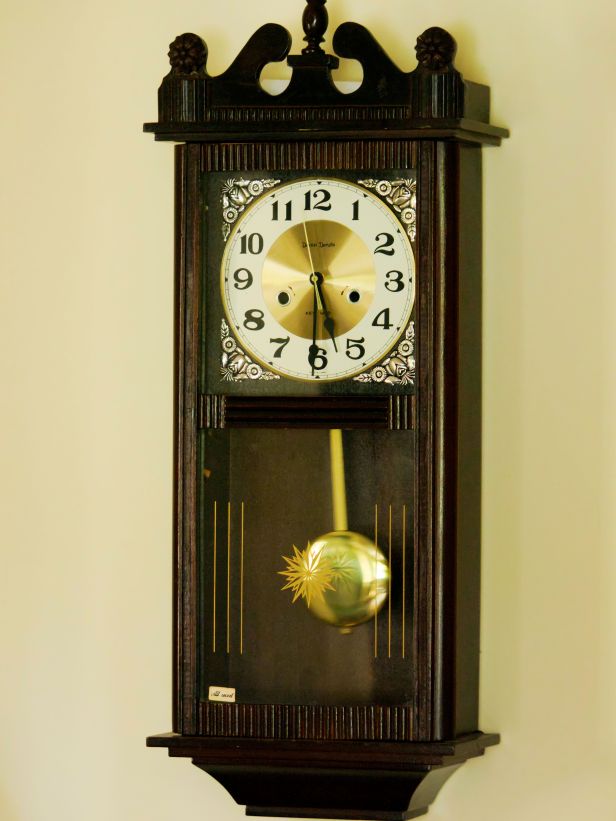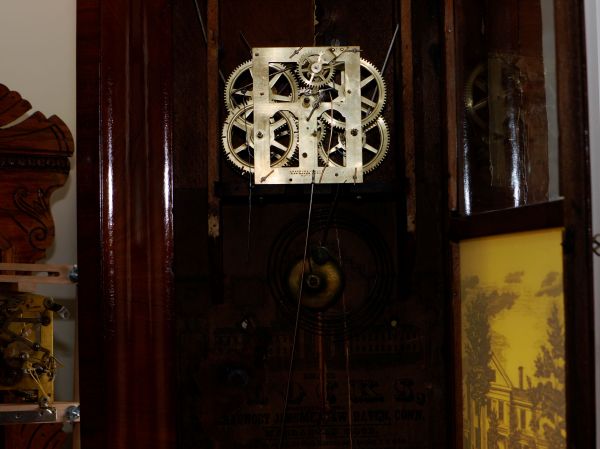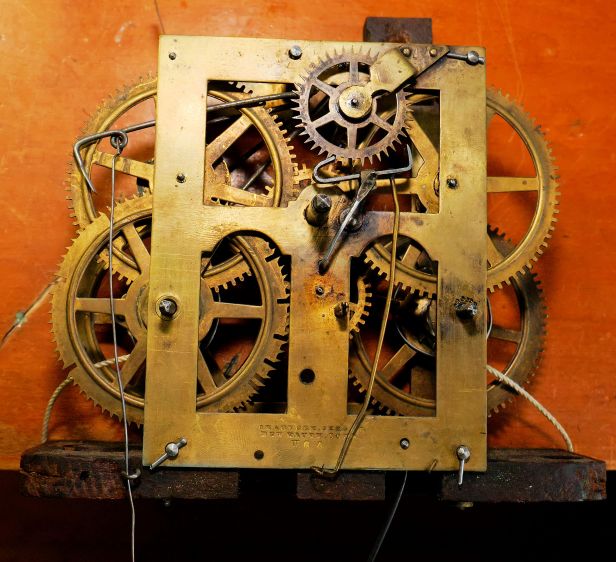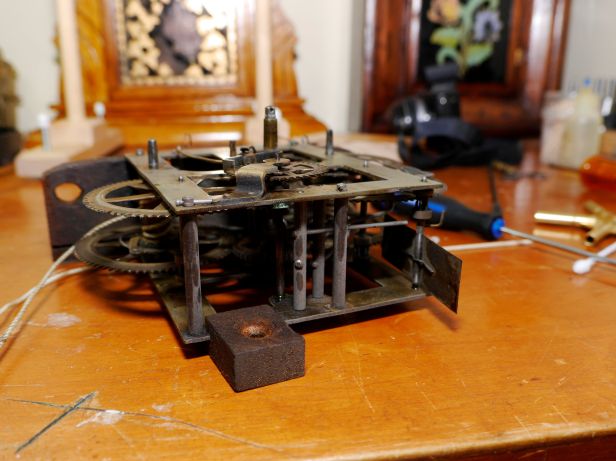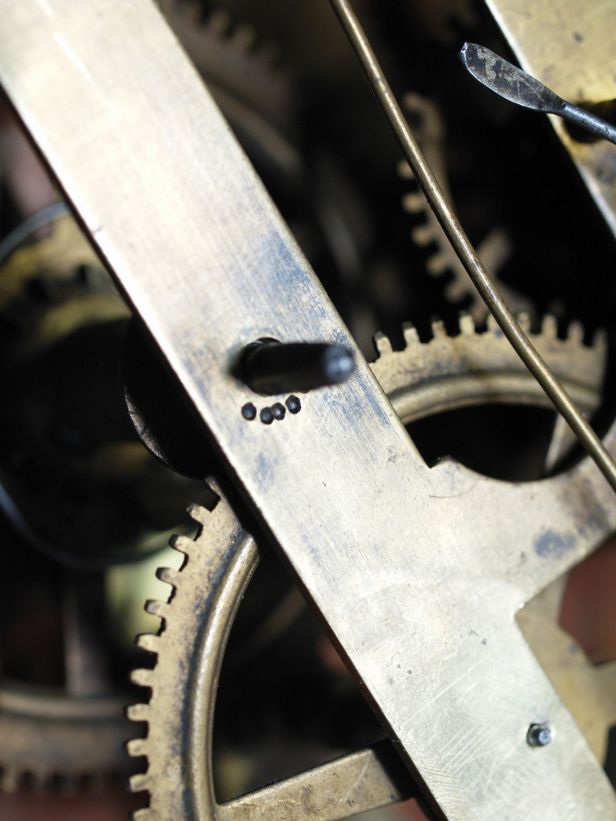

The Macdonald Museum – if you are a clock fan, or even if you are not, this small museum may surprise you

I have been to Middleton, Nova Scotia many times. I have even passed the Macdonald Consolidated School where the clock museum is located without realizing what treasures lay inside. The clock museum represents a small section of the museum, the remainder of which is dedicated to the history of the area.

In the Spring of 2018 my wife and I set off on one of our many mini staycations. On my agenda was a visit to this museum and I was not disappointed.
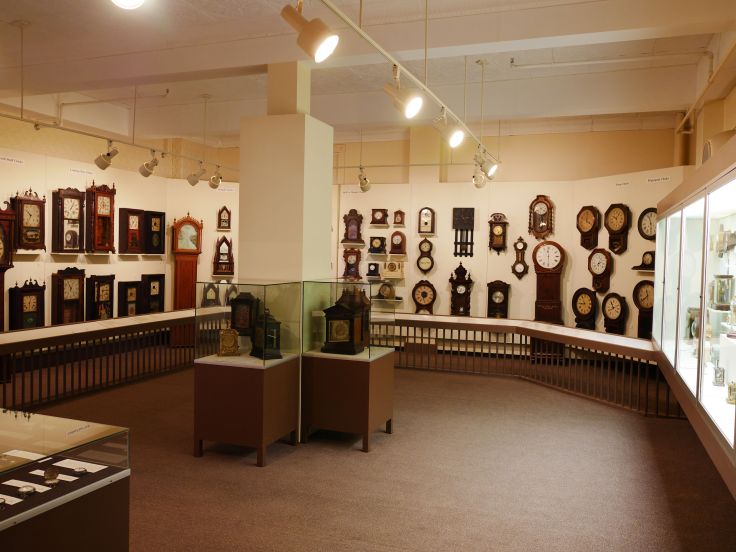
MacDonald Museum main exhibit area
Macdonald Museum main clock exhibit area
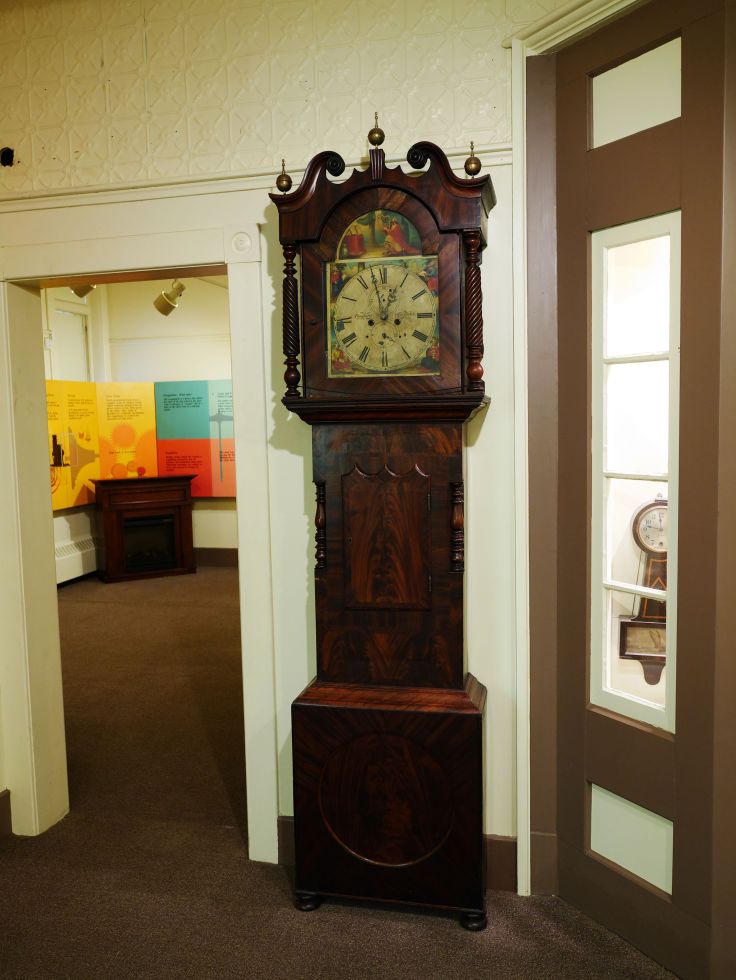
Tallcase clock
Holbeck made tall-case clock
It certainly ranks as the best exhibit in Atlantic Canada

Off highway 1 on School Street, Middleton, Nova Scotia stands the Macdonald museum. I had some expectations because I had been to two well respected clock museums, the NAWCC museum in Columbia PA. and the Canadian Clock Museum in Deep River, Ontario. Though not on the same scale as these two, it certainly ranks as the best exhibit in Atlantic Canada.

According to the web site

The Annapolis Valley Macdonald Museum is home to the Nova Scotia Museum’s collection of over 150 antique clocks and watches. This permanent exhibit showcases items collected by the late Norman Phinney and was one of the primary reasons for establishing the Macdonald Museum. Many of the clocks are in working condition. There are a wide variety of clocks and watches on display, with some dating back to the late 17th century. Anyone interested in clocks would do well to see this exhibit – one of the best in Eastern Canada.

The museum is well laid out with enough information on each of the clocks on display to satisfy the general public and clock enthusiasts alike. Each display highlights its significance as an important development in horological history. We were alone as we walked though the main exhibit area and an adjacent room which contained a fascinating old clock-maker’s shop and a well laid out and informative interactive display on how mechanical clocks work.
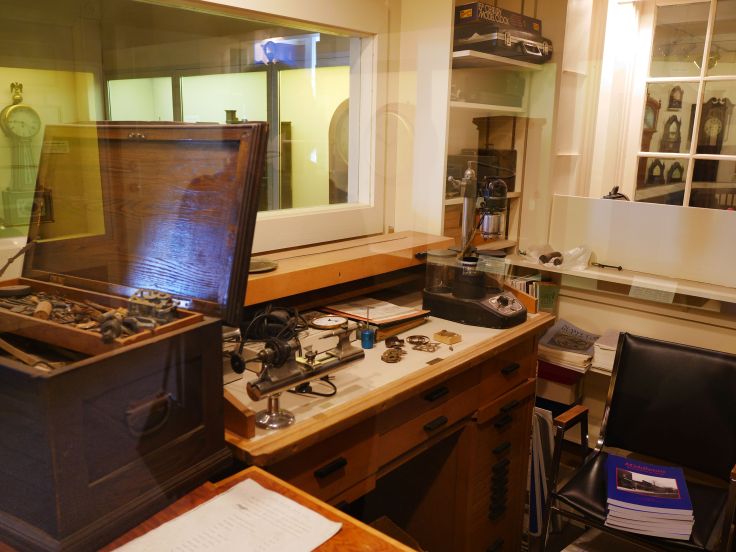
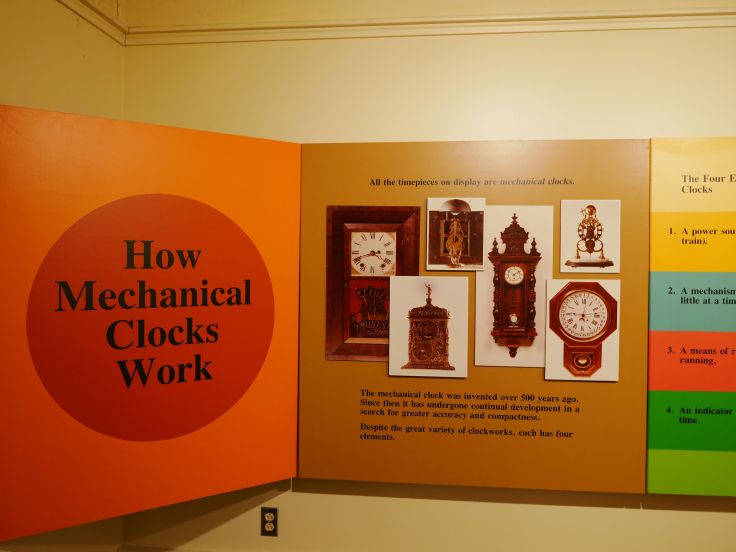
Clockmaker's shop
Clock-maker’s shop
How mechanical clocks work

At least one example from the Baird Clock Co. of Montreal and five examples from the Arthur Pequegnat Clock Co. of Berlin (now Kitchener) Ontario were on display including the Arthur Pequegnat Regulator #1, that the company once advertised as “The finest clock made in America”.
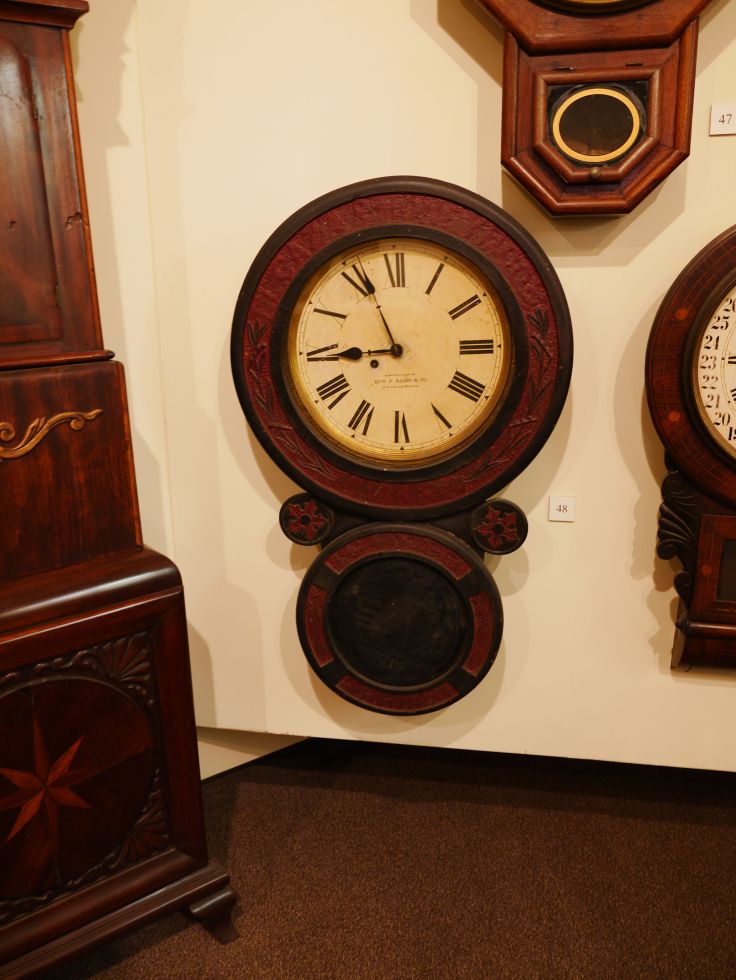
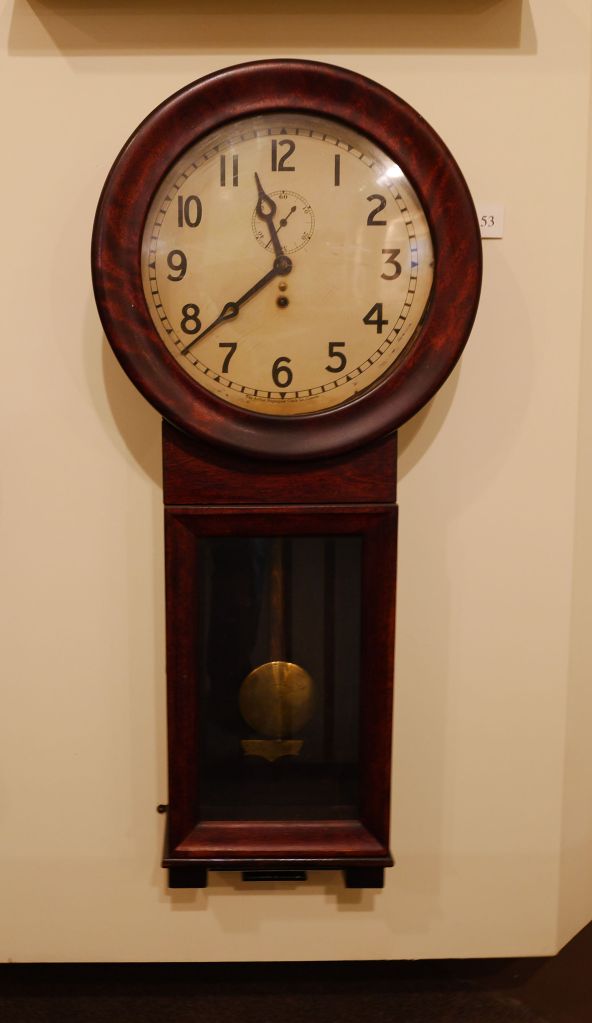
Baird clock from Montreal
Arthur Pequegnat Regulator #1

None of the clocks were running, however. Though the clocks appeared to be in excellent condition, the sound of ticking clocks make for a more authentic experience. All other clock museums make a practice of running some clocks on a rotating basis at any given time.

At the entrance to the clock collection there is a simple plaque dedicated to Norman D. Phinney. Learning more about Norman D. Phinney, his contribution to the Macdonald Museum and the story of how the museum received his clock collection would add to the experience.
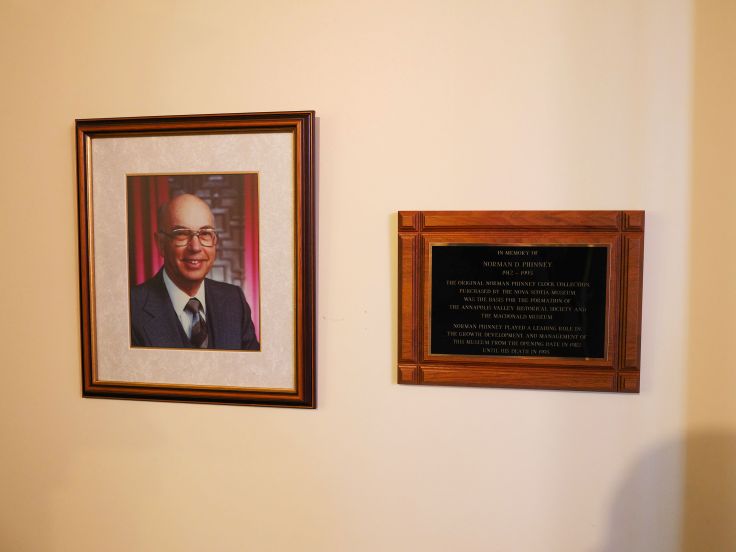
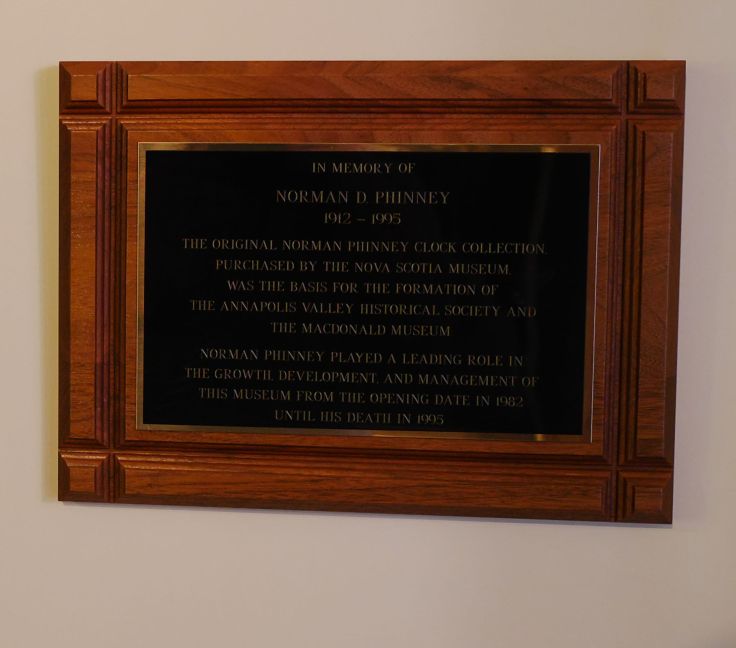
Norman D Phinney
Norman D Phinney

If you are a clock fan or even if you only have a casual interest in the world of horology, this small clock museum may surprise you

Though perhaps not within the scope of Phinney’s original collection, examples from the Canada Clock Co. and the Hamilton Clock Co. or more peddlers clocks from Nova Scotia and New Brunswick would have provided an enhanced Canadian horological perspective.
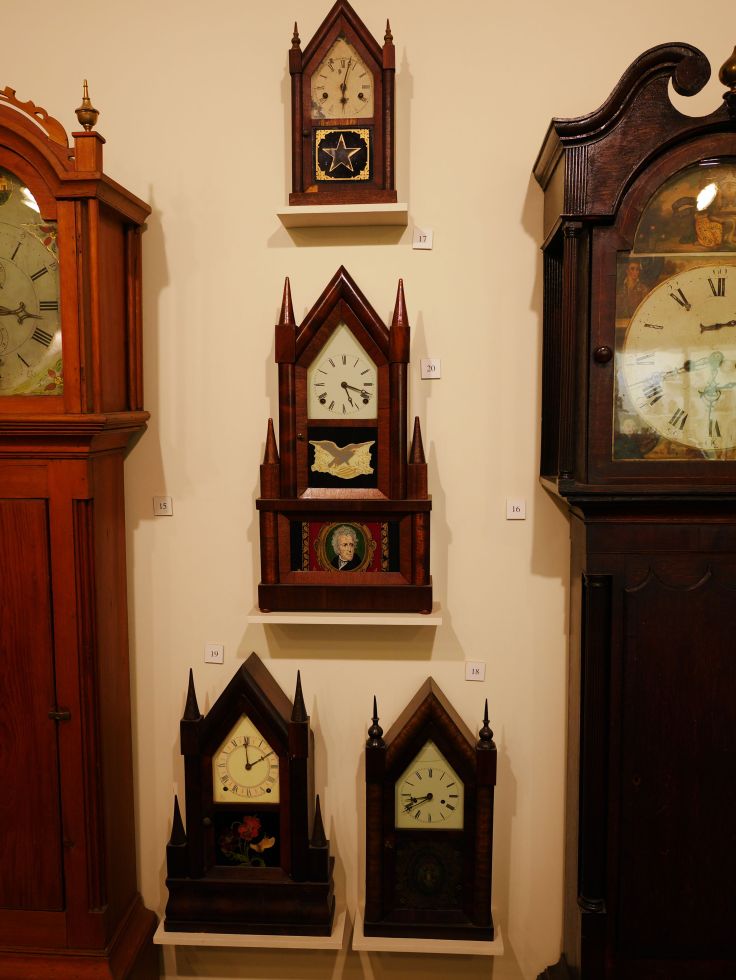
Steeple or sharp Gothic clocks

However, these are minor quibbles and should not detract you from appreciating the high quality of the exhibits which contained British, American, French and Canadian examples or the many styles that included Pillar and Scroll, tall-case, shelf, beehive, steeple, drop octagons, mantel, alarm clocks and Ogee clocks, all of which were well represented.

If you are a clock fan or even if you only have a casual interest in the world of horology, this small clock museum may surprise you.

Oh, and while there, visit the rest of this fascinating museum.

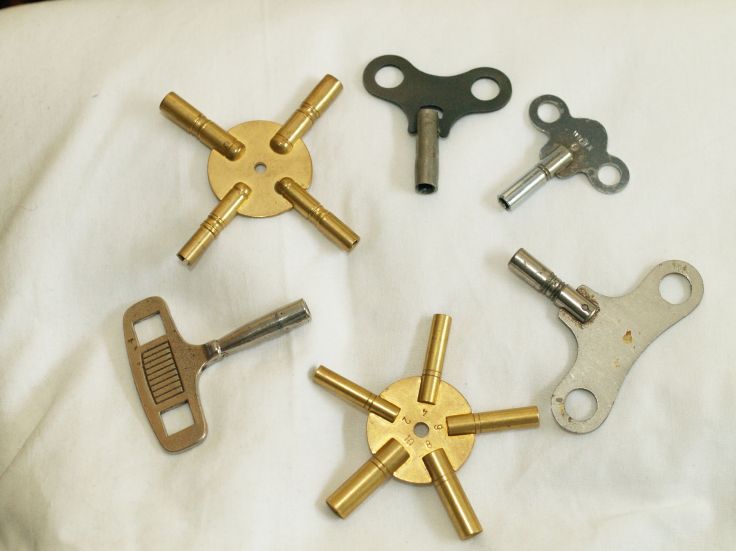
Tick Talk Tuesday #15 -what size clock key do I need?

Tick-Talk Tuesday is about the letters and comments I have received from you, the reader, concerning your clock, issues you might have had, challenges you face or a clock you would like me to profile and my responses to your questions with advice on your particular clock concern. For those comments and questions that stump even me, I consult within my clock circles for the best possible answer.

CM writes,

4 and 5 prong keys and singles

“Hello, I just read your article about keys for wind-up clocks. I have a parlor clock that belonged to my parents. It is on the wall, has a pendulum & requires winding. I believe that it is from the early 1980’s. And made by The Time Mfg. Co. However, I do not have a key – seems that it was lost prior to my getting it. Can you tell me what kind of key I need to get for it? And do you have any that would fit my clock that I could purchase? Thank you so much & have a great day.”

My reply,

“Hi CM. Thanks for coming to my blog. If it is made in the 1980s it is likely Chinese or Korean but it is hard to tell unless I see a photo. If I am correct these are 31 day movements. You could measure the arbours which will tell you the size but it likely takes a #6 or a #8 key which you can find here.”

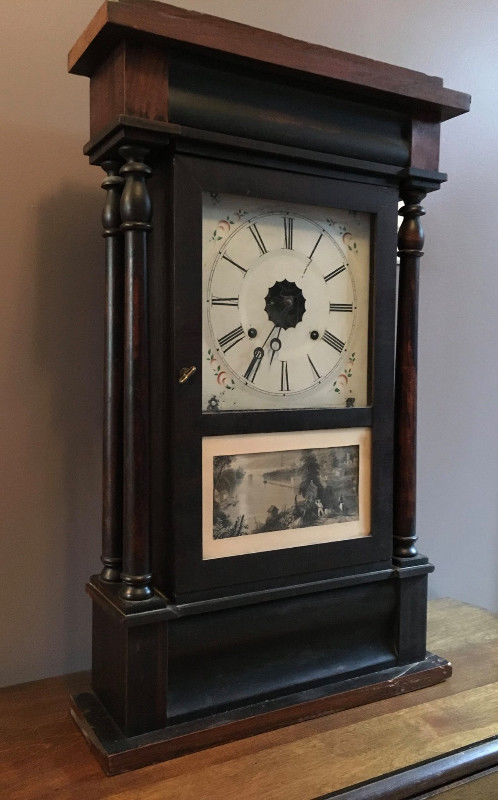
Sperry and Shaw 30 hour 4 column New York Style shelf clock circa 1846-47

4 column Sperry and Shaw 30 hour shelf clock

I have the 30-hour clock bug and my collection of them is steadily growing, but where to put them all? I have not decided where to put this one and for the moment it is on the floor of my work room.

Sperry and Shaw were not thought of as a high end clock company but some models like this 4 column New York style were quite attractive

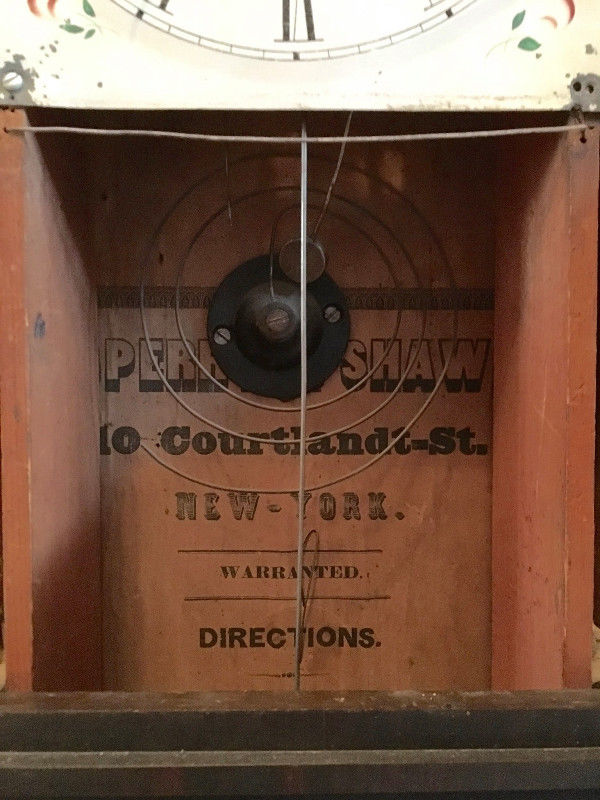
This is a New York-styled Sperry and Shaw 30 hour time and strike, 4 column shelf hour strike clock, measuring 25 1/2 inches in height by 14 inches in width. The 4 free-standing turned columns first drew my attention as I had never seen anything quite like it. While researching the NAWCC site I discovered that this clock was made in or about 1846-47. The label, of which 98% is intact inside the backboard says 10 Courtlandt (not a misspell, there is a second”t”) Street, the company headquarters during the aforementioned period. Sperry and Shaw were business partners and were regarded as distributors and assemblers rather than clock-makers.


Sperry and Shaw's label showing 10 Cortlandt St.
Sperry and Shaw’s label showing 10 Cortlandt St.

They sourced cases and movements, affixed their own stamp on the movement and placed their labels (sometimes over other makers labels) inside the case, a common practice at the time as clocks for the home and workplace both locally and abroad were in great demand.

Not everyone in the clock business was happy with Sperry and Shaw. Consider this excerpt from Chauncey Jerome’s book, History of the American Clock Business.

“These New York men would say that they were agents for Jerome and that they would have a plenty in a few days, and make a sale to these merchants of Jerome clocks. They would then go to the Printers and have a lot of labels struck off and put into their cheap clocks, and palm them off as mine. This fraud carried on for several years. I finally sued some of these blackleg parties, Samuels & Dunn and Sperry & Shaw, and found out to my satisfaction that they had used more than two hundred thousand of my labels. They had probably sent about one hundred thousand to Europe.”

Chauncey Jerome had a few clock-makers/assemblers on his hit list that included Sperry and Shaw and at least managed to sue some successfully.

Sperry and Shaw were not thought of as a high-end clock company but some models like this 4 column New York style were quite attractive, sold well at the time and are sought after today by collectors.

The movement is Jerome-like (Counterfeit perhaps?) and stamped Sperry and Shaw, New Jersey. I measured the plate thickness and compared it to a Jerome in my collection and the plates in this clock are a little thinner.

The narrow brick-shaped weights (4  3/4 inches X 1 inch) fit neatly into channels on the left and right. When I first communicated with the seller, he was not sure if the weights were in the clock. He later emailed to say that it did indeed have weights. I would have passed on the clock had it not come with the weights because the narrow bricks are the only type that will fit into the channels and they would have been almost impossible to source. The weight cords, clearly not original, are old and frayed and will be replaced with simulated gut. How old, well on the first night I raised the strike weight up about halfway and about 20 minutes later I heard a loud BANG. I knew exactly what happened; the cord had snapped and the weight had dropped. Luckily there was no damage.

The open moon steel hands are original.

The upper glass appears original and has the waviness you would expect from a clock over 172 years old.

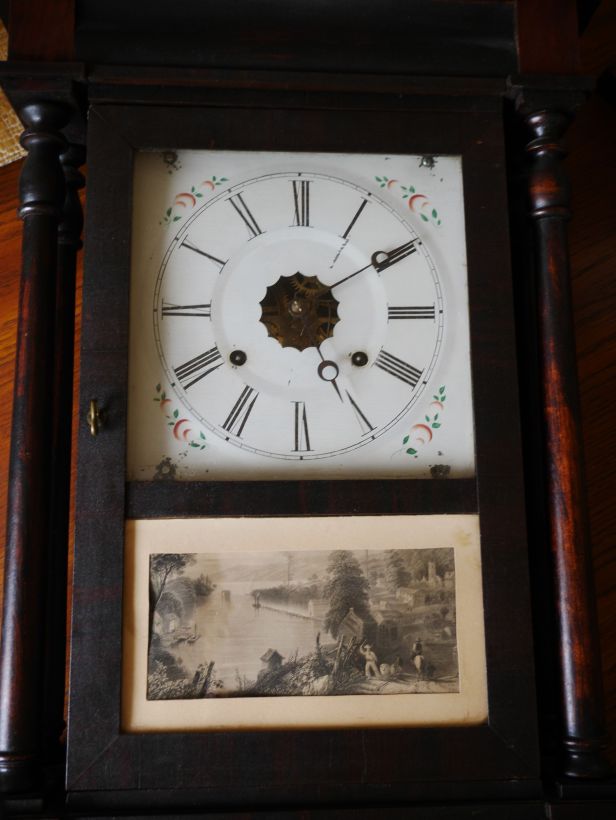
The lower tablet has a cropped image of the Bay of Quinte (Ontario, Canada) taped to the inside – not original but old. The original 18X12 cm steel engraving was drawn by W. H. Bartlett and engraved by J. C. Armytage in 1840; the image can be found here. Since the image is from 1840 and appropriate to the period of the clock, I might just leave it there. It also tells me that the clock likely spent most of its life in Ontario, Canada.

Sperry and Shaw clock showing dial and lower tablet
Sperry and Shaw clock showing dial and lower tablet print

The zinc dial is old though not as old as the clock itself since there is a patent stamp on the back of the dial dated Dec 1, 1863.

Dial patent date of 1863
Dial patent date of 1863, a later addition to the clock

There is also a clock-makers inscription that says, “cleaned by Felo Bros, March XX 1901”. Obviously this particular dial would not have been on the clock at the time it was made. A wood dial would have been appropriate for the period.

Clock-makers inscription in pencil

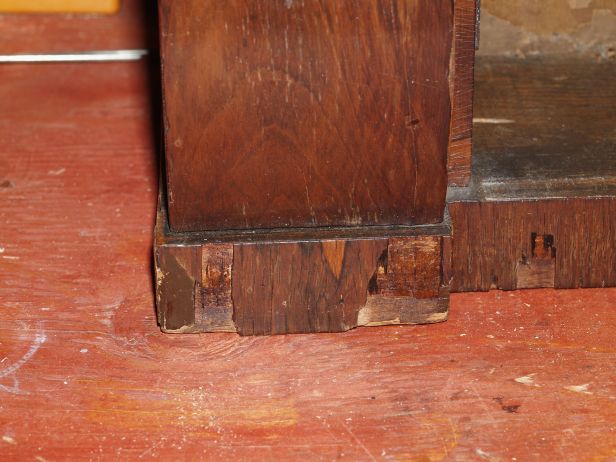
The case looks good…from a distance. The veneer looks like mahogany or walnut, I am really not sure. There are a few small pieces of veneer missing at various places and mostly on the corners, a common issue. It has a two-tone appearance though the case might have been all one colour when made (??). There is a lot of grime on the darker surfaces and I have to decide whether to leave as-is or take it down a little bit to see what’s there. Attending to the veneer issues should be a fairly straightforward process. The break in the right corner of the base is a crude repair and that will have to be redone.

One of several areas of minor veneer loss

The movement is dirty but should clean up nicely. There is not a lot of pivot wear on the front plate of the movement but I will learn more once it is out of its case.

There are a number of other clocks in the queue but I am eager to tackle this one.

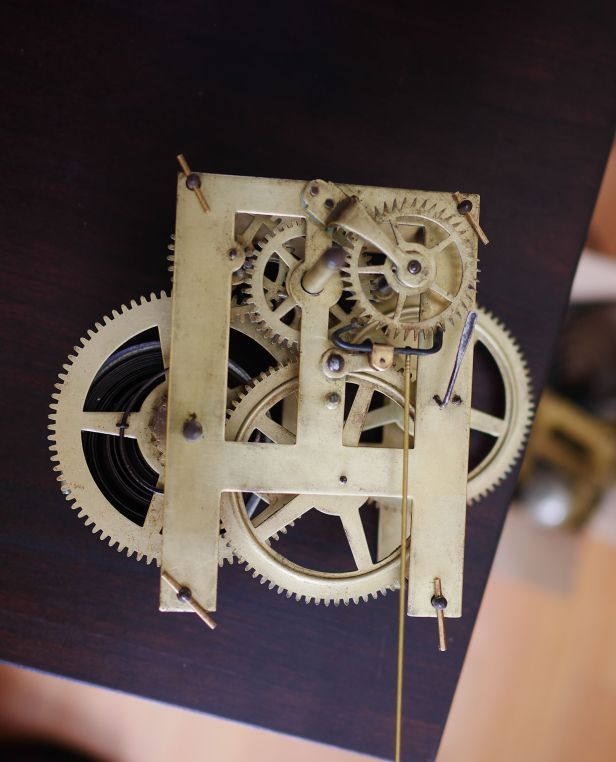
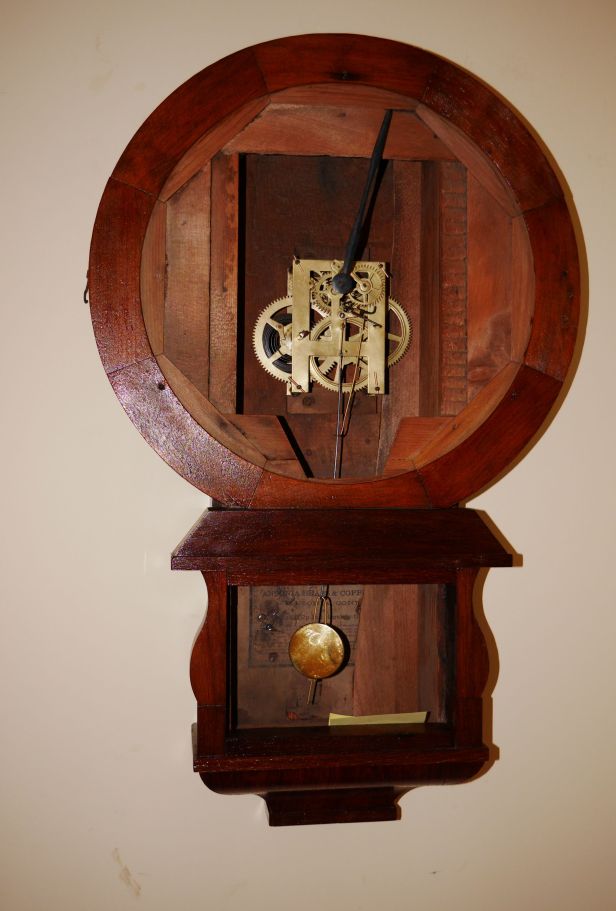
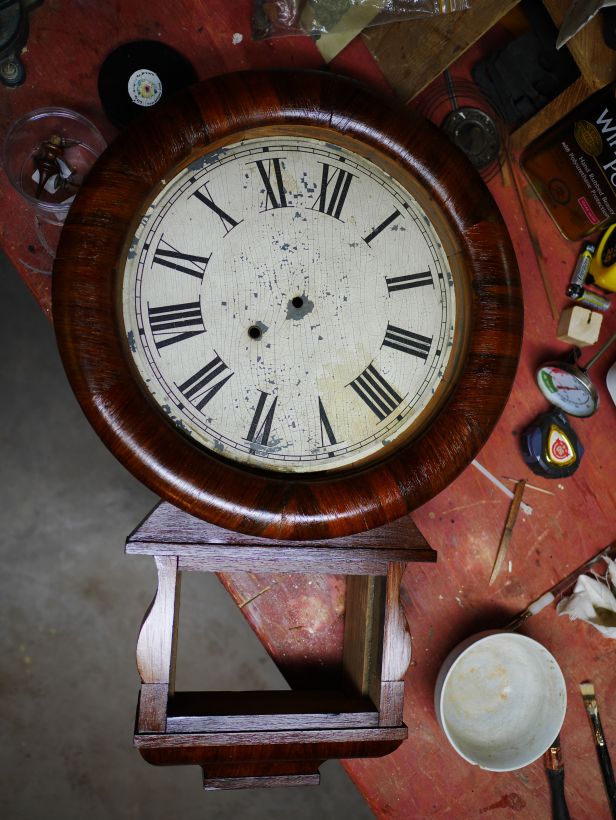
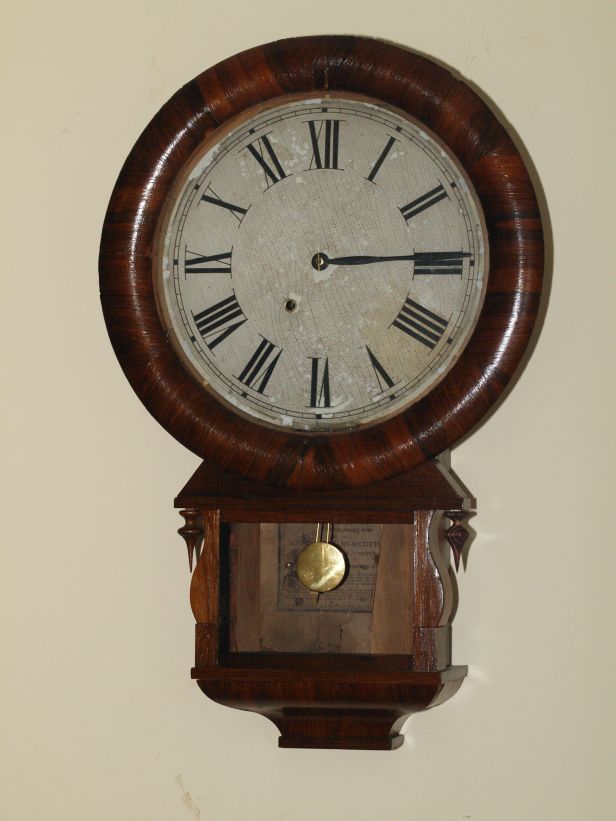
Ansonia Extra Drop wall clock – moving ahead with repairs

Ansonia Extra short drop wall clock
Ansonia Extra short drop wall clock in as-found condition

The photos tell the story

Some time ago I wrote an article on an Ansonia barn find. It is an Ansonia Extra Drop time-only Rosewood veneered wall clock, circa 1880. I thought I would update readers on how this little project is progressing. I was able to find most of the parts but there are still some missing. I will let the photos tell the story.

It did not look like it would ever run again

Siezed time-only movement
Before shot of the seized time-only movement

Cleaned up time only movement
Cleaned and serviced one-train time-only movement

Ansonia movement in case
Ansonia movement in the case and running an 8-day full cycle

The movement was cleaned up with 4 bushings installed and is now able to run a full 8-day cycle. The case received attention with glue repairs, a new backboard, new right finial and a re-lacquering of the veneer surface. The veneer was in good condition and required very minor repairs.

Dial with minor losses, At this point is test fit with the wood bezel
Dial with minor losses

Touched up dial, mounted in case
The dial has been touched up and mounted in the case

Addressing the paint loss on the dial was a challenge. I played with various shades and mixed colours that were a close match to the original. The result is better than it was. The glass fits into a slot on the wood bezel and the fit was surprisingly tight. Had I known I would have glued the bezel pieces with the glass in place. Lesson learned!

I am still missing the drop access door plus its reverse painted glass and the brass bezel that surrounds the dial face. I will make the door but will leave that project for another day. My search for the brass bezel continues.

As I progress with this restoration project I will keep the reader up to date with changes.

Ansonia cottage clock – a neglected clock brought back to life

Last summer (2017) my sister asked me to look at her newly acquired Ansonia time-only 1-day cottage clock (circa 1895). “How much did you pay for it”, I said. “Only $25 but it doesn’t work, something is wrong with it,” she said without being specific. And she was correct.

The clock would have not cost much at the time, perhaps a dollar or so but today people collect small clocks such as this and prices can be higher than the more common mantel clock. In those days for an extra 50 cents you could buy a time and strike cottage clock with an alarm feature but his one is pretty basic. They were cheaply built, somewhat disposable since very few made their way to the repair shop and not as many have survived.

Several months have gone by and I thought I should take a look at the clock, repair the movement, spruce up the case and dial face and return it to my sister in working condition. Having completed a number of other projects I decided I had time to tackle this one.

Time-only 30 hour movement

It was dirty as expected and the gears generally loose, particularly the winding arbour. It was clear something around the mainspring was amiss. The click was loose and would not engage every time.

Top plate is removed
The top plate is removed

Time-only movements are the simplest to work on and this is no exception. If you are starting out in the world of mechanical clocks this is the movement to begin with. The movement is very small in comparison to mantel or kitchen clocks and measures only 2 inches wide by 3 inches tall. Despite its diminutive size, it is easy to work on. The case itself is only 9 1/2 inches tall by 7 inches wide by 3 1/2 inches deep.

The movement had been worked on before. The click anchor screw was stripped and there were punch marks on the escape wheel bridge.

New bushing but 2 punch marks are still showing
New bushing but 2 punch marks are visible

The most troubling issue was the main wheel arbour which had detached from the gear. It took a few punches on the brass shroud to push it in back into place and secure the wheel to the arbour. Not the prettiest of repairs but very functional. The click was also loose and would barely engage the ratchet. It took a couple of hits with a hammer on the holding pin to secure it tightly in place.

The arbour is now secured to the wheel and the click has been repaired

Four bushings were installed, the centre arbour (rear), the rear of numbers 2 and 3 wheels and the escape wheel bridge.

Centering prior to drilling a hole for a bushing
Centering prior to drilling a hole for a bushing. You can also see how small the plate is

The clock was mounted on the test stand and run for several days without issue. Once testing was completed it was returned to its case.

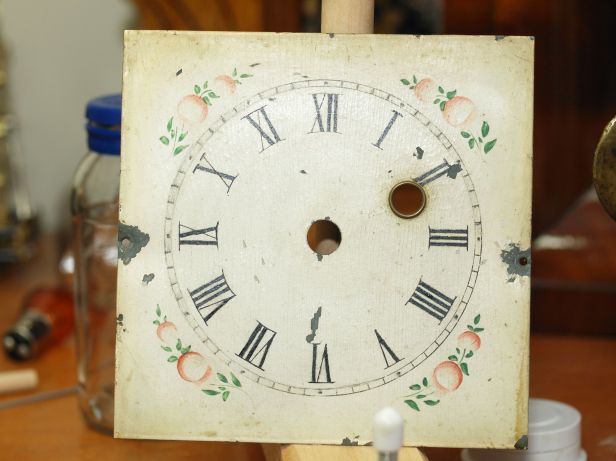
The numbers on the dial were somewhat faded. I decided to address the numbers with a little paint.

Faded numerals on dial face
Faded numerals on the dial face

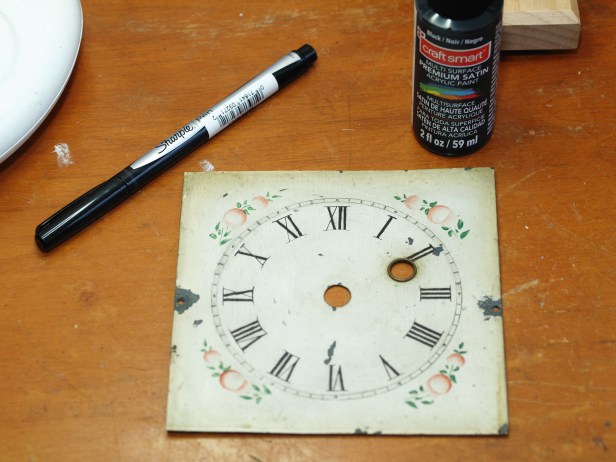
I was concerned about being too invasive when touching up the dial but I thought the numerals should stand out a little more. I used a number 2 paintbrush and touched them up using flat black acrylic metal paint and a Sharpie pen for the small lines. The effect is subtle without being over the top.

After touching up the numbers with paint and a Sharpie for the thin lines
After touching up the numbers with paint and using a Sharpie and straight-edge for the thin lines

The case was cleaned up with a toothbrush and Murphy’s Soap. There is some finish loss on top but I will leave that as-is.

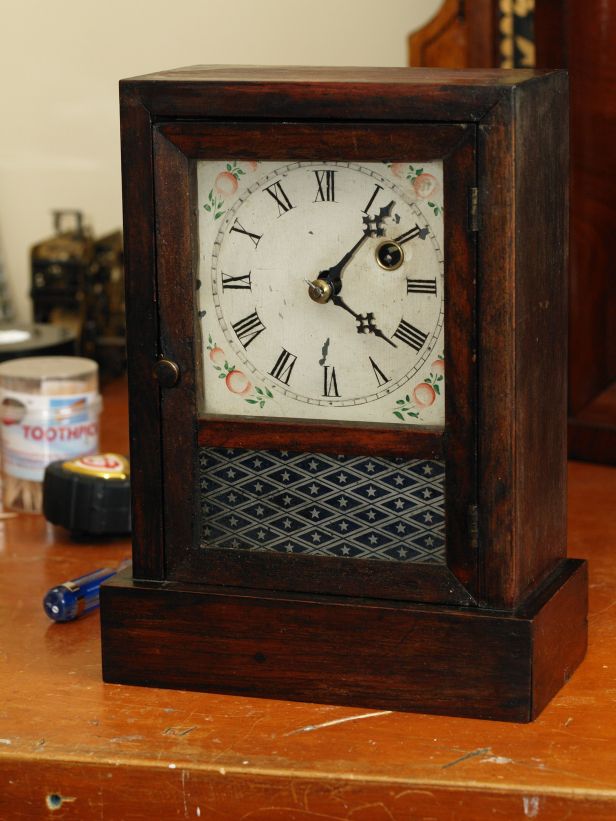
Here is the completed project. The movement is now back in its case.

Assembled, in beat and ticking away strongly

The hands, which appear original, are attached and the clock is running better than it has in years.

I am sure that my sister will be pleased when the clock is returned to her.

Arthur Pequegnat Bedford mantel clock – an interesting find

As regular readers know I am a fan of Arthur Pequegnat clocks not just because they were made in Kitchener, Ontario, Canada but they are attractive, well made and hold their value well (in Canada!).

Eddy's photo of the clock
Eddy’s photo of the clock

I have had clocks given to me in the past but this was a rather unusual situation. As readers know I publish at least seven or eight articles a month in order to provide interesting content on all aspects of mechanical clocks. I publish a regular feature called Tick Talk Tuesday in which I profile the mail I receive from readers. The mail is private email and not comments after a blog article. I receive many emails you will not find on my blog. Some people prefer writing to me privately and that is perfectly fine.

I received one such email some time ago from Eddy who lives in the Quebec City area (Province of Quebec, Canada). Eddy was researching my blog and discovered that I admired and collected Canadian-made Arthur Pequegnat clocks. He wondered if I would have an Arthur Pequegnat clock added to my collection.

Because it was an Arthur Pequegnat I was immediately interested but I did not expect a reply. To my surprise Eddy answered with five photos of the clock from various angles. It was a mantel clock in pretty rough shape and after seeing his photos I was still curious even though it likely required a lot of work to restore it.

Top of the clock
Top of the clock

In his email Eddy explained that he was having serious health issues and was taking stock of his life. He had a number of antique and vintage items that his father and grandfather had left him and he felt they should be passed on to someone who would appreciate having them. As Eddy explained, “My father had that clock as a trade against work done for people he helps with their house and lawn chores. He gave it to me since he’s got too many, just like my grand-father did. He was okay with me parting with it.”

I wrote back and told him that a meeting was indeed possible. We would be passing through the Quebec City area in the next few days on our way to our cottage in Quebec to open it up for the summer. We (my wife and I) had even planned to stay in that area for the night. We could stop by to have a look at the clock. Eddy then provided me with his address and telephone number. A meeting day and time was set up.

After nine hours of driving we arrived at his door. He invited us in and we spent a very pleasant two hours getting to know each other, discussing my collection of clocks, talking about the clock in question, his fathers hobby of searching out old antiques and finally, matters related to his struggle with a serious illness.

broken brass hinge
broken brass hinge

I was a little confused. Was he was actually giving me the clock or did he expect money in return so I decided to ask him straight out. No, he said, you can have it. he then brought out three other clocks to the kitchen table, a cottage clock, a steeple clock and a swinger. He asked me if I wanted those as well and I thanked him for the offer but declined. While they were very nice clocks I felt awkward taking all of them for nothing. So, we left with just one clock.

We walked out the door with clock in hand and for the next hour of our drive we talked about Eddy and his gift of an Arthur Pequegnat clock.

The clock was complete with original hands, pendulum bob, coil gong and of course, the signature Arthur Pequegnat movement with nickel-plated steel plates. The only visible sign of an issue with the movement was the time side mainspring which, as Eddy explained, could not be wound with a key. Damaged veneer, side trim pieces splitting open was clear evidence that at some point the clock had been dropped or fallen hard. The impact point was the very top of the  clock. Yes, it was in rough shape!

A challenge to repair? Yes, but I graciously accepted the clock knowing that I would have to spend several hours putting it right.

The sides and front were coming apart
Both sides and the trim front were coming apart

Thanks to Eddy I am now the new owner of an Arthur Pequegnat, Bedford model that I will add to my collection of four other Pequegnat clocks. In a later post I will detail the repairs to this fine Canadian made clock.

Eddy suggested that instead of offering him money that we donate to a charity and so a cheque went to the Canadian Cancer Society. I have never given names to my clocks but this one will always be called Eddy in honour of a individual who felt strongly that a family treasure should go to an appreciative owner.

Looking for an antique Ogee clock? Now is the best time to buy

Ogee clock prices seem to be at their lowest level in years. If you have your heart set on an Ogee clock, there is probably no better time to buy than now.

Ogee clockclock design that originated in the United States in the 1830s, distinguished by a case (usually pine) the front outer edges of which are curved into an S-shape (ogee). This shape is formed by the union of a convex and a concave line. A mass-produced variant of the shelf clock, the ogee clock stands about 30 inches (75 cm) high and is usually weight-driven. The movements were usually made of brass and were made to run for 30 hours or eight days. (Brittanica.com)

Earlier this year (2018) I bought three Ogee clocks at an estate auction. There were about a dozen clocks up for bid, some gingerbreads, a couple of mantel clocks and a few Ogee clocks. Fearing that the auction would bring out collectors I surmised that the clocks would fetch somewhat higher prices. Though there were many clocks there were few aficionados. I scored three clocks, all were in very good condition though they were running poorly.

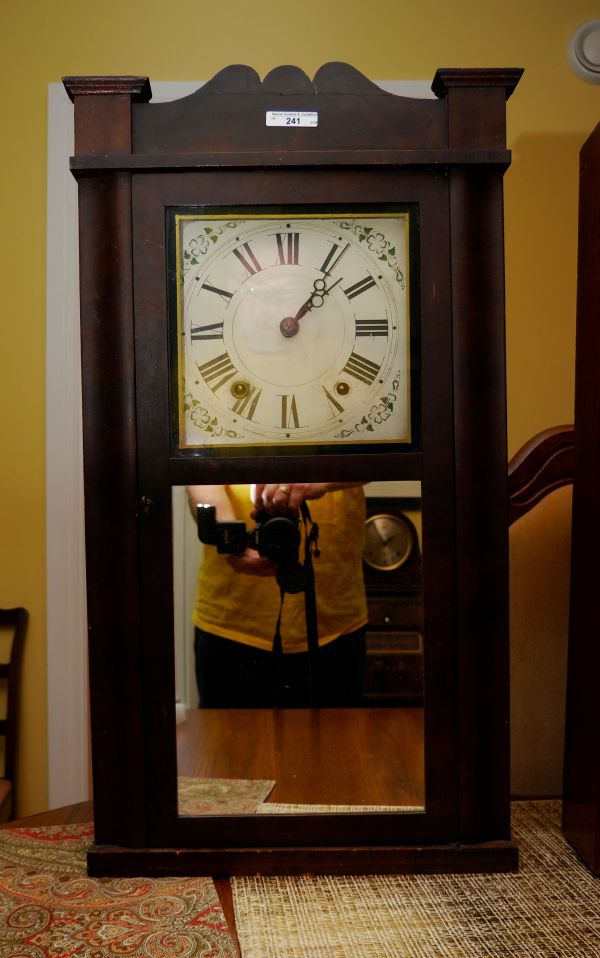
Daniel Pratt reverse ogee and splat clock

This Daniel Pratt Jr clock caught my eye. It is reverse ogee and splat, time and strike with wood movement made in the mid-1830s. My winning bid was a mere 30CDN. Ogee clocks with wood movements have sold for at least 200CDN in years past and eBay asking prices for Daniel Pratt Jr. clocks are typically between 60US and 200US. Although Ogee clocks have hit rock bottom in Canada the same may not be true elsewhere.

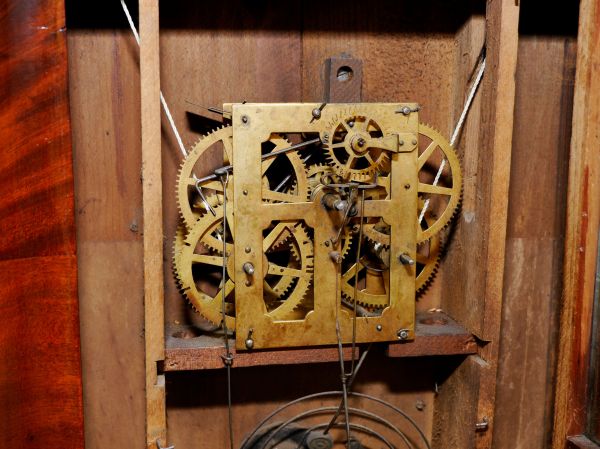
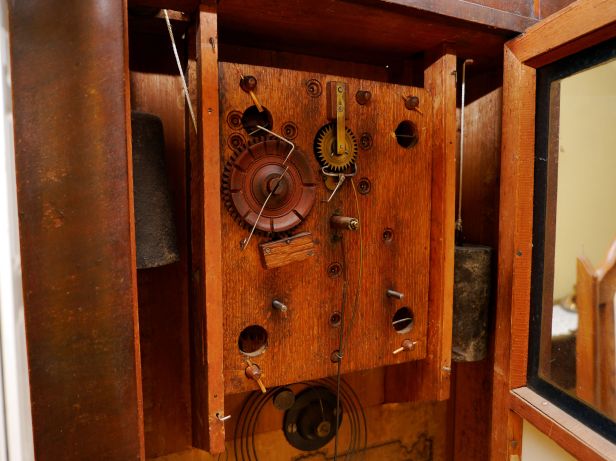
Wooden movement, time and strike

I have written about the decline in clock prices in a previous post. There is a legion of unwanted clocks out there. EBay and other online sites are flooded with ordinary antique clocks though special interest clocks still command higher prices. Many reasons are attributed to the decline though the poor economy in recent years is a major factor. Since 2008 clock prices have been dropping steadily and an upward direction in the near future looks dim. Prices are at or near the bottom. As the economy improves and antique buyers return to the marketplace we will see an uptick in values. In the meantime, now is certainly the time to buy.

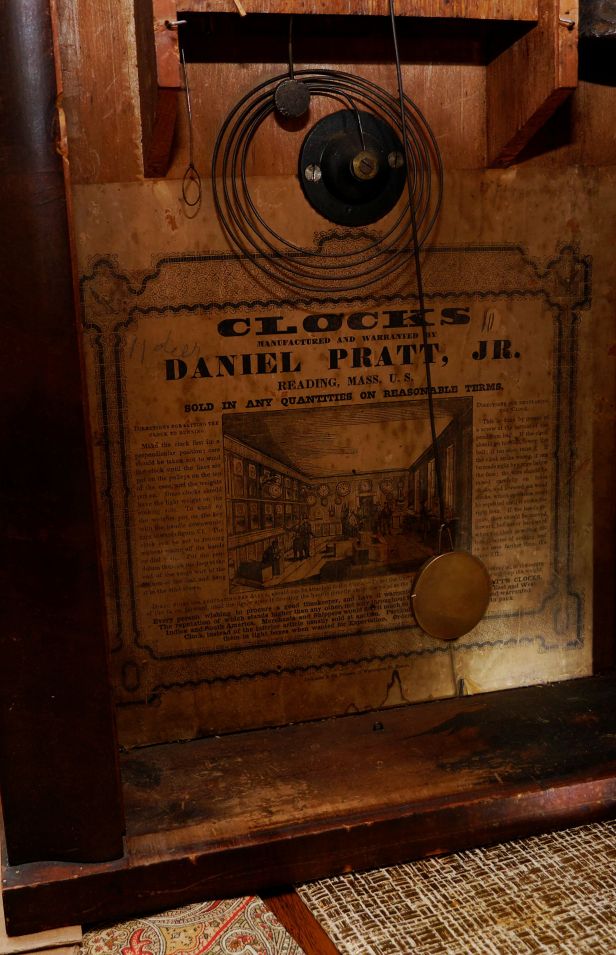
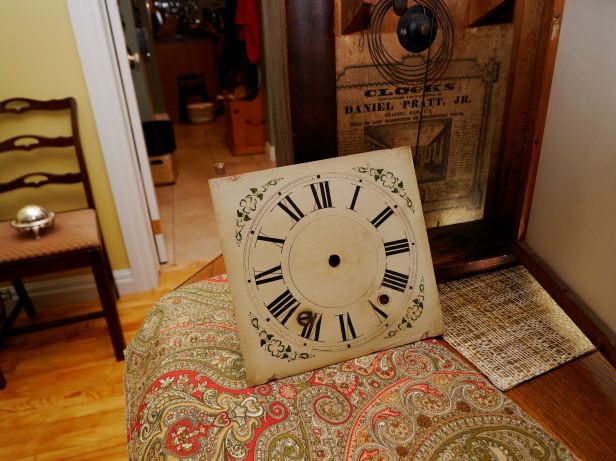
Clocks, manufactured and warranted by Daniel Pratt Jr

I paid 60CDN each for the other two Ogee clocks, one a Chauncey Jerome 30 hour time and strike, circa 1857, the other, a George H. Clark 30 hour time and strike, circa 1860.

Chauncey Jerome 30 hoir Ogee clock
Chauncey Jerome 30 hour Ogee clock

George H Clark Ogee clock
George H Clark 30 hour Ogee clock

Sellers are posting inflated prices but a clock is only worth what the buyer will pay. Do your research and learn to shop with a critical eye and you be rewarded.


240 clock posts later and still ticking away

The other day I decided to explore my humble beginnings and realized that 240 posts ago was post number one. Three years ago I had recently retired and I decided to look into blogging, something I always wanted to do. I never considered myself a great writer. I do not have that natural flair that some people seem to have for writing but I wanted to give it a try. I had some thoughts and ideas that I wanted to communicate with an audience that was looking for something a little different.

I attended a WordPress session at my local college and was very impressed with how easy it was to set up a blogging site. Anyone can do it said the facilitator and I wasted no time getting started. WordPress impressed me as a very intuitive package then and after 3 years I am still impressed with the power of the product.

This year as some of you know I decided to buy a domain name which I think is a great name and says everything it needs to,  antiquevintageclock.com and a 1-year automatically renewable subscription. I won’t go into the additional benefits of the new package suffice to say the time was right for a change. The result has been a slight uptick in hits and exposure to more powerful options within WordPress.

Just a note about hits. In the first week or so of my new domain name my hits dropped dramatically, something to do with Google’s ranking analytics and not unusual for a brand new domain name. Of course, after I hit the migrate button and saw my hits drop I found an article that spoke directly to making preparations beforehand to avoid low hits after migration but too late for me. It would have been nice for a WordPress warning box to pop that would have read, “Oh, before you do that you may want to read this”

So, here is what I said three years ago. It was a short article and I remember at the time what a real struggle it was to put those first few words together.

I am no more than a clock collector and tinkerer. I am not a trained horologist nor do I have a great talent for clock repair or even getting a simple clock back to working order, but I find the world of horology to be quite fascinating.

It is a relatively new hobby for me which began with the purchase of a Daniel Dakota 2-train wall clock about 3 years ago.

The clock that started my collection, a humble Chinese clock that still ticks today.

Now I know what you are thinking. Why start with a Chinese made clock which most would consider inferior to almost any other clock in the world. Well, it was pretty cheap and it piqued my interest in collecting. From there I moved on to a Ridgeway grandfather clock and to my current collection of Mauthe, Seth Thomas, Hermle, Forestville, Sessions, Smiths Enfield, Muller and Pequegnat clocks.

I intend to profile my clocks both old and newly acquired on this blog and describe my attempts to repair and maintain my modest collection. I might even solicit a little help from my fellow clock enthusiasts.

Some of the nicer things about clock collecting are that is a great conversation starter and it allows me to combine my other passions, photography and traveling. Finding good clocks means traveling around the province of Nova Scotia, meeting interesting people along the way and is some cases getting fabulous deals. All the photos on this site are my own. I will try to capture the beauty of these old mechanical clocks and talk about the pedigree if I can learn anything about the history of any of these clocks..

Stay tuned. It is all a learning experience and as I bravely go further into the hobby I will be able to share my many experiences.

Well, I am still doing what I set out to do, profile my modest collection and pass on the clock repair techniques I have learned to the novice and intermediate clock repairer. Do I know more than I knew then? Sure, isn’t that what learning is all about? I am still tuned in and I hope you are too.

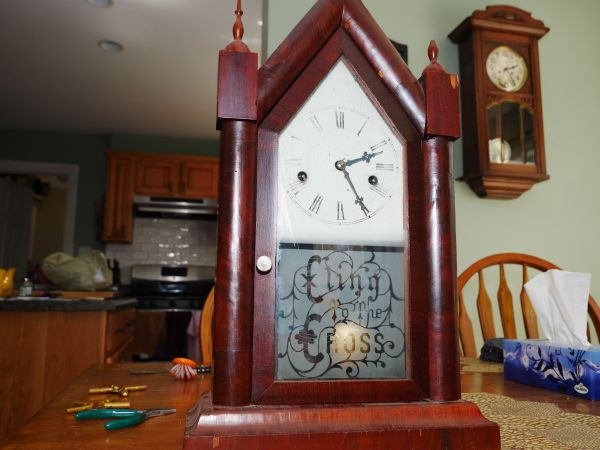
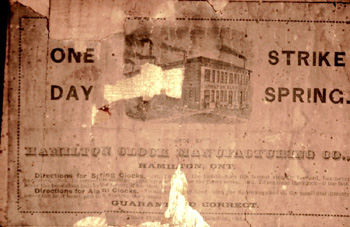
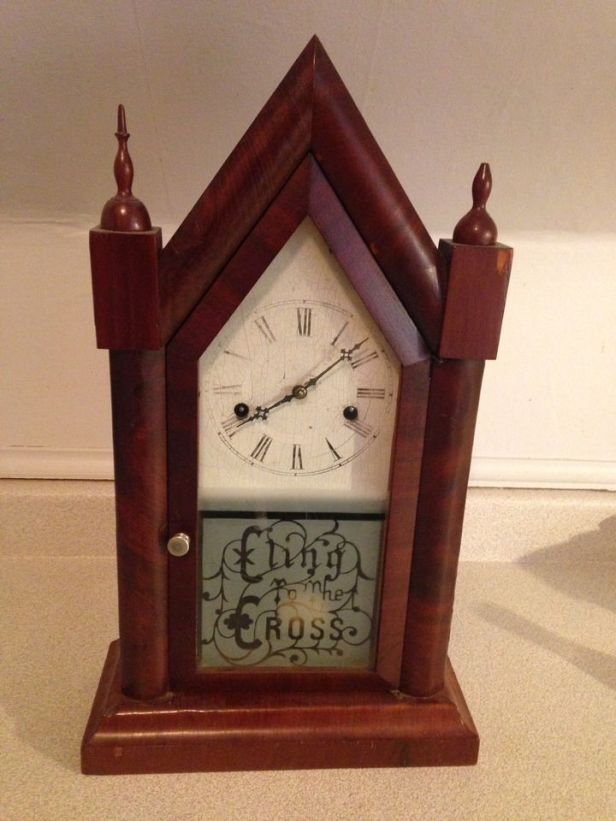
Interesting steeple clock from the short-lived Hamilton Clock Co. (Canada)

Hamilton Clock Co Gothic steeple clock

I wasn’t on the lookout for another steeple clock but when I discovered this on a local online for-sale site I just could not pass it up.
Let’s clear something up from the outset. The Hamilton Clock Co in the United States and the Hamilton Watch Co were probably associated with each other in some way but the Hamilton Clock Co. located in Hamilton Ontario, Canada which operated between 1876 and 1880 was not in any way affiliated with the American company.
I bought his Hamilton Clock Co. 30-hour time and strike steeple clock from a local seller. I am sure the seller thought he did well with the sale as he did not budge from the 100CDN he was asking. However, I consider this a win-win situation. We were both pleased because clocks from the Hamilton Clock Co. are sought after by Canadian collectors and this example would easily fetch much more than the price I paid. I was particularly intrigued by the etched tablet with, “Cling to the Cross” a religious phrase that was popular at the time. It is the larger of two versions at 19 ¼”. The Hamilton Clock company made the only true steeple clocks and very few survive.

The 30-hour time and strike movement is appropriately stamped HAMILTON CLOCK CO. HAMILTON ONT. The suspension spring is mounted higher up than a photo I saw on the Canadian Clock Museum site which shows the suspension spring mounted below the hour cannon. There is also a pin through what looks like the intermediate gear on this movement. There had to be some variations over the period the movement was made.

The clock is not without issues, after all, it was made between 1876 and 1880 and some wear and tear is expected for a 140-year-old clock. Everything seems to be there and it is in good shape including the “Cling to the Cross” inscription on the tablet. The etched glass tablet was the result of an association with glass factories in the Hamilton area and unlike anything offered by other companies. There were a whole series of clocks made with similar religious messages.

30-hour time and strike movement with clock company inscription on the bottom of the front plate

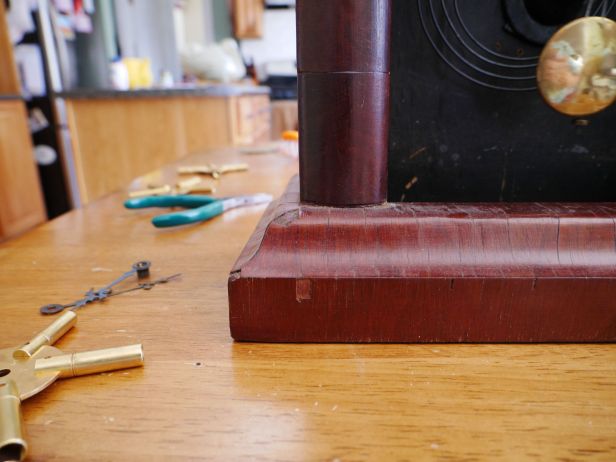
The original dial face is faded/worn, the hands are original and the 30-hour movement has the correct pendulum. There are minor veneer losses here and there consisting mostly of chips. The right steeple is also missing its tip.
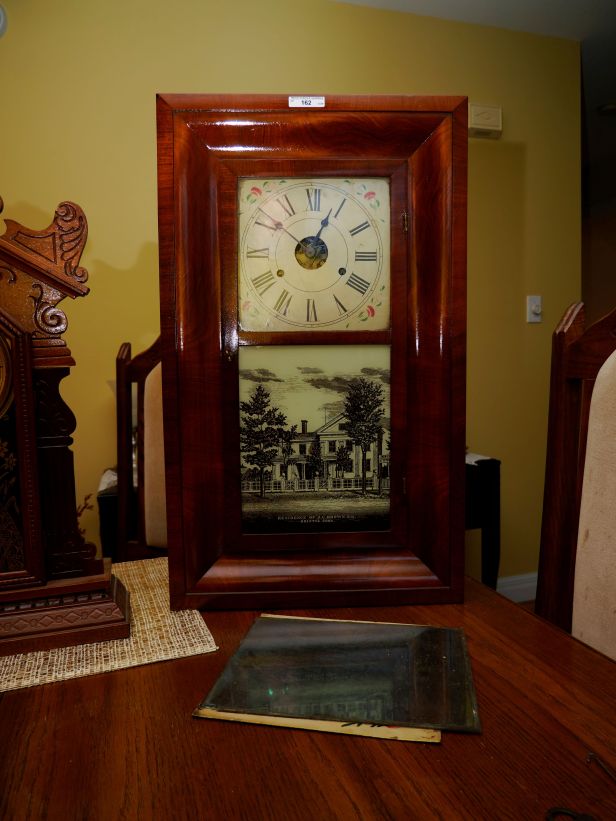
Veneer chips on left side of base
Veneer chips on the left side of the double-curved base

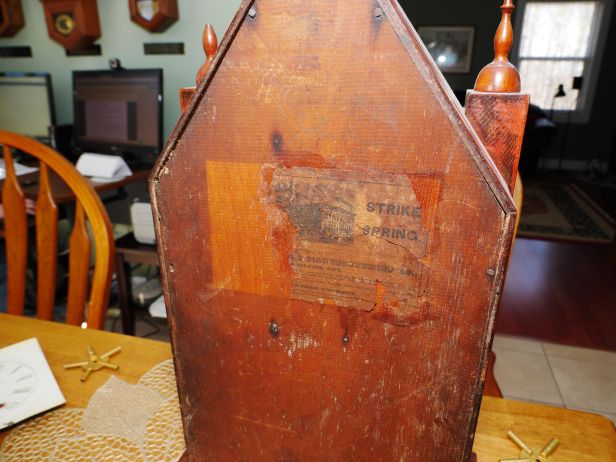
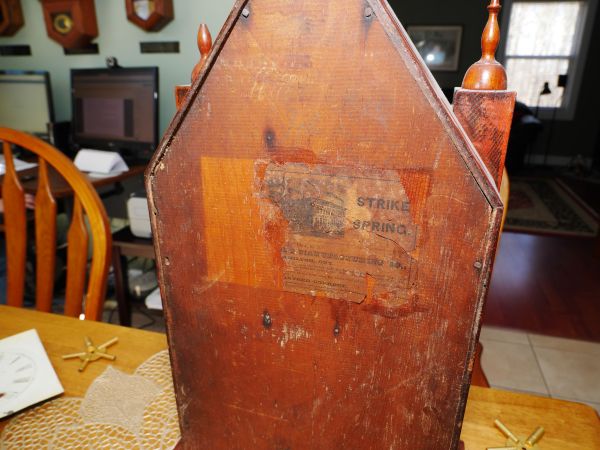
The label is not complete but is quite readable.

Loss on the clock label

Half the label is missing but enough to identify the clock.
Half the label is missing but enough to clearly identify the clock-maker

A complete label should look like this better example

The clock runs surprisingly well but requires a thorough cleaning and repair work on the time side ratchet click which slips when the arbour is wound. Generally, the clock appears to be in reasonably good shape.
I am always intrigued by clocks made entirely in Canada. The following information is taken from the Canadian Clock Museum located in Deep River Ontario (Canada). A must visit if you are in Canada, love clocks and are especially interested in Canadian makers.
“This company was established in 1876, after the failure of the Canada Clock Company in Whitby, Ontario.
The machinery and other tools and equipment were purchased and moved to Hamilton by two business men, James Simpson and George Lee.  Simpson, born in Scotland, had been active in Hamilton for years as a partner in a wholesale grocery business.  He assumed the title of President of the clock company.  Lee, born in Ireland, was also active in food wholesaling, and the operation of hotels, and restaurants.  He became the Business Manager.  Neither man had any prior experience with factory operations or clock making.
Technical expertise was provided by John F. Collins, who had previously acted as Manager of the Canada Clock Company in Whitby and had been instrumental in equipping and operating that enterprise.  He was brought from Whitby along with the equipment and given the title of Mechanical Superintendent.
Collins utilized tools, dies and designs he had created at Whitby, so the Hamilton company was really a continuation of his previous efforts. He was able to broaden the range of movements and case styles, and hence to offer a more complete line of merchandise.  Unfortunately, after a few years, he appears to have fallen out with the new owners and left the company in 1879.
George Lee, in turn, suffered health problems and was obliged to leave around 1880.
This left James Simpson as sole proprietor.  He ended production under the name Hamilton Clock Company and proceeded to make major changes.  The factory and equipment were retained, but a completely updated product line was developed.  Simpson found new investors and incorporated the firm as a public company that was renamed The Canada Clock Company Limited.
The Hamilton Clock Company appears to have made a valiant effort to provide clocks for the Canadian market, in competition with the huge U.S. clock factories that already dominated the market.  Hamilton clocks matched competitive products in appearance and their quality was quite adequate.  The volume achieved, however, was never very large and the product line was simple and limited.  No catalogs or printed material have ever been found from the company and our opinions can only be based on an examination of surviving clocks.  Perhaps, like the attempt in Whitby, the available capital and ‘know-how’ were insufficient to ensure a major success.”
There is nothing novel or unusual about Hamilton Clock Co. clocks. They had movements and cases similar to American made clocks but since the production was limited to 4 years, fewer were made, they are rare and therefore more desirable for collectors.
Overall I am pleased with this acquisition.

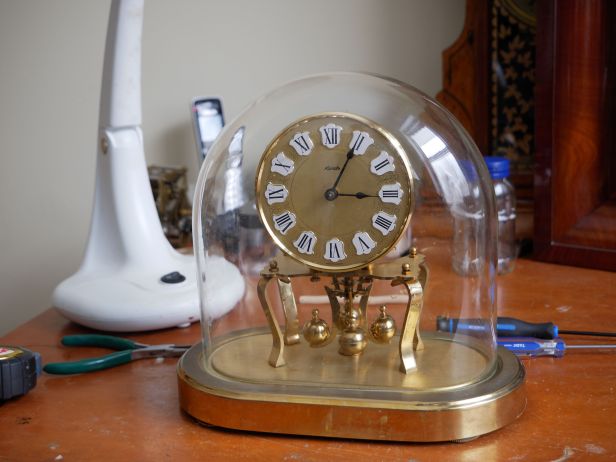
Kundo 400 day oval anniversary clock – let’s get this thing working!

Of the five anniversary clocks in my collection, none have cost me more than $30. It’s unfortunate because these clocks are truly fascinating devices. They are well-crafted, delicate, and ornamental, driven by spring mechanisms. While many thousands were produced, their abundance is reflected in their low value today. My focus is on collecting the older mechanical models, the last of which were manufactured over 35 years ago, and steer clear of the battery-operated anniversary clocks still being sold.

Among clock repair enthusiasts (horologists), opinions on anniversary clocks vary—some enjoy working on them, while others struggle to develop an affinity for them. I fall firmly into the former group, finding these clocks both intriguing and enjoyable to work on.

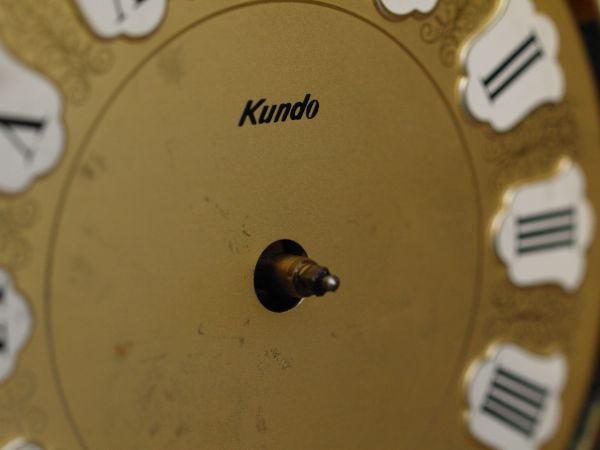
Kundo 400 day torsion clock

Gustav Becker, Haller, and Schatz 400-day clocks are certainly more desirable, better made, and fetch higher prices. While I don’t have any of these makes in my collection, I am always on the lookout for more desirable and collectible models.

Movement before cleaning
Movement prior to cleaning and showing verdigris on the spring barrel

I picked this up for $5 at a local antique store. When buying one of these clocks, regardless of the price, it’s crucial to check that all parts are present, as sourcing a missing part can be nearly impossible unless you purchase an identical clock for parts. Often, the only issue is a broken suspension spring.

Fortunately, this Kundo clock was complete and in generally good condition. However, the suspension spring had clearly been snapped off due to improper transport. Many people either forget about or are unaware that these clocks feature highly effective pendulum locking mechanisms.

These are called torsion clocks because there is a weighted disk or wheel, often a decorative wheel with 3 or 4 chrome or brass balls on ornate spokes, suspended by a thin wire or ribbon called a torsion spring (otherwise known as a suspension spring). The torsion pendulum rotates about the vertical axis of the wire, twisting it, instead of swinging like an ordinary pendulum.

These clocks operate very slowly—in the case of this Kundo Junior, just 10 beats per minute compared to 100 beats per minute or more for a typical pendulum mantel clock. Due to the slow movement of the gears, wear is minimal, and it’s quite common to find these clocks with a broken suspension spring as their only issue.

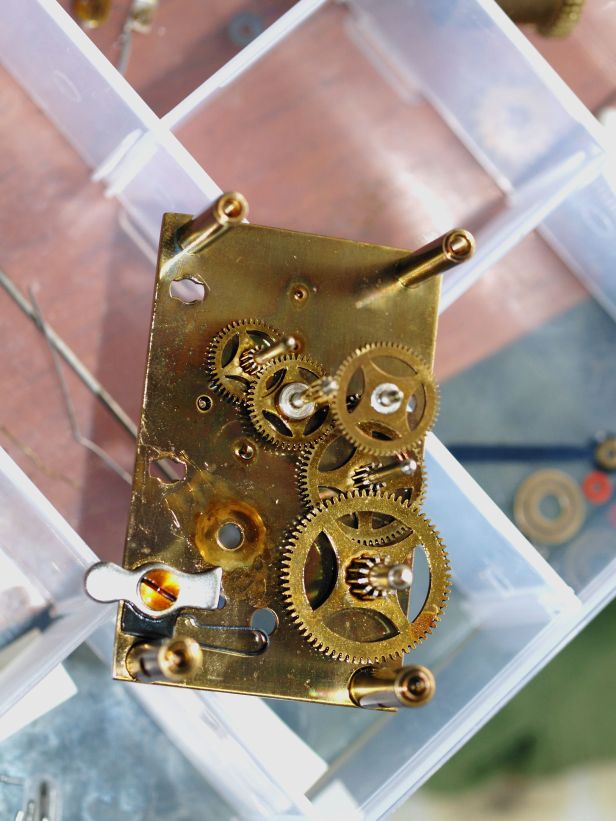
Front plate removed
Front plate removed

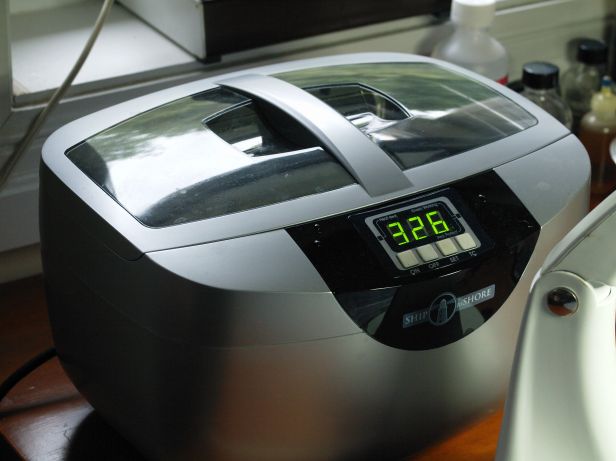
The movement was disassembled and cleaned in an ultrasonic cleaner. The mainspring was removed from the barrel, cleaned, and serviced. Otherwise, there was minimal wear to the pivot holes. In fact, I have never needed to install a bushing in an anniversary clock because their slow operation results in very little friction.

The old spring was very twisted

Now, it’s time to install the new suspension spring. The suspension spring is a very thin piece of steel running down the back of the clock, designed to twist back and forth while suspending the pendulum balls. It’s crucial not to kink or bend it, as a bent or crimped spring is the most common reason these clocks fail to function properly.

You can purchase pre-assembled suspension springs in kit form—springs already fitted with blocks and a fork—but I’ve found it far more cost-effective to buy the springs separately and re-use the blocks and fork. To ensure accuracy, I consulted my Horolovar manual (I eventually purchased one) to find the exact template—Kundo 5E, in this case. I then unscrew the blocks and fork to install the new spring. Here is an example of a suspension spring from a Kern 400-day clock.

suspension spring installed on a Kern
A new suspension spring was installed on a Kern

Installing the suspension spring requires a little patience. While it is a delicate process, it’s relatively easy to do. It’s best to work on a flat surface. There are screws on both the top and bottom blocks that must be loosened before the new spring can be inserted. The bottom block was a bit stubborn, and a jeweler’s screwdriver is essential—you don’t want to strip those tiny screws.

Use the template in the Horolovar manual as your guide. For the Kern clock mentioned earlier, I had to rely on some guesswork while waiting for the manual to arrive, but once it did, I was able to confirm the measurements. After positioning the blocks, attach the fork and secure it with screws.

Install the bottom block first. Attach the spring block to the 4 pendulum balls with the pin then lock the pendulum balls in place using the locking lever. Some 400-day clocks use a simpler bottom block solution that simply hooks the block into place. Because this one uses a pin it is a bit more frustrating. After the bottom block is secured and locked in place install the top block to the top mount by first slipping the fork over the verge post. In the case of this Kundo it is a small side screw that secures the top block to the mount (saddle?).

I then attached the dial face and the hands then gave the pendulum a gentle 360-degree spin. Not surprisingly the clock failed to maintain its spin. An adjustment was required.

Looking at the top of the clock, you’ll see a screw that can be loosened to adjust the fork in one direction or another. Be very careful not to kink the suspension spring when loosening this screw. Loosen it gently, just enough to allow movement, and make small, incremental adjustments when setting the beat. While you can buy a beat adjustment tool for 400-day clocks, with a bit of trial and error—observing the verge’s action and fine-tuning the beat setter—you’ll eventually find the correct beat. You’ll know it’s “in beat” when the time between the tick and tock is the same. At that point, the clock should run smoothly. Since the ticking is so quiet, it helps to turn off any background noise in the room while making adjustments. I have several loud-ticking clocks in my office, and I stop them to assist with the process.

If you work on enough torsion clocks, a Timetrax or similar beat amplifier will make the task much easier.

The clock has been running for several weeks and is in the process of being regulated. Above the pendulum balls in a regulating adjustment dial. You will see a “+” and a “-“.  Adjusting towards the plus side speeds up the clock and the minus slows it down. I recommend minute turns for either adjustment.

There’s some debate about whether or not to oil these clocks, given the slow movement of the gears. While polishing the pivots to reduce friction can certainly be beneficial, I believe a bit of pivot oil is never a bad idea.

As I mentioned earlier, I’m part of the group that enjoys working on 400-day clocks, appreciating their delicate mechanisms and the satisfaction that comes with restoring them to working condition.

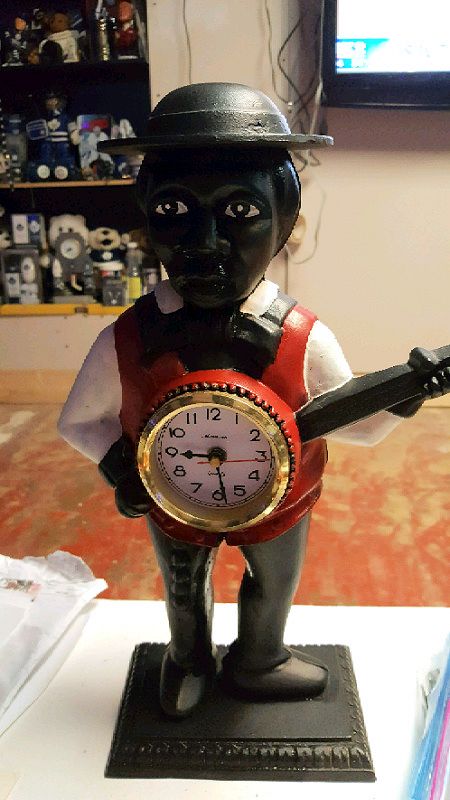
Cast Iron Banjo Clock

When I saw this listed on an online for sale site and not seeing a picture of the clock I was very curious. Imagine my amusement when I opened up the ad and saw this.

Banjo clock
Banjo clock

THE AD: Vintage cast iron bango player clock beautiful piece Heavy 16 in tall great condition

Well, it IS a banjo clock or should I say “bango”!

Blackforest shelf clock (Canadian made) gives me grief but decides to run again

Blackforest shelf clock

The clock is a 1937 Blackforest Royal Tour commemorative edition shelf clock with an 8-day time-only “plate” clock movement. Plate clock movements are so-called because they were typically used on kitchen clocks with Dutch Delft plates such as this one in the next photo.

Delft Clock from Forestville
Delft Plate Clock from Forestville

The movement is likely German and could have been made by a number of companies. There are no stamps or markings on the movement to give any indication of the maker. Canadian companies such as the Blackforest Clock Company of Toronto (the Forestville Clock Company after the war) imported German movements before the Second World War and installed them in Canadian made cases.

Grimy movement prior to cleaning

This clock had been happily running for about a year and then last week it suddenly stopped after a winding. I nudged the pendulum in an effort to make it go, checked to see if it was in beat and level but no luck. I nudged the pendulum a few more times, left it for a day or so, tried it again and still no luck. I was at the point of disassembling the movement to investigate the problem. Two days later I wound it tight and gave the pendulum a push and it sprang to life. I think I know what happened.
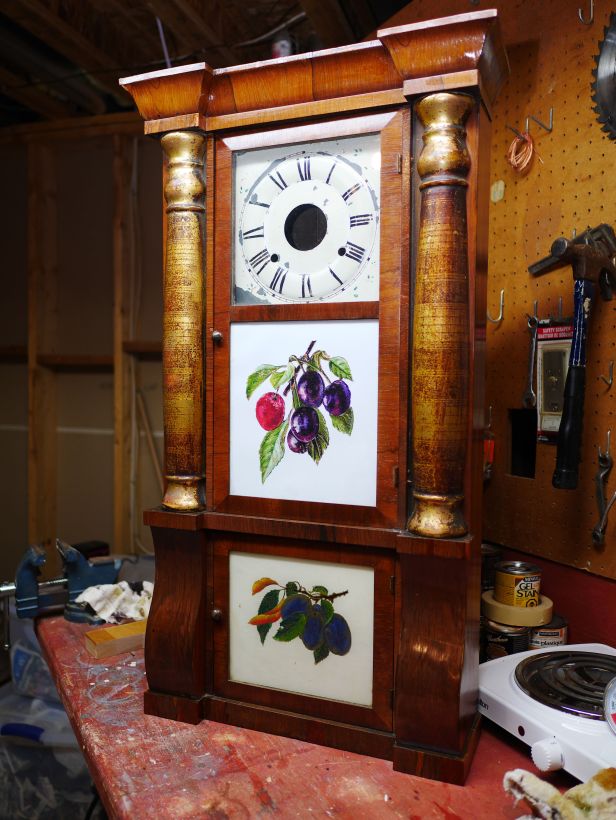
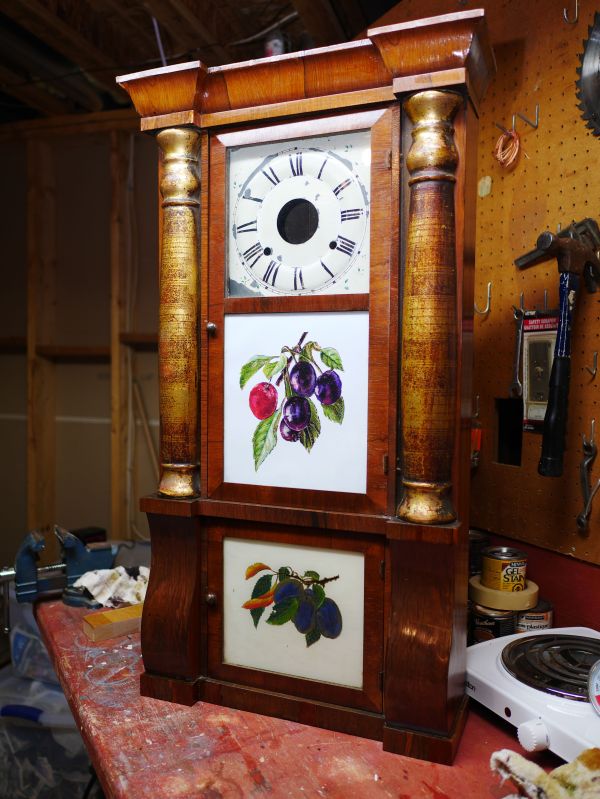
I thought I did a good job of servicing the movement including the mainspring over a year ago but apparently not well enough. You may have heard the expression, “you overwound the clock so that’s why it stopped”. There is a grain of truth in the expression because if you wind the spring till it winds no further the mainspring is at it tightest. If there are dirt, grime and rust on the mainspring the mainspring will actually cease in place, hence the clock stops. I believe this is what occurred in this case. Although it is running now it will need to be properly cleaned. In the meantime, I will let it run and see if it completes its full 8-day cycle.

Clocks we saw while on a visit to Spain and Portugal

In the early spring, my wife and I travelled to Portugal and Spain. We attended our daughter’s destination wedding in Sintra, Portugal and we decided to expand our stay, visit Spain and see the sights in Barcelona and Montserrat. Spain has always been on our bucket list and it did not disappoint.

Being a clock enthusiast I did a little research beforehand to find out if there were any clock museums along our travel route. Alas, we travelled to places that were very distant from the well know clock museums. Clocks in Europe were made in specific regions and that is where you will find clock museums. Here are a few clocks that I found in various places in Spain (Barcelona) and Portugal. I will let the photos tell the story.

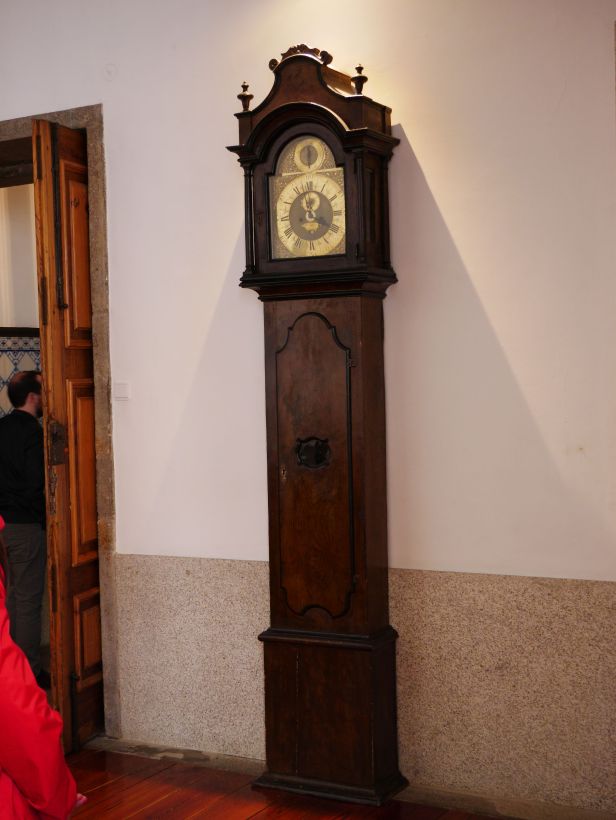
Tall case clock in a cathedral
Tall case clock in a Barcelona cathedral

Little card on the side simply said "High box clock, school clock"
Little card on the side simply said “High box clock, school clock”, Barcelona

Marriage of movement and case found in a shop in Porto.
A marriage of movement and case found in a shop in Sintra, Portugal

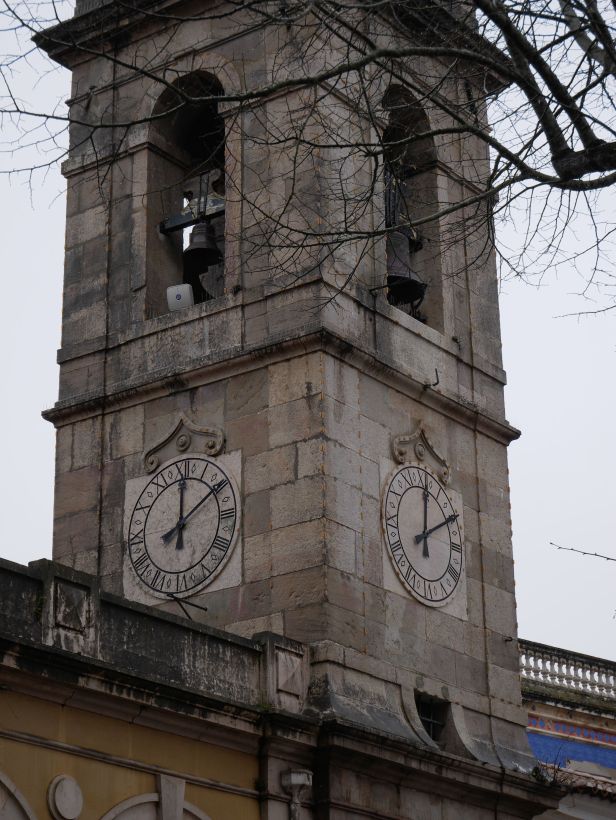
Town clock in downtown Sintra, Portugal

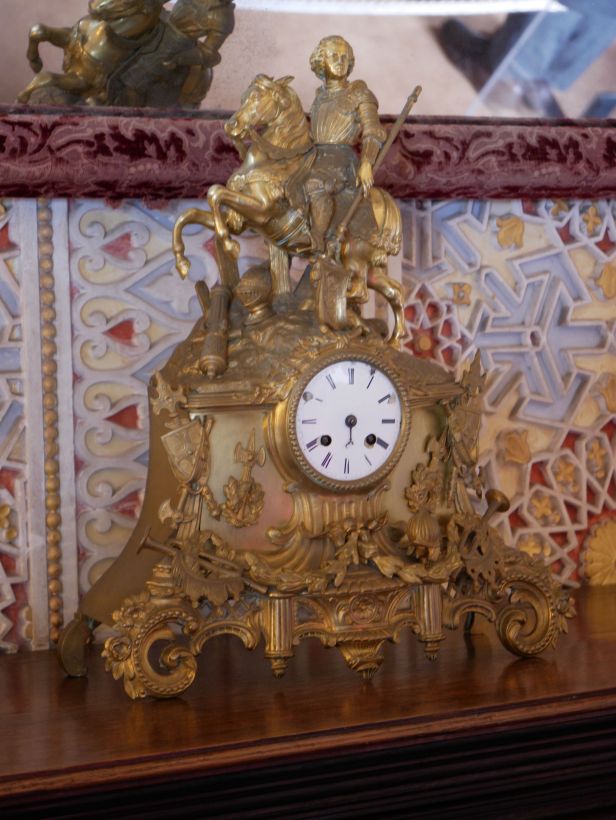
Very ornate clock in poor condition, Pena Palace, Sintra, Portugal
A very ornate clock in poor condition, Pena Palace, Sintra, Portugal

Pena Palace, Sintra, Portugal

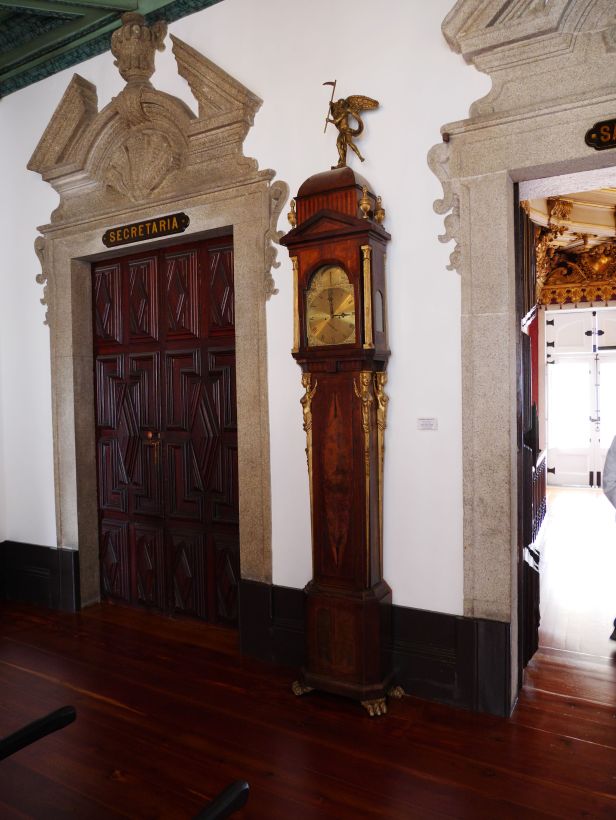
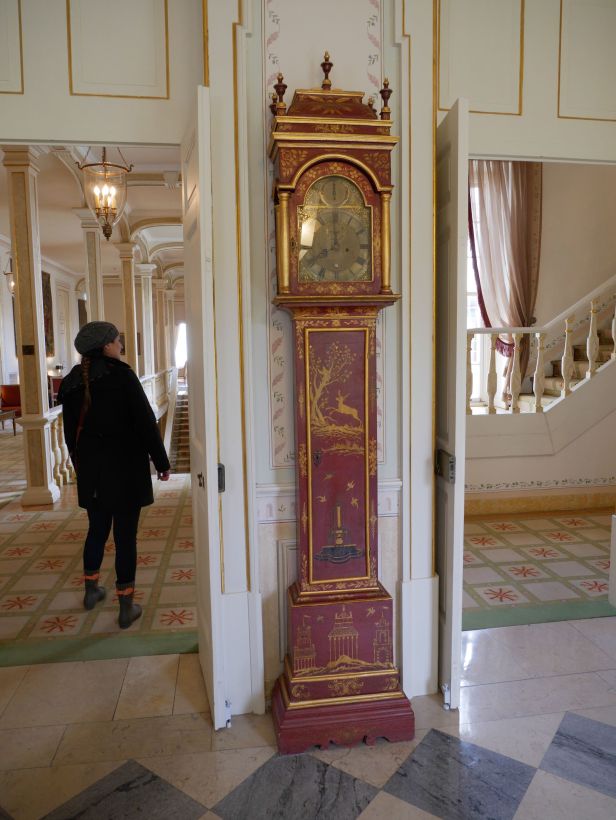
Tivoli Hotel, downtown Sintra. Unknown tall-case clock

The most ornate clcok is this working example at the Porto basilica
The most ornate clock I found is this working example at the Porto basilica

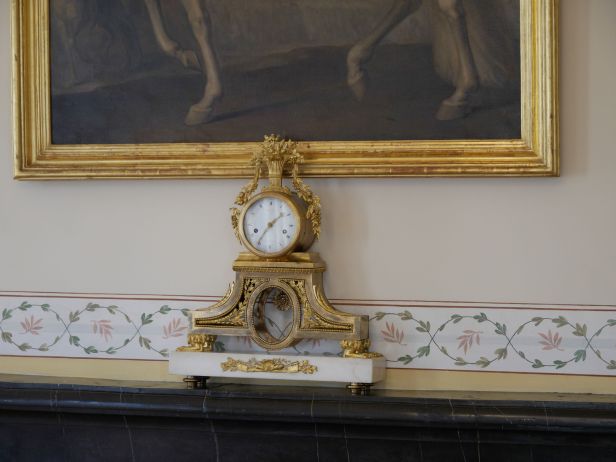
Unknown mantel clock, Tivoli Hotel, Sintra, Portugal

Unknown gallery clock. I could not find an opening on this clock. No arbor holes on the clock face.
Unknown gallery clock. I could not find an opening on this clock. No arbour holes on the clock face. Found on an estate in Sintra, Portugal

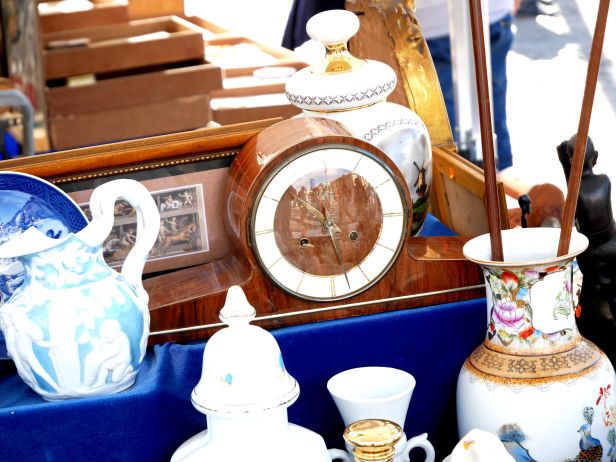
Flea market clock. Time and strike English or German clock, 1960s
Flea market clock. Time and strike English or German clock, the 1960s

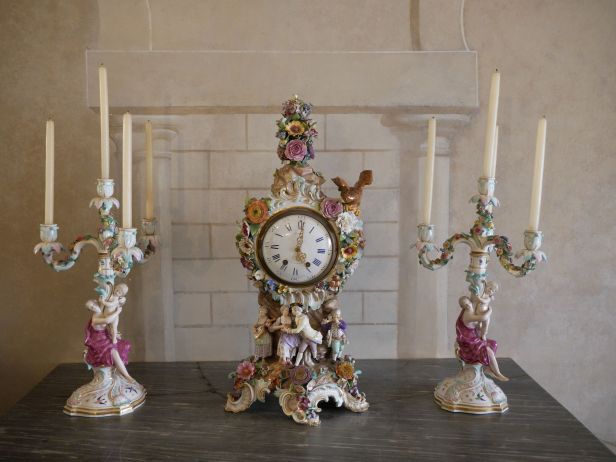
Flea market clock. Time and strike French clock with matching candelabra

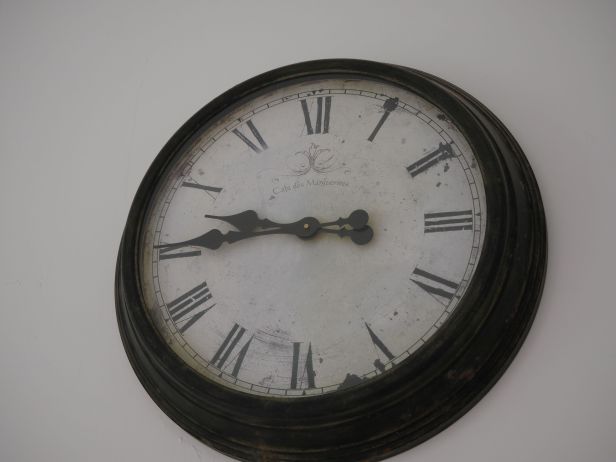
Used goods store, time and strike wall clock, possibly French

I was not specifically looking for these clocks but as we visited churches, museums, shops and public places I photographed any I discovered in our travels.

I have good luck finding a great deal on a clock

I seem to be one of those people who manage to find a great clock deal. I don’t think it takes a special talent but patience, research, and timing are three key elements in finding a bargain.

I often cruise the online for-sale sites for interesting clocks. In Canada, we have something called Kijiji. In the States Craig’s List is quite popular and I am sure other countries have something very similar.

What makes Kijiji (and similar sites) interesting and fun is that you can connect with people locally or in my case our province of Nova Scotia. There are a wide variety of sellers. Some know what they are selling and price items accordingly. Some have really no idea and either price items clearly for much more than they are worth or conversely for far less than their actual value.

It is nice to be able to meet the seller, find out the history of the clock, learn something about the seller, and their motivation for selling, negotiate a price, and bring the item home. There is no post office or courier service to “screw” things up. No “oh crap” sigh when you open the package. With online auction sites, you often get a “pig in a poke” which means that something is sold or bought without the buyer knowing its true nature or value, especially when buying without inspecting the item beforehand. This does not happen with Kijiji. You find the item advertised, connect with the seller several times electronically or personally if necessary, see the item beforehand, ask questions about it, inspect it for any immediate issues or potential problems and you have the choice to walk away if you are not completely satisfied. All transactions are cash with no pesky sales tax.

Clocks are interesting items to collect and prices are all over the map as you would expect. However, I have found a few gems in the last few years. Let me tell you about my latest experience.

A few weeks ago I saw this clock advertised on Kijiji (photo below). Now, this looks like any ordinary Gothic steeple clock but what grabbed my attention was the unique tablet inscription. The acid-etched glass tablet says “Cling to the Cross”, a religious expression not often found on this style of clock. I knew immediately that this was a very special Canadian-made clock.

Seller's photo
Seller’s photo

Why, because several months ago I watched a video presentation by Jim Connell. Jim Connell is well known in Canadian clock circles. According to the introductory remarks found at the aforementioned site “He has amassed a large collection of clocks of all types with an emphasis on those with a Canadian origin. As his collection and knowledge grew, Jim prepared and presented numerous articles, talks, and displays on Canadian clocks and their history.  He is the respected author of the Charlton Standard Catalogue of Canadian Clocks and he co-authored Early Canadian Timekeepers and The Canada and Hamilton Clock Companies with Jane Varkaris.”

In his presentation, he described this exact clock and mentioned in his presentation that there were very few copies left, a very rare Canadian clock indeed.

I wanted to confirm that this was the clock I thought it was and asked the seller to photograph the label. He did so and sent this to me.

Seller's photo of the label affixed on the back of the clock
Seller’s photo of the label affixed on the back of the clock

I attempted to negotiate a price. The seller wanted 100CDN and I offered 80CDN. He replied that he would not accept anything less than 100CDN. In the meantime, I checked with the curator of The Canadian Clock Museum to confirm its authenticity. Upon discovering that this was a Hamilton Clock Co. clock made between 1876 and 1880 I decided that, yes, this was a good find and in my email reply to the seller I said, “100CDN it is”.

It is what I would consider one of those happy win-win situations. The seller got more than he thought the clock was worth and I got a clock that is worth much more than I paid for it. My motivation, however, was not to celebrate a great deal at a great price but to acquire a piece of significant Canadian horological history at an affordable price.

Hamilton Clock Co Gothic steeple clock
Hamilton Clock Co. Gothic steeple clock
30-hour time and strike movement with clock company inscription on the bottom of the front plate
30-hour time and strike movement with company inscription on the bottom of the front plate

We met and settled the deal. I am now the owner of a Canadian-made 30-hour time-and-strike Hamilton Clock Co. Gothic steeple clock.

In a later blog article, I will profile this clock and describe my strategy to address some of its issues.

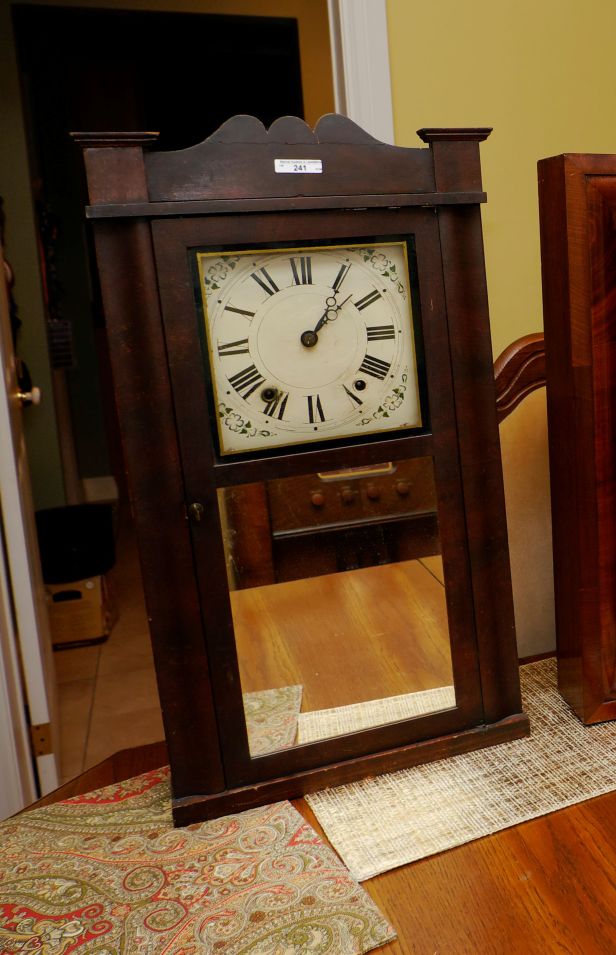
Daniel Pratt Jr. reverse ogee and splat clock with mirrored tablet

Daniel Pratt reverse ogee and splat clock
Daniel Pratt reverse ogee and splat clock with mirrored tablet

This Daniel Pratt Jr. reverse Ogee shelf clock was made in Reading, Massachusetts, c. 1832-38. It has a splat-top mahogany case with half (?) reverse Ogee moldings flanking the door, painted wooden Roman numeral dial and mirrored lower tablet.

Clocks, manufactured and warranted by Daniel Pratt Jr

The label inside states in part.

Clocks manufactured and warranted by Daniel Pratt Jr. Reading Mass, U.S. Sold in any quantities on reasonable terms

The label is a ink drawing of a clock merchants shop and is printed by Dickinson and Co. 52 Washington St. Boston.

Wooden movement, time and strike

Wooden Roman numeral dial
Wooden Roman numeral dial with missing grommet on right arbor hole

Daniel Pratt (1797-1871), Jr., clock-maker, banker, town clerk, legislator, lived in the town of Reading, Massachusetts, in the 1800s. Reading is a suburb twelve miles north of Boston. Pratt did not contribute much to clock-making and was regarded as an entrepreneur rather than an innovator. He made wooden movements in his plant, as well as wooden cases. The clocks they sold during the 1832-35 period were typically wooden movement, weight driven, 30 hour, wood-cased, “looking glass” shelf clocks.

This Pratt clock measures 28 inches high, 14 3/4 inches wide, and has a depth of 5 inches. It is covered with mahogany veneer over pine. The square dial is of painted wood, 9 inches wide by 8 1/2 inches tall, with Roman numerals with floral spandrels. The dial is in good condition for the age of the clock. This clock was produced during the heyday of wood movements which were eventually phased out when cheaper but more reliable brass movements were introduced after 1839.

The memory of this successful man is continued by the quiet, even beat of his many clocks which have survived to this day — truly a great honour indeed.

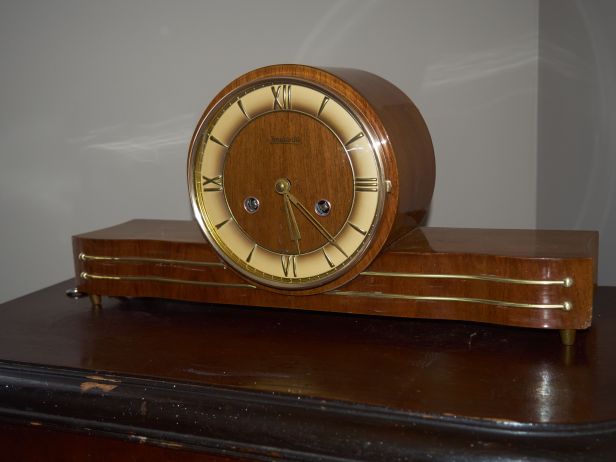
My Forestville mantel clock looks like yours

Forestville mantel clock
My Forestville mantel clock

Tick-Talk Tuesday is about the letters and comments I have received from you, the reader, concerning your clocks, issues you might have had and challenges you face and my responses to your questions with advice on your  particular clock concern(s). For those comments and questions that stump even me, I consult within my clock circles for the best possible response to your question

AM writes, “I am writing in hopes you can help me figure out how to safely set and wind my clock !

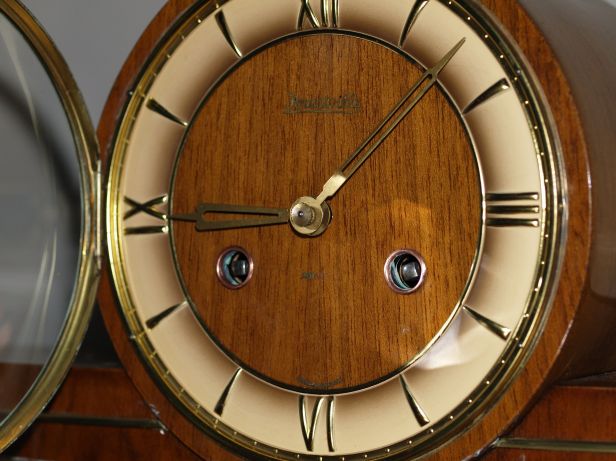
It looks pretty much identical to this one of yours I found online. Exactly same roman numerals. Forestville name in gold appliqué at top. GERMANY appliqué near the VI at bottom. Two key holes. Wing shaped box. Mine has darker brown wood glossy, and only one gold trim line. Same little feet. It has a silver colour key. I tentatively tried winding the left side clockwise, and it wound, but seemed tight. So I only wound it twice.  Scared to try the left side. Please let me know if you would – what each wind is for, and whether to go clockwise or counterclockwise. Thanks in advance for any clues you can give me.”

Roman numerals, Forestville name

Over winding a clock is a myth

My response, “Hi, These Forestville clocks have German movements. The movements are quite robust and will last for years. The left side is the strike side and the right side is the time side. You should be able to wind each side as tight as possible. Over winding a clock is a myth. If the clock does not run after you have wound each arbour to the limit, the springs are rusty and have seized the clock. However you should be able to safely wind each side several turns. The strike side will not function unless the time side is wound fully. You can get a feel for how the clock is wound. These clocks wind clockwise and the strike side might be a little tighter than the time side, I know mine is. The clock sounds like an old wristwatch because it has a hairspring or a floating balance wheel escapement not the usual pendulum ( I gather yours is the same). Anyway, do not be afraid of your clock. Wind it and enjoy it.

AM writes back and says, “Hello and thank-you for your reply. I took the plunge and wound each side about 4-5 X. No ticking as yet !  It must be seized at you said…Not sure what to do now cuz we live in the XXXXXXX and I doubt a clock expert nearby (within 300 km). Prince George is 3 hr drive west, and Grande Prairie Alberta 2.5 hr east. Will start asking around for sure. It is quite funky and reminds me of my Aunty Jane… so I will use as décor for the interim.”

My reply, “Open the access door. Locate the escapement at the top of the movement. If it is exposed give the wheel a little push. If it is in a plastic enclosure, tap on the plastic a few times. That might be enough to free the escapement. If it runs you have power through the clock. If it does not your power issue might be elsewhere i.e. seized springs, bent wheels etc. Unfortunately a repair would be far more than the clock is worth but that is a decision you will have to make.”

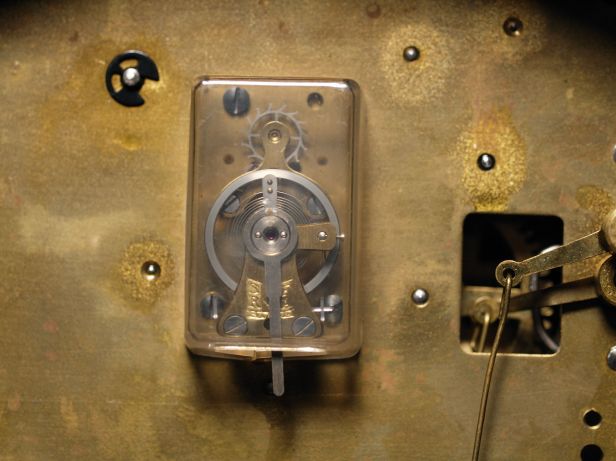
Hairspring escapement in my clock

AM managed to get the clock working but it will not strike despite plenty of whirring.

Balance wheel or floating balance escapement

Closer look at the floating balance escapement

AM says, “Well now I’m thinking maybe I can fix the chime myself ?  Particularly with your help.  So this one last attempt will show you how it sounds.  I also need to know:

  1. During the weekly wind, if I just do not wind the chime… will it stop the click and whirr without affecting the clock time?
  2. Here’s what I see at the back during non-chime time – one hammer is a ‘two in one’, and it was up, but the one at the back was down touching the rod.  So I tried lifting it, and realized that the little black metal stopper that holds the ‘two’ works well, but the front stopper wouldn’t hold the back hammer.  I gently bent that front black stopper (horrors? !) so it will hold it up. But still no chime.
  3. Then I decided to take a wee video of the strike during chime time.  At 11:00 that morning, this is what happened in the back of the clock:
  4. It seems to me by the length of whirring, that the chime is out of whack in that sense also.  Not sure tho how much whirr = one chime.”

I took a look at the video and the strike rods are way too high above the rods.

My reply, “There are three hammers. Your clock is not a chiming clock – it is a striking clock. A chiming clock makes a musical sound and typically the musical sound is the Westminster chime on the quarter hour. You have what is called a striking “Bim-bam” clock. The rear hammer hits first followed by the two front hammers to make that bim-bam sound. The hammers should be just above the strike rods. Yours are too high to strike the rods therefore you are not getting the sound of the strike. Lower the rods by slightly bending them past the rods to the side and bend them so that they are just barely above the rods leaving a gap of about 1/8 inch. They should now work as designed. I can only surmise that someone in the past bent the rods upwards to quiet the clock.”

AMs Forestville clock
AMs Forestville clock, a very attractive Art Deco clock

AM replies, “Ok!  Well that makes sense, and even the bending of the hammers.  I can hear and see my Uncle Bill … first swearing, then getting in there and bending those hammers!  He was dear soul really. Thanks for all your help”.

Chauncey Jerome 30 hour ogee – servicing a #1.314 time and strike movement

Chauncey Jerome 30 hoir Ogee clock
Chauncey Jerome 30 hour Ogee clock

I bought four clocks at an estate auction several weeks ago, this and three other Ogee clocks plus a parlour clock. This clock is no less interesting than the others but I was lucky enough to research its maker and date it fairly accurately. I wish I knew its provenance but nevertheless it is an excellent example and has been well cared for over the years.

It is a Chauncey Jerome 30 hour Ogee weight driven time and strike clock. No-one can deny that Chauncey Jerome had made a historic contribution to the American clock industry in the 18th century when he substituted brass works for wooden works and was said to be “the greatest and most far-reaching contributor to the clock industry.” Although he made a fortune selling his clocks, and his business grew quickly his company failed in 1856.

Chauncey Jerome one-day movement type 1.314

The number 11 Ogee was the last of the Jerome clocks made in 1855. Mike Bailey, a Chauncey Jerome clock collector has an excellent blog in which he meticulously details and dates Jerome cases and movements. After researching his site I was able to determine that my clock is a number 11 Ogee made just before the Jerome bankruptcy, 1855. It has the Jerome patent 30 hour brass movement number 1.314 which is likely original to the case.

Type 1.314 movement, very dirty

There were some issues with the movement as you would expect from a 156 year old clock. There were a number of punch marks here and there, but specifically on the first wheel and the second wheel time side. The movement had years of dirt. The repairs over the years are typical for this type of clock. Punching to close pivot holes would have been the preferred approach to repairing a worn clock. With the advent of the modern bushing machine repairs are much simpler.

Eight bushings were installed. The first wheel strike side, the second wheel strike side plus the fly, the lower gear off the centre cannon, rear plate and 3 bushings on the time side.

Punch marks on first wheel
Punch marks on first wheel, strike side

A piece came off the wood support for the movement when I disassembled the movement. Dry-rot perhaps. I had leftover hide glue from a previous project, applied the glue and clamped it for 24 hours.

broken movement support
Broken movement support

The retainer clip for the count wheel was riveted in placed and prevented me from taking it apart.

Retainer clip for count wheel riveted in place
Retainer clip for count wheel riveted in place, not nice!

Some were punched very close to the pivot hole as you can see in this next photo. I left that as-is and decided to take a second look in a year or two.

Looks like a large pivot hole but actally punched close to the hole
Looks like a large pivot hole but actually punched very close to the hole

After eight bushings were installed (4 in the front and 2 in the rear) and an ultrasonic cleaning, the parts are test fit to check the smooth running of the gears. The rope for the weights looked re-usable, they were not replaced. The suspension spring also looked to be in good shape. The crutch wire has had bending and twisting over the years but it was also re-usable.

Test fitting parts
Test fitting parts after cleaning

 30 hour movement servicing
30 hour movement servicing, oiled, movement in the case

C Jerome 30 hour movement testingin the case
C Jerome 30 hour movement testing in the case

Now to regulate the movement. The clock is ticking away nicely and in beat. There are always challenges setting the strike side and this movement is no exception. However, through trial and error the strike side is functioning as it should.

These are very simple clocks to service and a great movement to hone your clock repair skills.

Addressing an upper tablet replacement on a Seth Thomas column and cornice clock

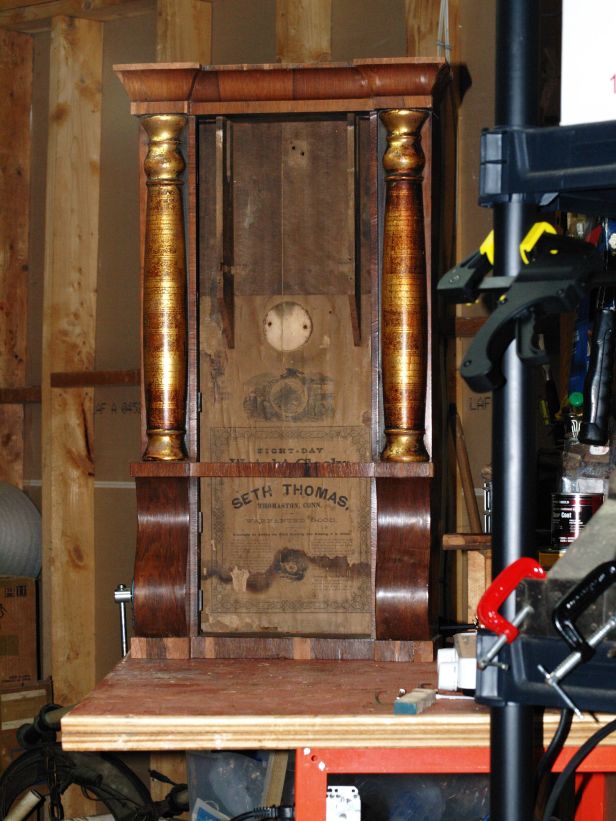
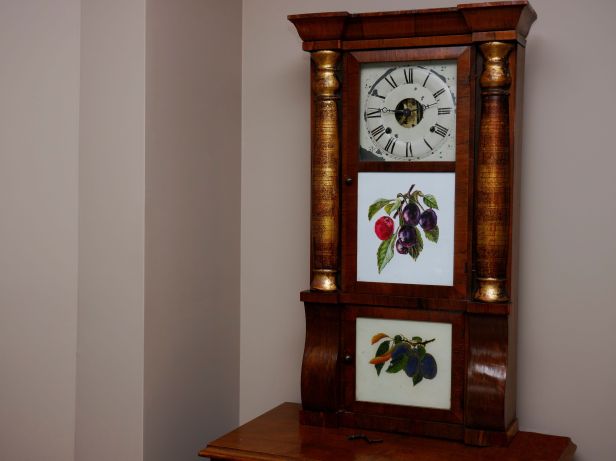
This is a fine example of a Seth Thomas column and cornice clock with sleigh front made prior to 1867 and sold by the R.W. Paterson Company of Canada West. Both the lower and upper tablets appear to be original and are in very good condition. Unfortunately this antique American column and cornice time and strike Seth Thomas clock is not mine and if it were I would proudly display it.

My clock, though similar is missing its upper tablet and a few other items that I wish to address in stages.

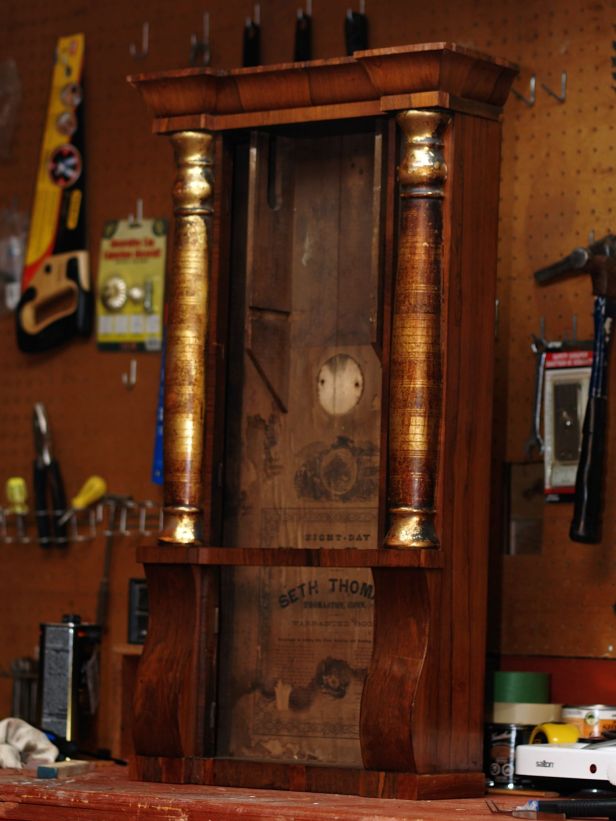
Missing upper tablet
Missing upper tablet on an American Seth Thomas clock

This blog article concerns one aspect of the clock, it upper and lower tablets. The lower tablet appears to be original and shows a cluster of fruit. Not as stately or ornate as the one in the first photo but quite appropriate for this style of clock. A quick online search shows that there were an endless number of reverse tablet painting designs ranging from birds, flowers, pastoral scenes, stately structures, eagles, parrots, berries, flags, drapery, crests and the list goes on.

Because there is a missing top tablet, the clock does not look complete. The clear glass is certainly not correct. As is typical for most clocks this age, things go missing over the years.

To address the missing upper tablet there are a number of options to consider;

  • Do nothing,
  • Attempt to find a decent quality reverse painted set from the same period,
  • Try my hand at painting a new tablet,
  • Buy a photo reproduction set online
  • Find a complimentary design and reproduce it on my home photo printer.

Finding a decent quality reverse painted set from that era is quite difficult and a search would take a long time. I am no artist, so, painting a tablet is out of the question. Buying a reproduction set online is a possibility but how much am I prepared to spend on something I could potentially do myself. After analyzing the options my first thought was to explore the possibility of buying a reproduction set online.

A search on EBay revealed sellers who make reproductions of the original tablets. They are essentially a “replacement picture set” of the clock tablets. They are as one ad put, “Exact copies of a set of Seth Thomas 8 day “Column” model sleigh front clock ca. 1880. They are printed on photo stock and mounted on mat-board that when put behind antique glass they are very hard to tell from the original and make a Seth Thomas column clock with plain or damaged pictures into a super looking clock.” I have seen them offered from 15USD to 45USD + shipping.

Hmm, I can do this myself!

Following a search of my photo collection I found a cluster of hanging fruit that complimented the lower tablet. Using PaintShopPro X6 by Corel I chose a water-colour effect, removed some fruit, changed the orientation of the image, adjusted the back lighting to match the tone of the lower tablet, cloned the deleted areas and darkened the stem and black-berries.

The first photo shows the source photo converted to a water-colour. The next shows the adjustments made to the “water-colour”. The third shows my first attempt without back-light darkening.

Using my wide carriage Epson Stylus 1400, here is my first attempt.

First attempt, a little lighter than what I was looking for
First attempt, a little brighter than what I was looking for but close

Colour-matching the lower tablet is a real challenge. More adjustments are required to get the right effect but I think I am on the right track.

If you have any suggestions on how I can improve my workflow I would love to hear from you.


The art of veneering – Part III – staining and finishing

This is Part III and the final part of a three part series on my first venture into veneer repair on an antique clock. Prior to beginning this project I spent many hours researching veneer repair, watching YouTube videos and seeking advice from my knowledgeable colleagues at NAWCC.

A recent acquisition, this is an 8-day Seth Thomas column and cornice time and strike shelf clock with sleigh front. It has a Plymouth (Hollow) lyre movement with a Thomaston Conn. label which means that the clock was made shortly before the incorporation of Thomaston in the early 1870s.

ST column and cornice , as found
ST column and cornice, as found

An example of veneer loss

I assessed this clock in Part I and described the steps in preparation for the veneer repair. In Part II I described the process of  applying veneer. Part III concerns the final finishing. Once the case work is complete I will focus my attention on servicing the movement, addressing the dial issues and replacing the clear glass with a floral pattern in the upper tablet.

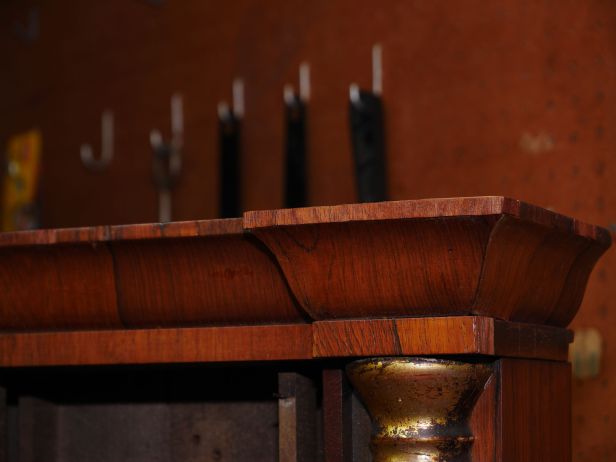
The lighter coloured sections in the next photo are new veneer pieces. New veneer is found on the top of the cornice, the left cornice base, the right column support and sections of the bottom base.

Veneer repairs are complete
Veneer repairs (light areas) are complete

Finishing is the final phase of this project. In many respects this can be the most challenging phase of the project because once the hard work of applying veneer is complete the job means nothing if the new veneer does not match the old veneer. Although it can never be a perfect match the goal is to come as close as possible.

One finish seemed to stand out above the others

I conducted an experiment on leftover Brazilian Rosewood.

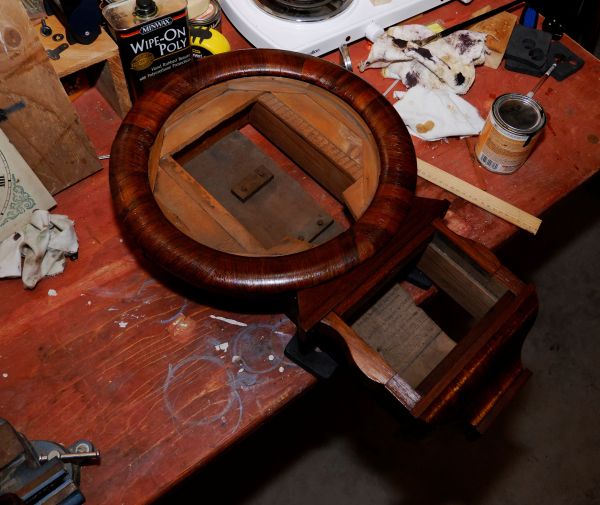
I selected three stains/finishes, Minwax Rosewood gel stain, Wipe-On Polyurethane satin clear coat and yellow shellac. I utilized various light sources to see the effect colour temperature had on the results and came to the conclusion that there was one finish that seemed to stand out above the others.

In the photo below there are three swatches on a piece of leftover veneer; Rosewood gel stain on the left, Wipe-On Polyurethane in the middle and on the right is yellow Shellac. Wipe-On Poly initially struck me as the best of the three; it is subtle while bringing out the character of the Brazilian Rosewood veneer while keeping that “aged” look but it is too muted. Rosewood gel is reddish and quite dark and looked very striking compared to the original Rosewood.

I concluded that yellow shellac was the best choice. Shellac darkens the veneer and accentuates the red tones nicely. Shellac would have been been the original finish when the clock was made and it is still the finish of choice today.

Comparing three stains
Comparing the three stains

Although veneering is a challenge, it is very rewarding work and I eagerly await my next project

New veneer above cornice, base of cornice is original though it looks like it was replaced
New veneer above cornice. The base of right cornice is original though it looks newer

Most of the base was replaced with new veneer
After two coats of shellac

After three coats of shellac, the case is complete

With dial and doors re-attached
With dial and doors re-attached, movement is out of the case at this stage

Although veneering is a challenge, it is very rewarding work and I eagerly awaiting my next veneering project.

Movement serviced and oiled
Lyre movement serviced and oiled

With the veneer repairs completed and the movement serviced there is still work to be done on this clock. I have decided that the gesso columns will stay as-is. Next is perfecting a tablet design for the access door to replace the clear glass, and finally, making a decision regarding the dial face; whether to leave as-is, find a suitable replacement or buy a new one from a clock supplier.

Seth Thomas column and cornice "Empire" style time and strike shelf clock
Seth Thomas column and cornice “Empire” style time and strike shelf clock

Lessons learned:

  • Allot a significant portion of time for the project, it is time-consuming and meticulous.
  • For an authentic repair hide glue must be used; avoid white or yellow carpenters glue though I would think there are rare times when it would be considered.
  • Hide glue:
    • must be a certain consistency to work properly. It should drip off the brush like honey. My hide glue was too thin at the start of the project.
    • will last a while in the fridge. Don’t cap the glue while it cools; condensation will hasten mold growth
  • Stay away from plastic based modern stains and finishes and go with shellac or any finish that would have been used at the time.
  • Some use filler to smooth the gaps between pieces of veneer, I did not use filler for this project; it is something I might consider next time.
  • A light sanding of the veneer is all you need, aggressive sanding will destroy the veneer (lesson learned).
  • Apply painters tape on the veneer before cutting; doing so eliminates ripping and tearing.
  • Use a sharp hobby knife
  • In future I would consider replacing larger sections rather than a patchwork of small pieces though that largely depends on how much veneer you have to work with.
  • Clamps are essential. Get various sizes of clamps and use wax paper between the clamp and the veneer, you will thank me!
  • Leave the area clamped for 24 hours. Although hide glue bonds quickly clamping for a day will ensure maximum adhesion.

This was a great project and I am confident that my next veneer project will be even better. Time, patience and perseverance are keys to a successful veneering project.

The art of veneering – Part II – veneer work

This is Part II of a three part series on my first venture into veneer repair on an antique clock. Prior to beginning this project I spent many hours researching veneer repair, watching YouTube videos and seeking advice from my knowledgeable colleagues at NAWCC.

This is an 8-day Seth Thomas column and cornice time and strike shelf clock with sleigh front. It has a Plymouth Lyre movement with a Thomaston Conn. label. The clock was made in the early 1870s.

Part I explores the steps in preparation for veneer repair.

The focus of this, Part II, is the selection of the correct veneer, working with hide glue, as well as cutting, applying and trimming the veneer.

Although one is tempted to use readily available yellow or white carpenters glue the only authentic product to use is hide glue

The veneer

I am not an expert in wood finishes and determining the type of veneer was my first major task. To do this I had to rely on expertise to tell me that I had Rosewood veneer. Once I discovered the type of veneer, I had to determine the quantity and the specific repairs that are required for this clock. My research revealed that the veneer used at the time was Brazilian Rosewood. An exotic wood, Rosewood would have been used extensively by clock-makers of that era and it is the correct veneer for this project. A clock friend (thanks JC) sent me two 7 X 8 inch pieces of Rosewood veneer, more than enough for the job.

The very worst sections were the top and bottom of the case and the column bases as one would expect given wear and tear over the years. Most of the cornice veneer is in good shape as are the door sections, door surrounds and the sleighs just above the feet.

Hide glue

One is tempted to use readily available yellow or white carpenters glue but the only authentic adhesive for clock case applications is hide glue. Hide glue is the glue of choice and it would have been utilized at the time the clock was manufactured. I chose pearl hide glue which is a type of hide glue rated at 150g Bloom strength. It takes takes a little longer to gel and with the longer working time it is better for applications like this when you need time to fit, but where high strength is not absolutely essential.

If you have never worked with hide glue, it is best to start with a small batch. My first batch was larger than I needed and too thin. Simply put 2 tablespoons (30ml) of glue in a heat-resistant glass container, cover with 1 tablespoons (15ml) of cold water and let soak for about an hour or until the glue softens and becomes gelatinous. Less is more and I recommend making small quantities. For about 20CDN you can buy a supply that will last a long time.

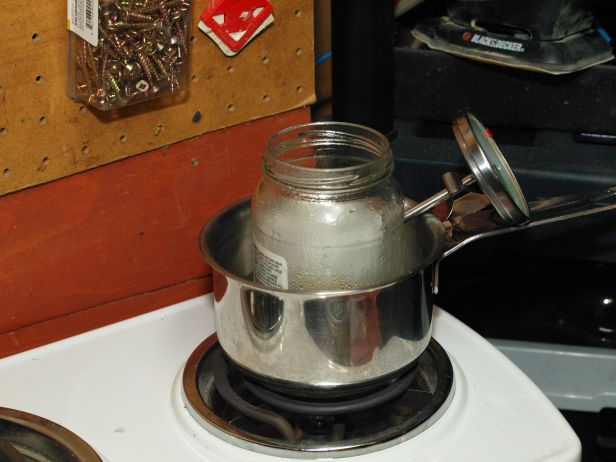
Place the container with the gelatinous glue in a bath of water in a pot especially designed for hide glue or a double boiler which I found worked just as well. Heat to approximately 140°F (60°C) and maintain the temperature. A candy thermometer is ideal to keep the glue at an even temperature.

Home-made double boiler with temperature maintained on a hot plate

Tools

Clamps, weights, tweezers, wax paper, a sharp knife, a metal straight-edge, painter’s tape, a micrometer, sand paper, palm sander and whatever you choose to use as a double boiler complete the list of tools.

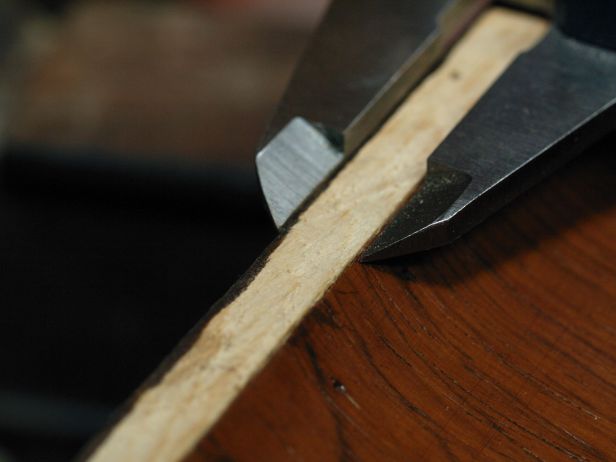
A micrometer is an indispensable tool for accurate measurements. Accurate measurements ensure a good fit, minimize the use of fillers and lessen waste.

A micrometer ensures an accurate cut

Cutting, trimming & clamping

Cutting veneer can be tricky. Veneer is thin, brittle and can easily tear. Veneer today is different than veneer used 100+ years ago, it is very thin. On some clocks you may need to double-up, that is layer the veneer to approach the height of the original veneer.

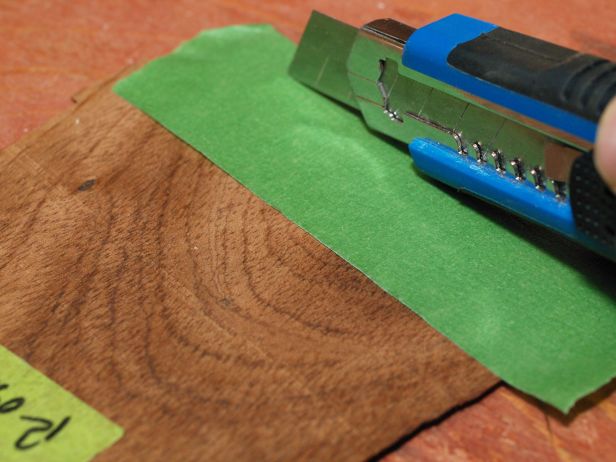
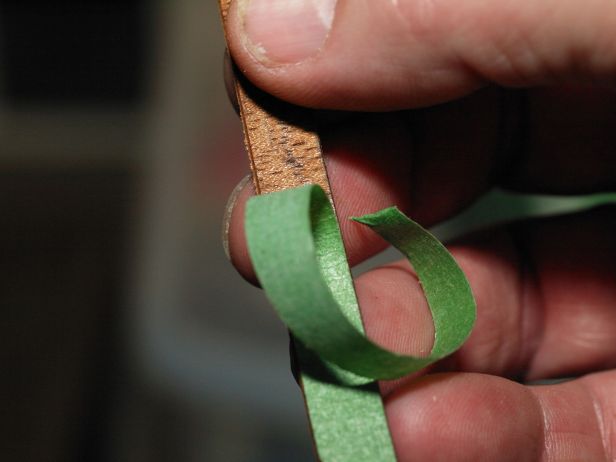
Cutting can be a challenge since you must follow the grain and those narrow strips can break very easily. Painters tape is a true friend since it prevents tearing and it is easily removed from the veneer prior to application.

Painters tape ensure a rip free cut

Painters tape easily peels off

You will never have enough clamps

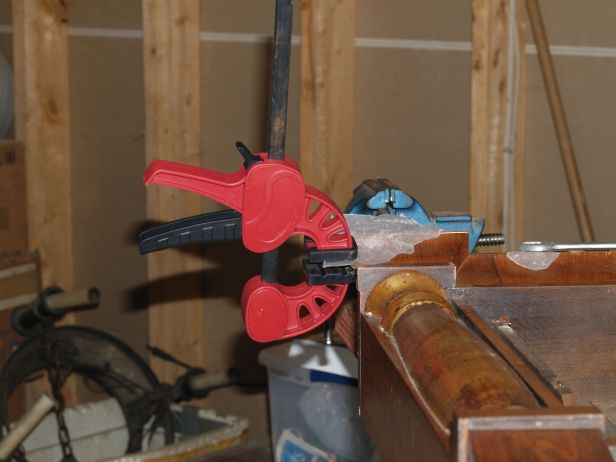
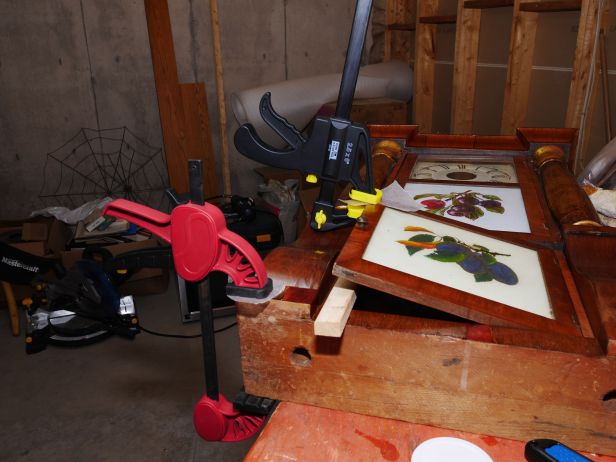
I chose to work one area at a time moving from the bottom of the case to the top. The next photos shows veneer sections glued and clamped into place. Clamps are essential for veneer repair but when clamps do not work other methods such as weights can be employed. You will never have enough clamps! Although a clamp need only be in place for a few hours, having it on for a 24 hours is best for maximum adhesion.

Clamping cornice veneer

Door piece and corner base piece is clamped

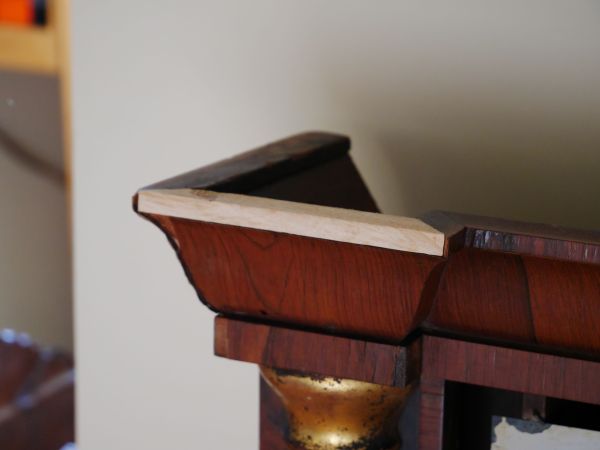
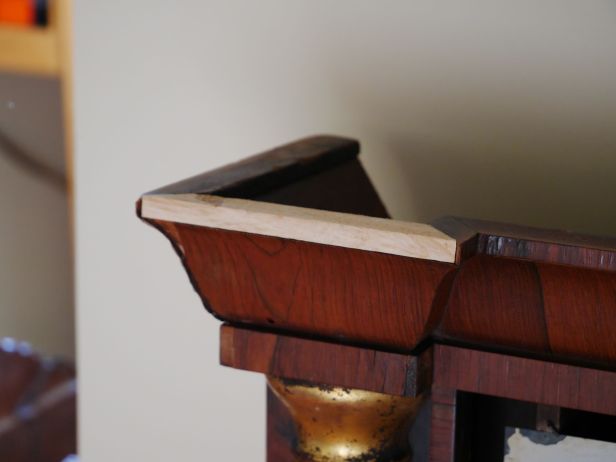
The upper left cornice presented a unique challenge. A section was missing just above the cornice. Fashioned out of softwood it was glued in place.

A piece of pine was cut to fit

strip of veneer applied
Strip of veneer glued in place;  prior to trimming and sanding

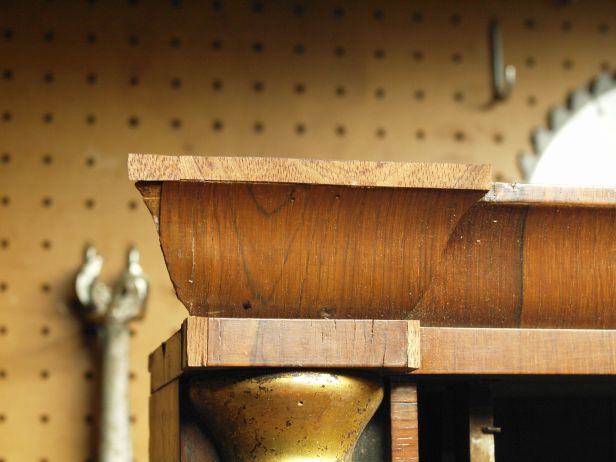
In this photo the piece for the curved part of the veneer is applied. The top area of the front cornice is now ready for staining and finishing.

Small angular cornice piece on left is glued in place

Top section almost complete and ready for staining
Top section is almost complete except for a left side cornice section (not visible in this shot)

As with any other project there will always be a slight colour variance as one would expect over the course of a century or more but the goal is to come as close to the original finish as possible

As mentioned the worst areas were the very top and very bottom of the case, expected after years of wear and tear. Another area which had veneer loss were the column bases. When possible I used old veneer to repair small areas but I found it very brittle and hard to work with. From my research I discovered that there are methods of softening old veneer but that can wait until the next project.

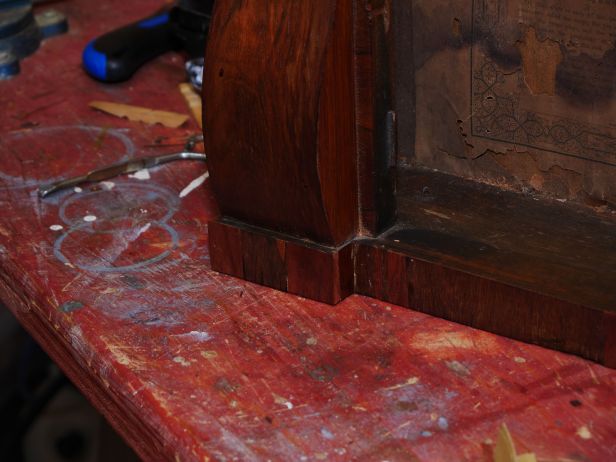
Right column base
Right column base, prior to sanding and trimming

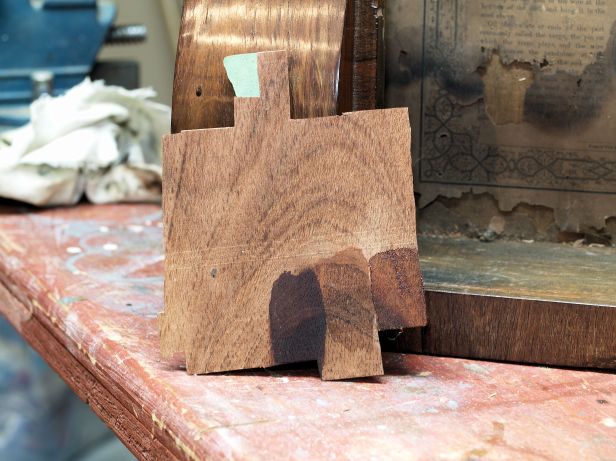
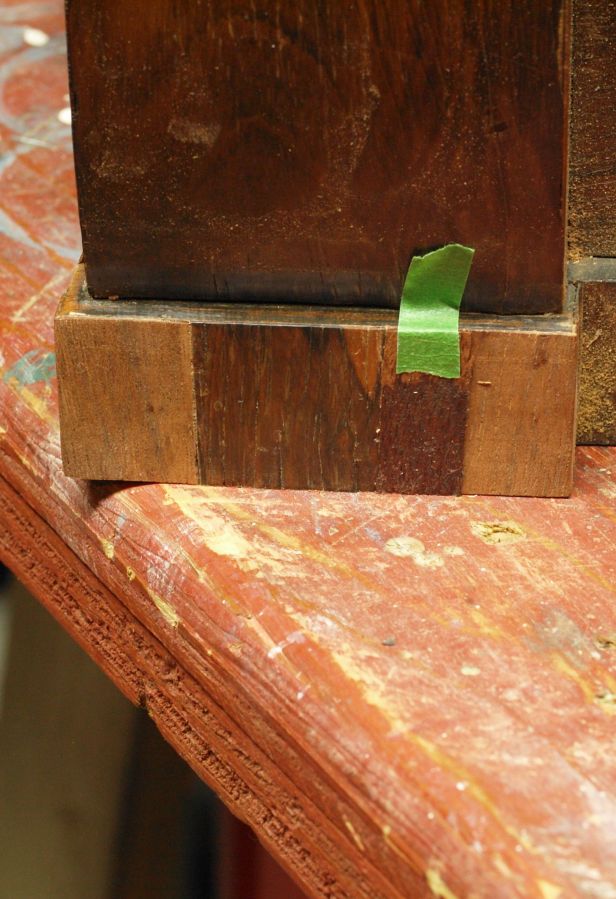
After many hours the veneer work is now complete The next step is colour matching the new to the existing veneer. As you can see in the following photo the chip held by green tape shows that Rosewood Minwax Gel stain is a close match to the older veneer. My experimentation did not end. Part III explores other finishing options.

As with any other project such as this there will always be a slight colour variance as one would expect over the course of a century or more. The goal is to be as close as possible to the original finish.

Colour matching test: the green tape is holding a chip that has one coat of Rosewood stain

Now that the veneer work has been applied the next and final stage is finishing. Stay tuned for Part III in a few days time.

Arthur Pequegnat Simcoe mantel clock

Canadian clock collectors are passionate about Arthur Pequegnat clocks. In private sales and online for-sale sites most sellers are knowledgeable enough to know that they are very desirable. A Pequegnat will sell for many times more than a comparable mantel clock, that is, in Canada.

Arthur Pequegnat Simcoe mantel clock
Arthur Pequegnat Simcoe model mantel clock


The Arthur Pequegnat clock company had an illustrious albeit short history

The Simcoe is my fourth Arthur Pequegnat clock. It is very similar in dimensions and style to the Jewel. Whereas the Jewel is basically a unadorned box the Simcoe has a piecrust dial bezel, claw feet on each corner and lions head handles on each side. It has a coil gong for the hour strike and a bell for the half-hour passing strike.

To collectors it is referred to as a”Berlin” clock. Although it is impossible to date Pequegnat clocks precisely the name Berlin distinguishes clocks made before 1917 and those made after and up to 1941 when the factory finally shut its doors. Clocks made prior to 1917 were inscribed “Berlin”, Ontario on the dial face since Kitchener was known as Berlin until midway through World War I. From 1854 until 1912 it was the town of Berlin and City of Berlin from 1912 until 1916. Because the name Berlin had a negative association with the war against Germany the city administration chose the name Kitchener. Kitchener is the present seat of the Regional Municipality of Waterloo, Ontario (Canada).

Time and strike movement with steel plates
Time and strike movement with steel plates, a common feature with Pequegnat clocks

The Arthur Pequegnat clock company had an illustrious albeit short history. Arthur Pequegnat, a watchmaker by training, was born in Switzerland in 1851. Arthur immigrated to Berlin, Ontario Canada in 1874 with his wife, parents, brothers and sisters; a grand total of 18 family members.

Arthur Pequegnat clocks such as a simple mantel clock you see here can command hundred of dollars in Canada

By the late 1870’s Arthur was operating a jewelry store and watch repair in Southern Ontario. By the middle 1880’s Arthur and his brother Paul were operating a shop in Berlin, Ontario. After ten years the brothers went their separate ways, both operating successful jewelry shops in Southern Ontario.

In 1897 Arthur expanded his Berlin jewelry shop to include the manufacture of Bicycles. However, by 1904, with the decrease in the demand for Bicycles, Arthur began to re-focus on the clock industry, by manufacturing his own clock movements at his Berlin Bicycle Manufacturing plant. Arthur obviously visualized a profit in clock making as many clocks at the time were imported from the United States. At first the wooden clock cases were made by local furniture makers, however in time he manufactured his own clock cases. Although the Arthur Pequegnat Clock Company was widely regarded as the only true Canadian clock company, lesser known companies such as the Hamilton Clock Company and the Canada Clock Company, though not as successful, predated it.

The Simcoe is a relatively nondescript clock. I passed by it in the antique store without realizing that it was a Pequegnat. My wife spotted it and I returned to take a second look. Sure enough, a Pequegnat!

The yellow oak case is in very good condition with one or two small scratches and a chip just above the top of the bezel. The dial pan has had an ugly repair, there are two brass tabs at 12 o’clock and 6 o’clock protruding though the front of the dial.

Piecrust bezel
Piecrust bezel

The dial face has some crackling but is otherwise in good condition. The piecrust bezel is in very nice shape as are the claw feet and lions heads.

Lions head on case side

The movement looks very clean with little evidence of wear. There is an inscription on the back dated Jan 10, 1970. It was likely serviced on that date. In any event it does not appear to have had much running since then. Unfortunately, there is no label.

Ornate front feet
Ornate front feet

The movement was taken out of its case, inspected for wear and found to be in very good condition. The movement was oiled, returned it to its case, the  beat was set and it is running strongly. The clock will be inspected in one years time to determine if servicing is required.

New Haven Ogee clock – attractive but not without issues

Ogee New Haven clock
Mini Ogee by New Haven, the gaps in the door indicate that the front was once veneered and later stripped

This spring driven 30 hour New Haven Ogee clock is a loud ticker and rapid striker so distinctive that I can hear the ticking outside the room it is in like a mischievous puppy who wants to remind you where it is.

Judging from other New Haven clocks I have researched from this period, 1875 seems to be the approximate date of manufacture. The case measures 18 1/2 by 11 3/4 inches (47cm X 30cm) and the movement measures 3 1/2 by 5 inches (9cm X 12.7cm); a small ogee styled clock some would call a mini.

The clock is a mere reflection of its former self but not unattractive

The New Haven clock Co. has had a long and illustrious history. In 1853 the Haven Clock Company was founded in New Haven, Connecticut by Hiram Camp (1811‑1892) and other clock-makers. The company’s mission was to mass produce inexpensive brass clock movements for use in clocks. In April, 1856 The New Haven Clock Company bought out a competitor’s company, the Jerome Clock Company. They moved their production to the former Jerome factory and New Haven began making clocks under their own trademark. In 1870 some of New Haven’s clocks were marketed under the Jerome & Co. brand.

In 1885 the company stopped selling clocks other than their own New Haven brand. In 1890 the company developed serious financial problems and efforts were made to keep it solvent until 1897 at which time the company emerged after reorganization. In 1902 Walter Chauncey Camp (1859-1925) began to turn the company around. In 1923 Walter Camp stepped down as head of the company and is succeeded by Edwin P. Root.

In 1929 Richard H. Whitehead replaced Root as president of the company but New Haven again faced financial difficulties compounded by the Great Depression in November, 1929. Whitehead was able to keep the company afloat during these troubled times and the firm regained profitability. From 1943 to 1945 the company turned to the war effort, producing products almost exclusively for military use. In March of 1946 The New Haven Clock and Watch Company became the new name of the firm after it reorganized once again. It returns to what it did best before the War, making clocks and watches.

The 1946 reorganization eventually leaves the company vulnerable to foreign investors and it lost control to a consortium of Swiss watchmakers. The man who had successfully shepherded the company through the hard times of the Depression years, resigned as president. In 1956 the New Haven Clock and Watch Company filed Chapter 10 bankruptcy in a U.S. court. Its fortunes have declined precipitously since Whitehead’s departure and it never recovered. In 1960 the company went out of business and the production lines closed. The facilities were sold through a combination of public auction and private negotiation in March of 1960.

Coiled gong - a replacement?
Coiled gong – a replacement from an E. N. Welch or a Gilbert.

This 30 hour New Haven Ogee looks good from a distance but closer inspection reveals a number notable issues. The movement appears original to the case and the case is in fair condition having been reconditioned at one time. Although the sides of the clock are veneered, the veneer on the front has been stripped off presumably because there was too much loss/damage. There is also some veneer loss on the top right side. Crude chisel marks on the left front indicate that the veneer in that area might have been more difficult to strip off. Unfortunate, but I have no intention of re-veneering the front. From a distance it still looks good and the casual observer will hardly know the difference.

The coil gong is a replacement and is in a slightly different location than the original gong judging from screw holes to the right. I can only surmise that the original gong somehow broke. This gong is probably from an E. N. Welch or a Gilbert.

New Haven 30 hour movement
New Haven 30 hour movement, back plate

30 hour movement - front plate
30 hour movement – front plate showing factory installed oil cups

There are oil sinks on the front but not the back plate. The sinks on the front plate are stamped by the factory and were made to look like a more expensive clock since most would not see the rear plate. An odd decision by the manufacturer but a common practice.

Side view of 30 hour movement
Side view of 30 hour movement showing count wheel and cam wheel

The plates are pinned (rather than the newer bolts or screws) and there are two solid gear wheels suggesting that it is an earlier version of this particular 30 hour movement. The suspension spring and leader are a replacement as expected given the age of the clock. The pendulum bob is a replacement and so is the dial face.

I took the movement from its case, inspected it for wear and applied clock oil. The clock is running well and does not require immediate servicing.

The clock is a mere reflection of its former self but not unattractive.

Waterbury 30 hour Ogee clock – servicing Part II

Waterbury OG clock
30-hour Waterbury Ogee with a beautiful veneered case

This 30 hour Ogee clock was purchased in the fall of 2017. I was eager to add this clock to my collection as it is the one particular style of clock that I do not have. From my research on Waterbury clocks I determined that it was made in or around 1870.

I decided to turn the worn trundles inward and seal them with Permatex (medium strength thread-locker) so they are fixed rather than rolling; not ideal but reversible

While the case is in remarkable condition for the age of the clock the movement has suffered the ravages of time.

Simple 30 hour movement, top plate removed

Testing over the course of a day or so revealed that clock would not run for more than a few minutes. The movement was taken out of its case and inspected to determine what needed to be done to get it to running condition.

I expected punch marks and there were a number. In the old days clock-makers would attempt to address pivot wear by closing the pivot holes with a stake or punch. Not ideal but a common practice. Bushing work was definitely required. The pivots, on the other hand, were in very good shape and polished up nicely.

Punching the bushing home

My first task was to address the bushings. Ten bushings were installed, 5 on each plate. The front bushing work included the escape wheel bridge, always a challenging spot to bush. Next I addressed the other serious wear issue – the trundles on all of the lantern pinions.

Lantern pinions on the escape wheel

The trundles on the lantern pinions were in bad shape as you can see in the photo above. The wear seen here was identical on all 4 lantern pinions. Notched trundles were not what I expected.

The trundle work was certainly the most interesting part of the repair. My experience with lantern pinion work is zero. After some research the method I selected was to hand drill through the top shroud to release the worn trundles.

Drilling through the shroud to release worn trundles
Drilling through the shroud to release worn trundles; I used a smaller bit than the one pictured here

After releasing the worn trundles I used 1.10mm pivot wire which is ideal for this purpose and matched the worn trundles precisely.

Test fitting of pivot wire before the wire is cut to proper length

I began with the fly. I drilled into the top shroud. I then cut 1.10mm pivot wire into the required lengths then rounded the ends with a cut-off disc on a  Dremel. After the fly was completed I addressed two more lantern pinions in the same way. I staked the shroud ends to seal the trundles inside.

With three done the escape wheel lantern pinion was next and that is when I ran into a snag. The escape wheel shroud is reversed (see photo below), so I cannot drill into the top shroud without a lot of guess work. Using needle nose pliers I decided to turn the worn trundles inward and seal them with Permatex (medium strength thread-locker) so they are fixed rather than rolling. This is not ideal but it is reversible.

There does not appear to be a definitive answer as to whether the trundles should be free-moving or fixed although I suppose they are designed to roll with the gear teeth. At some future point the trundles on this wheel will need to be replaced.

So, how do you get at those trundles?

The clock did not come with a pendulum bob so, a new one was attached. The suspension spring and leader was replaced to address a crimped spring that resulted in a wobbling pendulum bob. I used .09mm suspension spring in the correct length. The clock now runs well and it has completed a number of 30-hour cycles.

I suspect that this will be a clock that will not be run daily, the inevitable hassle of constantly winding a 30 hour clock but I am pleased that it is back in running order and I will ensure that is runs on special occasions.

2017 – Time to reflect, a year in summary

I am a retired educator living in Nova Scotia Canada. I collect vintage and antique clocks that I repair and maintain. I also write about horological areas of interest, interesting clocks and clock stories when I search for new acquisitions.

As most bloggers know the key to building a successful blog is not only attracting new visitors but keeping existing ones interested enough to come back

Baby Ben alarm clock with second hand
Baby Ben alarm clock with seconds hand

In the spring of 2015 I began my journey into blogging. The first few months of writing about clocks, clock collecting and repair were very challenging. How could I interest those who not only collect antique and vintage clocks but have just a passing interest? As time went by I began to realize that there was plenty to write about, that the world of clock collecting and repair is incredibly vast and that there is much to learn.

This blog has given me an opportunity to profile my own clock collection, walk the reader through the challenges of restoring and repairing my clocks and the knowledge gained from those experiences.

Cuckoo clock
Cuckoo clock

As I write this article my blog has over 49,000 total views, 33% from United States, 17% from Canada and the remainder from around the world including the United Kingdom, Australia, Romania, Germany, India, The Netherlands, South Africa, Malaysia and 80 other countries. The top 5 articles this year were:

  1. Mauthe Mantel Clock
  2. Daniel Dakota Wall Clock
  3. What is my clock worth?
  4. How to wind a mechanical clock
  5. U.M. Muller Box Clock

As most bloggers know the key to building a successful blog is not only attracting new visitors but keeping existing ones interested enough to come back. In the past year alone viewership has doubled. My visitors average 1.8 articles per visit with an average of 88 views on a typical day in 2017. November and December peaked at 100+ views per day.

Swiss made smoothing broaches

Providing enough stimulating content so that visitors want to return is always a challenge. I post 7 articles a month, sometimes one or two extra, usually spaced 4-5 days apart, on various topics of interest. I also attempt to appeal to all facets of clock collecting and repair from profiling my own acquisitions and experiences restoring and repairing my clocks to articles of general interest. I also inject historical horological context as much as possible.

I receive about 30+ comments per month on average. All comments and inquiries are welcomed. Interesting comments come from people who typically ask me how much their clock is worth, particular problems they have with their clock, strategies for repair and information about the history of their clock. All questions are answered to the best of my ability but I make no pretense that I am a trained professional.

one-weight Vienna wall clock
Miniature one-weight Vienna wall clock, circa 1870

In 2018 my intent is to continue to write interesting articles about clocks in general as well as profiling my modest but expanding collection of antique and vintage clocks. I also plan to explore special areas of interest.

Future articles include, “Letting a clock sit without running”, “Mercedes clock – not made by the car folks”, my 4th Arthur Pequegnat clock, a second installment of the Waterbury Ogee 30 hour clock, a mini New Haven Ogee that has some curious modifications, how to set up your grandfather clock, “What style clock do I have?” and more Crazy Clock Ads.

Ingraham Huron mantel clock circa 1878

Mauthe Westminster chime mantel clock

Stay tuned and if there is an area of interest you would like to see me to explore, drop me a quick note. If you like what you are reading express “Like” it at the end of each article.

Thanks for your comments, your encouragement and your continued support.


So you want to fix a mechanical clock – Part II – advanced tools

tools are essential for clock repair because they enable precision and accuracy, which are critical when working with delicate mechanisms and intricate components. Let’s identify the key reasons.

Antique and vintage clocks can lose significant value if repaired improperly. Using the right tools minimizes the risk of damage, preserving their historical and monetary worth. The right allows you to handle small parts without causing damage. Specialized tools ensure components are handled carefully and correctly.

Proper tools make the repair process faster and more straightforward. Having the right tools helps build confidence and competence. They allow you to focus on understanding clock mechanisms without being hindered by improper equipment.

This article will describe some of the more advanced tools required to tackle the repair and/or cleaning of mechanical clocks.

Based on years of clock repair experience, I recommend the following tools for those ready to advance their skills in clock restoration and repair. Most specialty items will need to be ordered from clock supply companies such as Timesavers (USA), Perrin (Canada), or Meadows and Passmore (UK). Other items such as an ultrasonic cleaner can be ordered through online merchants.

Part I of this two-part series describes the basic tools for those just starting out. The tools/equipment described here are for the more advanced hobbyist/amateur horologist.

A Suggested List of Items

Ultrasonic Cleaner: This Harbor Freight special will do for now but it is so low-powered that a newer, more powerful machine is on the horizon. It does not perform as well as better quality machines and it has a limited load capacity. An eight-minute limit for each cycle means that several cycles are required to properly clean clock parts. It is a start.

Ultrasonic cleaner
Ultrasonic cleaner

Spring winder: An essential tool. Disassembling clock movement also includes servicing the mainsprings. Mainsprings must be inspected for breaks, cracks and splits, cleaned of old oil and rust (as long as there is not too much rust) and lubricated prior to re-installing them into the movement. Too much rust and they should be discarded.  I generally do not replace springs in a movement unless they are quite set, or have breaks or cracks. I have found that the steel in the original movement is better quality than can be found today. Mounting the spring winder on a piece of hardwood provides a stable tool and allows it to be clamped to a work-desk.

Although there are other types of spring winders, the Olie Baker winder is one of the better choices in my view. It is well made and should last for years. If you can find a used one you will save a little.

Joe Collins has plans for a homemade spring winder that you can find on the National Association of Watch and Clock Collectors site.

Mainspring contained in a clamp
Mainspring servicing
Mainspring servicing; taking the clamp off to inspect and service the mainspring
Mainspring barrel
Mainspring barrels require collars supplied with the Olie Baker spring winder

Bergeon 6200 Bushing Machine: Some bush by hand and they are to be applauded for their patience and skill. I chose a bushing machine for the delicate work of installing bushings. This is the Bergeon 6200 which is made in Switzerland. It is exceptionally well made and relatively simple to use.

Chucks and reamers
Chucks and reamers

The machine can be bought separately or with a set of cutters and other hardware (above). The cutters can last 15 years or more. Of course, you must also have an assortment of correctly sized brass bushings that are purchased separately from any clock supply house.

To operate, a correct size cutter is placed in the bottom end of the steel shaft, holes are cut after which the new bushings are punched in place with a hammer head fitted to the shaft.

Bergeon Bushing Machine
Punching the bushing home
Pressing a brass bushing into the drilled pivot hole
Six bushings on back plate
Six new bushings on the back plate of a mantel clock

Lathe: Good quality mini lathe are available from Sherline, Taig and others. A cost effective option is the Taig Miniature Lathe for metal. The Taig lathe was originally designed for precision machining of watch and clock parts; ideal for clock repair applications. The small office space in my home means that its compactness, portability and relative simplicity are attractive features.

Taig lathe with 1/4 hp motor
Taig lathe with 1/4 hp Marathon motor

Reference/Reading material: I recommend the Steven Conover series of repair manuals. The manuals are well-written, and detailed and are great resources for the beginner or the advanced amateur.

  • Steven G. Conover; Clock Repair Basics
  • Steven G. Conover; Striking Clock Repair Guide
  • Steven G. Conover; Chime Clock Repair

The acquisition of clock supplies and equipment has been a personal journey for me. I started with a few basic tools for disassembling movements, gradually learning what additional tools were necessary and steadily expanding my collection over time.

Several years ago, my first major purchase was the Olie Baker spring winder. A few months later, I added a Bergeon bushing machine, complete with cutters and a supply of bushings. Most recently, I acquired a Taig mini lathe with accessories. This mini lathe will enable me to advance my clock repair skills by allowing me to polish and burnish pivots properly, replace worn or damaged pivots, and perform other specialized repairs. As new challenges arise, I plan to seek out additional specialized tools and equipment to further enhance my capabilities.

And finally

Set a specific goal, research your requirements, and build your collection of tools and equipment gradually while sticking to a reasonable budget. Clock repair can be more affordable than you might expect, especially when costs are spread out over time and some tools can be sourced from the used market.

I hope you found this helpful! If there’s a tool or piece of equipment you consider absolutely indispensable, I’d love to hear about it.

Website Powered by WordPress.com.

Up ↑