Maintaining your mechanical clock – it’s simpler than you think

Maintaining your antique clock – a discussion

Ingraham 30 hour cottage clock

How do I know if my antique mechanical clock is keeping good time? While it may be important today, years ago people had a different concept of time. Back in the 18th and 19th centuries common folk had little need to know the time of day precisely. There were no cars, TVs, or the Internet. There was little demand for careful timekeeping and clocks, whether they be spring driven or weight-driven, that were accurate to within a few minutes a week were considered excellent timekeepers. Astronomical clocks were certainly available to scientists and better regulators were made for commercial purposes (the railroads for example) but for the common man, the emphasis was on cost rather than absolute accuracy, and to-the-second time was neither sought nor desired.

The weight-driven ogee was a very popular clock for the home

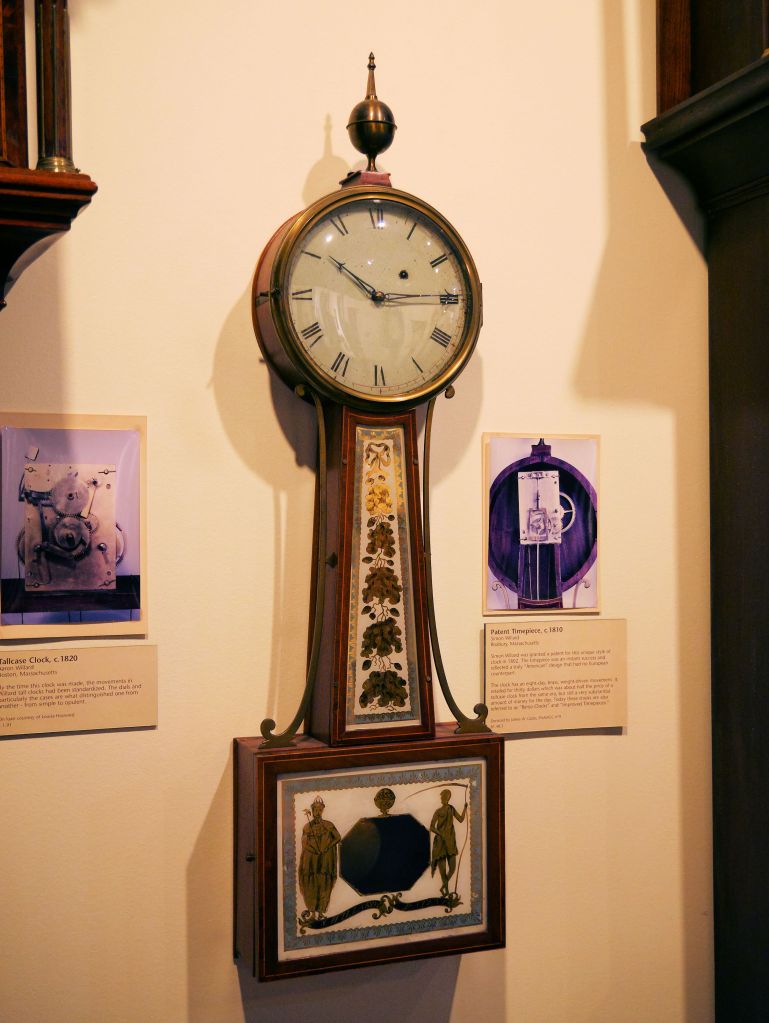
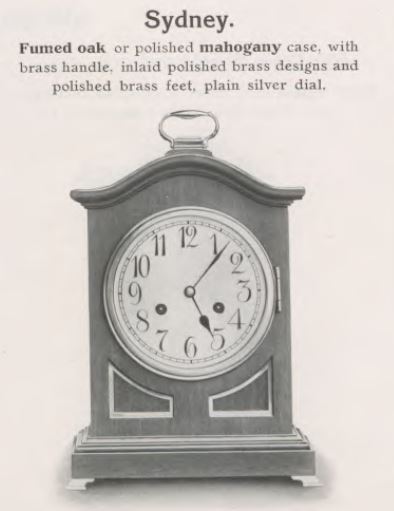
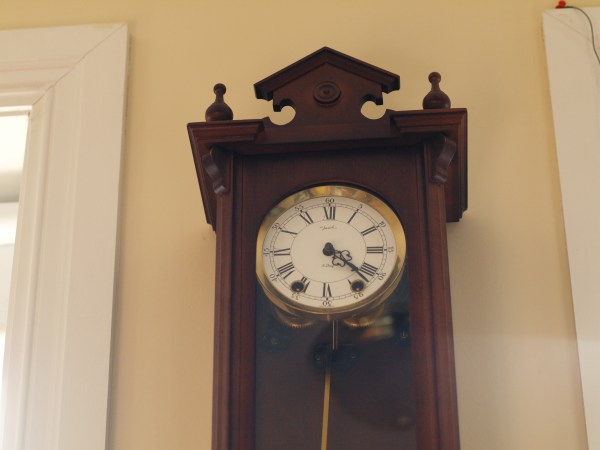
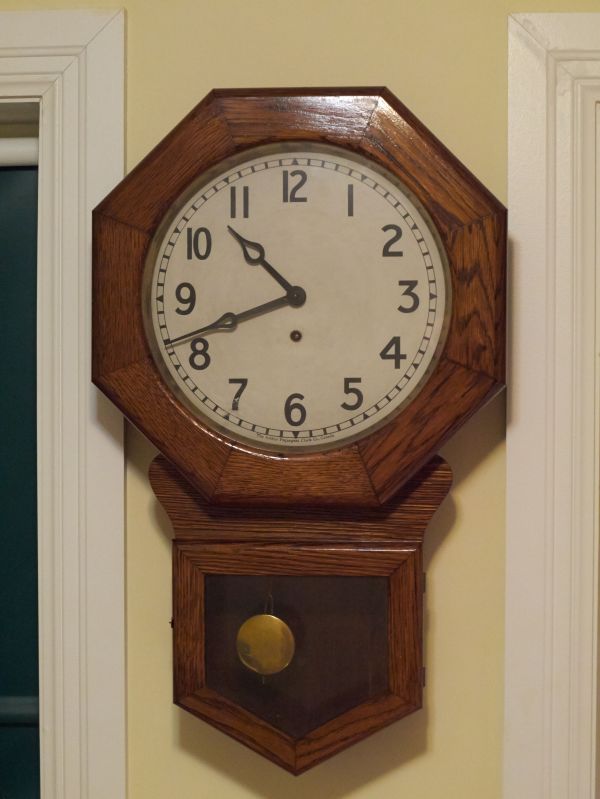
The common mechanical clock for the home was a wonderful invention and by the mid-1800s, with a clock in every home people could regulate their lives whether it be sending the children off to school, attending church, or working in the fields.

In those days if the family clock stopped and usually there was only one in the home, the priority was to have it serviced often by backyard tinkerers. For those who could afford it, reputable repairpersons were available and professional repairs were provided.

Clockmaker's shop
Clock-maker’s shop from about 1900

Today professional repair shops are disappearing at an alarming rate and with it, knowledge is lost forever. There is no going back. Mechanical clocks are still with us and require periodic maintenance, after all, they are machines, and machines are not meant to last forever though they can last an incredibly long time if cared for properly.

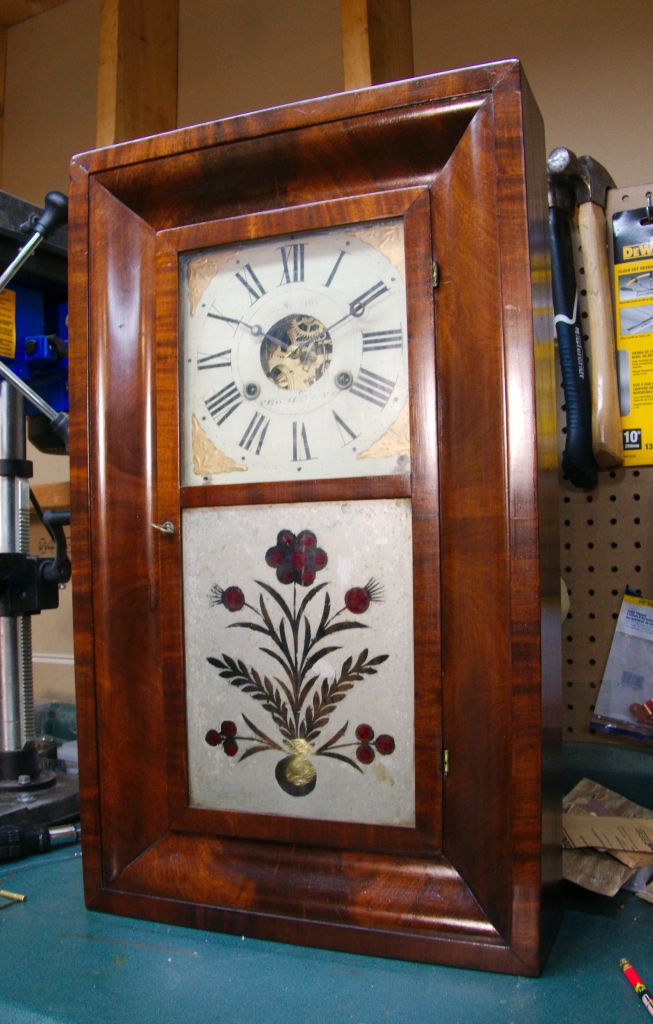
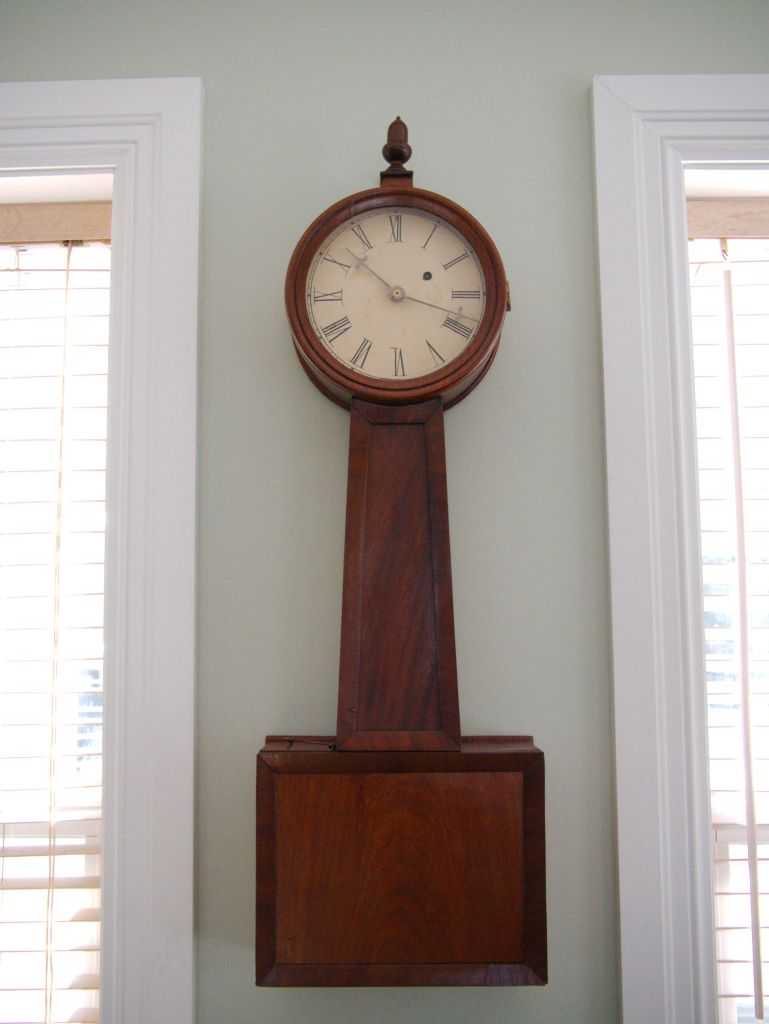
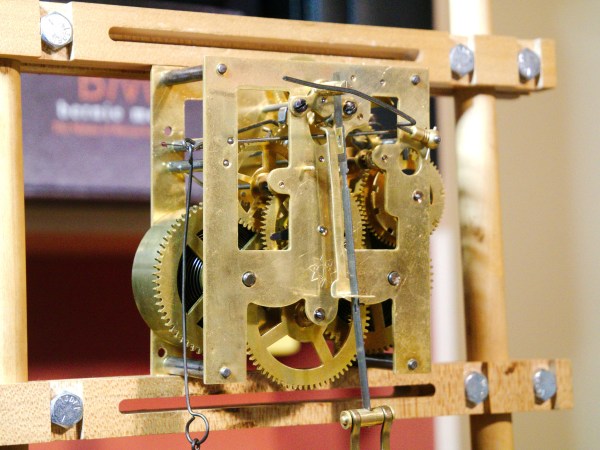
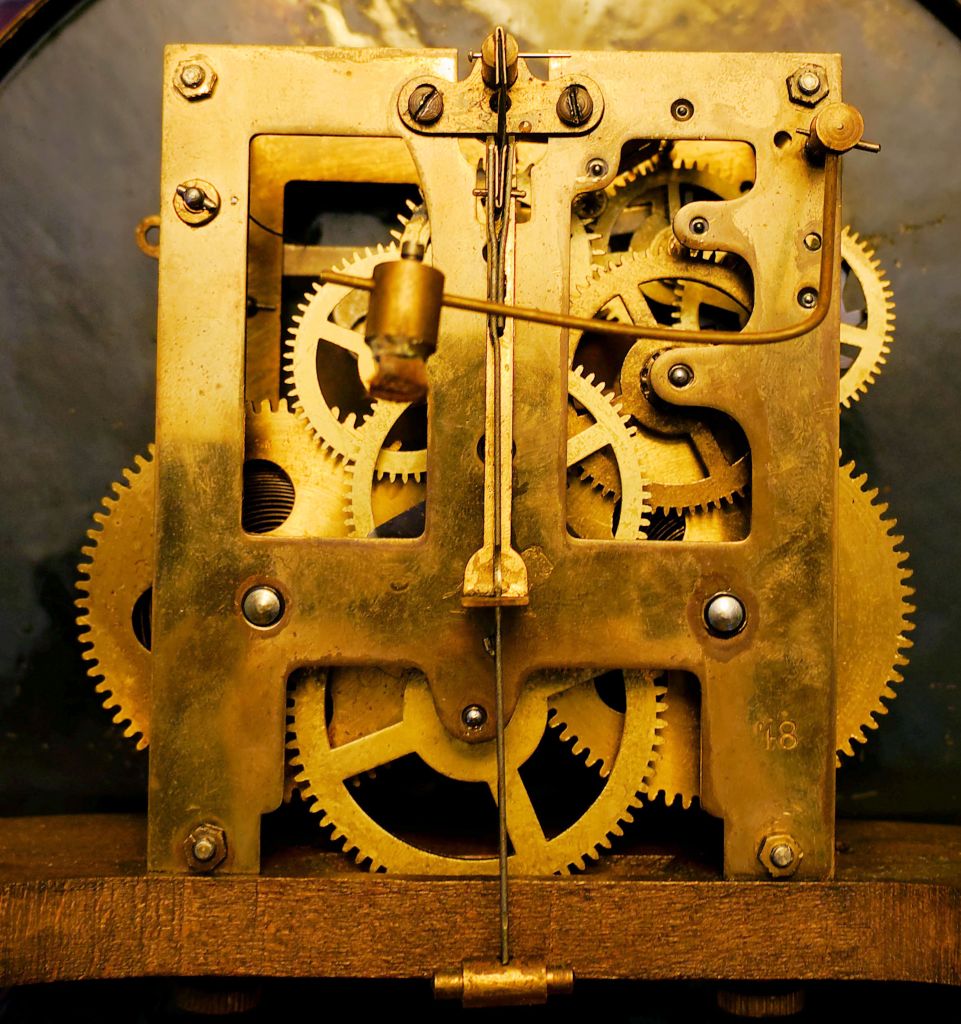
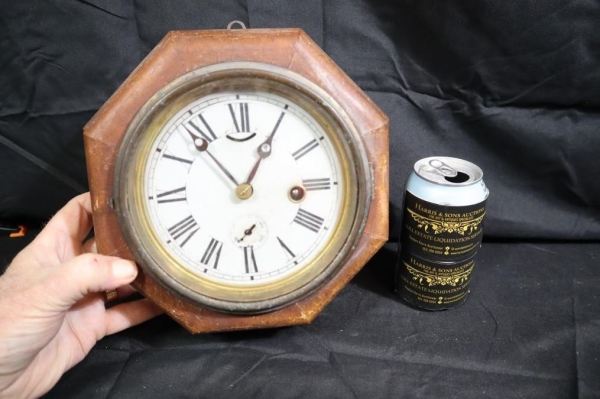
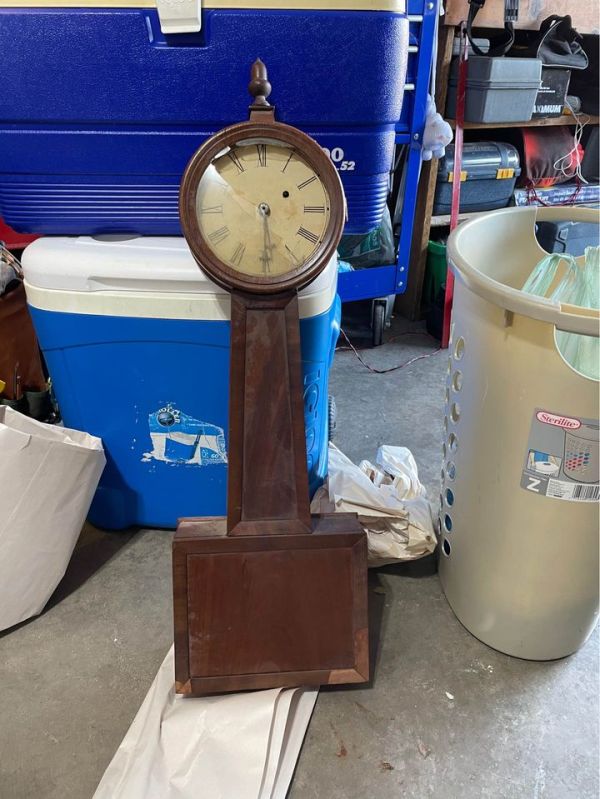
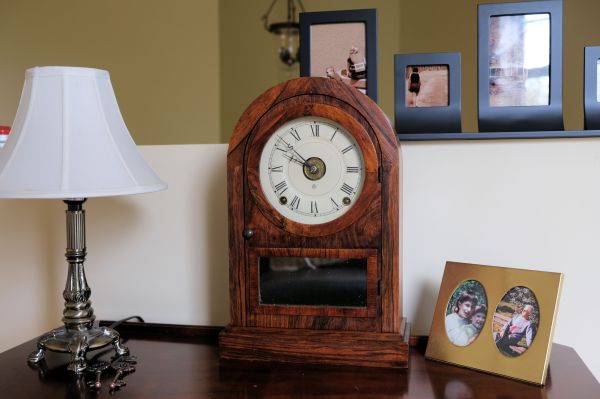
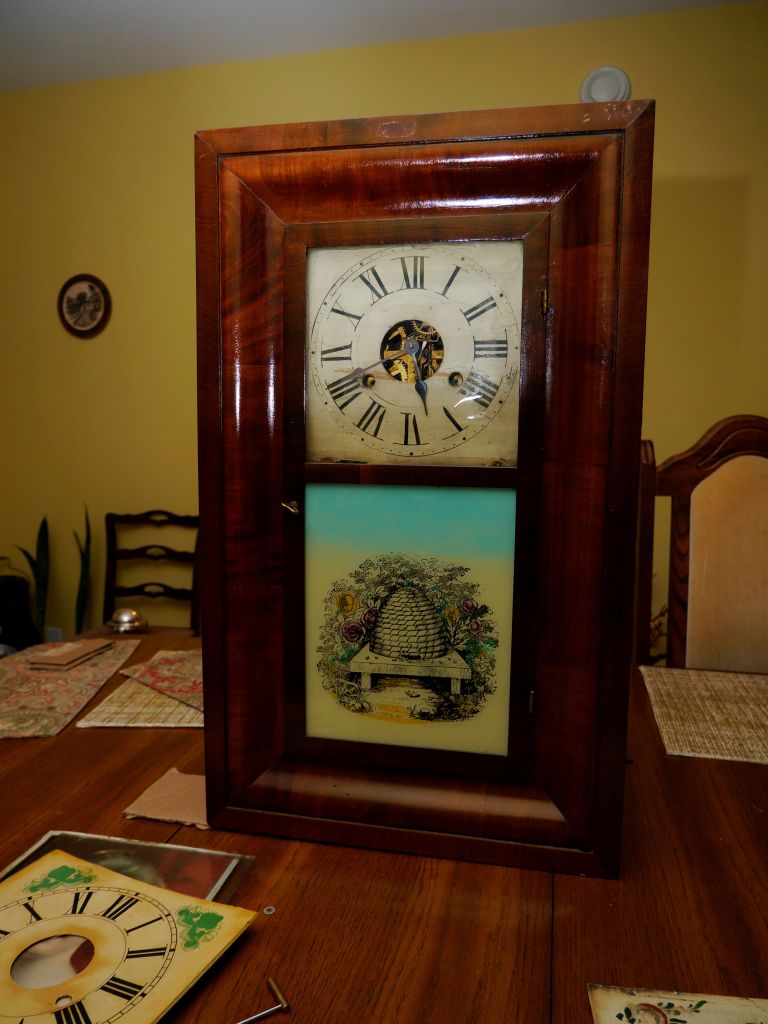
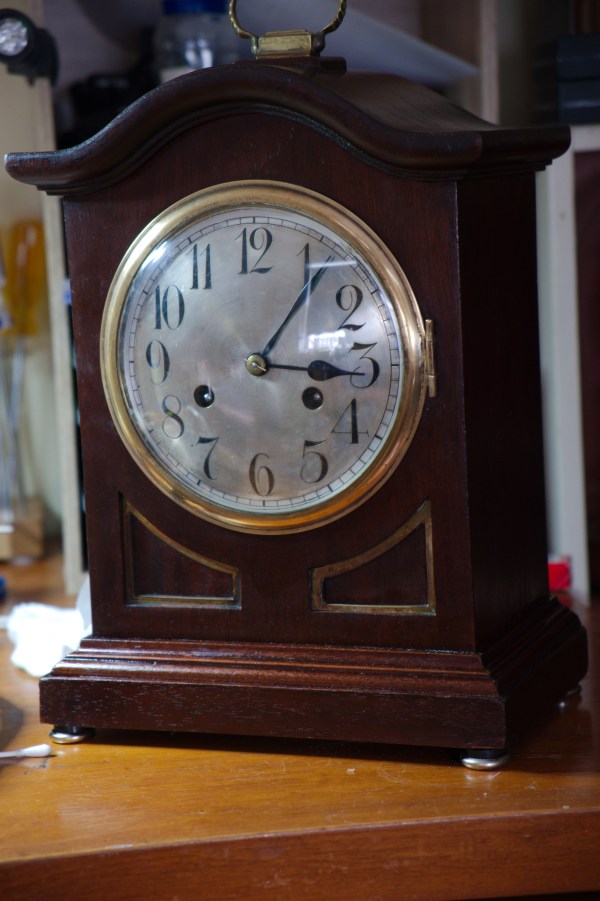
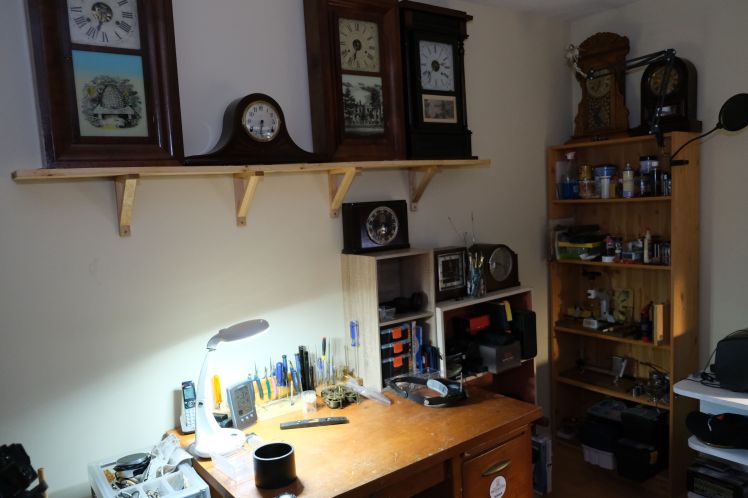
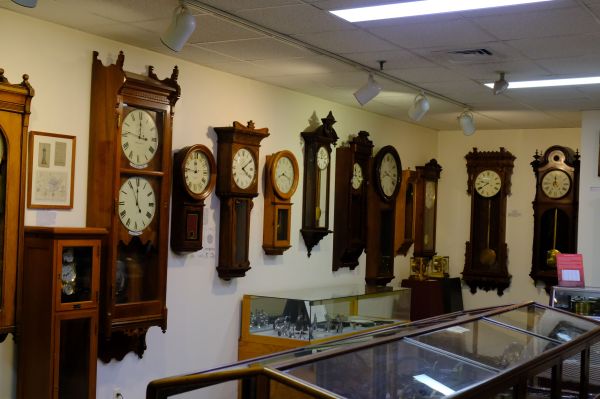
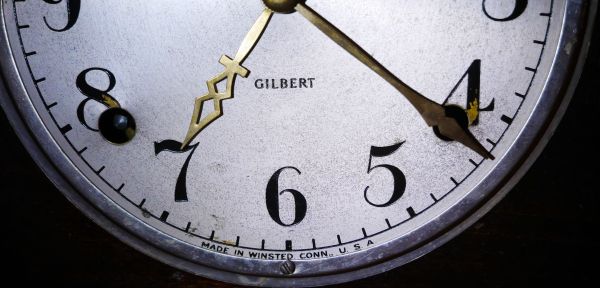
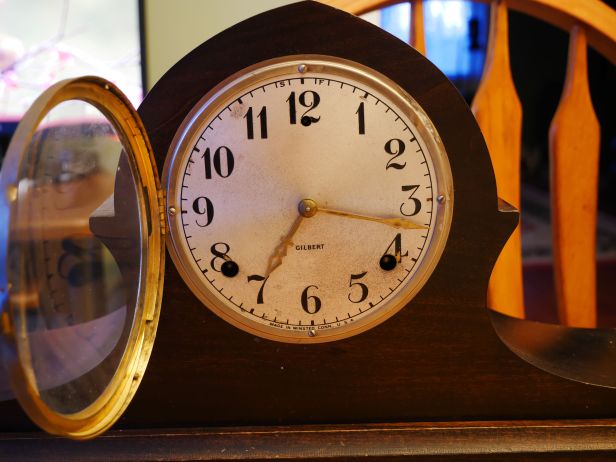
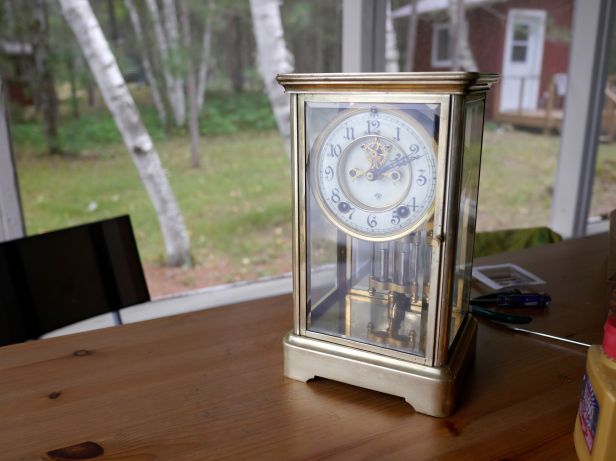
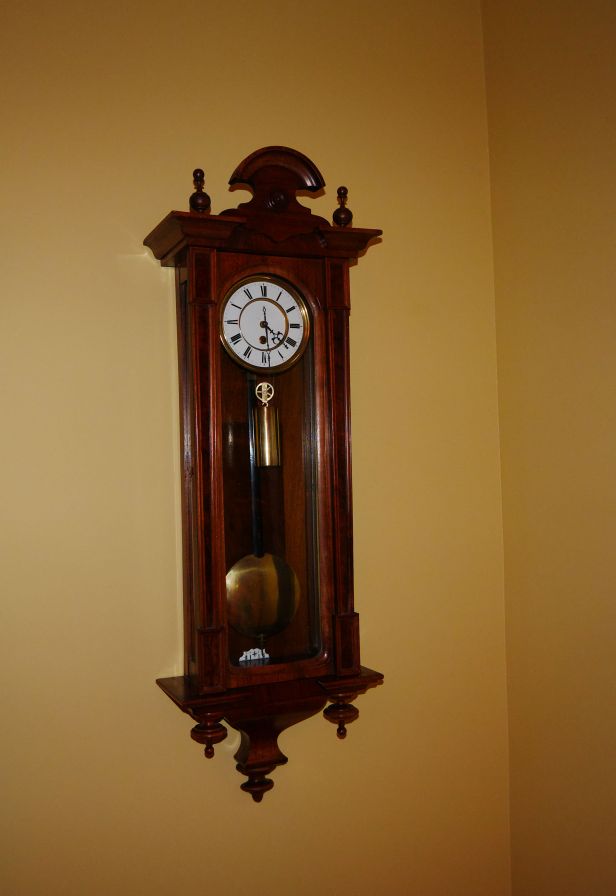
That a mechanical clock can last a long time is partly because of clever engineering, robust construction, and periodic maintenance. Indeed, I have clocks in my collection that are over 150 years old that still work daily and not because of sheer luck. They are properly maintained.

180-year-old weight-driven banjo clock from Boston

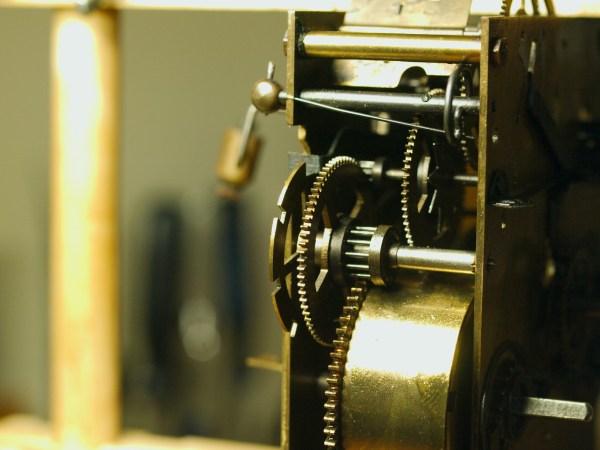
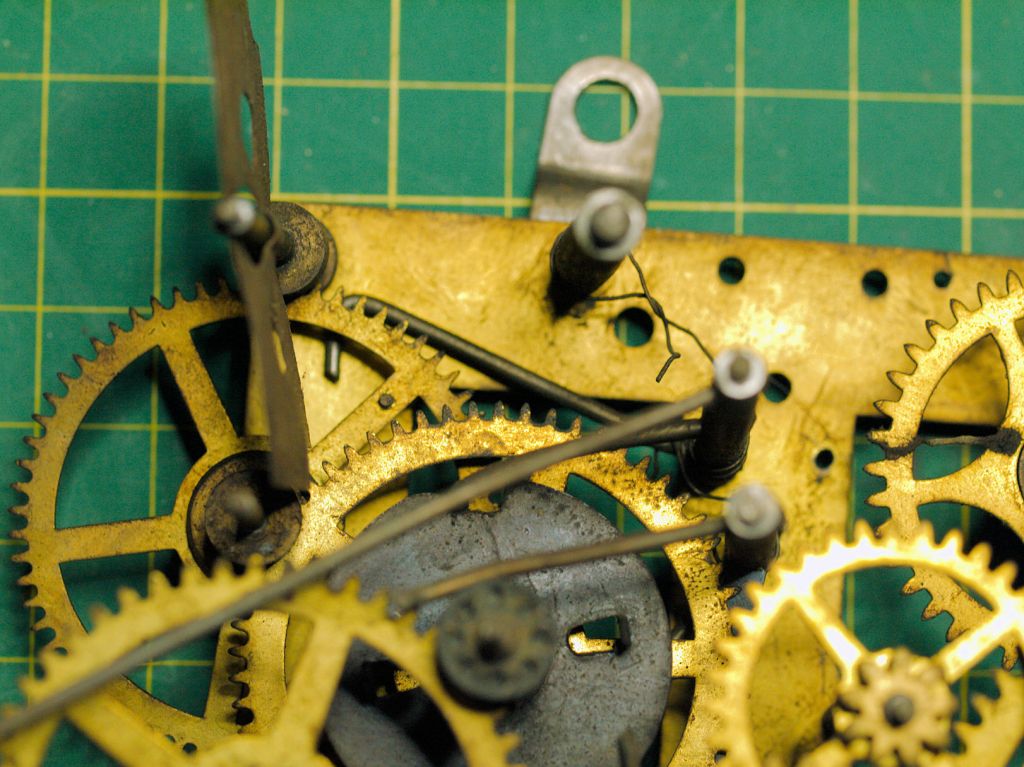
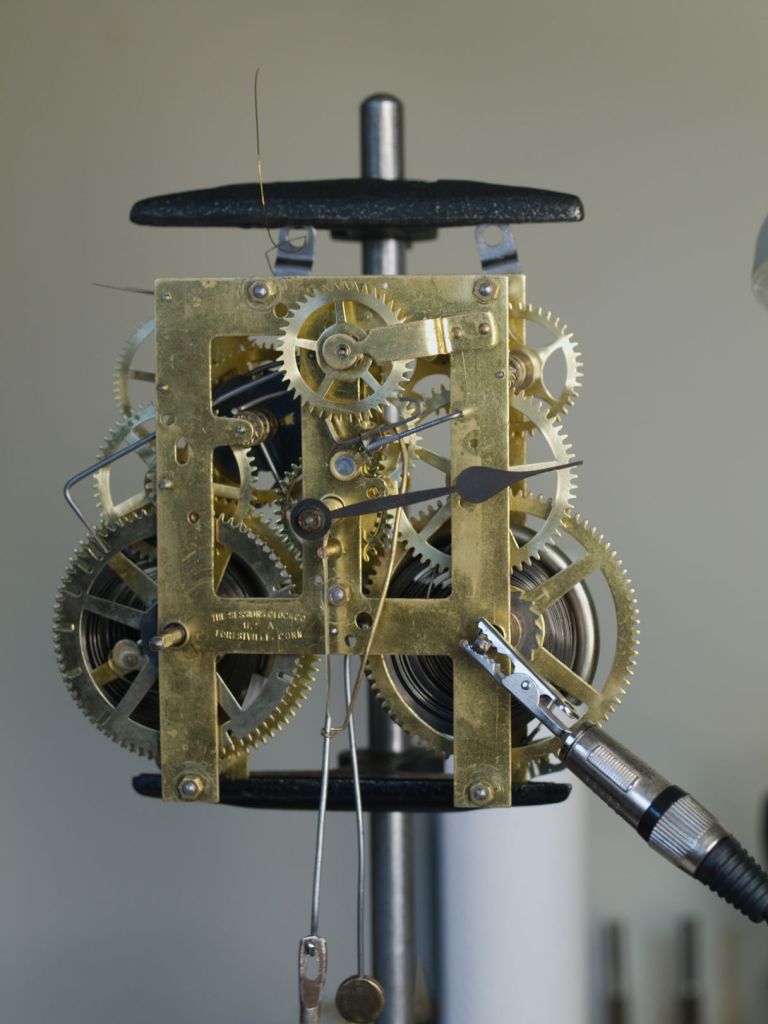
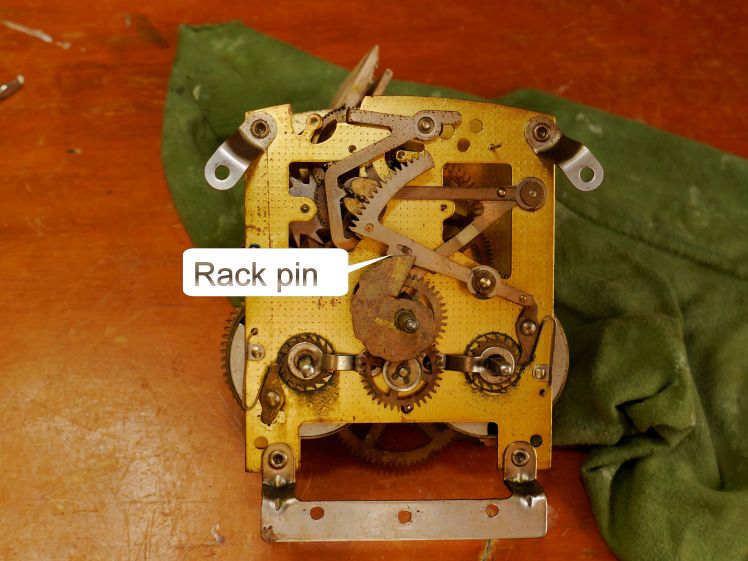
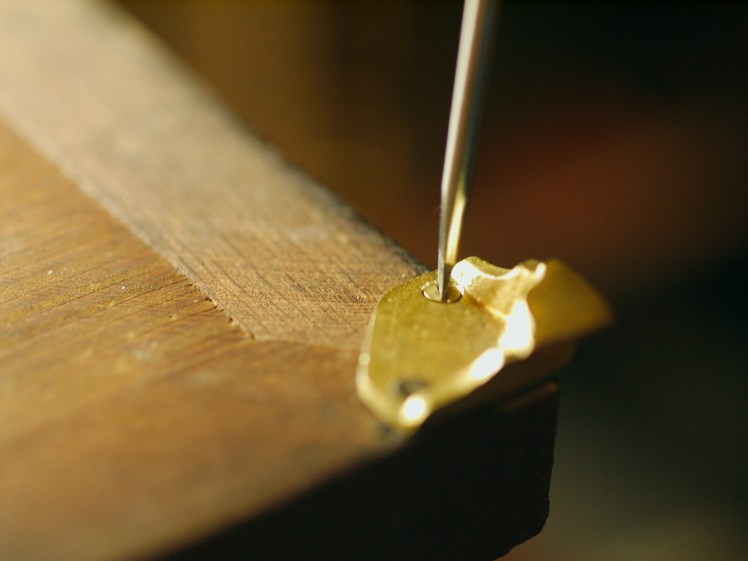
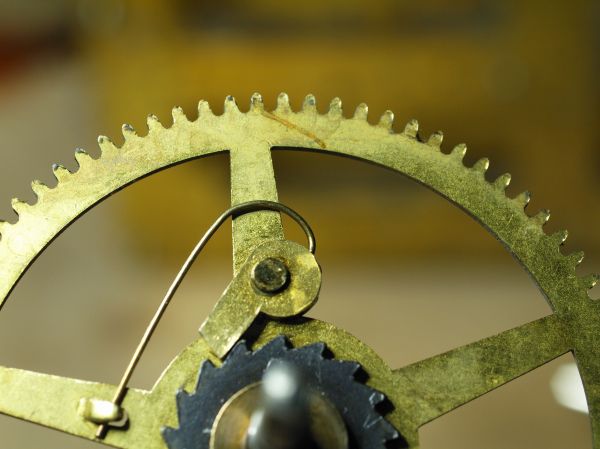
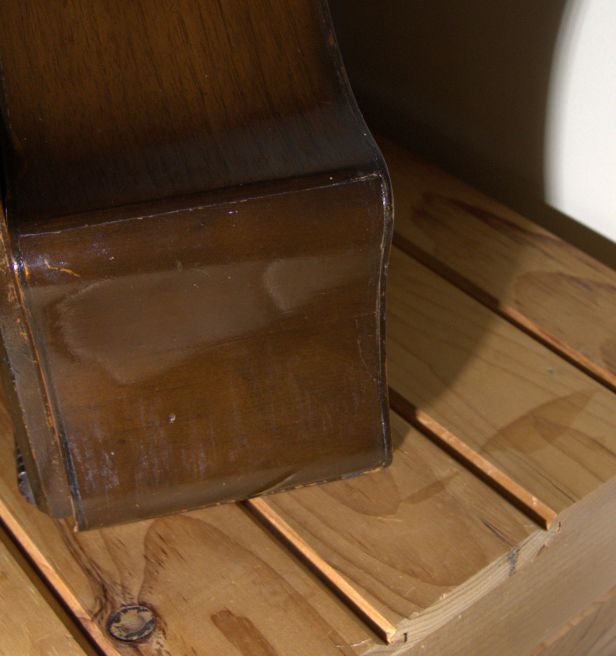
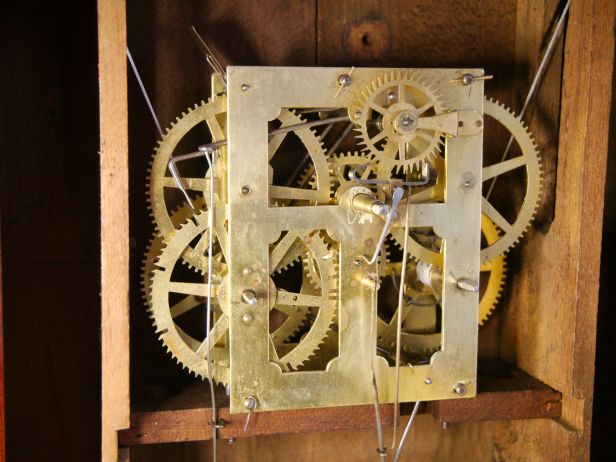
Any clock repairperson will tell you that friction is a clock’s worst enemy. Worn clock parts that lack oil or dried up and dirty oil cause friction that can interfere with the running of a clock. Mitigating friction is the key a clock’s long life.

Trundle wear
Trundle wear on a lantern pinion

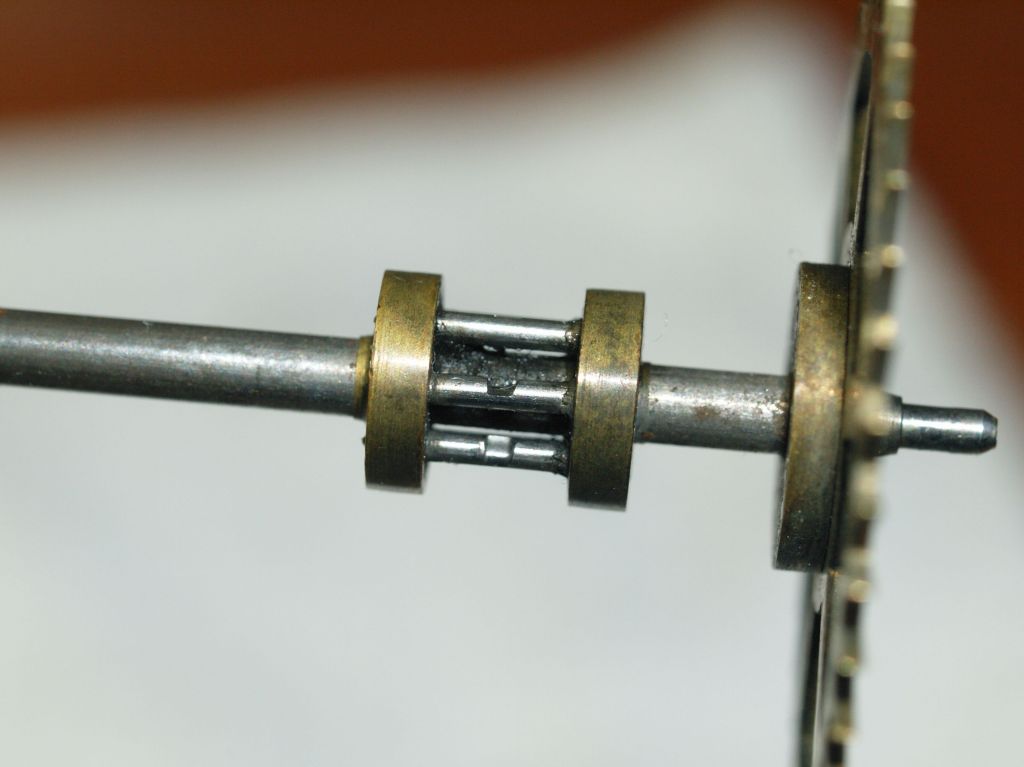
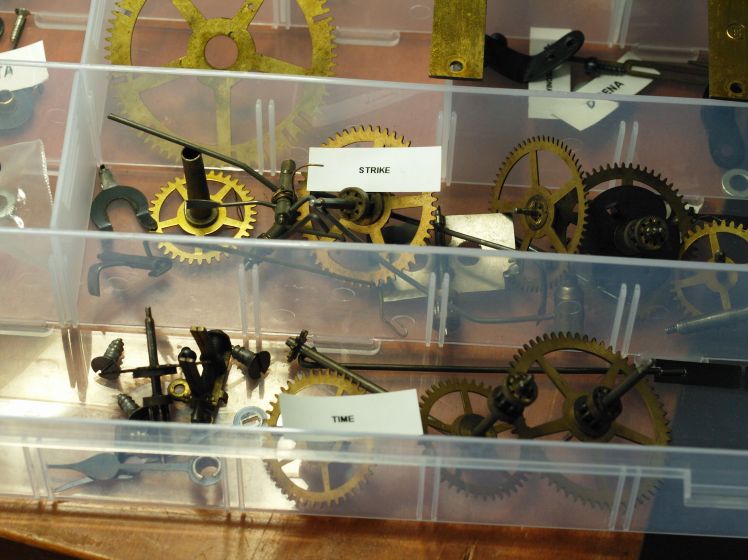
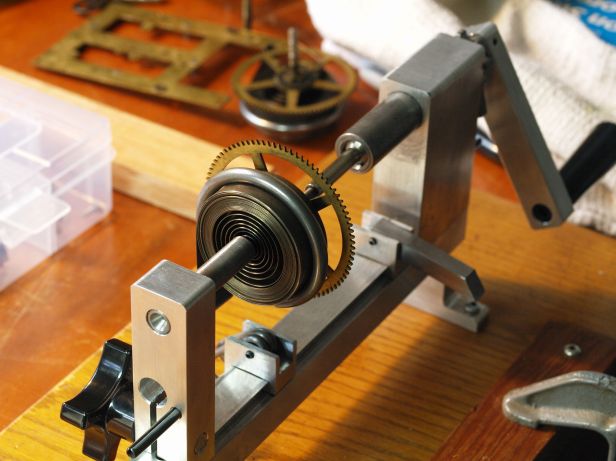
Several things happen to clocks as they run year after year. Oil contaminated with dirt and dust build-up, the oil turns black and parts moving with one another generate wear, gradually at first and accelerates as grime builds. In time wheels that are unable to properly mesh with one another cause a clock to stop. In some cases, weakened or tried mainsprings become set, lose their ability to completely unwind, cannot maintain their rated cycle (One-day, 8 days), and must be replaced. Wear is reversible in most cases but occasionally replacement parts are the only option.

When to oil and when to service

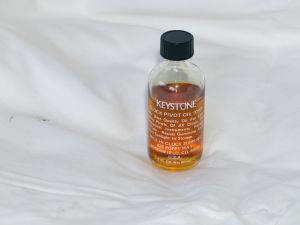
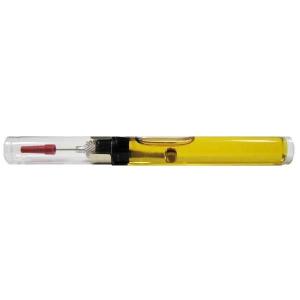
There is no absolute timetable with respect to periodic maintenance and servicing. there are many opinions among clock repairers but a cycle of between one to five years is considered reasonable. If a periodic inspection reveals that the clock is clean and the pivots well-oiled the period between servicing can be extended, assuming that the clock is running well, to begin with.

Clock pivot oil
Clock pivot oil

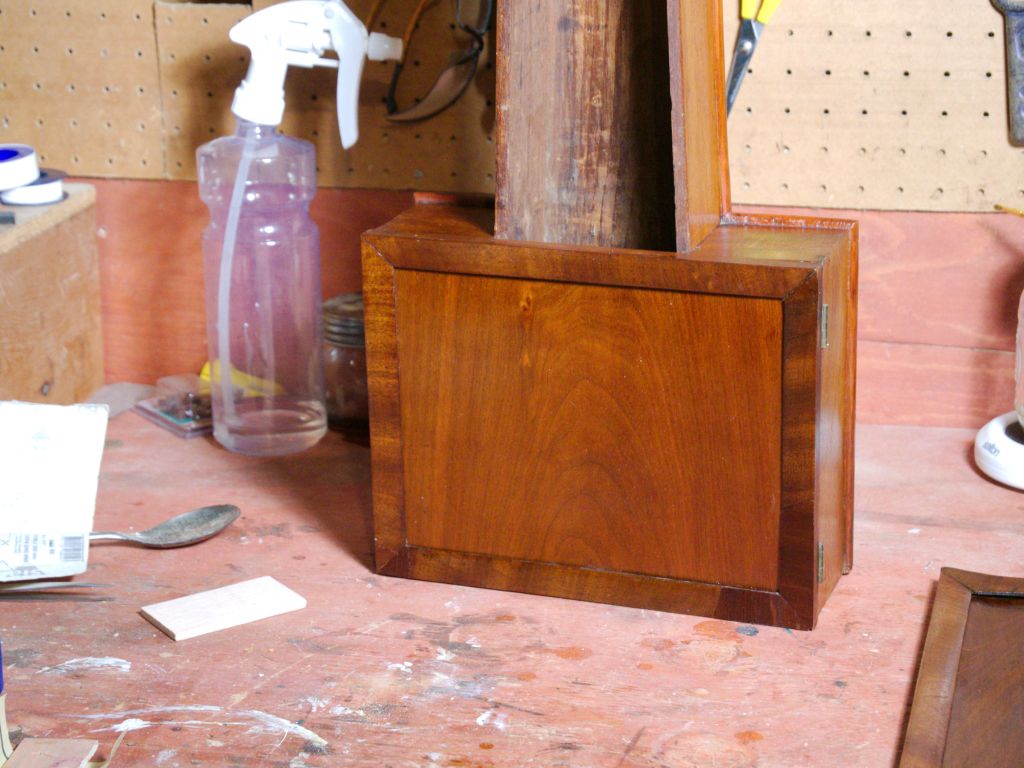
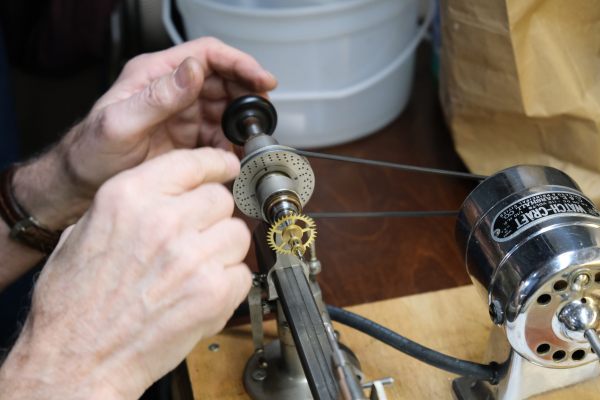
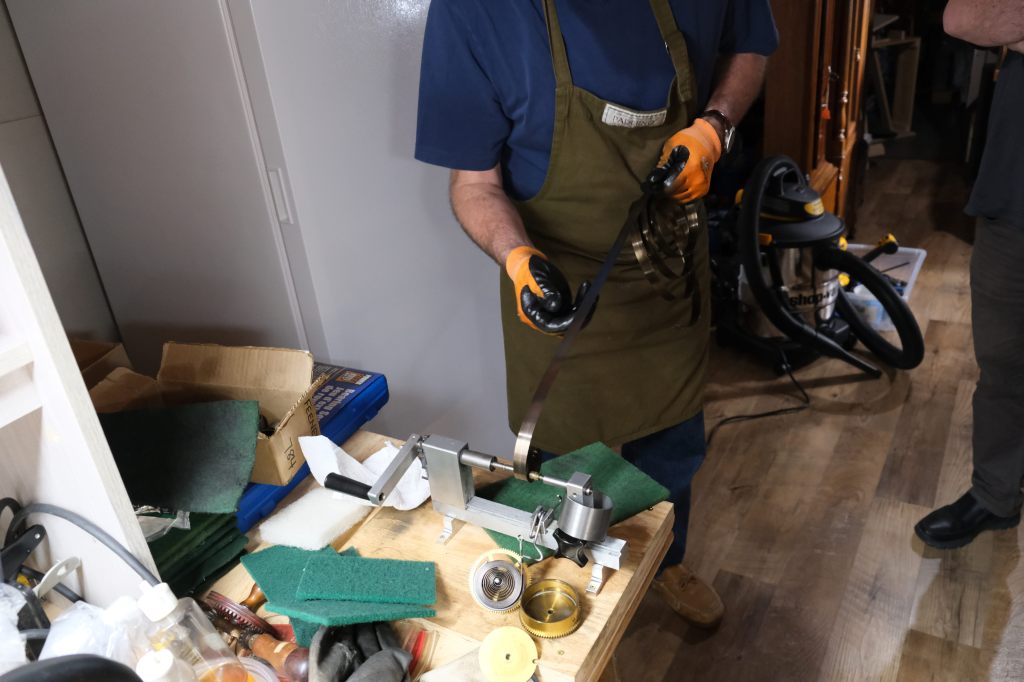
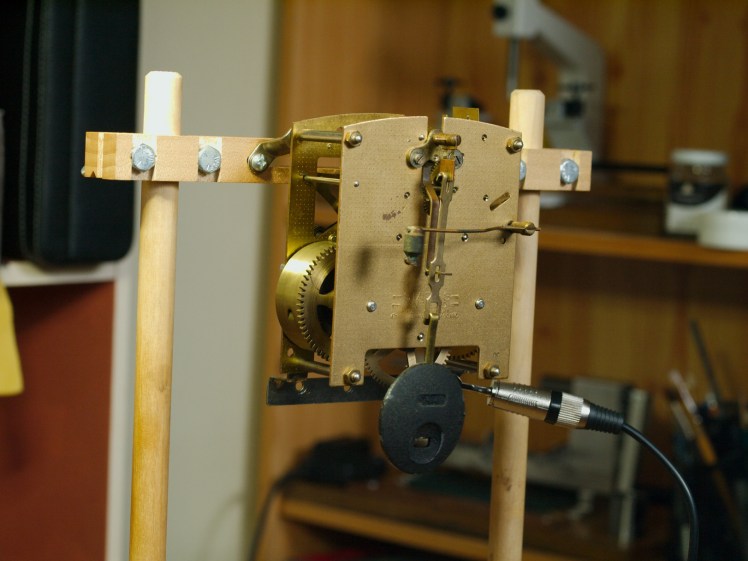
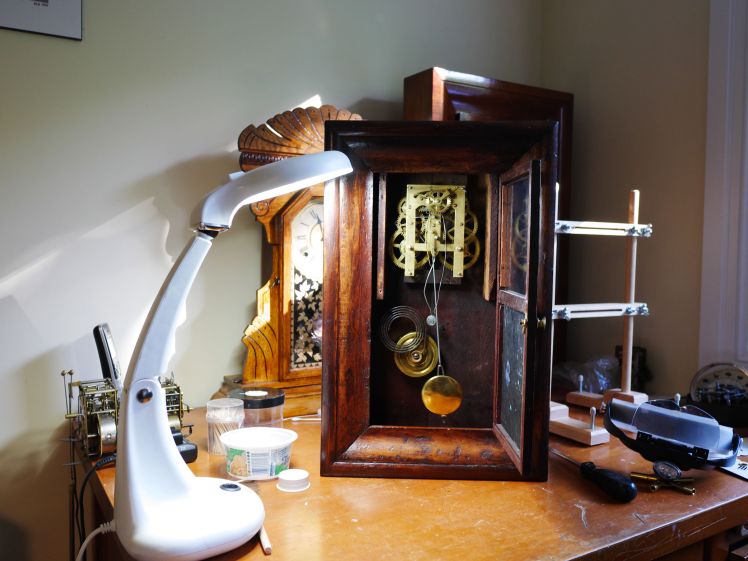
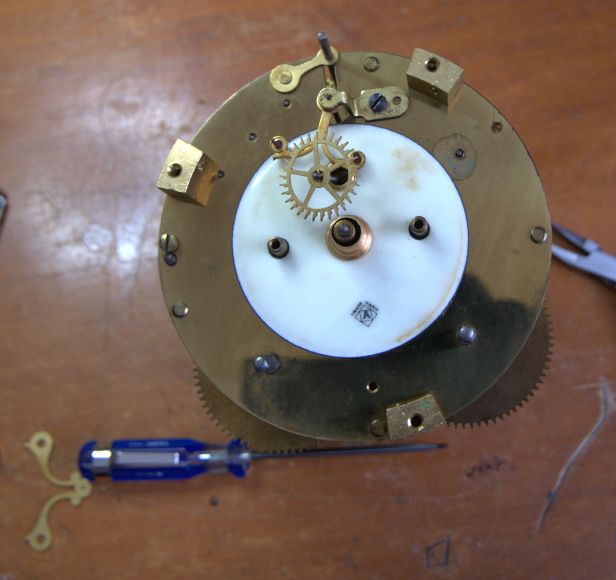
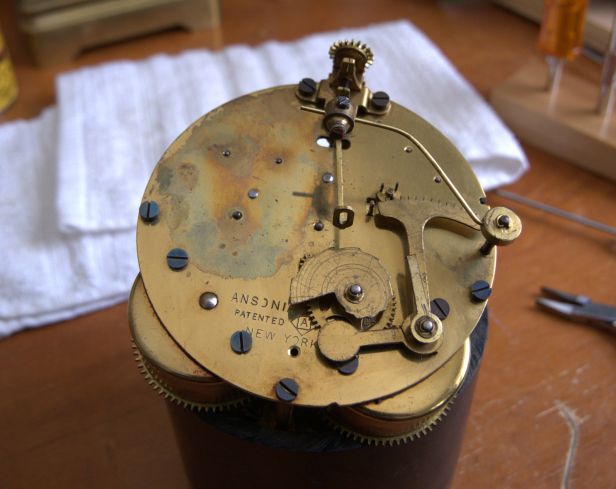
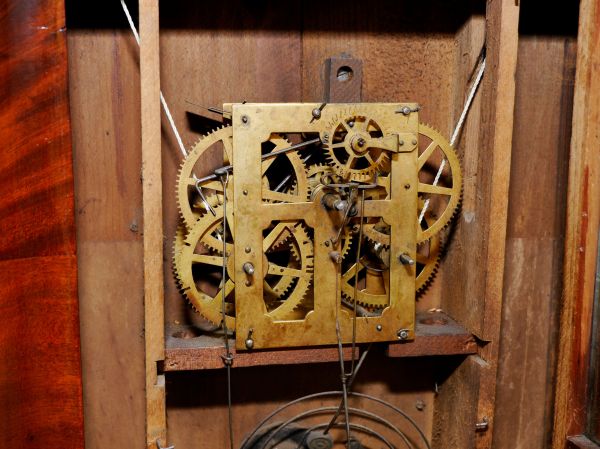
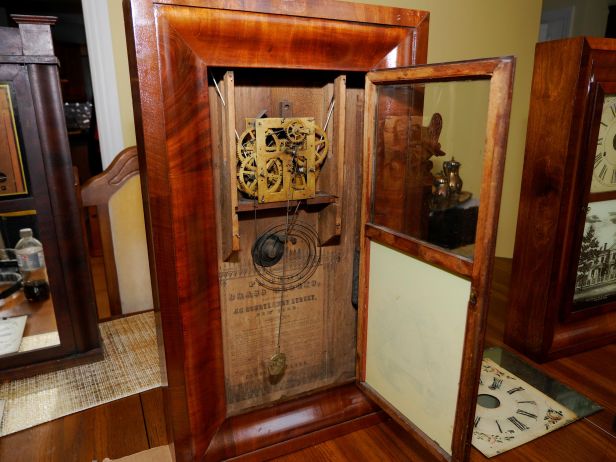
Routine maintenance should always include careful inspection and if necessary, disassembly of the movement, cleaning, addressing wear issues, reassembly, oiling, and testing. Even the simple task of reoiling a clock movement involves taking it out of its case in order to access all the oiling points.

When a clock stops

When a clock acts up it is sending out a clear message. When a clock is acting up one might be tempted to add more oil or spray the movement with either a lubricating oil or WD-40 (which is actually a water dispersant rather than oil). Doing so will actually turn the clock into a dust magnet and the combination will turn the oil or other questionable lubricant into a grinding paste around the pivots and exacerbate wear.

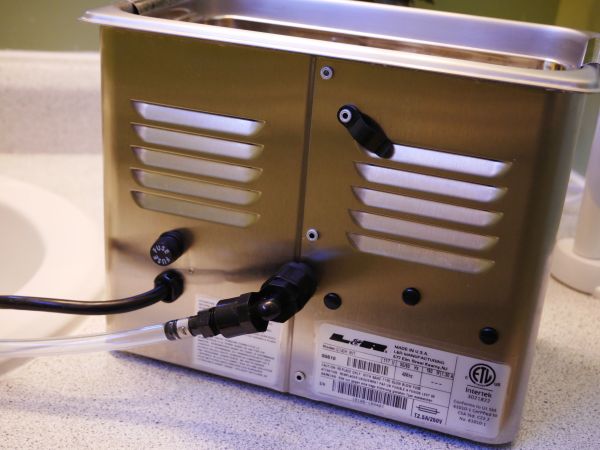
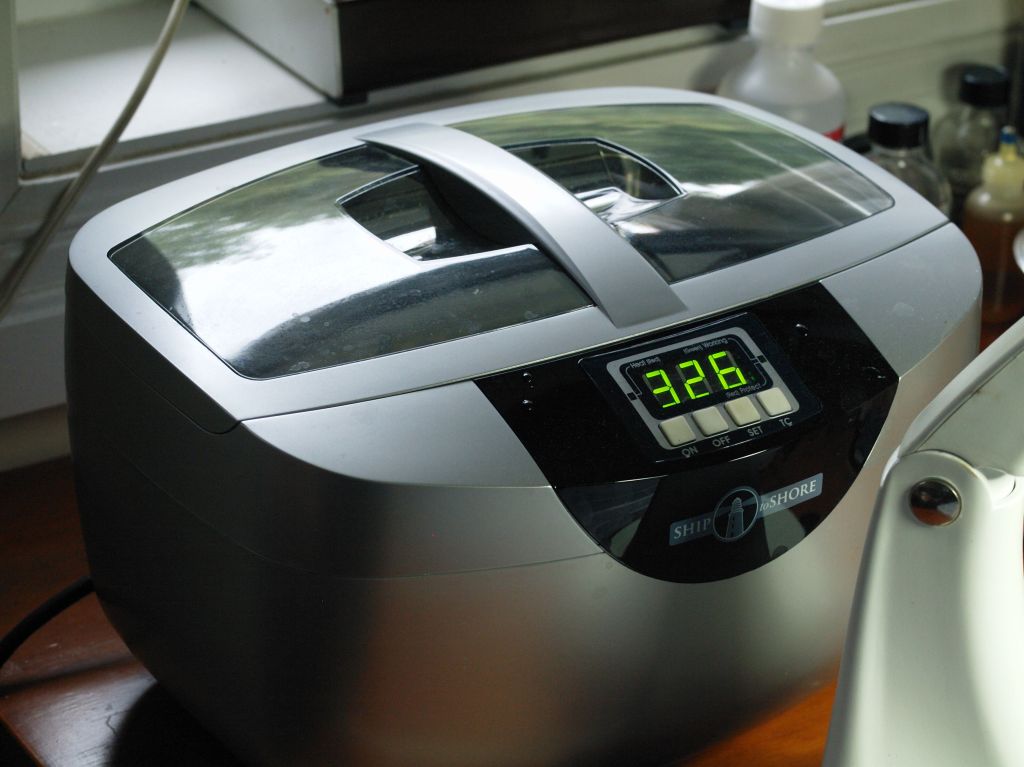
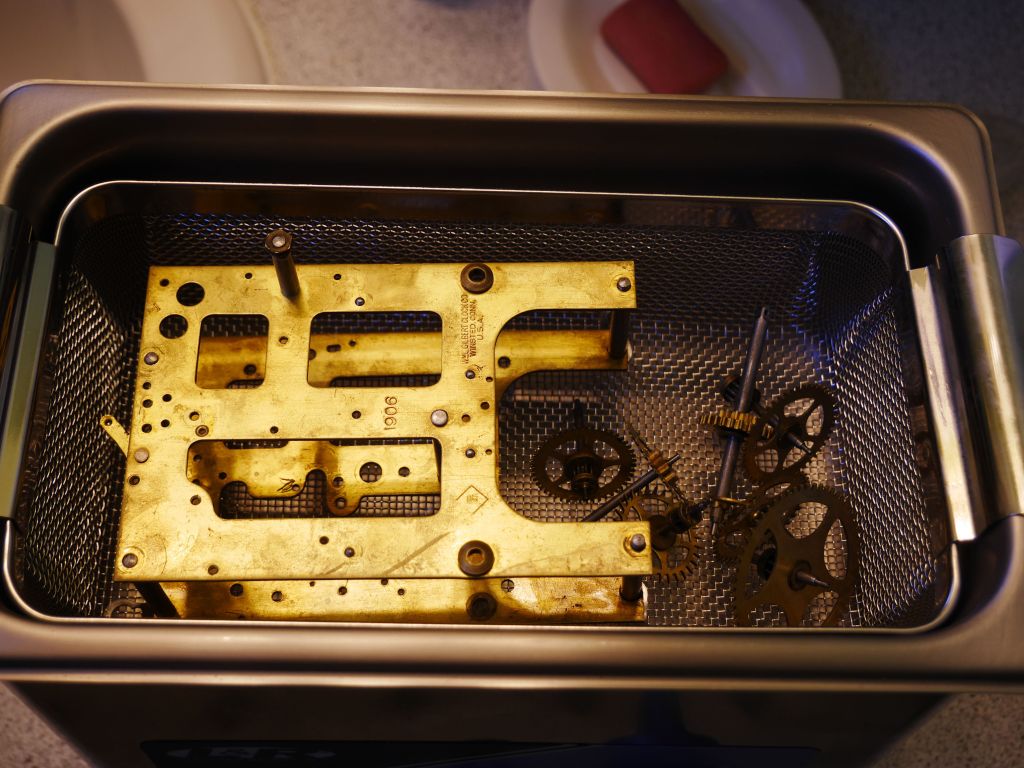
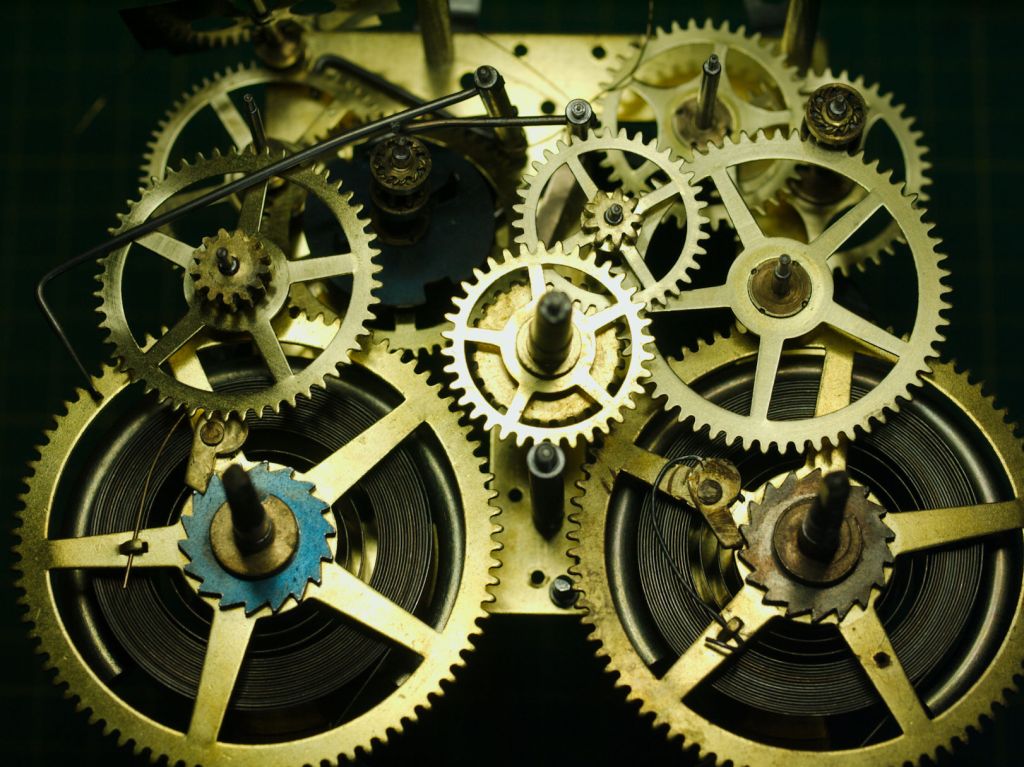
Those new to antique clocks will go to great lengths to avoid taking a clock movement apart but experienced clock repairers know that proper cleaning can only be done when a movement is taken completely apart. There are no shortcuts. Dunking a movement into a solution, drying it, and calling it clean is no substitute for complete disassembly. Dipping a movement into an ultrasonic cleaner also does not equate to a clean movement. Other than sending the clock to a shop which entails a fee for servicing one should either learn this task or establish a relationship with someone who knows how.

Ultrasonic cleaner by L&R

If one is mechanically inclined and comfortable working with small parts, learning to repair clocks can be a joyful and rewarding experience. Simple tools can be easily acquired and once the basics are mastered specialized tools can assist with more complex repairs.

Needless to say, one does not become an expert overnight.

Oiling your mechanical clock – a quick guide

Like a car engine, oil is the lifeblood of a clock. A correctly oiled clock will ensure a long life. Oil is the “lifeblood” of the car engine; the same applies to a clock. Just as a car engine relies on quality oil to keep its moving parts running smoothly and efficiently, a clock depends on oil to reduce friction and wear between its delicate components, such as gears, pivots, and arbors.

Lubrication is essential to the efficient running of any mechanical clock movement.

German time and strike clock movement

The primary purpose of lubrication is to reduce wear. Forming a protective film between moving parts enables them to glide smoothly against each other, thereby reducing resistance, improving efficiency, and minimizing energy loss.

Proper lubrication ensures smoother component operation, helping maintain accurate timekeeping by preventing irregular behaviour caused by increased friction. Additionally, it prolongs the lifespan of gears, pivots, and other moving parts by minimizing stress and wear.

A Quick Guide Including Some Dos and Don’ts

Avoid using spray lubricants like WD-40 on clocks, as they are unsuitable for precision mechanisms. WD-40 is a water displacement agent, not a true lubricant, and for that matter, spraying any kind of lubricant can harm the clock, especially since some parts, such as wheel teeth, pinions, and levers, must remain dry. Instead, use a specialized product like Keystone clock oil, specifically designed for clock mechanisms.

Clock pivot oil
Keystone clock pivot oil

When applying oil, use a small amount—about the size of a pinhead—at each lubrication point. Tools such as a toothpick, small wire, needle dipper, or a clock oiler are ideal for precise application. Avoid over-oiling, as excess oil attracts dust, which can mix with the lubricant to form a paste that increases wear. Less is more, which means less of something—a smaller amount of it—can at times be better than a large amount of it.

clock oiler

Focus on oiling the following areas:

  • The pivots of all wheels and the anchor or lever arbor on both front and back plates. In clockmaking, a pivot is the slender, polished tip of a wheel or arbor (the shaft that supports and drives the wheel) that rotates within a hole or bearing in the clock’s plate. Pivots are critical components in the mechanism as they allow wheels and arbors to spin smoothly and with minimal friction.
  • The crutch loop where it contacts the pendulum rod. The crutch loop is a part of the clock’s crutch, a thin, typically metal component connected to the escapement mechanism. The crutch transfers the motion from the escapement to the pendulum, keeping it swinging back and forth.
  • The escapement pallets. The escapement regulates the release of energy from the clock’s power source (mainspring or weights) to drive the gear train and maintain the pendulum’s motion.
recoil escapement
Escapement pallet
  • The clicks. The clicks are small, rotating components in a clock’s winding mechanism. They play a vital role in ensuring that the clock’s mainspring or weight-driven system remains securely wound and does not unwind uncontrollably.
  • Pulley axles on weight-driven clocks. In weight-driven clocks, the pulley axles are the central shafts around which the pulleys rotate. These pulleys are part of the weight system that powers the clock.

When to Oil

Oiling a movement without first disassembling and cleaning is not recommended unless, following a visual inspection, the mechanism is free of black oil and the pivot holes are simply dry. Otherwise, the addition of new lubricant to old will mix with the dirt and grime to form a grinding paste which acts as an abrasive, hastening pivot and pivot hole wear.

In short, if the pivots are dry and show no residue, a small amount of oil can be applied without the need for disassembly.

During servicing, ensure the mainsprings are oiled with specialized mainspring oil. Apply the oil by drizzling it along the sides of the coiled spring, allowing it to wick between the coils, and wipe away any excess.

When oiling, avoid dipping directly into the oil bottle; pour a small amount into an oil cup for easier application and to prevent contamination of the oil in the bottle.

Don’t leave the oil in a sunny window. UV rays will break down the oil and degrade its chemical structure over time. UV rays cause a process called photo-oxidation, where the oil reacts with light and oxygen. The degraded oil may become thicker, stickier, or form a residue, making it unsuitable for precise lubrication.

Cover the oil when not in use.

Routine Clock Inspection and Oiling

I inspect my clocks every 2-3 years if they run on a daily basis. If the movement is free of dust and the pivot holes are dry, I will apply fresh oil. If there is blackened oil around any pivot hole, it is time to disassemble the movement, clean it, and apply new oil once reassembled.

In the end, proper lubrication is less about how much oil you use and more about how—and when—you use it. A careful eye, a light touch, and the right product will do far more good than overzealous application. Clocks are remarkably durable when treated with respect, and with just a bit of routine attention, they will continue to keep reliable time for decades. As with most things in horology, patience and restraint are your best tools.

Related Articles

E. N. Welch marine style 30 hour wall clock

Marine movements were in high demand by the 1850s as boat and rail traffic increased. The marine movement is a specific type that does not have a pendulum. Pendulum clocks do not work on a ship or train because they require a stable base. A marine clock has either a balance wheel or lever escapement and were the perfect choice at sea.

This is an E. N. Welch 30-hour marine clock.

Many makers including E.N Welch would buy ready made movements from other shops, assemble them and sell the finished product under their name.

A short history of E. N. Welch. The E. N Welch company was formed on July 6, 1864. Elisha N. Welch (1809 to 1887) had been making clocks at a factory site on East Main Street at Forestville, Conn. since taking over the bankrupt business of J. C. Brown in or about 1856.

Marine style clock by E. N. Welch

The Welch firm was well known for its handsome rosewood cases, though in 1885, with changing styles in furniture, the surviving firm began to introduce new models with solid walnut cases and discontinued some of the older rosewood veneered cases.

After the death of Elisha Welch in 1887, the firm steadily declined, selling off some of its assets and issuing new stock to raise much needed capital. In May of that year the factory was closed down and a receiver was appointed. The receiver spent nearly two years selling off stock and settling the debts of the firm. It was not until 1896 that the firm resumed production.

But the company continued to struggle, would not survive and in 1902 its assets were bought by the Sessions Clock Co.

This movement was not made by E. N. Welch but was sourced from Laporte Hubbell. There were many variations of this movement but the basic two plate layout was identical. In this particular movement the minute wheel is in the two o’clock position and there is the addition of a seconds arbour running off the second wheel just above the “maker’s” stamp. From 1857 to 1863 the E. N. Welch Co. used this 2-plate, 30 hour marine movement. The exact year? Certainly no later than 1863. (source, NAWCC Watch & Clock bulletin, Nov-Dec 2013)

Otherwise, the case is in good condition with two small veneer chips, the brass bezel is very dirty, almost black from years of grime, the dial has minor losses and the movement is running well at this point though at its fastest speed it is running slow.

The plan is to service the movement, and refresh the case. It should be a fun little project.

Cleaning an antique/vintage clock movement – Ron’s method

Let’s clear something up right away: I am not a “Dunkin Swish” enthusiast. If you’ve been researching the clock-collecting world for a while, you might have come across this term. If you haven’t, consider yourself lucky—it’s something best avoided at all costs.

“Dunkin Swish” (apologies to those named Duncan) refers to the practice of placing an assembled movement into a cleaning solution or an ultrasonic cleaning machine, drying it off, and then declaring it “clean.” This is the absolute worst method for cleaning a clock movement and is never a good way to clean mainsprings within their spring barrels.

Why? Only by disassembling the movement can you properly inspect parts, polish pivots, peg holes, and thoroughly remove the dirt and grime that accumulate in the small crevices of a movement—buildup that will accelerate wear over time.

There is only one method to properly clean a clock movement, and complete disassembly, which includes removing mainsprings from their barrels/arbours.

Here are the steps I always follow when cleaning clock parts.

Hermle movement parts after cleaning

In most cases, clock parts can be safely cleaned using an ultrasonic cleaning machine. However, in rare instances, when working with something very old and delicate, hand cleaning may be the only viable option.

For the purposes of this article, I will assume that most clocks you work on are standard common-place brass mechanical movement types found worldwide.

Let’s get started.

Pre-cleaning

Once I have the movement disassembled, I clean any stubborn stains and wipe off excess oil from the parts beforehand. From experience, I’ve learned that while an ultrasonic cleaner works remarkably well, it’s not a magic solution—tough stains don’t always come off easily in the cleaner.

Pre-cleaning has an additional benefit: it extends the life of the cleaning solution. The solution can be reused multiple times, but once it becomes too dirty or cloudy to see through, I dispose of it. Proper disposal can be a challenge, which is why I always opt for a non-ammoniated, biodegradable solution.

I also clean all the pivot holes with peg wood or toothpicks and remove oil from the pivots beforehand. Additionally, I wipe away excess oil and dirt from the mainsprings.

The ultrasonic cleaner

In the early days of my clock repair work, I used an inexpensive ultrasonic cleaning machine. It was adequate for small jewelry items and acceptable for clock parts, but as I could afford something better, I decided to invest in a commercial-grade product.

Ultrasonic cleaner
Ultrasonic cleaner

I came across many Chinese-made ultrasonic cleaners on Amazon and eBay. While some may have had positive experiences with these machines, and the prices are certainly appealing, I was looking for something of higher quality and with a solid warranty. I have no issue with Chinese ultrasonic machines, but I would only consider them if they offered a reliable return policy and warranty.

I chose L&R for two main reasons: their reputation and warranty. I get no credit for mentioning this company, but the link will allow you to explore their product line to find the right size for your needs. After four years of continuous use, my L&R cleaning machine has performed flawlessly. L&R meets all of my requirements.

Ultrasonic cleaner by L&R
L&R Quantrex Q140, 3.2L with heater

The Q140 with heater is the size I opted for. It will hold one complete movement but is a tight fit for larger movements. Its smaller size means less cleaning solution is used and quicker heat-up times.

A high-quality ultrasonic cleaner will not disappoint. While there may be other brands that are equally good or even better, you generally get what you pay for.

Using an Ultrasonic Cleaner

Ultrasonic cleaners use cavitation, generated by ultrasonic waves, to clean objects made of non-absorbent materials. Ultrasonic cleaning effectively removes dirt, grease, and other contaminants from delicate components without causing damage. Just look at how bright and shiny this 30-hour movement looks after ultrasonic cleaning. That said, achieving an absolutely shiny movement is not the goal.

30-hour movement after cleaning in Ultrasonic

Should everything go into the ultrasonic cleaner? Avoid mixing metals beyond brass and steel in the cleaner as they may react with each other. I also avoid placing anything plastic in it. Some modern clock movements with plastic or nylon gears and parts should be cleaned separately and not placed in the ultrasonic cleaner. Hammer heads made of leather should not be placed in an ultrasonic.

Use your own judgment with friction-fit parts, such as a center gear and pinion, as there is a risk of damaging them if you’re not confident they can be reassembled easily. Otherwise, disassemble as much of the movement as possible.

Choose the Right Cleaning Solution

Avoid using flammable substances such as alcohol, gasoline, or other volatile liquids. These can vaporize, potentially causing a fire or explosion, and release harmful gases into the workspace. Inhaling these toxic fumes is never safe.

Only solutions that are specifically designed for an ultrasonic cleaner should be used. Among acceptable cleaners is Polychem Deox 007 as a cleaning solution that works effectively. The mix is 5 to 1 ratio with water and it is free of odour. According to their product brochure Deox-007 is “an environmentally friendly, non-ammoniated concentrate cleaner. It is mildly alkaline for the efficient removal of oils, grease, tarnish, stains, corrosion, and oxidation from brass, bronze, copper, gold, and silver”. Once it has outlived its usefulness it can be safely dumped down the drain.

Wire basket holding an American-style movement in the ultrasonic before the solution is added

Many cleaners have a safe fill line, typically about 1 inch from the top of the tank. Whether you’re cleaning one part or several, always ensure the solution reaches this fill line.

A stainless steel wire basket is also necessary as it is not advisable to place parts directly on the bottom of the cleaning tank. A stainless steel wire basket is necessary because placing parts directly on the bottom of the cleaning tank can cause them to become damaged. The basket keeps the parts elevated, allowing the ultrasonic waves to clean them evenly without contact with the tank surface.

Not quite dirty enough to throw away

Although I always drain the solution after each use, I understand for the sake of convenience why some repairers leave it in the tank if the ultrasonic cleaner is used daily.

No cleaning method I’m aware of is as effective at cleaning lantern pinions as an ultrasonic cleaner. The results are truly remarkable.

The Ultrasonic Session

I pre-heat the solution which involves pouring in the solution, turning on the heater, and allowing the ultrasonic to come up to temperature. It takes about 10 minutes.

Green heater switch

I typically run the ultrasonic for 20-30 minutes, which is usually sufficient for most jobs. On rare occasions, I’ve run parts through a second time.

Next is drying all the parts and this is where speed is essential. It is surprising how quickly rust forms on the steel parts. I use shop towels and for difficult locations such as lantern pinions, I use a hair dryer. Occasionally, if my wife is baking I will put the parts in the oven during its cool-down phase.

Years ago, some repairers salvaged parts from discarded hot-air popcorn machines, but I don’t see those around anymore. Additionally, in the past, some repairers designed heat boxes using a light bulb, but today’s LED bulbs run far too cool.

Sessions mainsprings are cleaned and ready to be re-installed in the movement

If you choose to place mainsprings in the ultrasonic cleaner, it’s important to dry them as quickly as possible.

There are two reasons why you might prefer to clean them by hand. First, they can be easily cleaned on a spring winder, and second, the solution will become dirty very quickly, shortening its lifespan.

Olie Baker spring winder. Cleaning the strike side mainspring
Cleaning a mainspring

One could clean in phases—first the time side, then the strike side—if drying is a concern. Ultimately, it’s up to personal preference.

Using a small metal lathe to buff the Wheels

To buff the wheels using a small metal lathe, securely mount the wheel on the lathe’s spindle and gently apply an emery board to the wheel. Run the lathe at a low speed, applying light pressure to achieve a smooth, shiny finish.

Next, clean the pivots with an emery board. To clean the pivots with an emery board, lightly hold the board against the pivot while moving the emery board up and down at a low speed. Use gentle, consistent pressure to remove any grime or oxidation without altering the pivot’s shape or surface. Use a soft cloth to wipe off any excess residue from the pivots.

Polishing a pivot
Polishing a pivot

Next Steps

Once everything is dry, the next phase involves any necessary bushing or pivot work, followed by reassembly and testing.

So, that’s the method I follow. If you have a different technique or additional steps that you include in your process, I’d love to hear about them.

Servicing a Sessions Grand Assortment time and strike movement

The Grand Assortment was sold “six in a case” to retailers who then sold them separately. The name “Assortment” seems appropriate and I am not surprised that some collectors refer to them simply as the Grand. So, was the “Assortment” a choice among a number of Grands (Grand 1, Grand 2, etc.)?

Auction Photo

Selling clocks in lots of 6 was a fairly common practice in the early part of the 20th century. An individual might order one of the clocks either directly from Sessions or working through a retailer but would normally select one from the retailer’s shelf.

This clock was bought at auction in the spring (of 2022). The plan is to fix it up and sell it to offset a recent equipment acquisition. I am not normally in the business of selling clocks but will sell the odd one locally to keep my collection manageable.

The clock case needs quite a bit of work which I will address in a future article.

The movement looks good but it is very grimy, no surprise there. We’ll get to that later in this post.

The Sessions dial

The dial, however, may not be salvageable. One option is a new paper dial, and another is a replacement with a suitable and period-correct alternative. I have the same size Arabic dial from an Ingraham gingerbread that I might use. Manufacturers interchanged Roman Numerals and Arabic dials on some models and I have seen at least one Grand Assortment on the internet with an Arabic dial so, an Arabic dial may be a good look.

These Sessions models were around for a number of years up to 1915 or so and like everything else the gingerbread clock fell out of style. I imagine this one sat on a shelf as a decoration for a good number of years after that.

The movement

Apart from having an even coating of dirt and grime all over the movement, there is surprisingly little wear.

A very dirty movement

Most Sessions movements I have come across have had a hard life and usually require a fair bit of intervention in terms of repairs including numerous new bushings. This movement may not need any as far as I can determine during my initial assessment. As a matter of fact, this is probably the least worn Sessions movement I have ever worked on. It is not without issues, however.

Judging from pivot scratch marks, wrench marks on the plate around the pillar nuts, mangled helper wires, and a replacement spring for the click on the time side it certainly has been worked on in the past, likely cleaned more than once.

A coating of dirt all over the movement

There was a film of rust on the mainsprings, not enough to write them off and they still have plenty of power left in them.

Trademark

Clicks are a documented weakness in Sessions’ movements. Both sides were in good condition although I had to re-attach the click spring on the time side. A past repairer had attempted a fix and replaced the original wire with a steel replacement wire that looks homemade, but it works. It just needed tightening.

The helper springs were evidently broken at some point and shortened. One was wrapped around the top pillar post and the lifting lever was wrapped around the count lever. Both should be attached to a pillar. I was able to reuse one but the other had to be replaced.

Helper springs top center

Most, but not all, American time and strike clocks have helper springs to maintain tension on lifting and locking levers. Springs are occasionally removed from a movement either because they are broken and/or repairers do not understand their function.

New helper spring

The mainsprings are in good condition. They were cleaned and oiled.

Mainspring retention clip to restrain the power of the springs

No bushing work is required for this movement which is a rarity for old American clocks I have come across. All pivots were polished, pivot holes pegged out and now for reassembly.

This is a fairly easy movement to reassemble but the strike side count and drop levers must be in the correct position in order for the strike side to function correctly. That means the drop lever is in the slot of the cam and the count lever is in the deep slot of the count wheel. The lock pin on the wheel just below the fan must also be next to the locking lever.

Sometimes I get it right the first time but often I must separate the plates on the top corner and re-adjust the locking wheel.

Everything in place but the escape wheel

Once re-assembled it is placed on the test stand for several cycles.

On the test stand

The next step is addressing the clock case finish.

The clock case needs quite a bit of work and may require stripping, not something I do as a matter of routine but in its present condition, it will never attract a buyer.

Restoration work on a 181 year old weight driven banjo clock

There are basically three types of banjo clocks with mechanical movements. Those with lever escapements which are usually in the $75 to $100 range, spring-driven ones that are generally $100 to around $300 and up but weight-driven banjo clocks occupy the upper end of the range and are normally between $300-$500 in fair condition and upwards of thousands for desirable clocks made by Simon Willard or E. Howard.

When my wife discovered this particular clock on Facebook Marketplace for $100 I suggested she make an offer for $75 and the seller immediately accepted. It is always a risk buying or accepting an offer without first examining it but this, I believe, was an excellent prospect and for the price I was willing to take a chance.

The day it was purchased

It is weight-driven federal style cased banjo clock from the 1840s. I have since learned that the clock was very likely made by John Sawin in 1840 (Boston) by himself or one of his apprentices or associates.

Unfortunately, there are no identifying markings on the movement or the case but there are strong indicators that this is a Sawin clock. John Sawin apprenticed under Simon Willard and was a journeyman under Aaron Willard, famous clockmakers of the day and makers of the original patent timepiece.

Everything is intact except for the dial class which was broken at some point in the clock’s life.

The broken glass is convex which prompts an interesting question. Is the glass a replacement and if so, did these clocks originally come with flat glass?

There is a school of thought among most horologists that simple mahogany cased clocks with wood bezels and an absence of ornamentation that were made in this particular style back in the 1840s had flat glass installed. Presentation timepieces, on the other hand, such as those with gilt accents, sidearms, brass dial bezels, a lower bracket/finial and reverse painted glass tablets had curved glass.

Patent Timepiece 1825 by William Cummens with convex glass

My belief is that this clock originally had flat glass.

So, let’s move on with the various case issues beginning with the missing pieces of veneer.

Veneer

The only section that requires veneer work is the left and right bottom corners on the pendulum. Many repairers attempt to hide the missing veneer with touch-up stain but new veneer is the only way to go.

New veneer pieces

Although the case is made of mahogany I selected rosewood from my collection of harvested veneer. It has the same thickness (modern veneer is much thinner). Although mahogany has a slightly different tonal characteristic and grain, the match was very close. Since I used hot hide glue, the veneer can be easily lifted with heat at a later date but for now my goal is to disguise the missing veneer.

While I was working on the veneer sections I cleaned the case and applied a light coat of shellac. I am not opposed to applying a finishing coat to preserve and improve a clock’s appearance. The added benefit is that it enhances the grains on the case.

In my view there is no clear right or wrong answer and it should be left up to the restorer (and owner) to decide how the clock’s finish should be addressed.

Veneer work is finished

The throat is in perfect condition.

The dial bezel has a crack at the 11 o’clock position which was addressed with hot hide glue. I forced glue into the crack, closed the gap with a number of elastic bands tied together and left it for 24 hours to dry.

Cracked bezel as found
The bezel crack is all but invisible

The glass

Removing the old putty was a little more involved than I had planned. A heat gun would have been too much and I did not want to ruin the wood bezel but a 30W soldering iron was perfect for this job. I picked away and removed just enough putty to install the glass. I ordered 6 13/16 inch flat glass and it was a perfect fit. Wet putty is always an option but Plaster of Paris is easier to work with, does an equally fine job and secures the glass in place.

Enough of the putty is chipped away for the glass to fit

Plaster of Paris dries hard in 30 minutes and is stainable/paintable. I applied the plaster with a putty knife and smoothed it out with a wet finger.

Plaster of Paris is easy to work with and dries hard in 30 minutes

After several hours I applied a dark stain to give the plaster an aged look.

The plaster is stained to give it an aged look

The bezel is now ready to be attached to the case.

The finial

The final was in the pendulum box when I bought the clock. It now requires a new post. The peg was broken and a previous owner attempted to secure the finial with glue and, of course, that failed. The finial would originally have been mounted with a piece of dowel.

New finial peg

Using a piece of 3/8 inch doweling I cut off about 1 1/4 inches. I scraped off as much glue as I could from the bottom of the finial and the plinth and drilled out the old doweling on both the finial and the plinth. Once the dowelling was glued in place it was given a mahogany stain. It fits well and looks great.

Other case repairs

Other case repairs involved closing or filling several holes. For these repairs I used yellow carpenter’s glue for maximum adhesion.

A clamp is used to close a gap
Shavings from old veneer are glued into screw holes

Shavings from old veneer are glued into screw holes for the mounting ears and the case hook to ensure that those screws are secure.

View of face
Mounted on the wall

The case repairs are complete and the last step is servicing the movement.

Maritime Association of Watch and Clock Collectors

On November 2-3, 2019 the Maritime Association of Watch and Clock Collectors held its first meeting. Members came together from various parts of the Maritimes to meet in Prince Edward Island (Canada) to form a club of like-minded individuals.

A educational component of the meeting, a lesson in bushing

Unfortunately the pandemic scuttled all plans for a subsequent meeting but the climate is right for another face-to-face meeting shortly. In the meantime the group has stayed connected through email.

The goal of this group is to gather individuals of every skill level from across the Maritime provinces (PEI, New Brunswick and Nova Scotia) to share experiences, mentor each other, learn new techniques, provide opportunities to acquire clocks/watches and foster social interaction.

Inspecting an antique pocket watch

We chose the name MAWCC, the Maritime Association of Watch and Clock collectors. We agreed to no less than 2 meetings per year but that sub-groups would meet more frequently.

At this point in time we are not affiliated with the NAWCC (National Association of Watch and Clock Collectors) an American-based clock and watch group.

Demonstration of the cleaning of a mainspring

If you are from the Maritime region of Canada (Prince Edward Island, New Brunswick, Nova Scotia) and you have a keen interest in advancing your skills in horology or just beginning your journey into clock and watch repair and would like to connect with like-minded individuals, contact Wendell Feener at wcfeener@eastlink.ca

What’s the difference between an antique and a vintage clock?

There is enough confusion among clock collectors and owners of antique and vintage items that it prompts a discussion.

The terms vintage and antique are often used interchangeably, and often incorrectly.

Vintage or antique, Seth Thomas adamantine mantel clock C.1911

According to the United States Government, the term “antique” is reserved for valuables that are over a century old. Webster’s dictionary defines an antique as a work of art, piece of furniture, or decorative object made at an earlier period and according to various customs laws at least 100 years ago. Wikipedia defines antique as applying to objects at least 100 years old. Therefore, most sources define the term “antique” as items that are 100 years or more.

The word “vintage”, according to eBay, is a defined period that is less than 100 years but more than 30 years. To many, vintage often means anything that is not new, is dirty, worn, or looks like it might be old if nothing is know about its provenance.

Vintage Fleet Time mantel clock C. 1936

The word vintage is as overused, and misused, as the word “antique”. 

The use of the word vintage in auctions is becoming used moreMost often the seller who knows nothing about what they are offering for sale will use the term vintage or even “rare” and hope the buyer is convinced. 

Some items that were considered rare many years ago are common today. Take the 30-hour ogee clock which was once considered rare but with the advent of the internet thousands were offered for sale and prices dropped accordingly. “Rare” then became “antique”. What is truly rare today are one-of clocks that have an significant provenance.

The word “collectible” is another clever marketing term, and like the word vintage, has been misused. It presumes that the item offered must be added to what you already have and because it is the one piece you need the most, it will cost you more.

Jewelry is an interesting example. Anything over twenty years old is considered vintage. Some terms like “near” vintage and “true” vintage are often used. I assume any number of years can be assigned to “near” or “true” although “near” seems to mean “almost new” and sounds better than the word “used”.

George H Clark 30-hour ogee clock
Antique George H Clark 30-hour ogee clock

In my view no quartz clock has any value. However, in 1970, Junghans invented the Astor-Quartz wristwatch which entered series production in 1972. Watch collectors everywhere would consider the Junghans quartz watch to be a highly collectible vintage timepiece even though it is quartz.

Take the time to research your prospective purchase by consulting various sources which will inform you of the age of the clock you are shopping for.

Some clocks can be dated precisely by serial number, patent date or date stamps on the movements. Many clocks can be dated with some accuracy but often it is a challenge at times to determine the age of a particular clock unless you compare the style and movement type with others of the same period.

Canadian time clock
Vintage or antique Canadian time wall clock

In my collection is an Arthur Pequegnat Canadian Time clock which is quite old but I do not know it’s exact year of manufacture but I can place it within a range of dates. It was made by the company between 1917 and 1941. There is nothing noteworthy about the movement or style of the case that determines the year it was made.

Whether antique, vintage or collectible, if you enjoy your clock nothing else truly matters.

But, if you are selling a clock it is important to inform your prospective buyer and give them the best information possible to help them make a decision.

Daylight Savings – it is time to end it!

Daylight Savings Time has no place in our modern world. Of 195 countries in the world, approximately 70 countries observe Daylight Saving Time in at least a portion of the country. Japan, India, and China are the only major industrialized countries that do not observe some form of daylight saving.

Top showing face and crown detail
Face of a Vienna Regulator clock C.1870

70 countries must live with it.

Clock face showing moon dial
Face of a Ridgeway grandfather clock C.1996

At 2:00am Sunday, set your clocks ahead one hour if you live in an area where the convention is still followed.

Typically, regions that use daylight saving time adjust clocks forward one hour close to the start of spring and adjust them backward in the autumn to standard time. In Canada, we have a little expression, “Spring ahead, Fall behind” to make it easy to remember what to do twice a year. In Canada, it is the second Sunday in March and the first Sunday in November.

Case is in fair condition, dial face has some flaking
Canada Clock Co. cottage clock C.1883

How to set your mechanical clock(s)

  • Move the minute hand slowly clockwise to the correct time, stopping briefly for the quarter-hour on chiming clocks and the half-hour for striking clocks.
  • Do not move the minute hand backward as it risks damage to the movement. This should be regarded as a general rule, exceptions are some clocks where it is safe to do so (read your owner’s manual).

There has been a push to scrap the time-switch in Canada.

It is stupid, needless, senseless, and confusing.

Adjustments to a Smiths Enfield mantel clock

This is a Smiths Enfield Art Deco-style clock that reflects the clean lines and geometric design of the 1930s. It needs a few adjustments to ensure smooth operation before being listed for sale. Perfect for collectors or anyone who appreciates vintage clocks of this era.

Smiths Enfield mantel clock

The Smiths Clock Co. became Smiths Enfield in 1949 and the Smiths Enfield name first appeared in catalogs from 1950 onward. This oak-cased time and strike shelf clock was made somewhere between 1949 and 1955, vintage, but not antique. More information on this company can be found here. The latter part of the 1970s saw the decline of this and many other companies who fought hard to compete with inexpensive clock offerings from the Far East.

The clock keeps good time, but there’s an issue with the strike side. While the strike has a pleasant sound, it operates erratically. This may be an adjustment issue that will require removing the movement from the case for further inspection.

Once out of its case, I ran the strike side going through each hour observing the action of the levers and the snail. The setup is conventional but there is no rat tail per se on this movement just a pin or striker point midway along the rack arm. The rack pin was hitting the sloping edge of the plateau part of the snail, and the pin was not connecting with the flat section of the snail.

Smiths Enfield
Smiths Enfield movement

The Adjustment

To make the adjustment, I removed the clip and washer to release the snail. I advanced the snail to the one o’clock position and removed the snail and reinserted it so that it was placed approximately where the rack pin hits midway along the plateau of the snail. This will permit the snail to fall at the midpoint throughout the 12-hour cycle. On the test stand, I monitored the strike sequence.

Determining the sweet spot in similar movements that have a rack and snail arrangement will take some experimentation.

As expected, I found that when advancing the strike, the paddle was catching on one of the points of the star wheel. This could either stall the strike train or cause an extra strike on the hour.

Although it is a simple adjustment the mainsprings must be let down and the plates pulled apart enough to relocate the paddle arbour so that the paddle is positioned between two tips of the star wheel. In the process of manipulating the levers, one or two other wheels may pop out. After repositioning all the wheels, secure one corner of the plate with a screw and proceed with testing the strike-side action.

Smiths Enfield movement
Smiths Enfield movement, testing

The clock had clearly been out of sorts for quite some time. Now that everything is properly adjusted and functioning as it should, it can be confidently sold without the dreaded disclaimer, “might need some adjustment.”

Junghans bracket clock – a small detail makes a big difference

A small change makes a big difference on a Junghans mantel clock from 1911. Let me explain.

Back in September 2020, I bought a German-made Junghans bracket style clock. It is 14 inches high by 10 inches wide by 6 inches deep, mahogany veneered, attractive brass accents, and a carrying handle on a curved domed top.

Junghans clock
Junghans bracket clock

I just love the way it looks.

Junghans bracket clock handle

What about those chrome feet

The clock is original in almost every way; the quality time and strike movement is original to the clock, the spiral gong is correct; latches, bezels, and so on look good and work perfectly but for some strange reason it has replacement chrome feet and they bug the heck out of me.

Why should a small detail mar the classic lines of this clock!

Junghans bracket clock
Junghans bracket clock, chrome foot

After searching various online auction sites, I discovered that the original corner feet would have looked like the ones in the below photographs. I can only surmise that many years ago one fell off, got lost and the repairer simply found what would work and tossed the other three feet out.

Junghans bracket clock online
Clock feet (Online photo, Fair Use: used informatively for the public good)

Bracket clock feet
Clock feet (Online photo, Fair Use: used informatively for the public good)

So, where to find corner feet. There are a number of suppliers worldwide but my usual go-to supplier here in Canada, Perrins who are otherwise excellent, has a very limited selection of clock case corner feet and not in the style or size I was looking for.

US suppliers similarly have a limited supply as bracket clocks are not as popular there as overseas. England is the logical place to look since it is the land of the bracket clock.

Interestingly, the term bracket clock first appeared in 19th century England and is commonly referred to as a spring-driven pendulum table clock with a carrying handle (and often with subsidiary dials) so that it could be moved from room to room in the owner’s home. Of course, true bracket clocks had a strike silencer so as not to disturb the owner’s beauty sleep.

Using the search term “brass bracket feet” I searched the two largest suppliers in England, Cousins and Meadows and Passmore.

I found exactly what I was looking for at Cousins UK. Cousins calls the part a ridged carriage clock corner foot made of polished brass, sourced from Spain or India. They come in three sizes and for this clock, I chose the smallest one.

It took two weeks from the order date to arrival on my doorstep. I am very impressed!

Bracket clock feet Cousins
Bracket clock feet from CousinsUK (Online photo, Fair Use: used informatively for the public good)

The feet are made of brass and look to be of decent quality.

Installation was simple. Rather than risk splitting the base so near to the edge I pre-drilled the holes. Using a mini electric drill I first marked the holes with each foot in place and drilled a deep enough hole.

Two slotted brass screws are required per foot. As I screwed one screw of each foot I checked for correct orientation and made a small adjustment as necessary.

Perfect!


Corner foot for Junghans bracket clock
Corner foot for Junghans bracket clock, the screw holes are pre-drilled

Corner foot for Junghans bracket clock
Left front corner foot

The feet are very sturdy and look exactly what the manufacturer would have used at the time.

Junghans Corner feet finished
Junghans bracket clock with new corner feet

Compare this last photo with the first to see the difference the new feet make on this clock.

This is an example of a subtle but important change that is very inexpensive (less than $24) and I am sure you will agree that it makes a dramatic difference.

Junghans Sydney
Junghans Sydney

While I was working on this clock I visited the Junghans site and discovered a 1912 Catalogue which informs me that this clock was called the Sydney.

It was available in fumed oak or mahogany, 14 1/2 inches tall “with brass handle, inlaid polished brass designs, polished brass feet, and plain silver dial”. Both finishes were available with an 8 day or 14-day movement. The quarter strike 8-day clock had 2 gongs while the 14-day movement had 1 gong.

This then is a 14-day movement with a mahogany case and is referred to as model 7020. Judging by the name and the style, this clock was made for the English market.

It seems my research concerning the new polished brass feet paid off very nicely.

Approaching 200,000 views and 58,000+views so far this year

In my home, I have a dedicated room to work on my clocks

Five years ago I attended a workshop on WordPress at our local community college. It taught me more about blogging than I ever knew. The idea of a clock blog intrigued me but it is a lot of work, there is much learning and it was not something I wanted to design from the ground up but WordPress came to the rescue. It has an easy-to-do template approach and the only task was providing the content. So, I began the journey of documenting my horological interests and experiences.

The first few months were discouraging. I had very few views and likes which seem to be the lifeblood of many blogs. There is a strong blogger community out there and once connected to that community you get a feel for those sites that are quite successful and offer terrific content and those that quickly run out of steam.

A computer is not only essential for clockwork but it is the tool I use to compose my blogs

It takes time and patience to build a strong audience. It is also a healthy practice in blogging to follow other blogs and support their content and I am seeing a lot of excellent content.

Clock collecting and repair is a passion but I struggle with my writing and try to envision what my audience would like to see in my posts. Writing is not my forte but years working in academia had taught me to convey my thoughts on paper for my students in an effective way. I took notes on what other bloggers were doing, what made their sites engaging so as to improve my writing.

Contentwise, my intention was never to satisfy expert horologists and those in the clock repair business though I certainly don’t mind if they drop by from time to time, make comments, and offer their perspective. I consider myself a clock repair generalist and judging from my mail I seem to appeal to those who are amateurs like myself and those who have stumbled onto my site looking for advice and guidance on clock collecting and repair.

As a self-taught horologist and over the last 11 years, I have gained knowledge and experience working on a wide variety of mechanical clocks. Cabinet or case restoration is also an interest. I do not operate a clockmaking business and I am not a clock vendor though I will sell the odd clock locally to manage my collection.

I have received many comments. Some offer suggestions and advice on projects I am working on while others are looking for direction on their particular clock problem. I provide whatever assistance I can and within my scope of expertise.

Testing in the clock case rather than on a stand
Testing an ogee movement

Stats – the lifeblood of a blog

Like it or not, statistics are the lifeblood of a blog. I receive over 200+ views per day. The top 6 viewers are in the USA, Canada, United Kingdom, Australia, South Africa, and Germany.

Writing articles well in advance and scheduling publication dates help with blog planning particularity when I am vacationing and cannot find the time to write.

Time and strike parts
Time and strike parts separated

My regular features, Tick Talk TuesdayCrazy Clock Ads, and What Is This Thing For look at the lighter side of clock collecting and repair.

If you are new to my blog, welcome, there is plenty to read. If you are a regular viewer, thank you for supporting me and if you have any ideas for future articles let me know.

My antique and vintage clock wish list

Putting together a list of all the clocks I desire really appeals to me. The more I research the antique and vintage clock world the more discerning I have become as a collector.

Most clock collectors evolve as their tastes change and after collecting for more than 10 years I have changed my thinking on clocks I collect. I have also been focusing my collection on specific styles (wall clocks are preferred over mantel clocks) and makes of clocks (Arthur Pequegnat, for example).

A good portion of my wall and mantel clocks were acquired years ago when I was less discriminating as a collector (and some need to go) but in the past couple of years, I have been focusing on exceptional clocks that have historic significance and generally those made before 1900 in an age where better quality clocks were manufactured.

This is my current list including those clocks (indicated) I have acquired:

  • Arthur Pequegnat Regulator #1 wall clock 
  • Arthur Pequegnat Moncton, time-only, double spring 15-day movement ACQUIRED – summer 2018
  • Seth Thomas regulator #2 ACQUIRED – summer 2018
  • English 8-day Fusee gallery clock
  • Ithaca, double dial calendar clock
  • Antique tall case clock, McLachlan clock – ACQUIRED – winter 2020
  • Banjo timepiece, weight driven
  • English lantern clock
  • Jeweller’s regulator with pinwheel escapement
  • Martin Cheney wall or tall case clock
  • English bracket clock
  • American crystal regulatorACQUIRED – summer 2018
  • Vedette wall clock – ACQUIRED June 2019
  • Vienna Regulator (mini) wall clock – one weight ACQUIRED – Fall 2016

The latest is a tall case clock from Newton Stewart, Scotland, circa 1850. My son-in-law has a Scottish tall case clock that is even older than this one. It was brought over by his family in the early 1800s. I have always admired that clock and wished that one day I could add a similar one to my collection. Luckily I was able to pick one up at auction in February of 2020.

Photo of McLachlan clock at an auction house

And, the search goes on for others on my list.

Seven steps to servicing an antique or vintage clock movement

Why does a mechanical clock movement require servicing? The answer is fairly straight forward.

Keeping your clock in good running condition requires maintaining the movement’s working parts and maintaining the working parts reduces wear. Ideally, most clocks should be serviced every three to five years to maximize longevity and ensure proper functioning.

This article describes the 7 steps that I typically follow when servicing an antique or vintage clock movement. A common American 8-day time and strike, pendulum-driven movement is used as an example.

Continue reading “Seven steps to servicing an antique or vintage clock movement”

Jauch wall clock – the end of an era

I was asked to take a look at this German made wall clock from the 1980s. The owner said it had not been running for 3 years. It is a German made Jauch wall clock from the late 1970s.

Sadly, the doors of the Jauch clock company closed many years ago. Jauch was not a notable supplier of whole clocks but Jauch did produce lots of clock movements after WWII to various assemblers. Many of these assemblers made clock cases or supplied kits with faces, hands and pendulum assemblies from other sources.

Continue reading “Jauch wall clock – the end of an era”

What a shame! – a clock disaster

repurposed clock case

I discovered this sad case in an antique shop near my home. What was once a gingerbread clock is now a repainted case with shelves at the ridiculous price of $35. Just a few steps away was a similar parlour clock for only $20 more and it was largely intact. Some would argue that a repurposed clock case is not such a bad thing but as a clock collector I find this appalling.

Is it not better to have left the case alone and present it as an ornament rather that convert it into a hideous curio cabinet?

Gilbert model 2038 8-day mantel clock with Normandy Chime

My wife was going through the online catalogue of an estate auction recently and found an attractive vintage Gilbert tambour style clock.

Gilbert mantel clock 1925

“Are you interested?” she said. “Sure”, I said, “put a maximum bid of $35”. We won the bid at $25 + tax and buyer’s premium, so, still under $35 CDN. Would I have paid more? Not likely. However, it is a handsome “Napoleon hat” styled clock but they were plentiful and cheap at the time and not particularly valuable or desirable today despite the fact that it is almost 100 years old.

Continue reading “Gilbert model 2038 8-day mantel clock with Normandy Chime”

Trash to Treasure – when clock restoration is the only option

I was on a Facebook clock collector page recently and I was intrigued by the work someone had done on a clock that was surely destined for the garbage bin. The transformation was given an apt phrase, “Trash to Treasure” and so I thought I would write about my own experiences resurrecting old clocks.

Preserving the original patina is always the principle goal and I do as much as I can to keep things as they are. However, when the finish has been adversely affected by environmental damage, heat, cold, humidity over the course of many years, as in a couple of examples below, the only course of action is refinishing.

There are times when the only course of action is complete restoration

My grandfather’s clock – partial restoration
Continue reading “Trash to Treasure – when clock restoration is the only option”

Arthur Pequegnat clock stops after 4 days

One of the few clocks that I have had professionally serviced is an Arthur Pequegnat kitchen clock (Fan Top). In the early days of clock collecting and repair I had not acquired the necessary skills and experience to perform my own work and had some of my special clocks serviced by a skilled clock-maker. I consider this Arthur Pequegnat “fan-top” kitchen clock, a special clock.

The following comments are not a reflection of the work done by a professional clock repair shop. I consider the clock-maker who performed the service on this clock to be highly competent and I would recommend them to anyone but mechanical clocks can be very temperamental at times.

Arthur Pequegnat kitchen clock commonly known as a “Fan Top”

Two years after the clock was serviced, it stopped. It shouldn’t have! I considered all of the possibilities including weak mainsprings, bushing issues, bent, twisted or torn suspension spring and bent wheels to name a few.

Continue reading “Arthur Pequegnat clock stops after 4 days”

Ansonia crystal regulator clock – Part III – brass case refresh

This is Part III of a three (3) part series. In Part I I discuss disassembly and servicing the mainsprings. In Part II, the movement and in this, Part III we will look at restoring the brass case.

Continue reading “Ansonia crystal regulator clock – Part III – brass case refresh”

Ansonia crystal regulator clock – Part II – the movement

This is Part II of a three (3) part series. In Part I, I discuss disassembly and servicing the mainsprings. In this, Part II, the movement and in Part III we will look at restoring the brass case.

My wife found this 1910 Ansonia Crystal Regulator in the late summer 2018 while antique shopping. What a great choice! We were in a hurry and despite a price reduction we should have asked the proprietor to show us that it worked. We returned home and to our dismay, it was not running.

In Part I of this two part series I discuss disassembly and the big question; how to service the mainsprings.

Front of movement showing visible escapement

The movement

There are 4 screws that release the plates. The 3 pin gathering pallet and hour gear must be removed to facilitate servicing. It is possible to re-assemble the movement without removing those two parts but it is very frustrating. To remove them assemble the plates. Using two small blades (small screwdrivers) positioned 180 degrees apart from one another will work. As these movements are visible, any scratches will show, so, placing masking tape on the plate will prevent scratches. Wedge both screwdrivers and the parts should pop off. The gathering pallet flew across the room (not ideal) but it worked.

Twisting the top regulator pivot bracket on the front plate upwards allows the pallets and crutch to come out from between the movement plates.

Clean parts in the usual way but do not put the pallet assembly in the ultrasonic if the pallets are jeweled. The ultrasonic machine will loosen the pallets.

Rack and snail assembly on the back plate

The movement required 5 bushings and all on the front plate; S2, S3, T2, T3, and T4. Unusual but understandable given the placement of the gears.

Getting it all back together

Putting the plates together with gears in place is fairly straightforward. It takes a gentle twisting to get the pallet assembly in position however, there is no need to force anything.

Most of the strike assembly is on the outside but it is important to set up the warning correctly. There are two wheels with stop pins.

Thanks to reader Bob G. for explaining the following. The wheel with the stop pin closest to the outside of the plate is the stop wheel. That is held back by the tab coming through the plate from the back of the movement. The next wheel that has a stop pin is the warning. As the hour arbor lifts the lever to begin the strike sequence, the warning pin holds everything back until the correct moment. That second stop pin should be at about the four o’clock position when looking at the movement from the front.

If the stop pins are in the correct position, you must adjust the position of the pins on the gathering pallet. If you hold the wheel next to the fly, you can grip the pallet with a needle nose pliers and turn it until the pins clear the rack. Otherwise, the pins on the gathering pallet will lock the rack and the clock will only strike once on the hour and half hour.

All adjustments have been made and the movement has been fully assembled and now onto the movement test stand.

Ansonia Crystal Regulator clock – Part I – disassembly

This is Part I of a three (3) part series. In Part I I discuss disassembly and servicing the mainsprings. In Part II, the movement and in Part II restoring the brass case.

My wife found this 1910 Ansonia Crystal Regulator in the late summer 2018 while antique shopping. In the 1905 Ansonia Crystal Regulator catalogue it is listed as the Prism at a price of $29.00 which would have been a hefty sum at that time. (Flash is required to open the catalogue)

What a great choice! We were in a hurry and should have asked the proprietor to show us that it worked. We returned home and to our dismay, it was not running. As I said in an article published in Dec 2018:

A gentle push of the pendulum produces a few ticks and then it stops. I am not familiar with Brocot escapements and before I do anything I will research the movement before I disassemble it and give it a thorough cleaning.

Brocot visible escapement; in this photo, the brass is very tarnished

Just days old but I thought I would polish the brass

This is a truly beautiful clock with a visible escapement. What I have learned is this; don’t mess with a Brocot escapement. The stone pallets, which are made of garnet are very delicate and breaking one or both is a huge issue. The pallets are held together by melted shellac and cleaning them in an ultrasonic will loosen them as they are position sensitive.

It is now April (2019) and I have put this project off long enough. So let’s begin.

This not a particularly easy clock to work on. The pivots are smaller than a typical American time and strike movement which means closer tolerances. The strike side is rack and snail, that is, there are no helper springs and only one combination lever between the plates. Most strike parts are located outside the plates and the final assembly for the Brocot escapement also occurs outside the plates. There are two wheels with stop pins for the strike side. Setting them up can be a challenge.

Dissembling the case

To disassemble the case I wrapped two strips of painters tape on all four sides. Doing so prevents the glass from falling out. Beveled glass panels are difficult to replace and exercising care when working with the case will prevent accidents. Each glass panel can be as much as $75 by the time shipping is included and turnaround time can be as much as 2 months.

The first to come out is the gong assembly. One large nut secures the gong to the case and is accessible from underneath the base.

I chose to disassemble the entire case though it is possible to remove the movement without doing do. There are three screws at the 1-2, 10-11 and 6 o’clock positions though a long skinning screwdriver is required to get at them.

There are 4 large screws on the bottom and 4 on top. Unscrew the bottom 4 screws first. Once the base is off you will quickly realize the importance of the painter’s tape. To access the top screws there is one small screw underneath the top plate that must be released to access the 4 top corner screws. Patience is key if you work slowly the chance of error is reduced. Put the brass pieces and the glass panels in a safe place while working on the movement.

Mainsprings

The mainsprings are in barrels. The barrels are secured to the movement plates with 4 screws. The great wheel and the arbour are one piece. With a twist, the arbour can be removed from the mainspring.

There are three ways to service the mainsprings.

1) Find a temporary winding arbor and use it to unwind the mainspring on a spring winder.

2) Hold the barrel in one hand and pull the spring out with the other being careful not to kink or bend the spring. Once the spring is released from the barrel, unhook it and you are free to clean the spring. To put it back together, use a thick leather glove to hold the barrel, hook the hole end, and carefully rewind the spring back into the barrel.

3) Partially disassemble the great wheel and use the arbour without the gear in place. Special tools are required to separate the arbour from the wheel.

Olie Baker spring winder

Front of movement showing visible escapement

Back of movement showing rack and snail, hammer and rate adjuster

In Part II I discuss servicing the movement and in Part III, restoring the brass case.

Dry home and clock case issues

Winter, along with the dry conditions of a typical Canadian home, can play havoc with wooden clock cases. In Canada we generally shut the doors and windows to keep the cold air out from mid November to mid March and we may stay inside for days at a time. During our Canadian winter we have difficulty controlling indoor humidity. Most modern homes have a commercial style air-exchanger that is designed to control relative humidity but it can only do so much.

I have dozens of clocks and most do not seem to mind the changes in humidity from season to season other than a rate adjustment. Those vintage clocks that are adversely affected tend to be clocks with thin veneers that separate from the frames of the cases. Less affected are Ogee clocks with thicker veneers.

My Ingersoll-Waterbury time and strike clock from the mid 1940s is a 70 year old clock and not a particularly valuable one to begin with but has been affected with peeling veneer. The peeling veneer is unsightly and must be addressed.

I am not opposed to using modern materials to repair a vintage clock and in this case yellow carpenters glue was used to close the gaps on both the left and right rear of the case. Yellow carpenters glue has a bonding strength of 3 tons and for maximum effect is should be clamped for 24 hours.

Split veneer on left side, rear

Both sides of the case were splitting open. The right was slightly worse than the left. Although I have several clamps I only had one to spare for this little project so, the job was spread over a few days.

Right side is clamped

Wax paper is placed between the clamp and the veneer to prevent the glue from adhering to the clamp itself.

Once the glue has bonded, the case is lightly sanded in the affected areas, the remaining cracks treated with wood filler and touched up with a dark stain.

Stain-able filler in the small cracks that remain

Two coats of shellac are then applied.

Not perfect but an improvement.

Clocks and museums

I am not fanatical about humidity as far as my collection is concerned but museums go to great lengths to control humidity. In museums temperature and humidity are interrelated, and must be monitored and controlled in conjunction with one another towards the goal of preservation. Room temperature is usually established according to the needs of visitors, and is set between 18 and 20°C. The relative humidity for the correct conservation of the works displayed usually lie in the limited range between 45 and 50%.

Clocks react to humidity differently. Clocks with wood pendulum rods need seasonal adjusting as the wood contracts and expands with changes in humidity. Wall clocks that have tight doors in the summer are easier to open in the winter as wood contracts.

High humidity can be mitigated through the use of humidifiers if there is sufficient concern about dry air and its effect on clock cases. It is a good option in the winter months.

If you have a modest collection of clocks I would not worry about humidity issues but you can be assured that seasonal changes can have an affect on your clocks.

Appreciating simplicity – the mechanical clock

What other machine have you acquired that has worked continuously since it was made 150 plus years ago and still does the job it was intended for? Mechanical clocks revolutionized people’s perception of time by displaying neutral, uniform units that showed the passage of time. Though not as accurate as the modern electronic timekeeper the mechanical clock remains a marvel of engineering and innovation.

The constant search for clocks

Locating antique and vintage clocks involves travelling, meeting fascinating people and discovering a clock’s particular history. Each story is unique and some stories are sad. I recently arranged the purchase of an antique French shelf clock, arrived to pick it up and discovered that the person was terminally ill and selling off his clock collection to provide for his wife after he had passed. I really felt sorry for the fellow. Of course, many stories are happy ones.

I enjoy clocks for what they are. I often think about the men who conceived them, built them and the craftsmen working in small factories in places such as New England with primitive (by our standards) tools and the harsh conditions they endured. Life to them was a day-to-day struggle. That the clocks are still with us today is a testament to the pioneers of clock-making.

Miniature Vienna Regulator
Miniature Vienna Regulator wall clock, circa 1870

There are a lot of clocks I find intriguing. There are some people that collect complex clocks and I appreciate them as well but I lean towards beauty in simplicity. For example, the miniature Vienna Regulator pictured above is a time-only clock made during the Austrian-Hungarian empire (1870). It is simple, little can go wrong and after nearly 150 years it is still running strong.

There is a certain joy in collecting and repairing clocks. The hobby of clock-making allows one to escape from negativity, put aside worldly matters, effectively manage stress, and dispense with everyday concerns. Occasionally clock problems are very challenging however, the joy in discovering a solution is immeasurable. Beyond that, clocks are an art form and should be appreciated for what they are.

As a collector, the number of clocks I have is not important. The size of my collection is also not important but by trimming my acquisitions from time to time I keep it manageable.

George H Clark Ogee clock – movement and dial work

One cannot deny the classic style of an American Ogee clock. This one is in great shape and required almost nothing to get it to top form. 30-hour shelf clocks are abundant but not many cases survive years of wear and tear.

Dial removed to show the 30 hour movement

This George H. Clark 30-hour shelf clock is a very good example of Connecticut form. The case form is called an “og” or “ogee”, a mathematical term that describes the “S” curve shape in the primary molding that surrounds the door.

The clock has a brass time and strike, weight driven movement with an excellent original printed paper label on the interior reading in part “Made and Sold at/46 Courtlandt St/New York…. George H. Clark”. It measures 28 x 17 x 4.5”. This rectangular shaped case is decorated with nicely grained mahogany veneers. The veneer has very little if any losses.

The dial face

The upper section of the door is fitted with clear glass. Through this one can view the painted wood dial. The wood dial tells me that it is an early pre-1850 clock. This dial is formatted with a Roman numeral time track.

It is always a challenge matching 100+-year-old paint but by combining white. brown and yellow acrylic paint I was able to approximate the original colour. Some Roman Numerals were touched up with black acrylic paint.

The wood dial before touch-ups

And after numerals and face given a matching paint; you can see the difference in the number 4

I also glued two small blocks under the left and right “L” pins to centre the dial correctly.

The door is open showing the gong coil and the pasted label in very good condition

The lower section features a beehive painted tablet. The tablet is a replacement but fairly close to what would have been there at the time.

Beehive design; not original but in keeping with the style

Observations regarding the movement

The movement looks like an early (unmarked) Waterbury, ca. 1860 type 2.411. Waterbury movements have “quarter-round” corners, while most other ogee movements tend to have the “tombstones” or plain rectangles. The movement could have been swapped but It is difficult to tell.

A clean Jerome style movement

Everything except the movement points to a period between 1840-50. If the movement is a replacement it was likely an early replacement.

30-hour movements will run surprisingly well with horrible pivot wear. However, regarding repair, my view is this: I do not normally install new bushings in every single pivot hole on the movement. If a bushing hole is passable I will leave it as-is but if the hole is quite oblong I will install a new bushing to mitigate potential gear meshing issues in the future.

Addressing the movement

I will also ignore some past repairs. For example, in this particular movement I noticed 4 punch marks around the escape wheel bridge pivot hole. As most clock repairers know using a punch to close a pivot hole was an acceptable practice many years ago though it is not considered a good practice today. In this particular case, the pivot hole was in good shape and I decided to leave it as-is. After assessing the movement further, I installed one bushing on the second wheel front plate strike side (S2) and the second on the second wheel strike side rear plate (T2). Just two bushings. As to the three lantern pinions, they were in very good condition.

Reassembly was routine. The time side ran fine.

Adjusting the strike side was not easy and should have been a simple procedure. The problem was not only correctly positioning the warning pin on the fly but ensuring that the warning hook lever could actually meet the warning hook. The levers in this clock had been bent every which way making it a real challenge to find the correct angles. It did not strike correctly before servicing. Trial and error combined with colourful language certainly helped correct the strike.

The finished clock

The gong block and coil were also cleaned up. Tip; it helps to put the same screws back in the same holes. Seems trivial but it is a good practice. Not all screws are the same.

Gong block removed and cleaned

Little time was spent on this clock and I was fortunate to have an almost perfect case. The previous owner knew how to take care of the case but the movement neede work. When many of these clocks stopped they simply became decorations but I am sure that this one will run reliably for many more years to come.

Website Powered by WordPress.com.

Up ↑