Optimizing Care for a Vintage Mauthe Clock: Inspection and Oiling

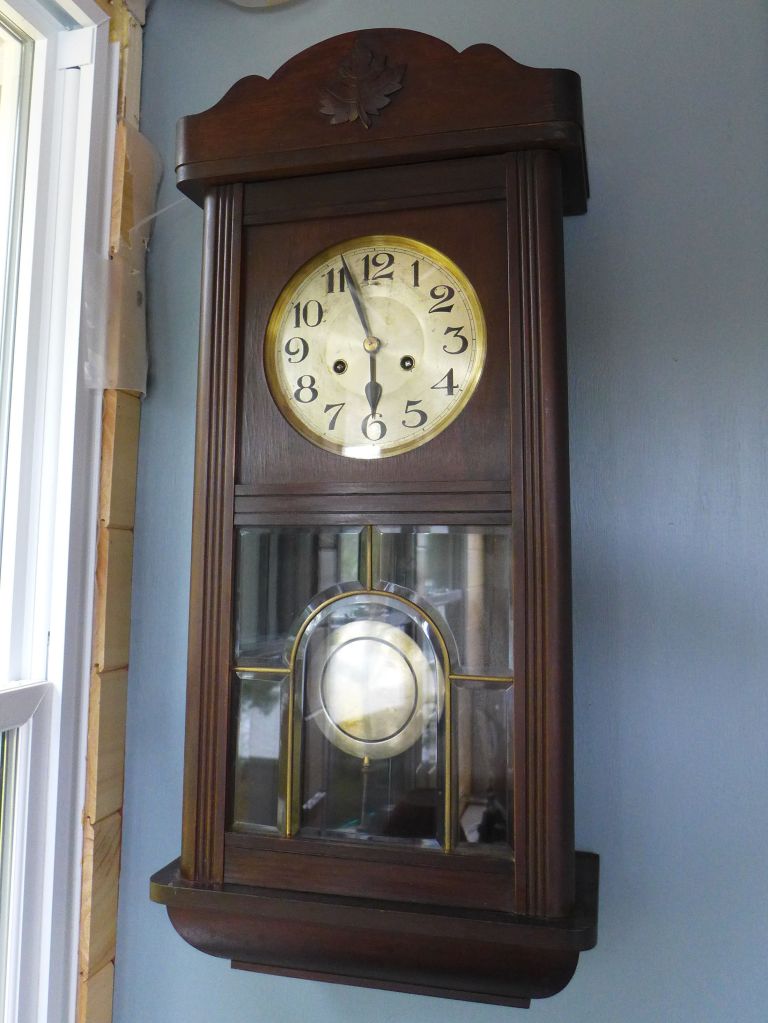
It’s time to inspect the movement on this mid-thirties German box clock. Purchased at an antique mall in Peterborough, Ontario, in May of 2017, it was serviced in 2020.

Mauthe time and strike box clock

This clock is part of a small collection at our family cottage and runs for about three months each year. However, the cottage environment can be harsh. Before we converted the screened-in porch to an enclosed sunroom, the clock was exposed to the elements for three years, so I expect some dust, dirt, and debris.

Mauthe movement back plate
Mauthe movement back-plate

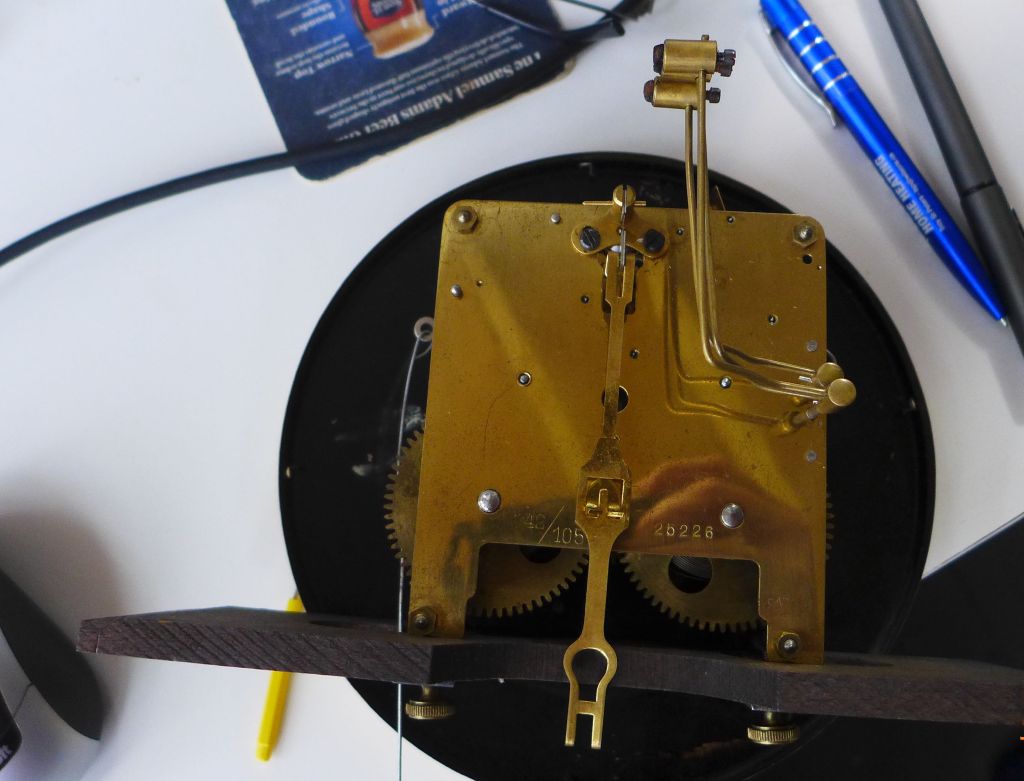
One hint tells me this clock is made by Mauthe of Germany, even though there is no trademark stamp on the movement plates. The gong block is made by Divina, a subsidiary parts maker for Mauthe.

In the 1930s and 1940s, the clock was sold in Canada under the Forestville or Solar name in department stores from coast to coast. An appliqué of a maple leaf on the crown of the case suggests it was made for the Canadian market.

Divina gong block

Removing the movement

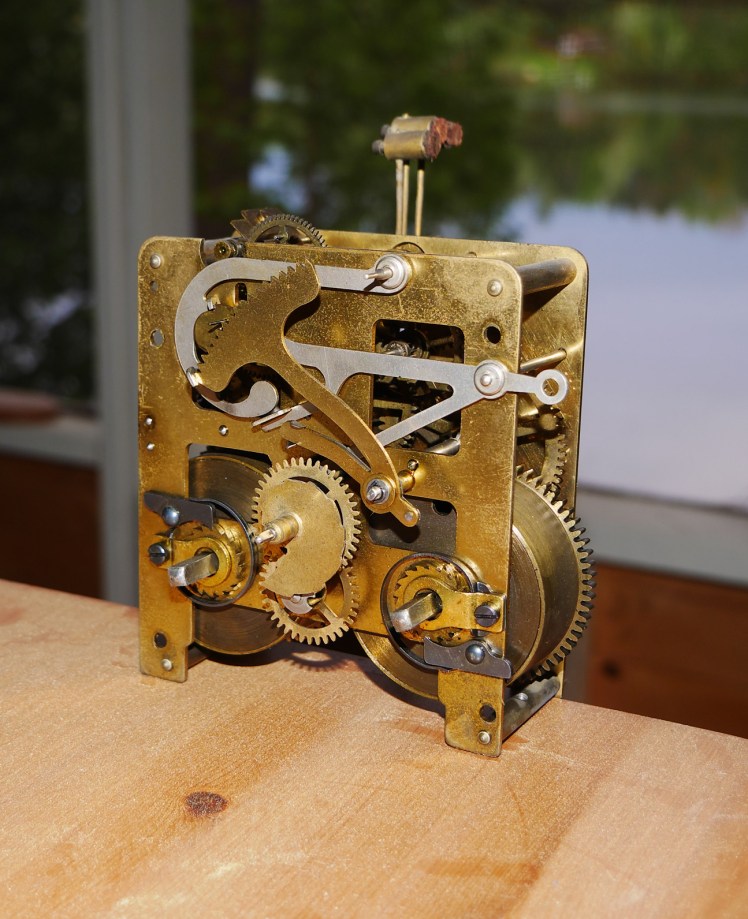
Removing the movement from its case is a relatively simple procedure. Open the front door and release the two thumbscrews under the movement seatboard, then slide the movement forward from its side channels.

Both plates are a robust 1.8 mm brass. The backplate is solid while the front plate is open. It is a robust movement that was evidently designed to last.

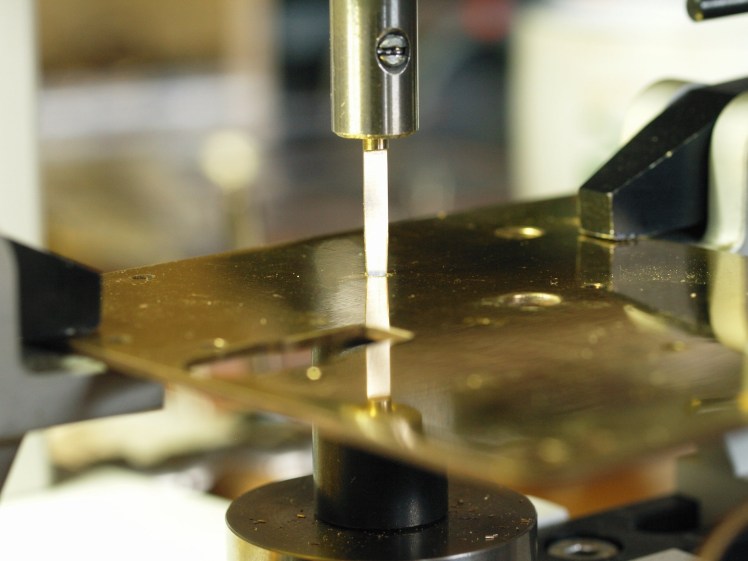
Removing the movement from the case is the best way to check the condition of the movement. Once out all you see is the back plate with the dial concealing the front of the movement. To inspect the front of the movement, the dial and hands must be removed. The hands come off easily by pulling the center cannon pin that attaches the minute hand. The hour hand is a friction fit and can be pulled out with minimal effort. Remove four brass pins on pillars to detach the face from the movement.

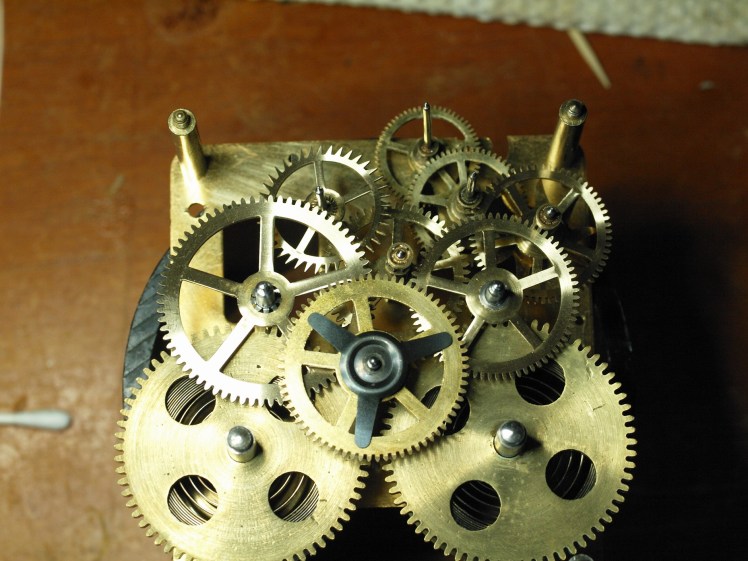
Once the dial face is detached both the front and back of the movement can be inspected.

Movement with attached seatboard

There is also no need to remove the seatboard to inspect the movement.

Of course, the only true measure of the condition of any movement is to take it apart, but in this case, I saw no need.

The clock has been working well, keeping good time and striking as it should.

What to look for

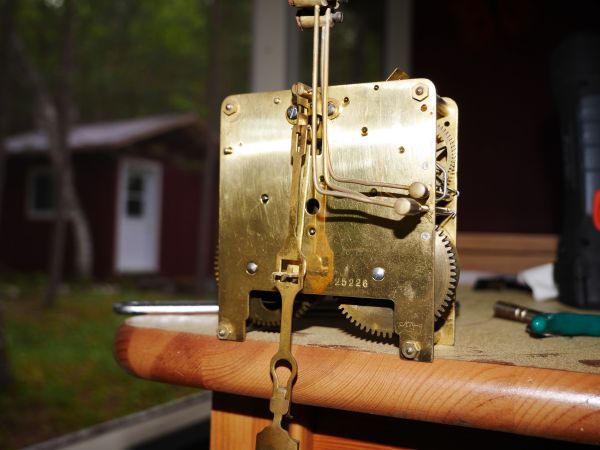
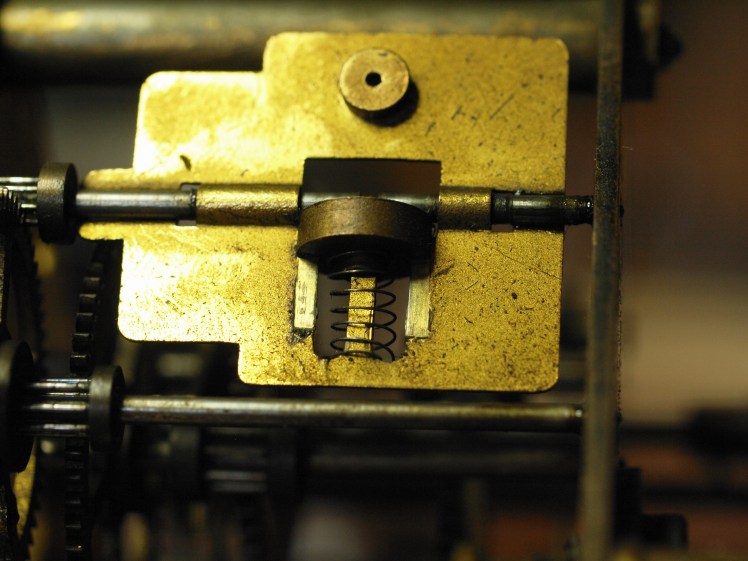
I always look for dirty oil around the pivots, which indicates possible wear. As oil ages, it gradually interacts with worn brass, creating a black abrasive paste. Here the pivots looked good but I did notice that some bearings had dried up. While at it I inspected the barrels for bulges and cracks, finding none. The lantern pinions, gear teeth, and levers looked clean. The suspension spring also looked good. In fact, I saw nothing that would cause me to take the next step: disassembly.

The movement is in excellent condition and will need no attention since its last servicing in 2020.

Oiling

All that is required is an oiling before it is returned to the case. Periodic inspections ensure that the oil is clean and appropriately applied, preventing friction and wear. In this case, the oil was clean but some pivots required additional oil.

Oil and applicator which has a spooned end

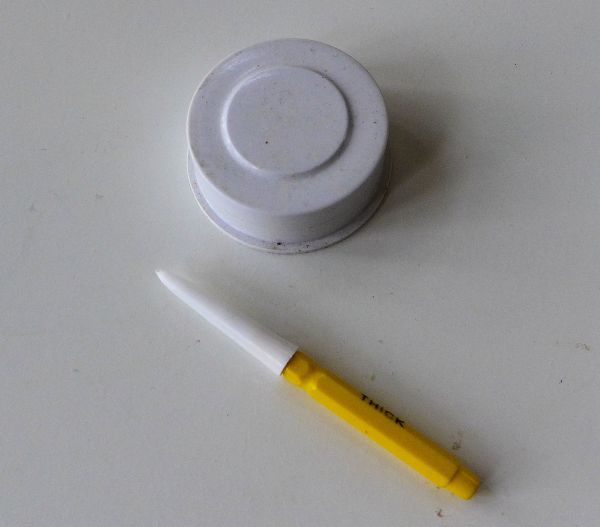
I keep it simple as far as my oiler and dipper container are concerned.

Periodic inspections

Periodically inspecting a mechanical clock movement is important. Regular inspections can identify potential issues before they become serious problems, helping to prevent major repairs or damage.

Over time, the movement parts can wear down, and identifying and addressing wear ensures the clock runs smoothly.

Dust, dirt, and other debris can accumulate in the movement, affecting performance. Regular inspections {and disassembly and cleaning if needed} can keep the clock running accurately.

Clocks exposed to varying environmental conditions, such as humidity or temperature changes at our cottage, may require more frequent inspections to prevent damage. My fears that this movement was dirty because it was in a harsh environment proved unfounded.

Mauthe movement front plate

If the clock starts losing or gaining time, an inspection can identify the cause and allow for adjustments. Inspecting the movement helps to ensure that all components, such as springs and gears, are in good condition and properly aligned.

Finally, by addressing these aspects through regular inspections, you can extend the life of your mechanical clock and ensure it continues to function properly.

Mauthe box clock movement servicing

It is time to service the movement on this mid-thirties German box clock. It was purchased at an antique mall in Peterborough, Ontario in May of 2017, and other than oiling, nothing has been done to it. While it has been running well since then, it is due for servicing. Plus, this little project is one of the many clock tasks that has kept me busy during the period of pandemic isolation.

There is nothing anywhere on this clock that tells me it is a Mauthe, not on the clock face or on the movement. However, the gong marked by the name Divina tells me that Divina was a subsidiary of Mauthe. It was likely sold under the Forestville or Solar name in department stores across Canada in the 1940s. There is an applique of a maple leaf on the crown so, I assume that it was made for the Canadian market.

German "box" clock by Mauthe
German “box” clock by Mauthe

As mentioned, this spring-powered rack and snail movement has no makers mark though 25226 is stamped on the front plate as well as the numbers 42 and 105; 42 the pendulum length in centimeters and 105 as beats per minute.

The front plate shows the rack and snail

CA 79/9 scratched in the lower right of the front plate is a clock-makers mark for servicing in September of 1979, presumably the last time it was taken apart for cleaning.

Dirty as expected but in good shape

Both plates are 1.8 mm brass. The backplate is solid while the front plate is open. It is a robust movement that was designed to last.

Spring-loaded weight on the governor

An unusual feature is a spring-loaded weight on the governor. Manufacturers sometimes used a special fly that has a small spring-loaded weight attached to try to even the power curve of the strike side. The faster the fly spins, the further out the weight, providing more resistance.

Day I – dis-assembly and servicing mainsprings

Safety is paramount; first and foremost, let down the mainsprings.

The rack, snail, lifting levers, and other assorted parts are separated from the movement before the plates are opened up. The strike hammers stayed attached to retaining pins as they were just too difficult to take out. Additionally, despite my best efforts to pull the gathering pallet off the arbour, it would not budge. I did not want to risk any damage to either part.

The movement was dirty, as expected, but I have seen much worse.

Once everything was apart I reinstalled the time side to check bushing wear and found the only suspect bushing to be T2, front plate. After taking out the time side gears I reinstalled the strike side gears and found that side to be in very good condition. The pivots likewise on both sides are in excellent condition.

The movement is in very good condition for an 80-year-old clock.

In the normal course of clock servicing I install more than one or two bushings

Different sized mainsprings for time and strike

The time mainspring is slightly shorter in height and length and therefore less powerful than the strike mainspring. On many movements, both sides have the same mainspring power but this movement is clearly different. Is it by design? There is more resistance pushing the strike gears through the train in that it has to work a little harder so, one would expect a strong mainspring.

Note the difference in the size of the cut pinions below. Both are second wheels. The one on the right with the larger leaf pinion is the strike side, the left is the time side.

Each time I work on German or English movements I make it a point to scratch a small “T” on both the time barrel and mainspring so as not to interchange them. Even if both sides have identical mainsprings I note the difference as a matter of practice. If the springs are different and they are switched, the increased power of the incorrect, more powerful strike spring might result in premature failure of the time side.

Second wheels and difference in the size of cut pinions

The other possibility is that during a repair in September of 1979, the time side mainspring was replaced by a smaller, and more than adequate, mainspring.

I took the springs out of their barrels and gave each a cleaning in the ultrasonic. Once dry I applied Keystone mainspring oil to each mainspring and returned the springs to their barrels. That’s it for day one.

Day 2 – bushing work

In the normal course of clock servicing, I install at least one or two bushings. On this movement, one bushing was required, T2F. The hole was marginally oblong and I am sure the clock would have functioned fine without it but as a precaution, a new bushing was installed.

Cutting into the brass to prepare for a new bushing
Ready for the top plate

I generally spread my clock cleaning and servicing over several days but the bushing work went so quickly that I decided to proceed with assembling the movement.

The only critical adjustment prior to assembling the plates is the stop wheel. The stop wheel requires about half a rotation to arrest the train during warning otherwise, all the other adjustments are made outside the front plate. During dis-assembly I made a note of the location of the wheel, at 12 o’clock, saving time and frustration and it worked just fine.

Rather than use a test stand I returned the movement to its case for further testing.

Website Powered by WordPress.com.

Up ↑