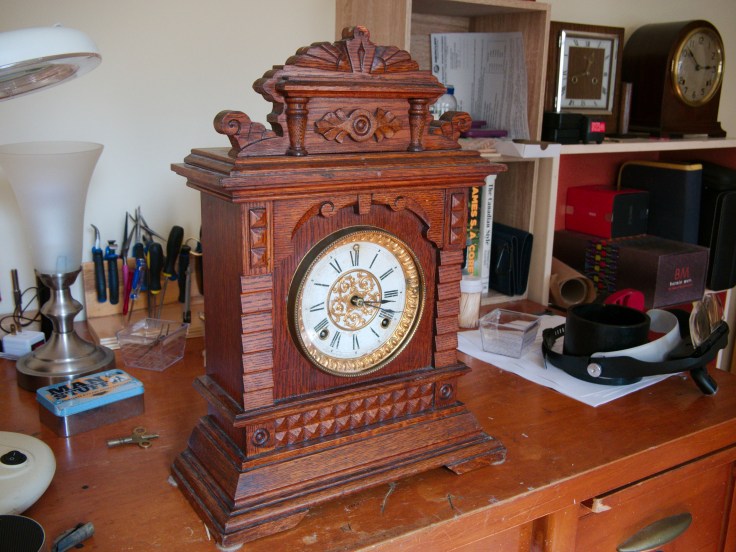
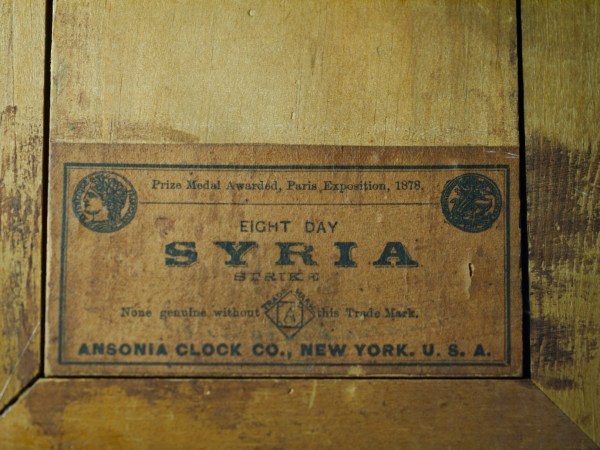
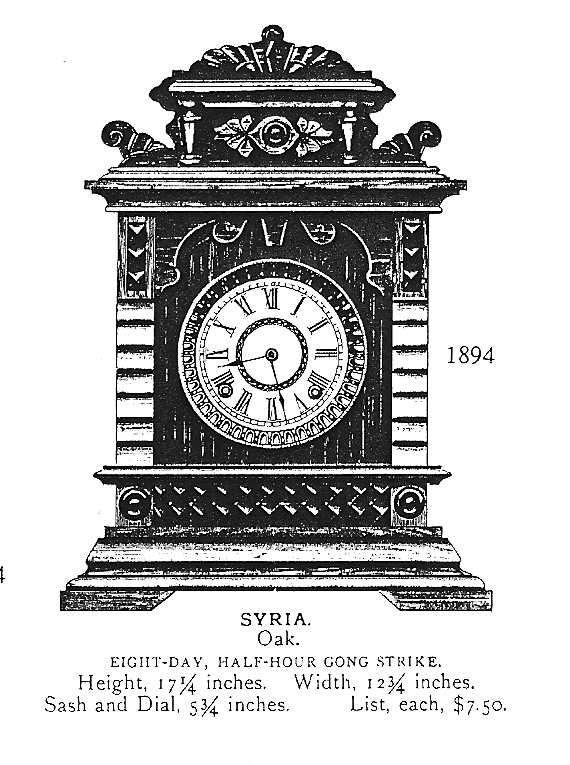
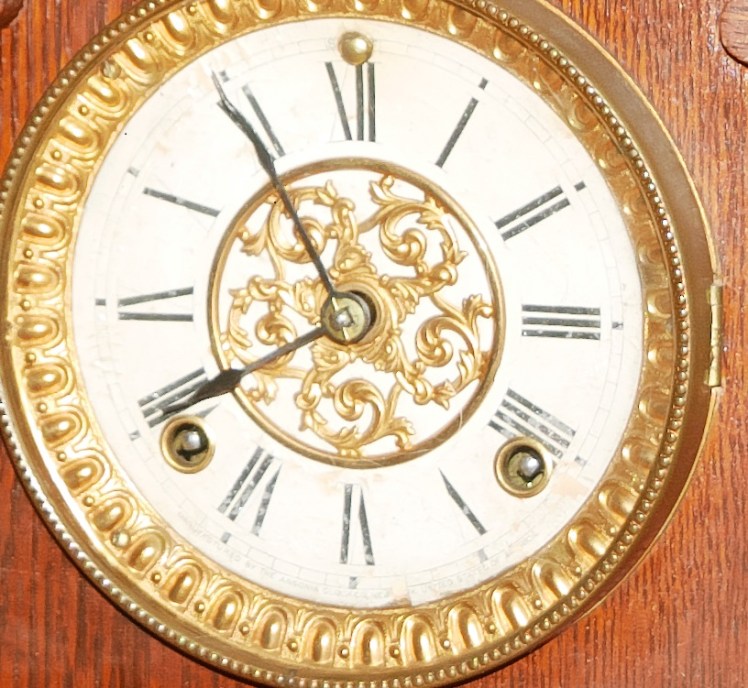
Over the summer of 2020, I was asked to service a friend’s clock. It is an attractive machine-carved oak Ansonia Syria parlour clock in the popular Arts and Crafts style of the late 19th century.
It has great sentimental value to my friend but she recognized that it was in need of adjustment or repair. It had been in her late husband’s family for a number of years and she wanted it to preserve it as a reminder of his life.
This is Part II of a two-part series. My general comments and first impressions are found in Part I which you can find here.
It is an attractive clock in relatively good shape for its age. From my research, I have determined that it was made sometime in the early to mid-1890s.

In this post, I will continue with disassembly, cleaning, general comments about the condition of the movement, and any potential trouble spots.
Dis-assembly and servicing the movement
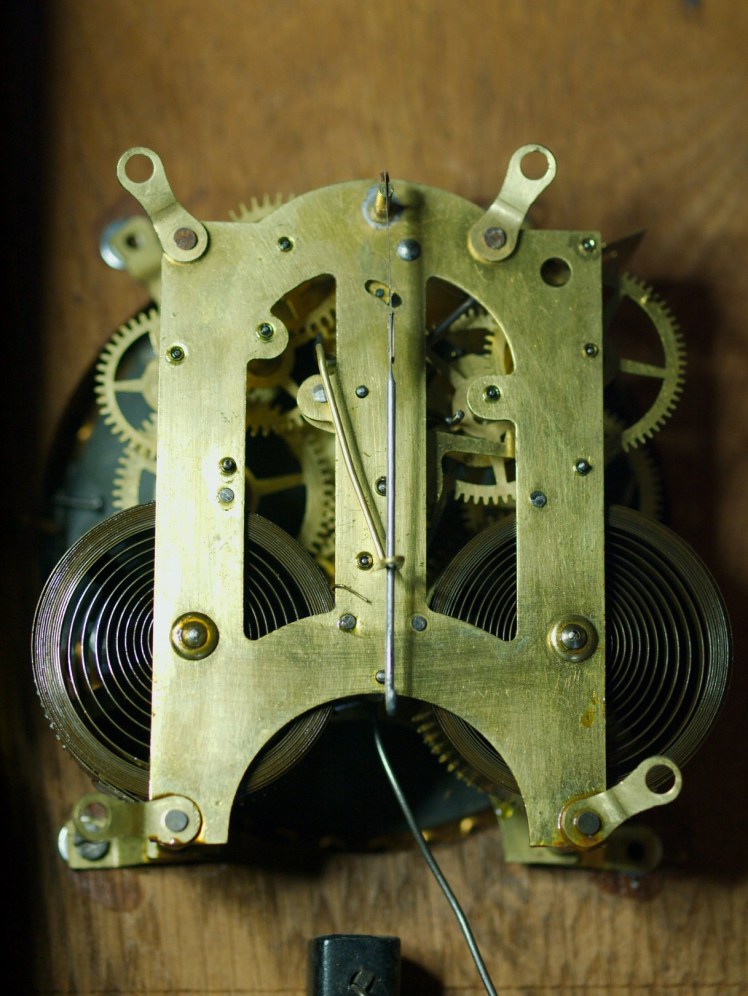
The movement is held in the case by 4 screws. Once out of the case the first order of business is to restrain the mainsprings with mainspring C-clamps before separating the plates. Safety is paramount; those springs are powerful.
Although C-clamps are the round type in the following photo I prefer flat clamps for most American movements. Either will do but flat clamps are perfect for tight spaces.

After disassembly, my Olie Baker spring winder was put into action to unwind the spring, inspect it for cracks, surface rust, or any other issues.
Each mainspring is stretched out and cleaned with a Scotchbight pad and WD-40. It is carefully wiped down leaving no trace of the WD-40 and placed in the ultrasonic cleaner for 20 minutes. Once out of the ultrasonic cleaner, you must work quickly to dry and clean the mainspring. Rust is insidious and will creep in quickly.
The mainsprings looked very good and once cleaned and carefully inspected I have no hesitation reusing them.

I applied a drop of Keystone mainspring oil on each of the coils, wound the spring several times to spread the oil. Once the C-clamp is re-applied and hooked on to the arbour, the excess oil is wiped away. The clicks are in good shape, sometimes a weakness in American movements. At this point, there is nothing more to be done to the mainsprings until the movement is assembled, so, let’s put them aside.
I try to minimize wrestling with American time and strike movement so that once I have the top plate on I loosely attach the bottom two screws and move to the time side because the strike side wheels and levers can be the most frustrating to position correctly and are left to the last

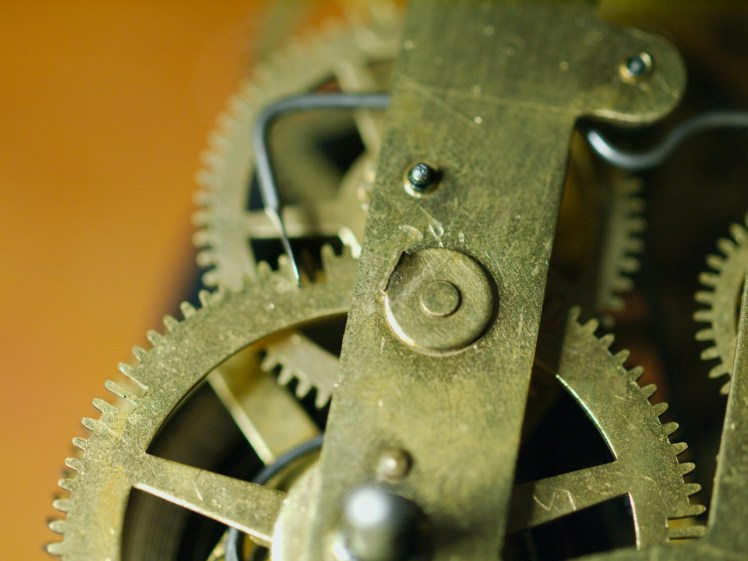
I inspected each of the wheels and pivots for wear and found everything including the lantern pinions to be in generally very good condition with one exception. There is minor wear on the flywheel lantern pinions but not enough to warrant replacement at this point.
I usually put the time and strike gears and pretty much everything else in one or two containers. When you have done many movements you learn to quickly identify the location of each component. I can take out any wheel or lever, for example, and identify its specific location. However, if you are just starting out or have not built up enough confidence I highly recommend separating the two sides. In the early days of clock servicing, that is exactly what I did.
I was curious to find that a past repairer scratched “S” (for strike) and “T” (for time) on each one of the wheels according to their location. I understand why but esthetically it does not look good. However, marking the mainspring arbours came in handy. I make it a point to return each mainspring on the arbour they came from. In most cases, the mainsprings are the same length and thickness but every now and then I come across two different sizes. Better to be safe than sorry. That aside the movement appears to be in good condition.

Once the parts are cleaned and dried and the pivot holes are pegged it is on to the next step, pivot polishing. I use a #11 Emory board to polish pivots. I secure each of the wheels in a 3-jaw chuck on my Taig metal lathe and move the Emory boards in an up and down motion to polish the pivots.

Following the polishing, it is on to any bushing work that may be needed. In the case of this movement, two bushings were needed, the second wheel, front plate and the fourth wheel backplate. Here, a new Bergeon brass bushing is pushed into the bottom plate.

Movement Re-assembly
And now for re-assembly and testing.
Since the lifting lever is attached to the bottom plate and is otherwise immoveable the count lever is the only component that has to be put in its correct location.
I try to minimize wrestling with American time and strike movement so that once I have the top plate on I loosely attach the bottom two screws and move to the time side because the strike side wheels and levers can be the most frustrating to position correctly and are left to the last.

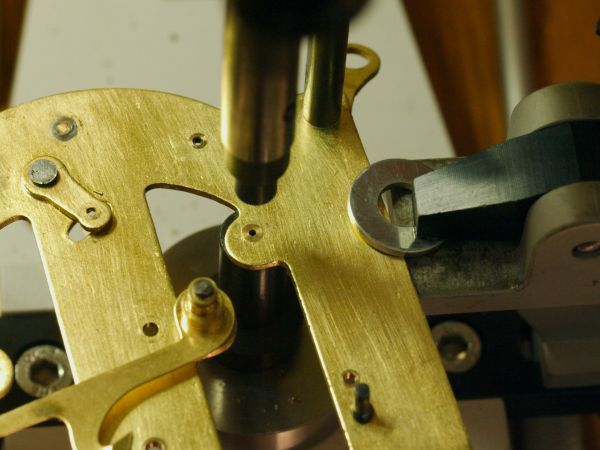
Once the time side wheels and the hour gear are in place I attach the third screw and then work the wheels and levers into place on the strike side. Once everything is in place I tighten all the screws. A pivot locator is your best friend when re-assembling any movement.

On the first attempt, I was not able to synch the strike side locking wheel (sometimes you get lucky the first time) but I mounted the movement on the test stand overnight to check out the time side and the next day it was running as expected. The locking wheel pin needs to be adjusted but that can wait till tomorrow.
One issue raised its head after re-assembly. The strike side gears were not moving at all. I tested each gear and found the flywheel (governor) was sluggish and had no end shake. It freed up if the nut nearest the flywheel was loose enough. The reason. A past repairer installed a bushing that was too tall for the plate. End shake allows freedom of the movement when the plates are screwed tightly down. I filed down the protruding bushing on the inside of the plate and the strike side then ran smoothly.

Next day
Now to open up the top part of the strike side to reposition the locking wheel. Safety first. I restrain the mainsprings just in case the whole thing explodes. I re-positioned the stop pin so that it is resting on the stop lever and presto, everything is working as it should.
I would like to refresh the case but the owner left strict instructions to leave it as-is.


You must be logged in to post a comment.