There is no maker’s mark anywhere on the case or the movement
The clock is an unsigned 8-day carriage clock in a rectangular brass case. This attractive little clock has a white enameled dial with Roman numerals, blued steel hands and a spring driven time-only movement with platform lever escapement visible through the top beveled glass. The brass case has 4 beveled glass panels complete with a fold-down travel handle.
In taking the movement apart to clean it I can see “73” stamped on the bottom of the case, the case handle, the door edge and 2 or three places on the movement and the letter “B” on the back of the front plate but no maker’s mark. What do the numbers mean? I think it is an internal production stamp. Thousands of these generic carriage clocks were made and I may never know the maker. The only taper pins on this movement are those that attach the dial face to the movement. However, judging from what see and its general construction I would comfortably date this clock to the 1880s.
The movement plates are secured by screws rather than taper pins. Older carriage clocks would have taper pins securing the movement plates. This clock would have been produced for the English market since it has “S”and “F” stamped on the escapement (Slow and Fast). The key has “France” inscribed on it so if it is original, then the clock is French.

Time-only carriage clocks are relatively easy to work on although the platform escapement takes a extra care. I chose not to service the escapement at this time.
First, let the mainspring down to release the power. If you take a wound clock apart it can injure you. Some of the compression points between cogs can have a very high gearing so even a weakly wound clock has the capacity to trap or pinch your fingers as well as throwing out and damaging components. I use a let down key that can be purchased at any clock supply house.

Taking the movement out of the case involves releasing 4 machine screws in the base. I use several elastic bands to keep the glass in place while I lift the sides and door off the base. When holding the clock firmly observe the effect of loosening the screws. The pillars have become loose and the glass can now move a little in the frame. If you unscrew all the screws completely without understanding that the glass is loose, it is too easy for the glass panels to slide out and break. They are not easy to replace! I’ll describe my work on glass cleaning later.
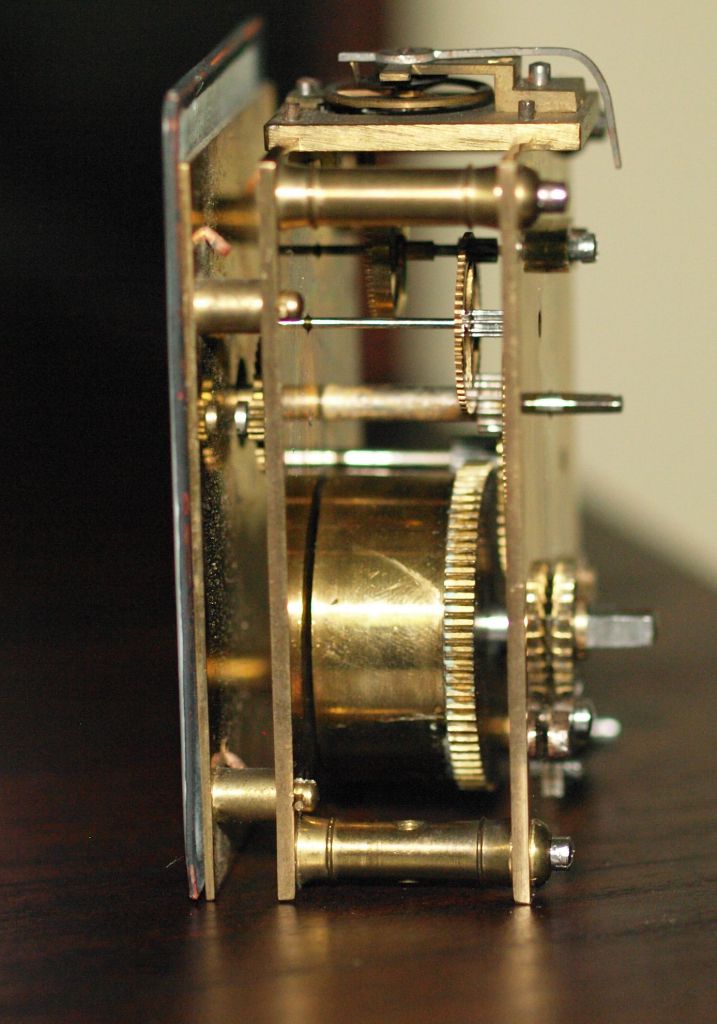
There are two screws which hold the base to the movement. Unscrew those and proceed to take off the front face. The enameled face is secured by 4 taper pins. In my case they were difficult to get out so I decided to take the back plate off the movement to allow my pliers inside to release the pins. Removing the platform escapement requires releasing 4 very tiny screws. A precision slotted screwdriver is absolutely necessary. It is best to unscrew all 4 together and leave them in place once off the movement so you do not have to fiddle with them when reattaching the escapement later, unless, of course, you intend to service the escapement.

I then separate the plates and inspect the wheels, pinions, pivots and pivot holes. I found a little bit of play in two pivot holes only observable with a loupe but not enough for bushing work. I polished the pivots, pegged the pivot holes and cleaned the wheels, plates and other pieces except the platform escapement in the ultrasonic cleaner.
Assembly of the movement is relatively simple as there are so few gears. Attaching the hour hand was interesting, however. Both the hour and minute hands are pressure fit, but the hour hand was a challenge because I had to use a screwdriver to push the hour shaft forward (gently) through the clock face while simultaneously attaching the hour hand. It was very tight. After a number of tries I managed to press it in securely.

Back to the glass. It is also important to put each panel back where it belongs. I discovered that there is a top and bottom orientation to each glass panel, they are cut so fine! There is enough resistance if you try to put the wrong end into the channels you will encounter difficulty. Each glass panel is taken out and cleaned with Windex and, of course, put back exactly how they came out.
Once everything is assembled the clock is oiled, wound and the time is set. Polishing the brass case is the final step. Brasso was used to clean up the brass and bring the clock back to its former glory.

Just what I was looking for, thankyou for posting.
LikeLike
Do you mind if I quote a few of your posts as long as I provide credit and sources back to your webpage? My blog is in the exact same niche as yours and my visitors would definitely benefit from some of the information you provide here. Please let me know if this alright with you. Many thanks!
LikeLike
Which posts specifically?
Ron
LikeLike